> ## Documentation Index
> Fetch the complete documentation index at: https://docs.xpander.ai/llms.txt
> Use this file to discover all available pages before exploring further.
# Weekly Changelog Maintainer
> A ready-to-use AI agent for creating docs changelogs and pushing them to new PRs.
The Weekly Changelog Maintainer agent uses the GitHub Remote MCP server to search for merged PRs in a target repository, classify them based on specific categories, create a summary and append it to changelog file, and open a new PR on a new branch.
This agent is specifically designed for documentation platforms that leverage GitHub and use markdown files, such as Mintlify. It can run its tasks on a scheduled basis using the xpander.ai agent task scheduler, relieving product managers from constantly and manually updating their products' changelogs. At the end of the process, the agent will notify the user via email that the task was complete.
 ## How it Works
The agent uses the following connectors and tools:
* **GitHub MCP Server**: This connector uses the following tools:
* `search_issues`: It supports the full GitHub search syntax. It is the primary tool for finding specific items like "merged PRs from last week".
* `issue_read`: Retrieves the full details of a specific issue or pull request. This includes the title, body description, author, state, and other metadata. The agent uses it to get the actual content to summarize from merged PRs.
* `create_branch`: Creates a new git branch in the target repository.
* `create_or_update_file`: Creates a new file or updates an existing one in a repository. The agent uses it to create the changelog file and append the summary to it.
* `create_pull_request`: The agent uses it to open a new PR from the branch it created towards the main.
* **Send Email**: This is an xpander built-in tool. The agent uses it to send email to the user, using the xpander registration email address, or any other email that the user asks to include in the scheduled task configuration.
## How it Works
The agent uses the following connectors and tools:
* **GitHub MCP Server**: This connector uses the following tools:
* `search_issues`: It supports the full GitHub search syntax. It is the primary tool for finding specific items like "merged PRs from last week".
* `issue_read`: Retrieves the full details of a specific issue or pull request. This includes the title, body description, author, state, and other metadata. The agent uses it to get the actual content to summarize from merged PRs.
* `create_branch`: Creates a new git branch in the target repository.
* `create_or_update_file`: Creates a new file or updates an existing one in a repository. The agent uses it to create the changelog file and append the summary to it.
* `create_pull_request`: The agent uses it to open a new PR from the branch it created towards the main.
* **Send Email**: This is an xpander built-in tool. The agent uses it to send email to the user, using the xpander registration email address, or any other email that the user asks to include in the scheduled task configuration.
 ## Step-by-step Agent Setup
This section walks you through the setup of the Weekly Changelog Maintainer agent.
### Requirements
Before setting up this agent, you need:
* A valid [xpander account](https://app.xpander.ai/).
* A GitHub personal access token.
To get a GitHub token:
* Log in to your GitHub account.
Click on [**Settings** > **Developers Settings**](https://github.com/settings/apps) > **Personal access token**.
### Prerequisites
xpander has already created a template so that you do not need to build the agent on your own. Do the following:
* [Open the Weekly Changelog Maintainer template](https://app.xpander.ai/templates/2fc0bdc4-aa90-4c12-96d8-ed5ba5b9414b).
* Follow the guided procedure to create the agent in your account from the template.
### Step 1: Define the Target Repository
After you created a new agent from the template, navigate to the **Instructions** tab. Below is what you will see:
## Step-by-step Agent Setup
This section walks you through the setup of the Weekly Changelog Maintainer agent.
### Requirements
Before setting up this agent, you need:
* A valid [xpander account](https://app.xpander.ai/).
* A GitHub personal access token.
To get a GitHub token:
* Log in to your GitHub account.
Click on [**Settings** > **Developers Settings**](https://github.com/settings/apps) > **Personal access token**.
### Prerequisites
xpander has already created a template so that you do not need to build the agent on your own. Do the following:
* [Open the Weekly Changelog Maintainer template](https://app.xpander.ai/templates/2fc0bdc4-aa90-4c12-96d8-ed5ba5b9414b).
* Follow the guided procedure to create the agent in your account from the template.
### Step 1: Define the Target Repository
After you created a new agent from the template, navigate to the **Instructions** tab. Below is what you will see:
 As you can see from the image, the **Agent role** reports a sample and generic target repository `https://github.com/{owner}/{repo-name}`. You have to change:
* `{owner}` with the owner of the target repository.
* `{repo-name}` with the name of the target repository.
The final result must be something like `https://github.com/xpander-ai/xpander-sdk` where:
* `{owner}` = xpander-ai
* `{repo-name}` = xpander-sdk
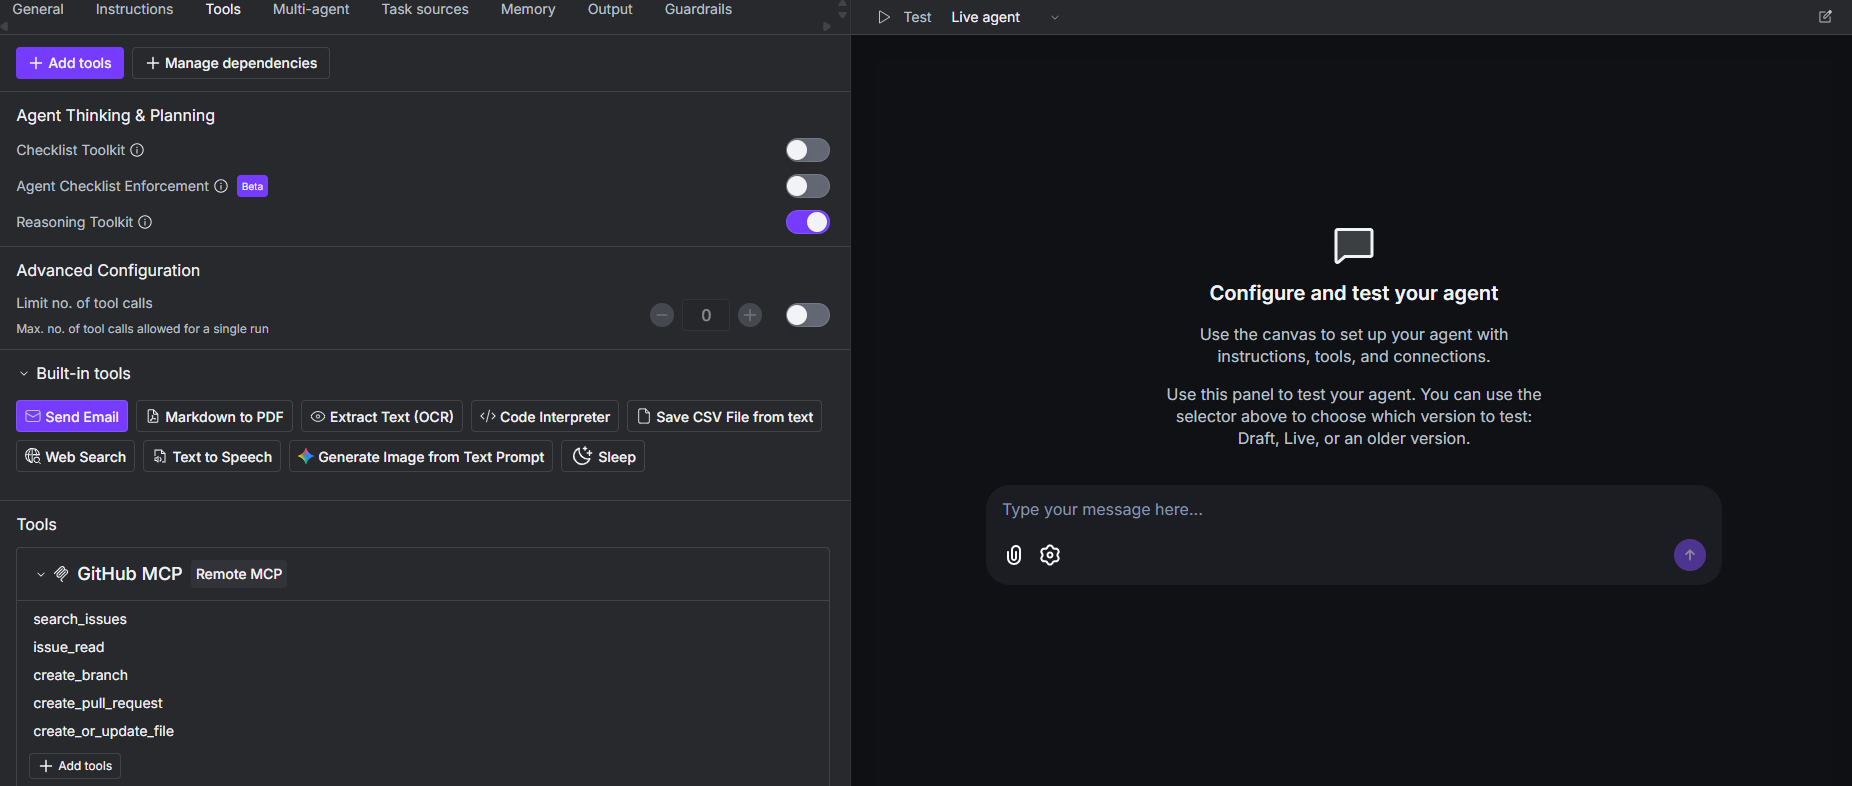
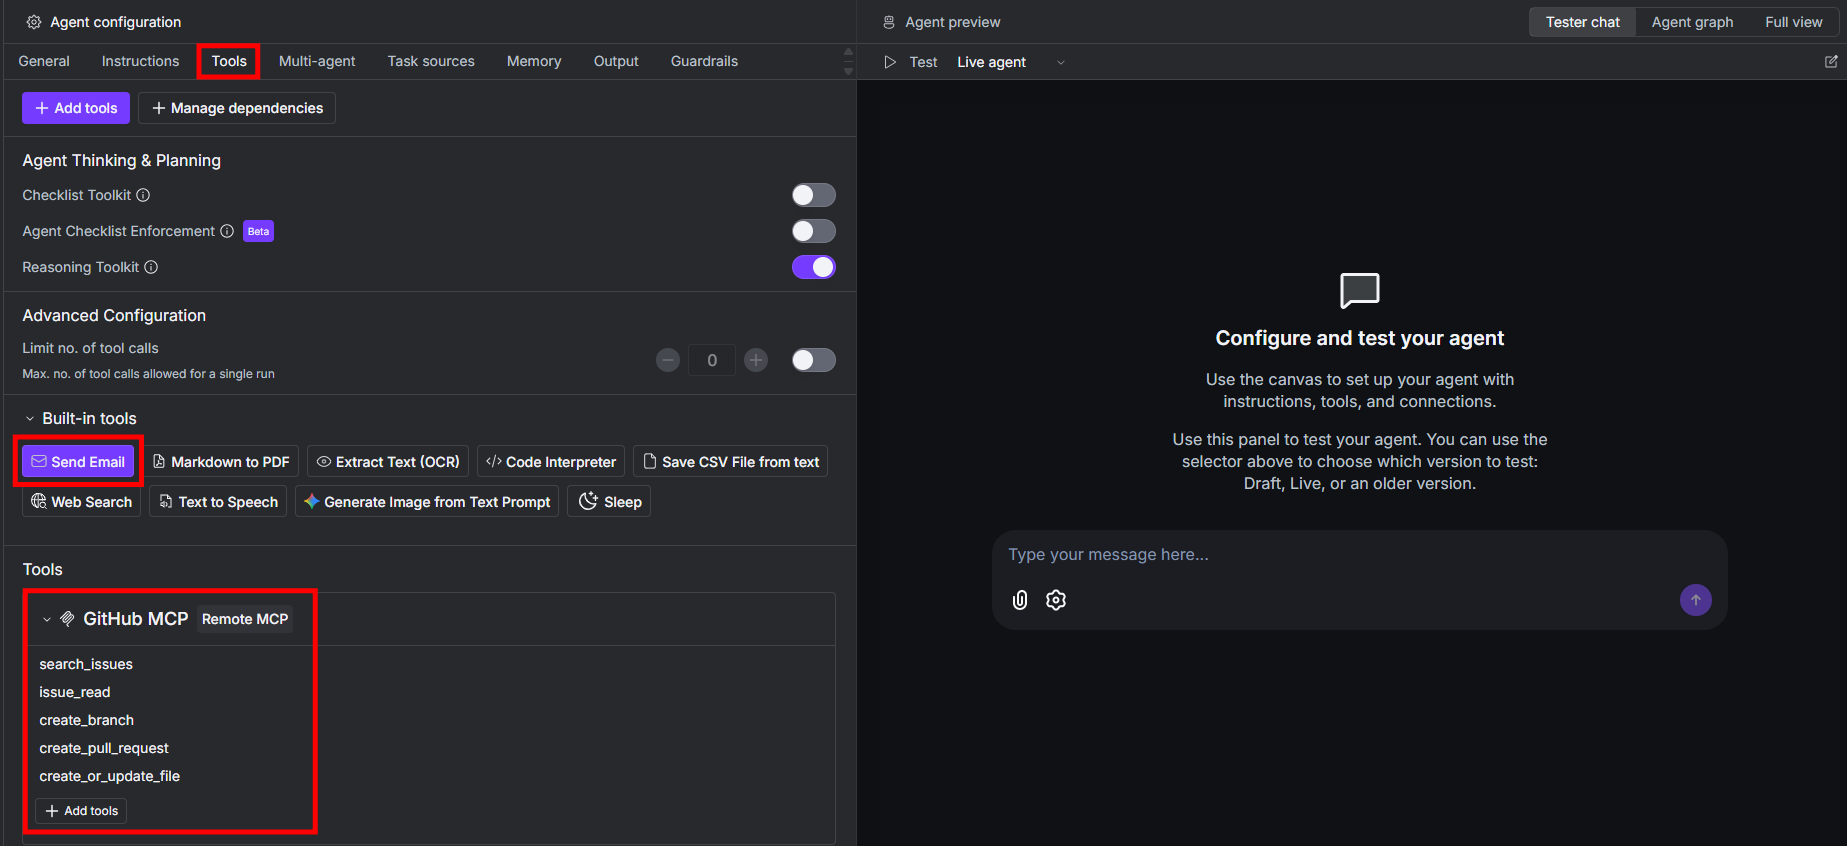
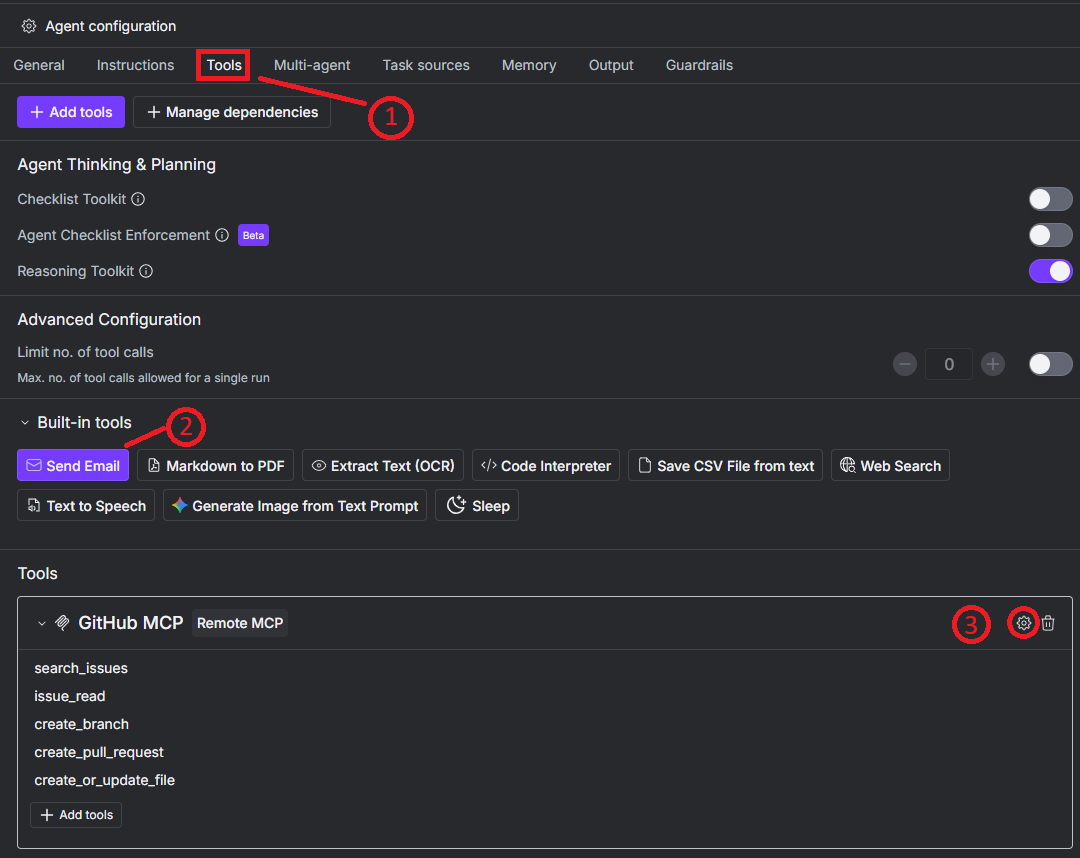
### Step 2: Add The Send Email Tool and Connect the GitHub's MCP Connector to Your GitHub Account
Under the **Tools** tab, select the **Send Email** built-in tool. Then, connect the GitHub MCP Server connector to your GitHub account by clicking on its settings:
As you can see from the image, the **Agent role** reports a sample and generic target repository `https://github.com/{owner}/{repo-name}`. You have to change:
* `{owner}` with the owner of the target repository.
* `{repo-name}` with the name of the target repository.
The final result must be something like `https://github.com/xpander-ai/xpander-sdk` where:
* `{owner}` = xpander-ai
* `{repo-name}` = xpander-sdk
### Step 2: Add The Send Email Tool and Connect the GitHub's MCP Connector to Your GitHub Account
Under the **Tools** tab, select the **Send Email** built-in tool. Then, connect the GitHub MCP Server connector to your GitHub account by clicking on its settings:
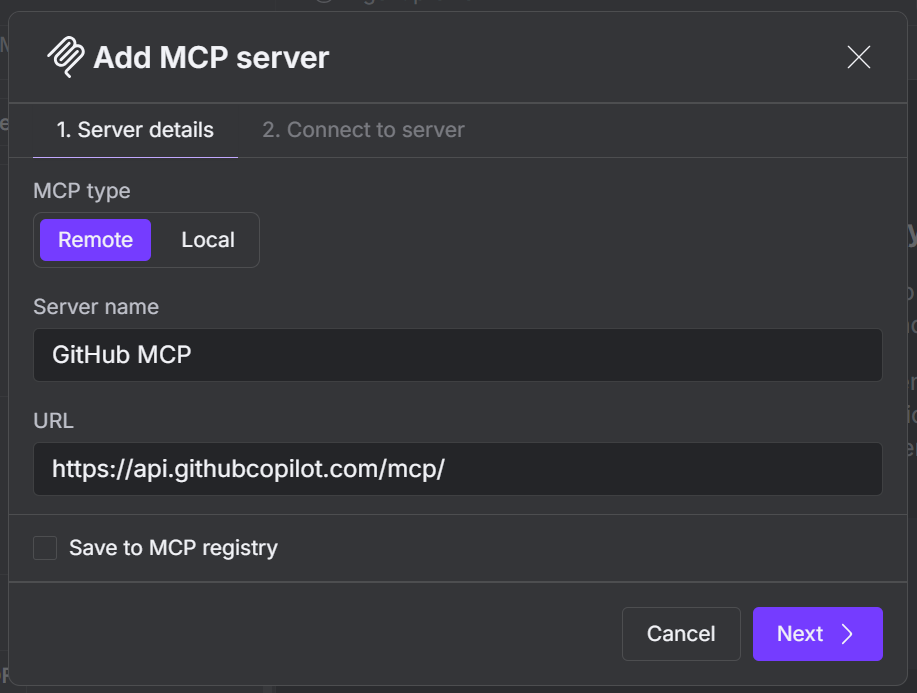
 Leave the **1.Server details settings** as they are and click on Next:
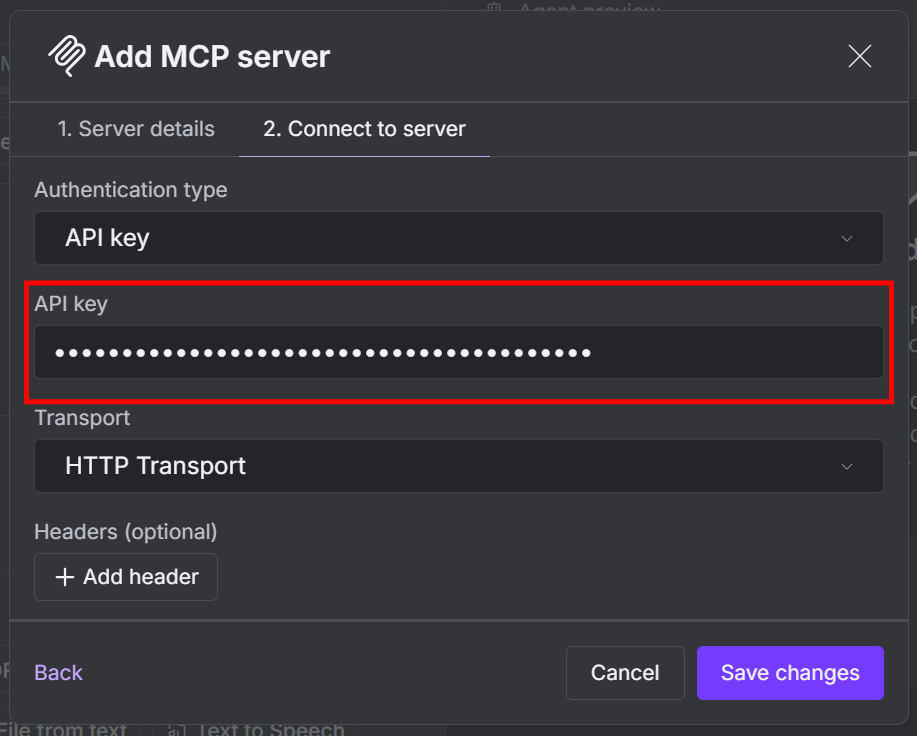
 In the tab **2. Connect to server** insert your GitHub token in **API key**:
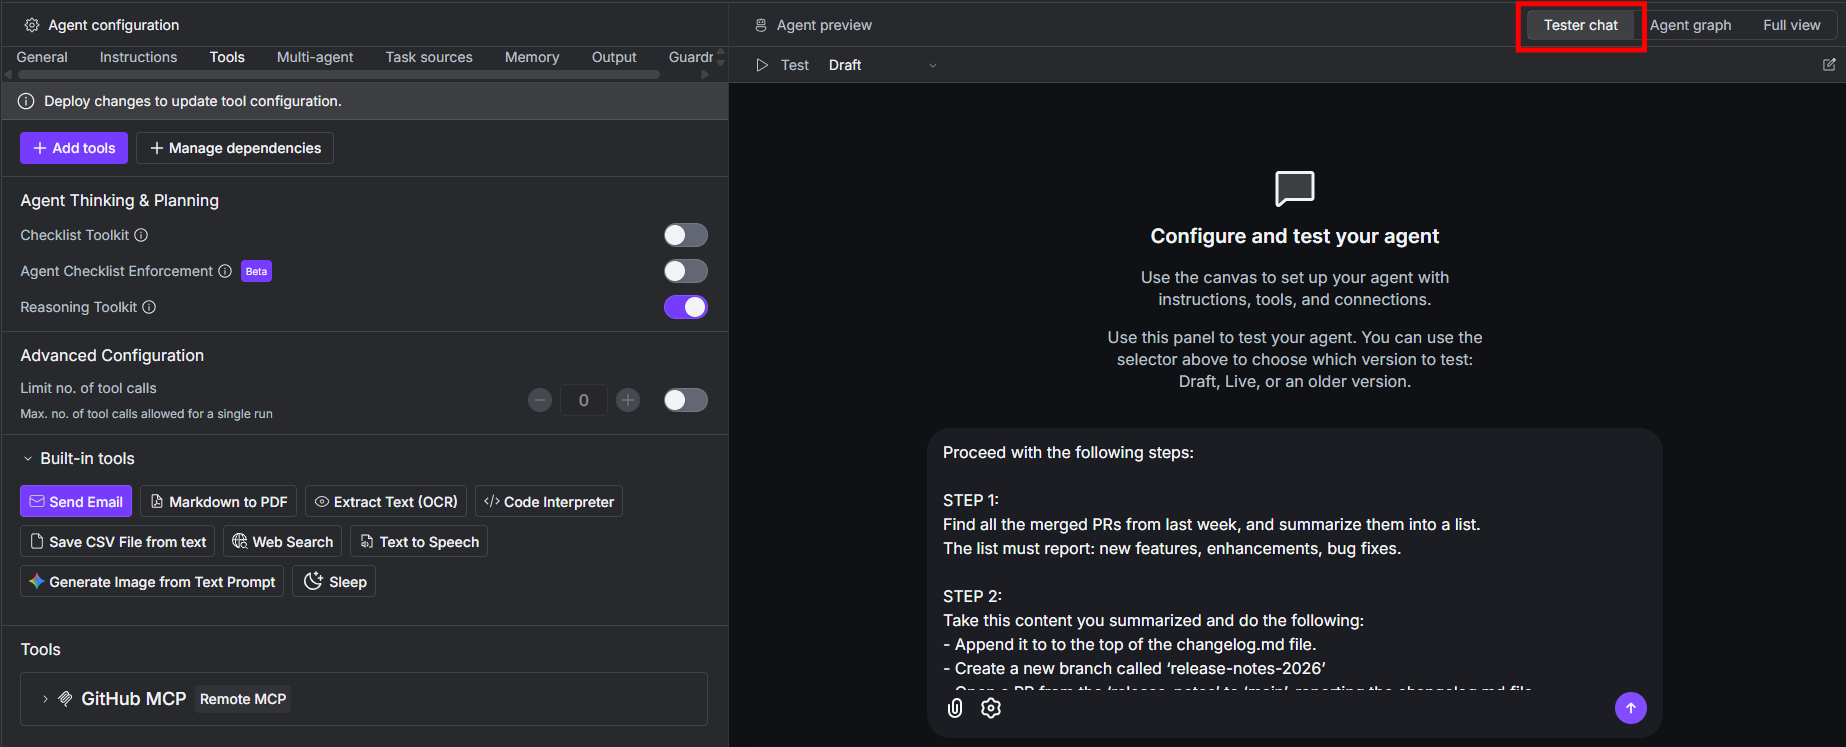
 ### Step 3: Test the Agent
To launch your agent, navigate to the **Tester chat** and write your prompt:
### Step 3: Test the Agent
To launch your agent, navigate to the **Tester chat** and write your prompt:
 A prompt you can use to test the agent is the following:
```plaintext theme={"dark"}
Proceed with the following steps:
STEP 1:
Find all the merged PRs from last week, and summarize them into a list.
The list must report: new features, enhancements, bug fixes.
STEP 2:
Take this content you summarized and do the following:
- Append it to to the top of the changelog.md file.
- Create a new branch called ‘release-notes-2026’
- Open a PR from the ‘release-notes’ to ‘main’, reporting the changelog.md file.
STEP 3:
When the process is completed, send me a nicely stylized email
that tells me the process is completed.
```
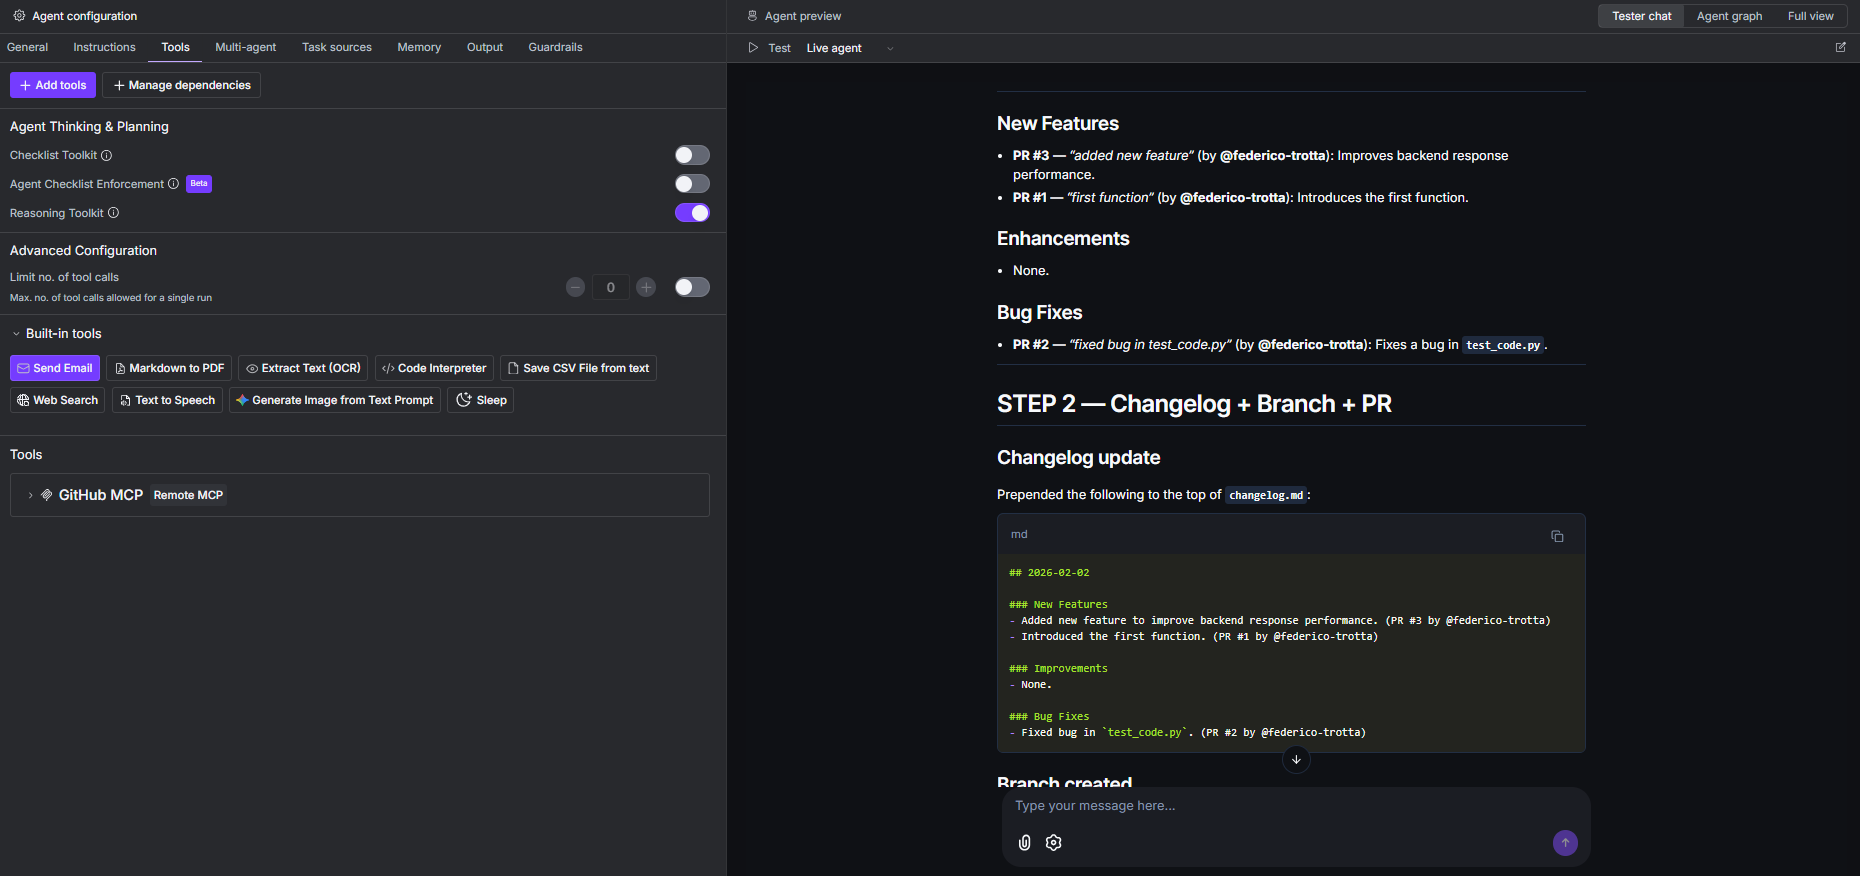
Below is how the agent would respond in the tester chat:
A prompt you can use to test the agent is the following:
```plaintext theme={"dark"}
Proceed with the following steps:
STEP 1:
Find all the merged PRs from last week, and summarize them into a list.
The list must report: new features, enhancements, bug fixes.
STEP 2:
Take this content you summarized and do the following:
- Append it to to the top of the changelog.md file.
- Create a new branch called ‘release-notes-2026’
- Open a PR from the ‘release-notes’ to ‘main’, reporting the changelog.md file.
STEP 3:
When the process is completed, send me a nicely stylized email
that tells me the process is completed.
```
Below is how the agent would respond in the tester chat:
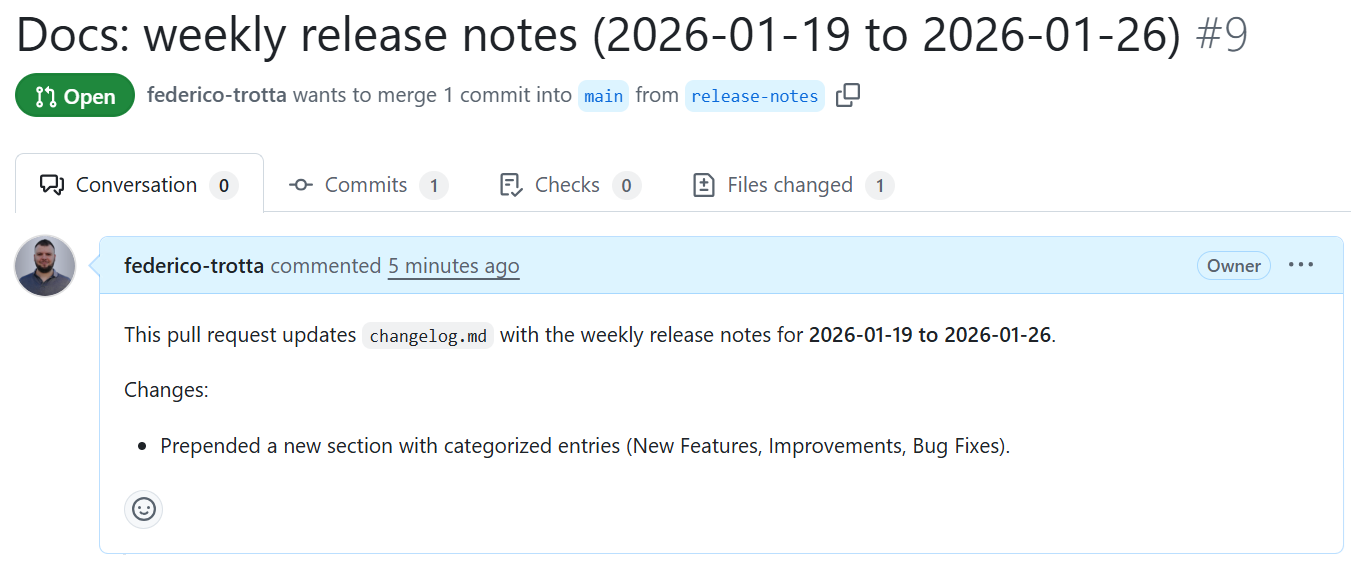
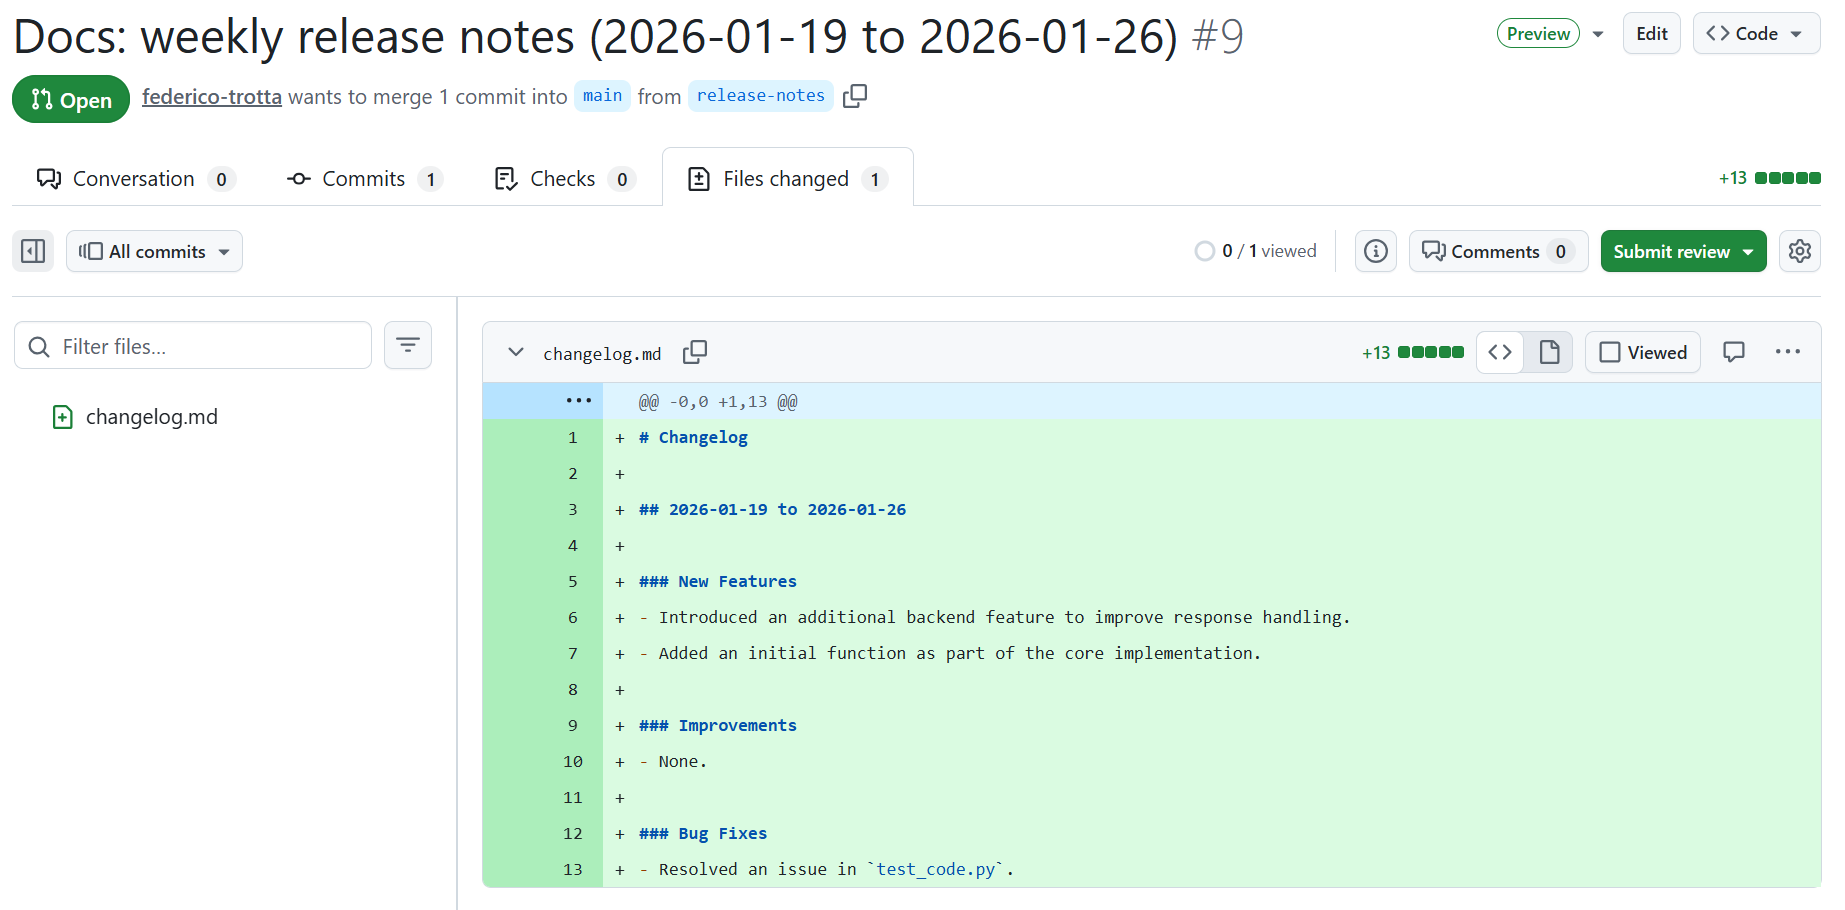
 The expected result of the PR on the target repository is as follows:
 The changelog appears as the following image:
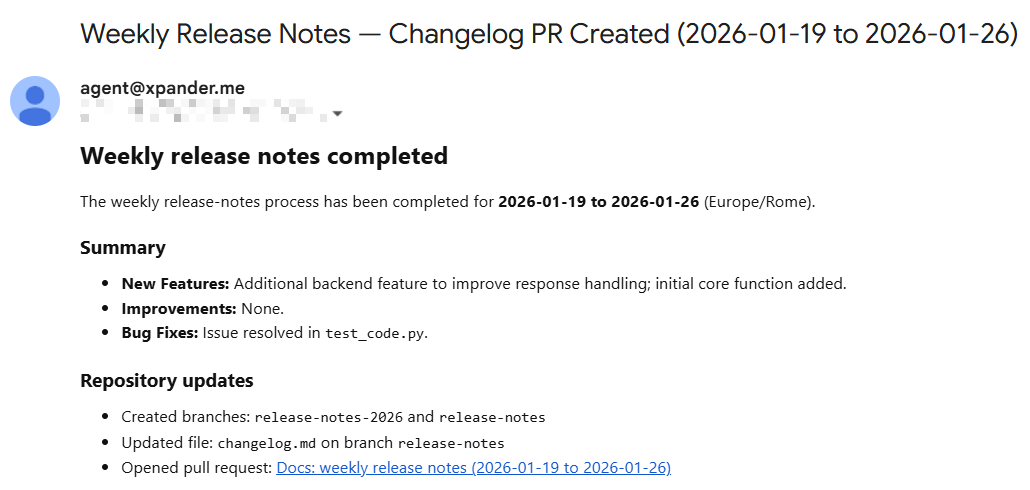
 Below is how you can expect the email to be:
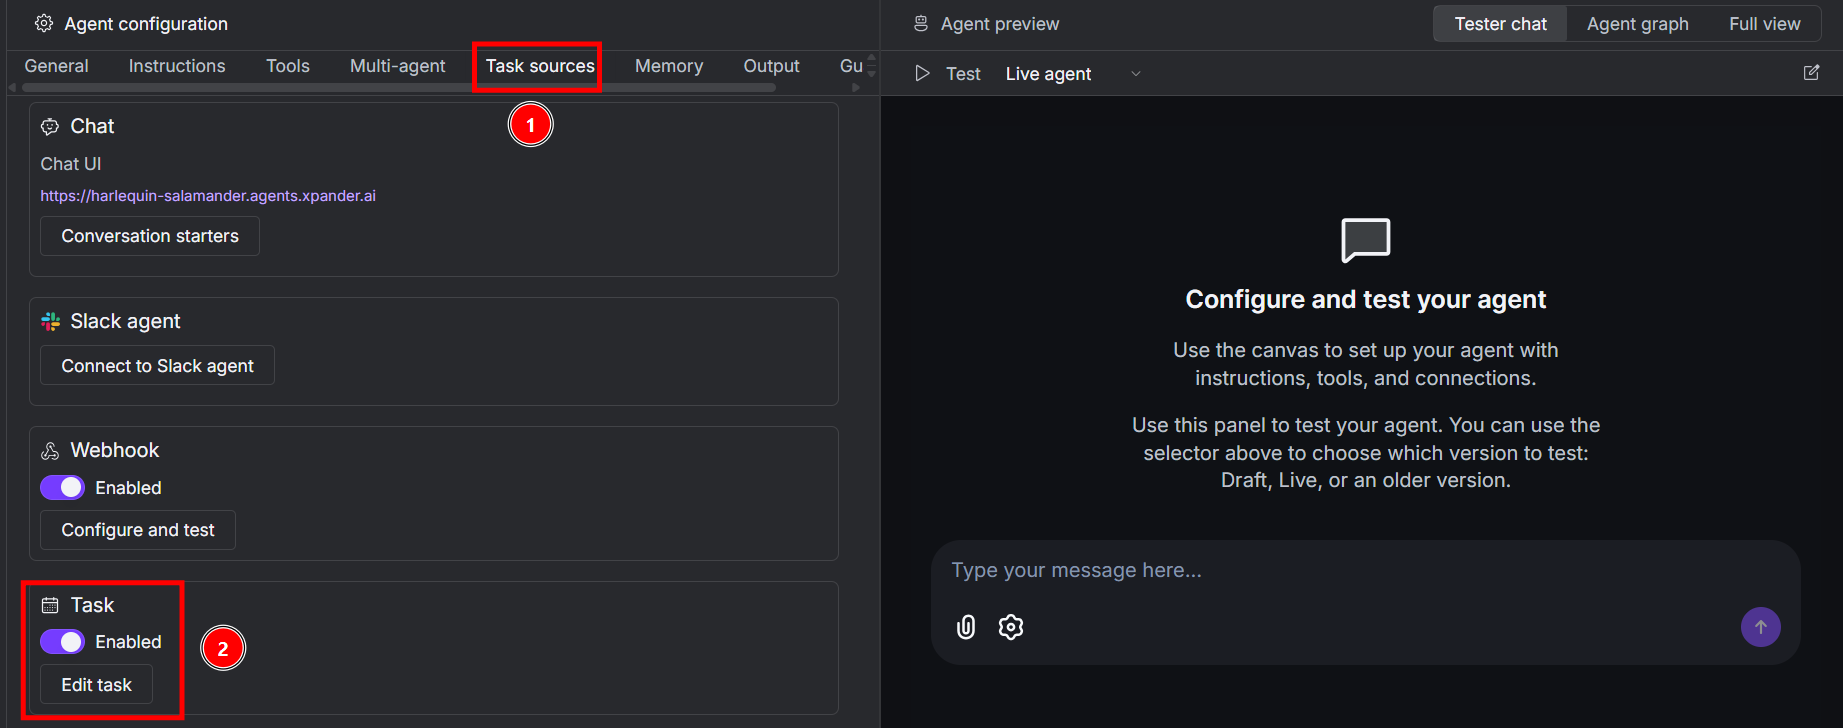
 ### Step 4: Schedule the Task
When you are satisfied with the results of your tests, you can set a schedule for the agent, for example weekly. To do so, navigate to the **Task sources** tab and enable the **Task** toggle:
### Step 4: Schedule the Task
When you are satisfied with the results of your tests, you can set a schedule for the agent, for example weekly. To do so, navigate to the **Task sources** tab and enable the **Task** toggle:
 Click on **Edit task** to define the scheduling settings. Inside the **Instructions** box you have to write the prompt that satisfied your last test:
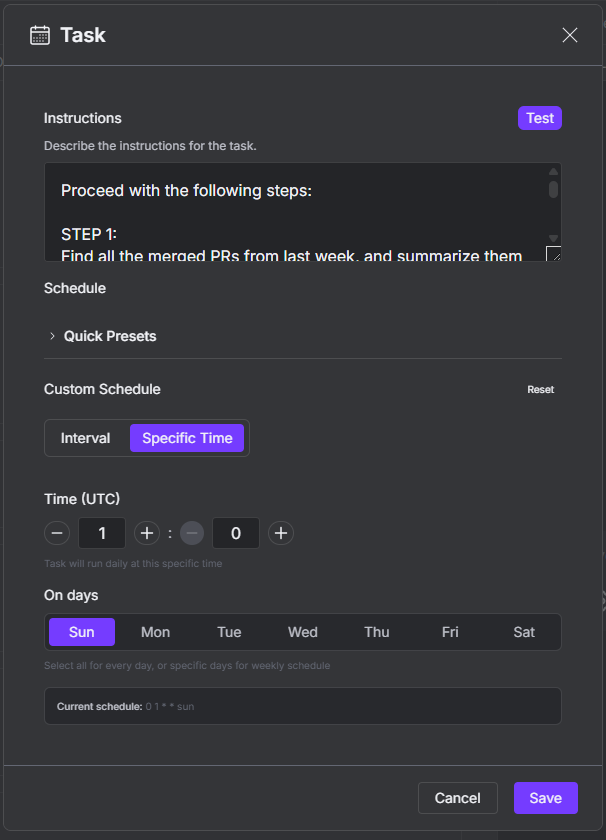 If you want to make an additional test, click on **Test**. If everything works fine, click on **Save**.
### Step 5: Set Up Memory Mechanism
Because this agent runs under a schedule, you have to activate and manage the agent's memory mechanism. This way, it does not take into account PRs that it has already considered in the past.
To do so, navigate to the **Memory** tab and activate the memory mechanisms:
If you want to make an additional test, click on **Test**. If everything works fine, click on **Save**.
### Step 5: Set Up Memory Mechanism
Because this agent runs under a schedule, you have to activate and manage the agent's memory mechanism. This way, it does not take into account PRs that it has already considered in the past.
To do so, navigate to the **Memory** tab and activate the memory mechanisms:
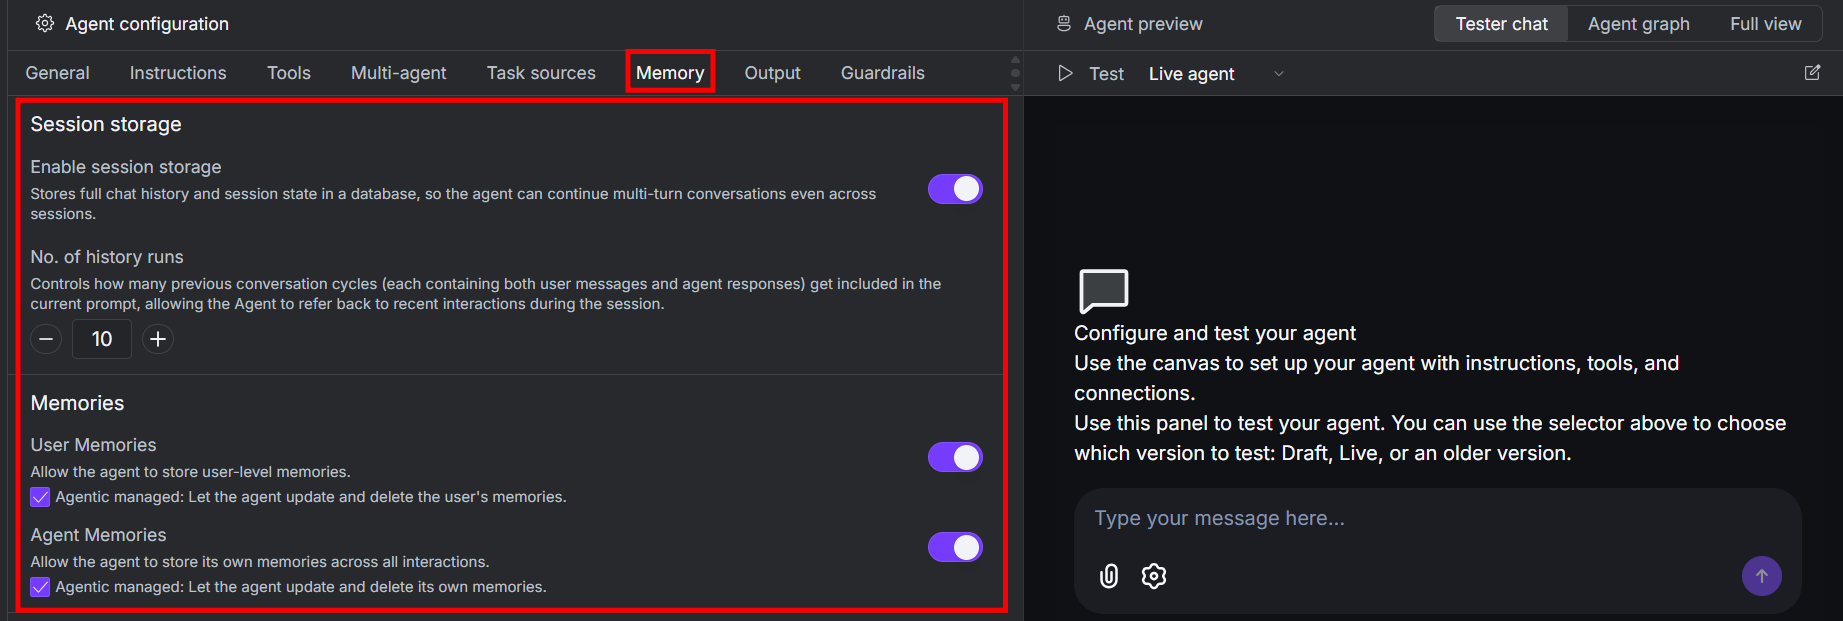 **NOTE**: Learn how to correctly set up agents' memory be reading the [**Agent Memory** section](/guides/agents/memory-state).
### Step 6: Deploy the Agent
To make sure the agent actually works, you have to deploy it. To do so, click on **Deploy**:
**NOTE**: Learn how to correctly set up agents' memory be reading the [**Agent Memory** section](/guides/agents/memory-state).
### Step 6: Deploy the Agent
To make sure the agent actually works, you have to deploy it. To do so, click on **Deploy**:
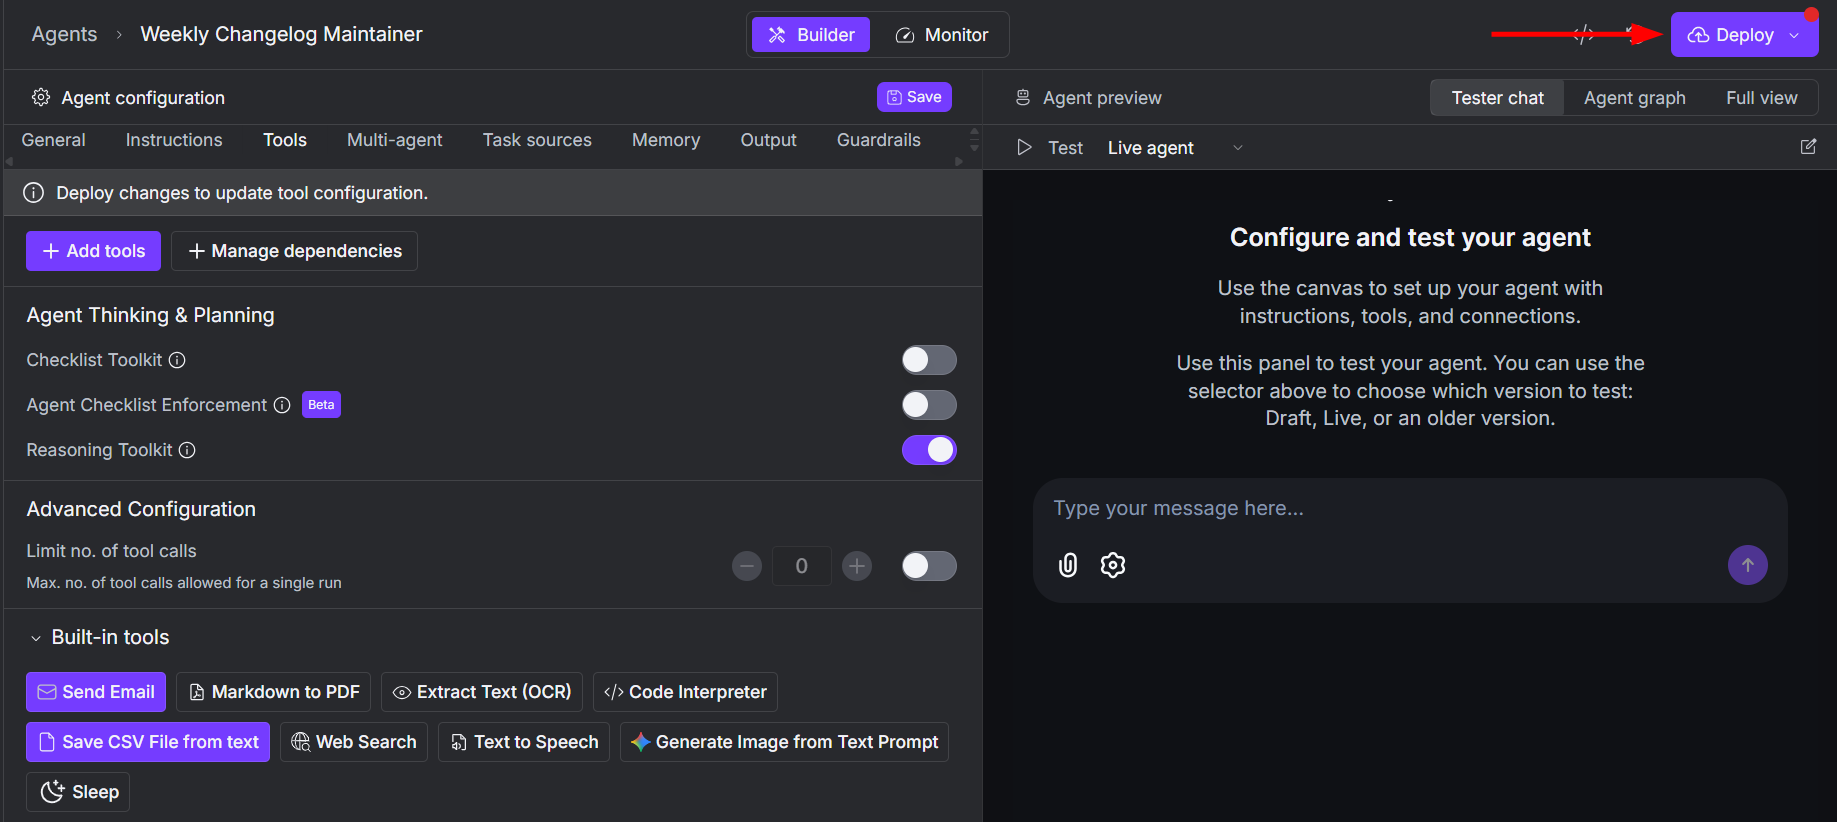 **WARNING**: Every time you change the settings or the instructions of an agent, make sure to click **Deploy**. The deployment is a snapshot of the current status of an agent, so you have to deploy it to apply the latest changes. Xpander suggests you to deploy an agent when you made changes with a red circle on the **Deploy** button.
### Step 7: Merge the PR
Once the agent completed the task, the PR is open. Then, you have to review and merge it. At xpander, we tested this agent in our Mintlify documentation repository. Below is how the [latest changelog](https://docs.xpander.ai/changelog/product-updates) appears, after we merged it into the main branch:
**WARNING**: Every time you change the settings or the instructions of an agent, make sure to click **Deploy**. The deployment is a snapshot of the current status of an agent, so you have to deploy it to apply the latest changes. Xpander suggests you to deploy an agent when you made changes with a red circle on the **Deploy** button.
### Step 7: Merge the PR
Once the agent completed the task, the PR is open. Then, you have to review and merge it. At xpander, we tested this agent in our Mintlify documentation repository. Below is how the [latest changelog](https://docs.xpander.ai/changelog/product-updates) appears, after we merged it into the main branch:
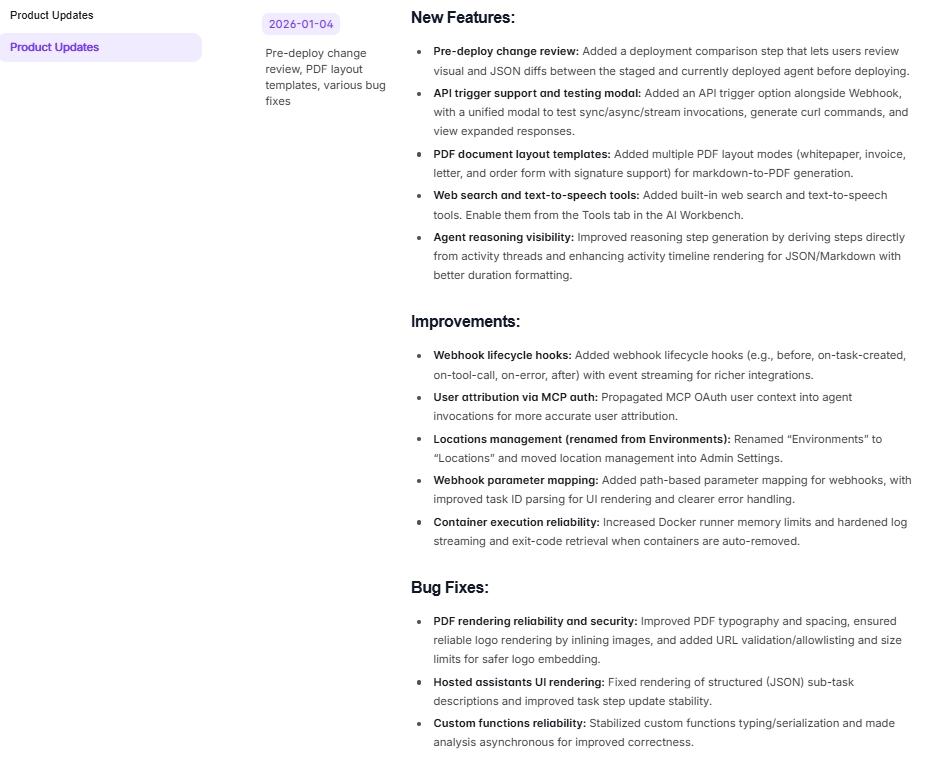 **NOTE**: To use the proposed prompt in a Mintlify repository, you have to change the extension of the changelog file to `.mdx`. So, the name of the file must be `changelog.mdx`.
## Use Cases
This agent can be used with any software documentation hosted on GitHub repositories like [Docusaurus](https://docusaurus.io/), [Mintlify](https://www.mintlify.com/), [MkDocs](https://www.mkdocs.org/), and any other framework you prefer using.
You can also test different solutions with different prompts. For example:
* The prompt proposed above asks the agent to find all the PRs merged last week. You can test with different timeframes.
* Instead of giving a specific name to the new branch like ‘release-notes-2026’ as proposed, you can try asking the agent to create a ‘release-notes‘ branch for the latest monthly merged PRs and let the agent specify the name.
* If you already have a changelog file, you can ask the agent to modify it, attaching the new content it retrieved from the merged PRs.
* You can define different categories to summarize the changelog, rather than using "new features", "enhancements", "bug fixes".
## Next Steps
Read our [examples gallery](/Examples/5-minute-wins) where you will find tutorials and use cases on how to use xpander.
Have questions or need help? Join our community on [Slack](https://join.slack.com/t/xpandercommunity/shared_invite/zt-2mt2xkxkz-omM7f~_h2jcuzFudrYtZQQ) or [Discord](https://discord.gg/CUcp4WWh5g)!
**NOTE**: To use the proposed prompt in a Mintlify repository, you have to change the extension of the changelog file to `.mdx`. So, the name of the file must be `changelog.mdx`.
## Use Cases
This agent can be used with any software documentation hosted on GitHub repositories like [Docusaurus](https://docusaurus.io/), [Mintlify](https://www.mintlify.com/), [MkDocs](https://www.mkdocs.org/), and any other framework you prefer using.
You can also test different solutions with different prompts. For example:
* The prompt proposed above asks the agent to find all the PRs merged last week. You can test with different timeframes.
* Instead of giving a specific name to the new branch like ‘release-notes-2026’ as proposed, you can try asking the agent to create a ‘release-notes‘ branch for the latest monthly merged PRs and let the agent specify the name.
* If you already have a changelog file, you can ask the agent to modify it, attaching the new content it retrieved from the merged PRs.
* You can define different categories to summarize the changelog, rather than using "new features", "enhancements", "bug fixes".
## Next Steps
Read our [examples gallery](/Examples/5-minute-wins) where you will find tutorials and use cases on how to use xpander.
Have questions or need help? Join our community on [Slack](https://join.slack.com/t/xpandercommunity/shared_invite/zt-2mt2xkxkz-omM7f~_h2jcuzFudrYtZQQ) or [Discord](https://discord.gg/CUcp4WWh5g)!