> ## Documentation Index
> Fetch the complete documentation index at: https://docs.xpander.ai/llms.txt
> Use this file to discover all available pages before exploring further.
# Calendly
> Learn how to integrate AI agents with Calendly using xpander.ai. Create intelligent scheduling workflows that automatically coordinate meetings, personalize communication, and adapt to real-time changes.
## About Calendly
Calendly is an online scheduling tool that helps individuals and businesses streamline the process of setting up meetings and appointments. Instead of the back-and-forth emails to find a mutually available time, Calendly allows users to:
* Share a personalized link with others (e.g., calendly.com/yourname)
* Let invitees book time based on the user's availability
* Sync with calendars like Google, Outlook, or iCloud to avoid double-booking
## Authentication Options
Below are possible authentication options you can choose:
The simplest way to connect Calendly is by using xpander.ai's built-in authentication:
1. Go to the **Connectors** section in the sidebar of your xpander.ai dashboard.
2. Select **Calendly** from the available integrations.
3. Click **Sign in with Calendly**.
4. Grant xpander.ai permission to access your account.
5. Your Calendly integration is now ready to use.
### Generate a Calendly API Key
1. Log in to your [Calendly account](https://calendly.com/).
2. Click on **Integrations & apps** in the sidebar.
3. Click on **API and webhooks**.\\
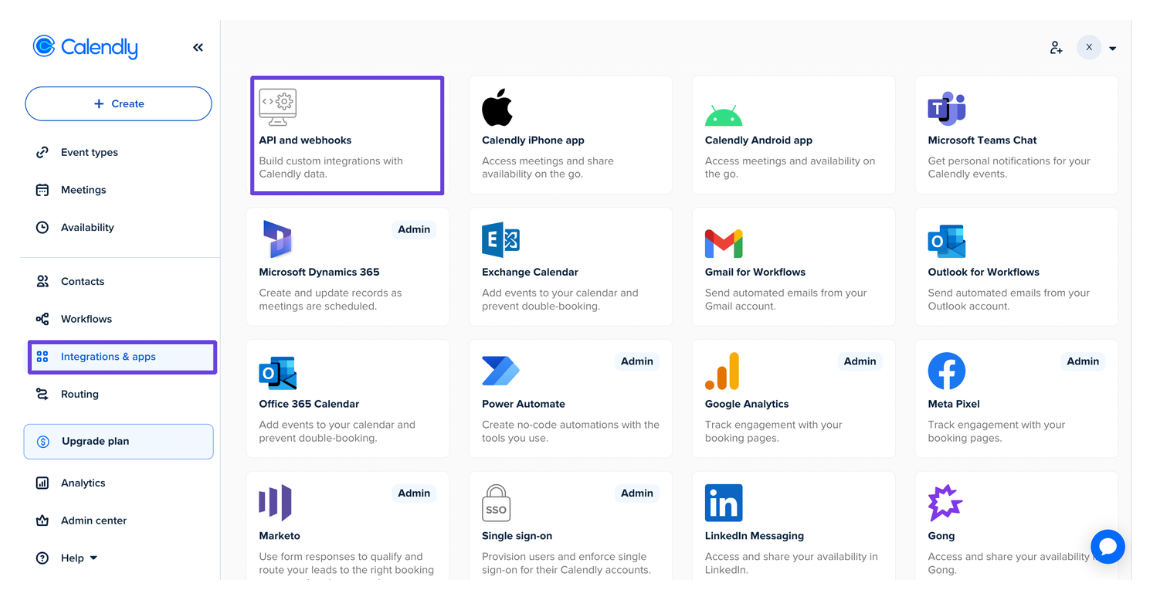 4. Click **Get a token now**.
5. Enter a name for your token, then click **Create token**.
6. Save the access token.
### Integrate Calendly into xpander.ai
1. Go to the **Connectors** section in the sidebar of your xpander.ai dashboard.
2. Select **Calendly** from the available integrations.
3. Click **Other auth options**.
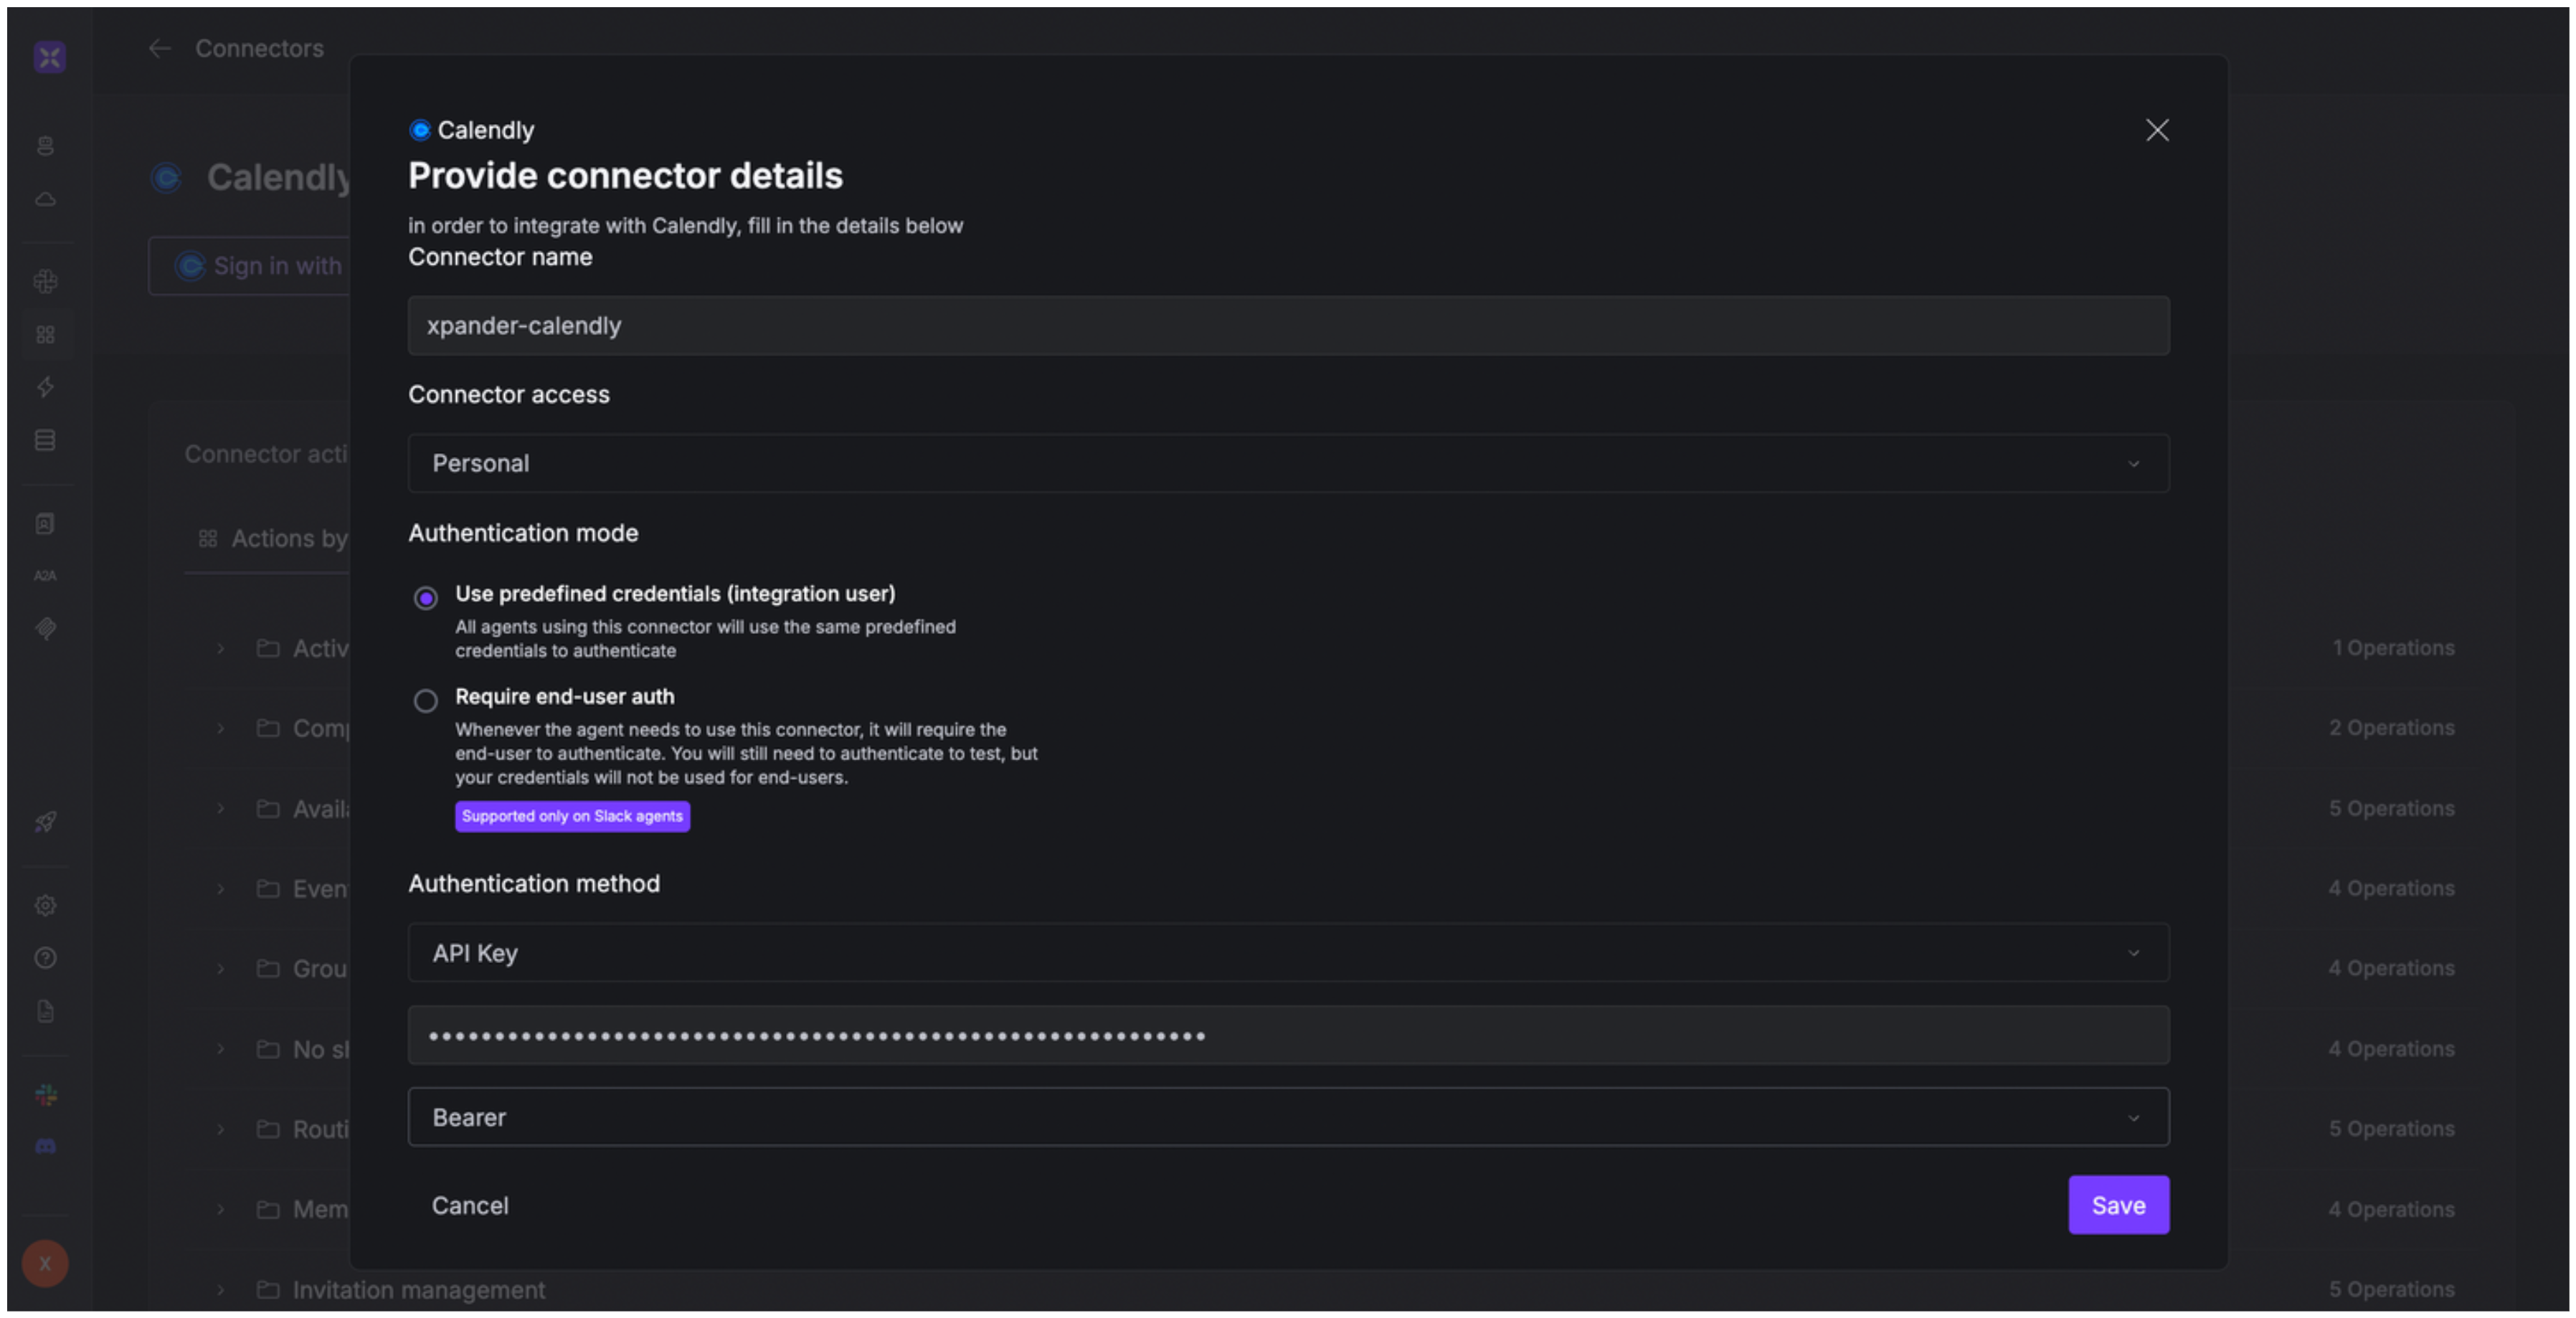
4. Enter a **connector name**, e.g., "xpander-calendly".
5. Select **Integration User** as the authentication mode.
6. Select **API Key** as the authentication method.
7. Paste the Calendly access token into the provided field.
8. Choose **Bearer** as the **Auth Type**.
9. In the **Interface specific settings** section, enter `https://api.calendly.com/` as the base URL.
10. Save the configuration.
4. Click **Get a token now**.
5. Enter a name for your token, then click **Create token**.
6. Save the access token.
### Integrate Calendly into xpander.ai
1. Go to the **Connectors** section in the sidebar of your xpander.ai dashboard.
2. Select **Calendly** from the available integrations.
3. Click **Other auth options**.
4. Enter a **connector name**, e.g., "xpander-calendly".
5. Select **Integration User** as the authentication mode.
6. Select **API Key** as the authentication method.
7. Paste the Calendly access token into the provided field.
8. Choose **Bearer** as the **Auth Type**.
9. In the **Interface specific settings** section, enter `https://api.calendly.com/` as the base URL.
10. Save the configuration.
 ## Integration of Calendly into AI Agent
Once you've configured your Calendly account with the authentication option(s) described above, you can integrate it into your AI agent with xpander.ai:
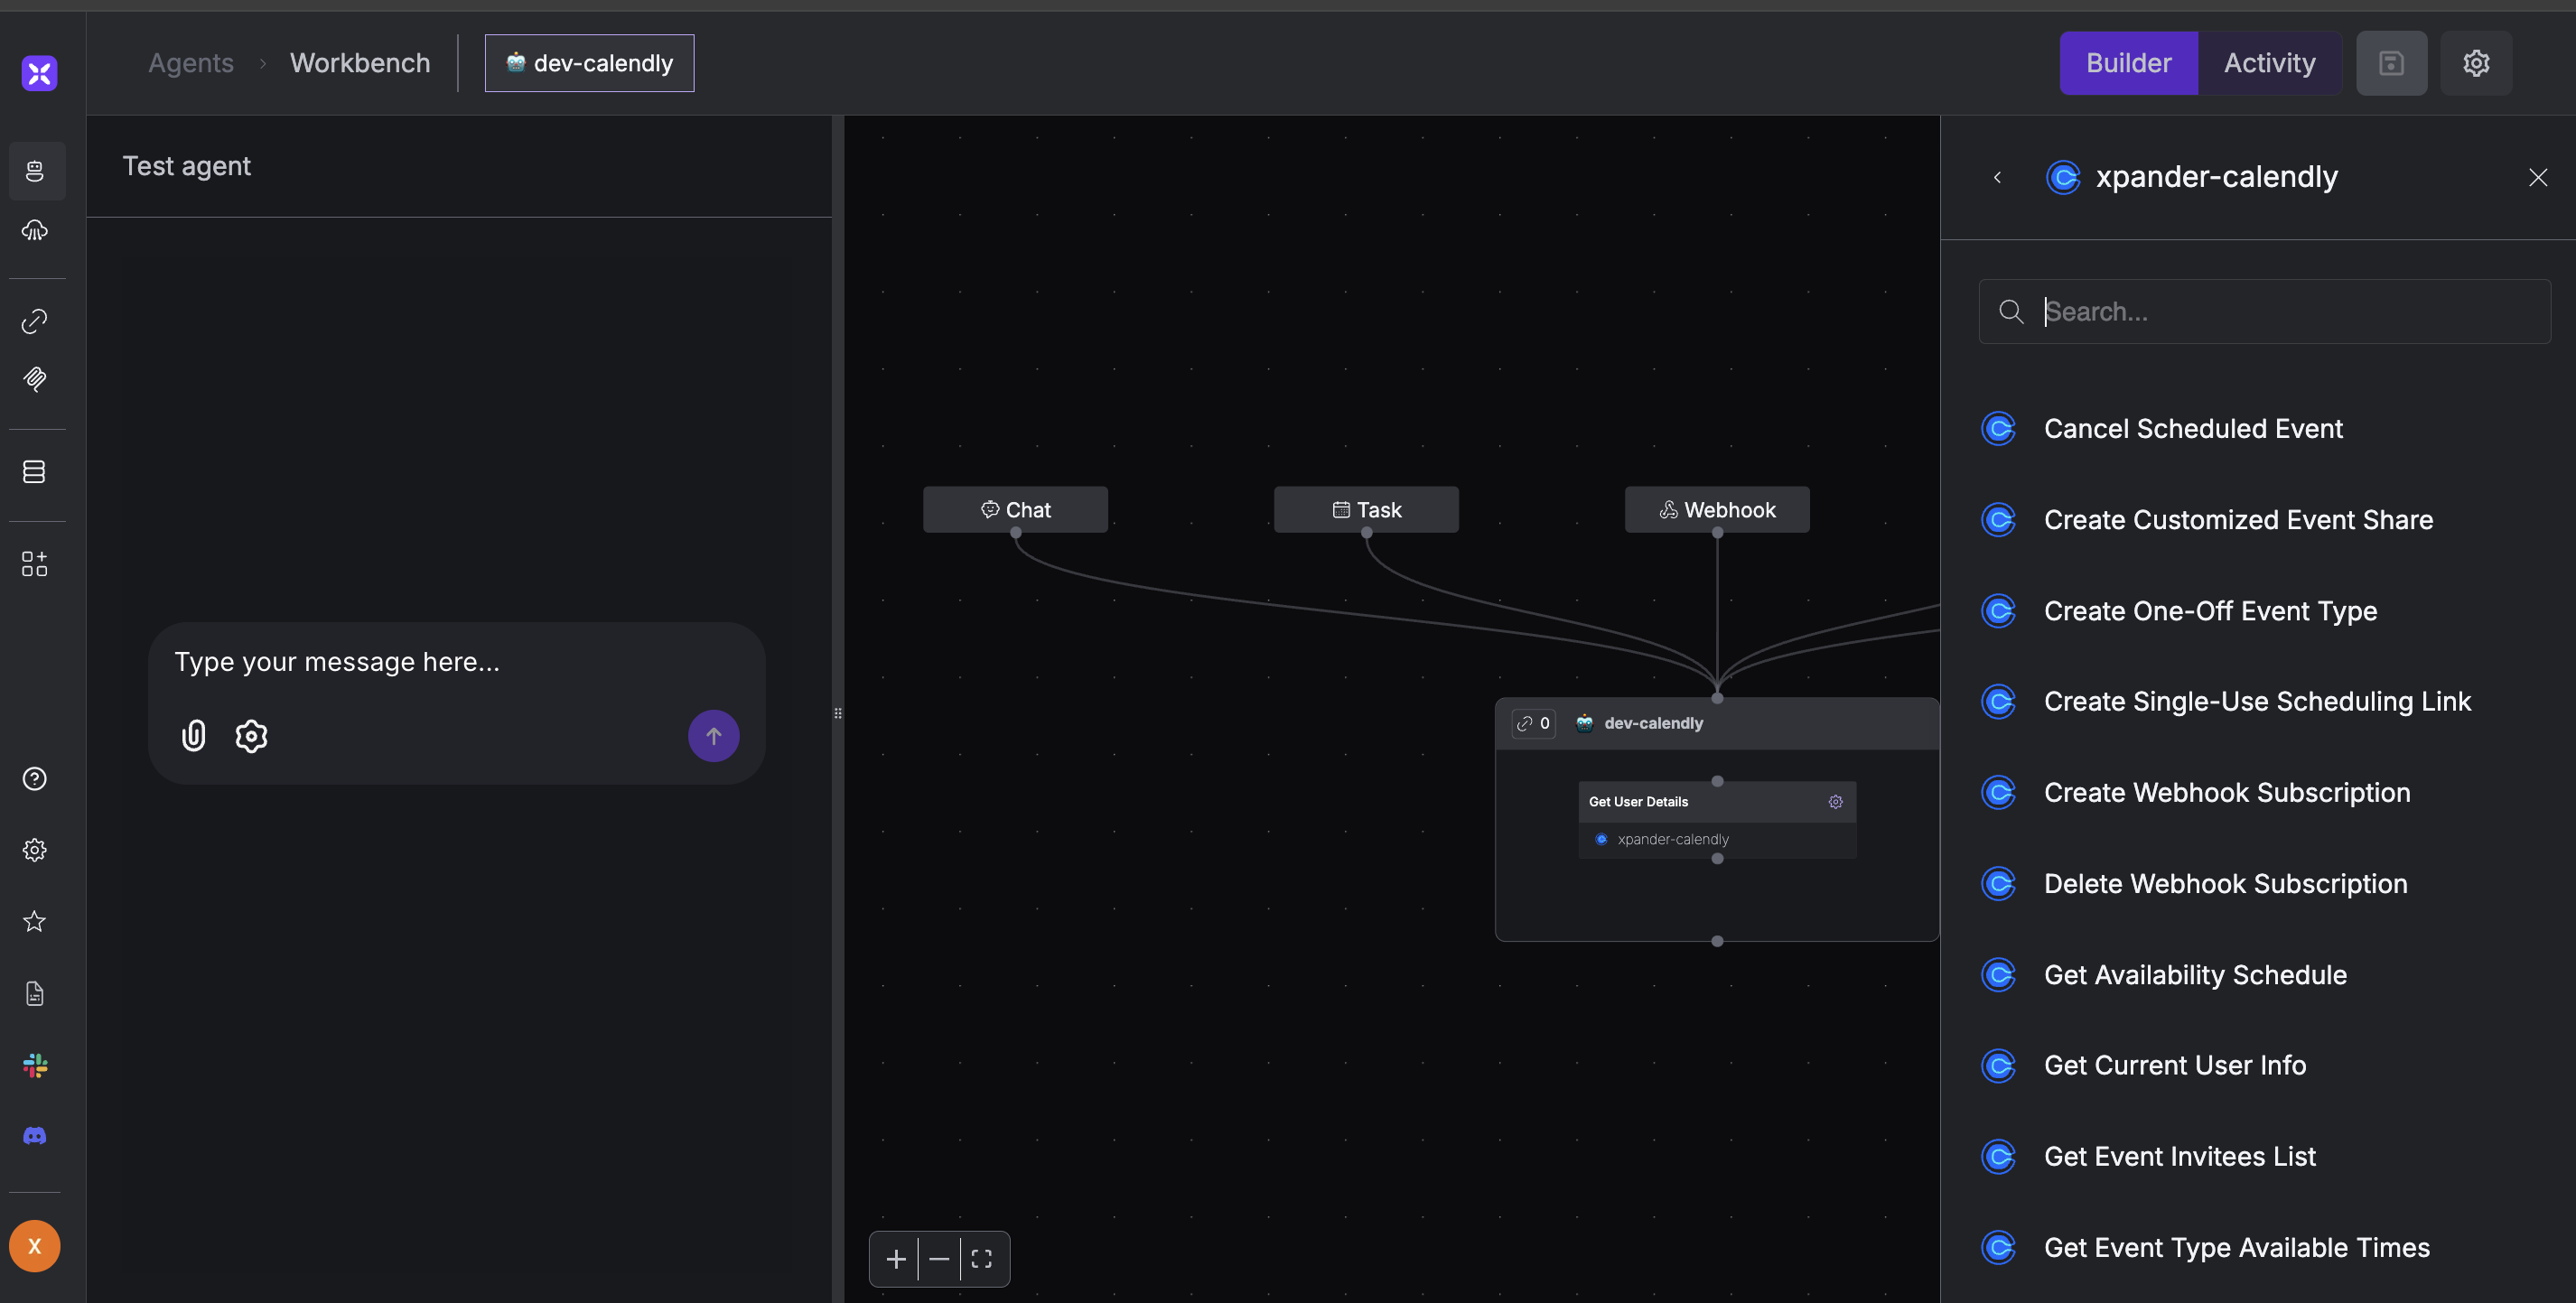
1. In your xpander.ai dashboard, go to the **Agent Configuration** tab and select **Tools**, then click **Add Tools**.
2. Select **Connectors**.
3. Choose **Calendly** with the same **connector name** you configured in the previous section (e.g., xpander-calendly).
4. Select the available Calendly operations that suit your use case.
## Integration of Calendly into AI Agent
Once you've configured your Calendly account with the authentication option(s) described above, you can integrate it into your AI agent with xpander.ai:
1. In your xpander.ai dashboard, go to the **Agent Configuration** tab and select **Tools**, then click **Add Tools**.
2. Select **Connectors**.
3. Choose **Calendly** with the same **connector name** you configured in the previous section (e.g., xpander-calendly).
4. Select the available Calendly operations that suit your use case.
 ## Expose Calendly as MCP Server
Alternatively, you can also expose your Calendly account as an MCP server. To do so:
1. Go to the **Connectors** section in the sidebar of your xpander.ai dashboard.
2. Select **Calendly** with the same **connector name** you configured in the previous section (e.g., xpander-calendly).
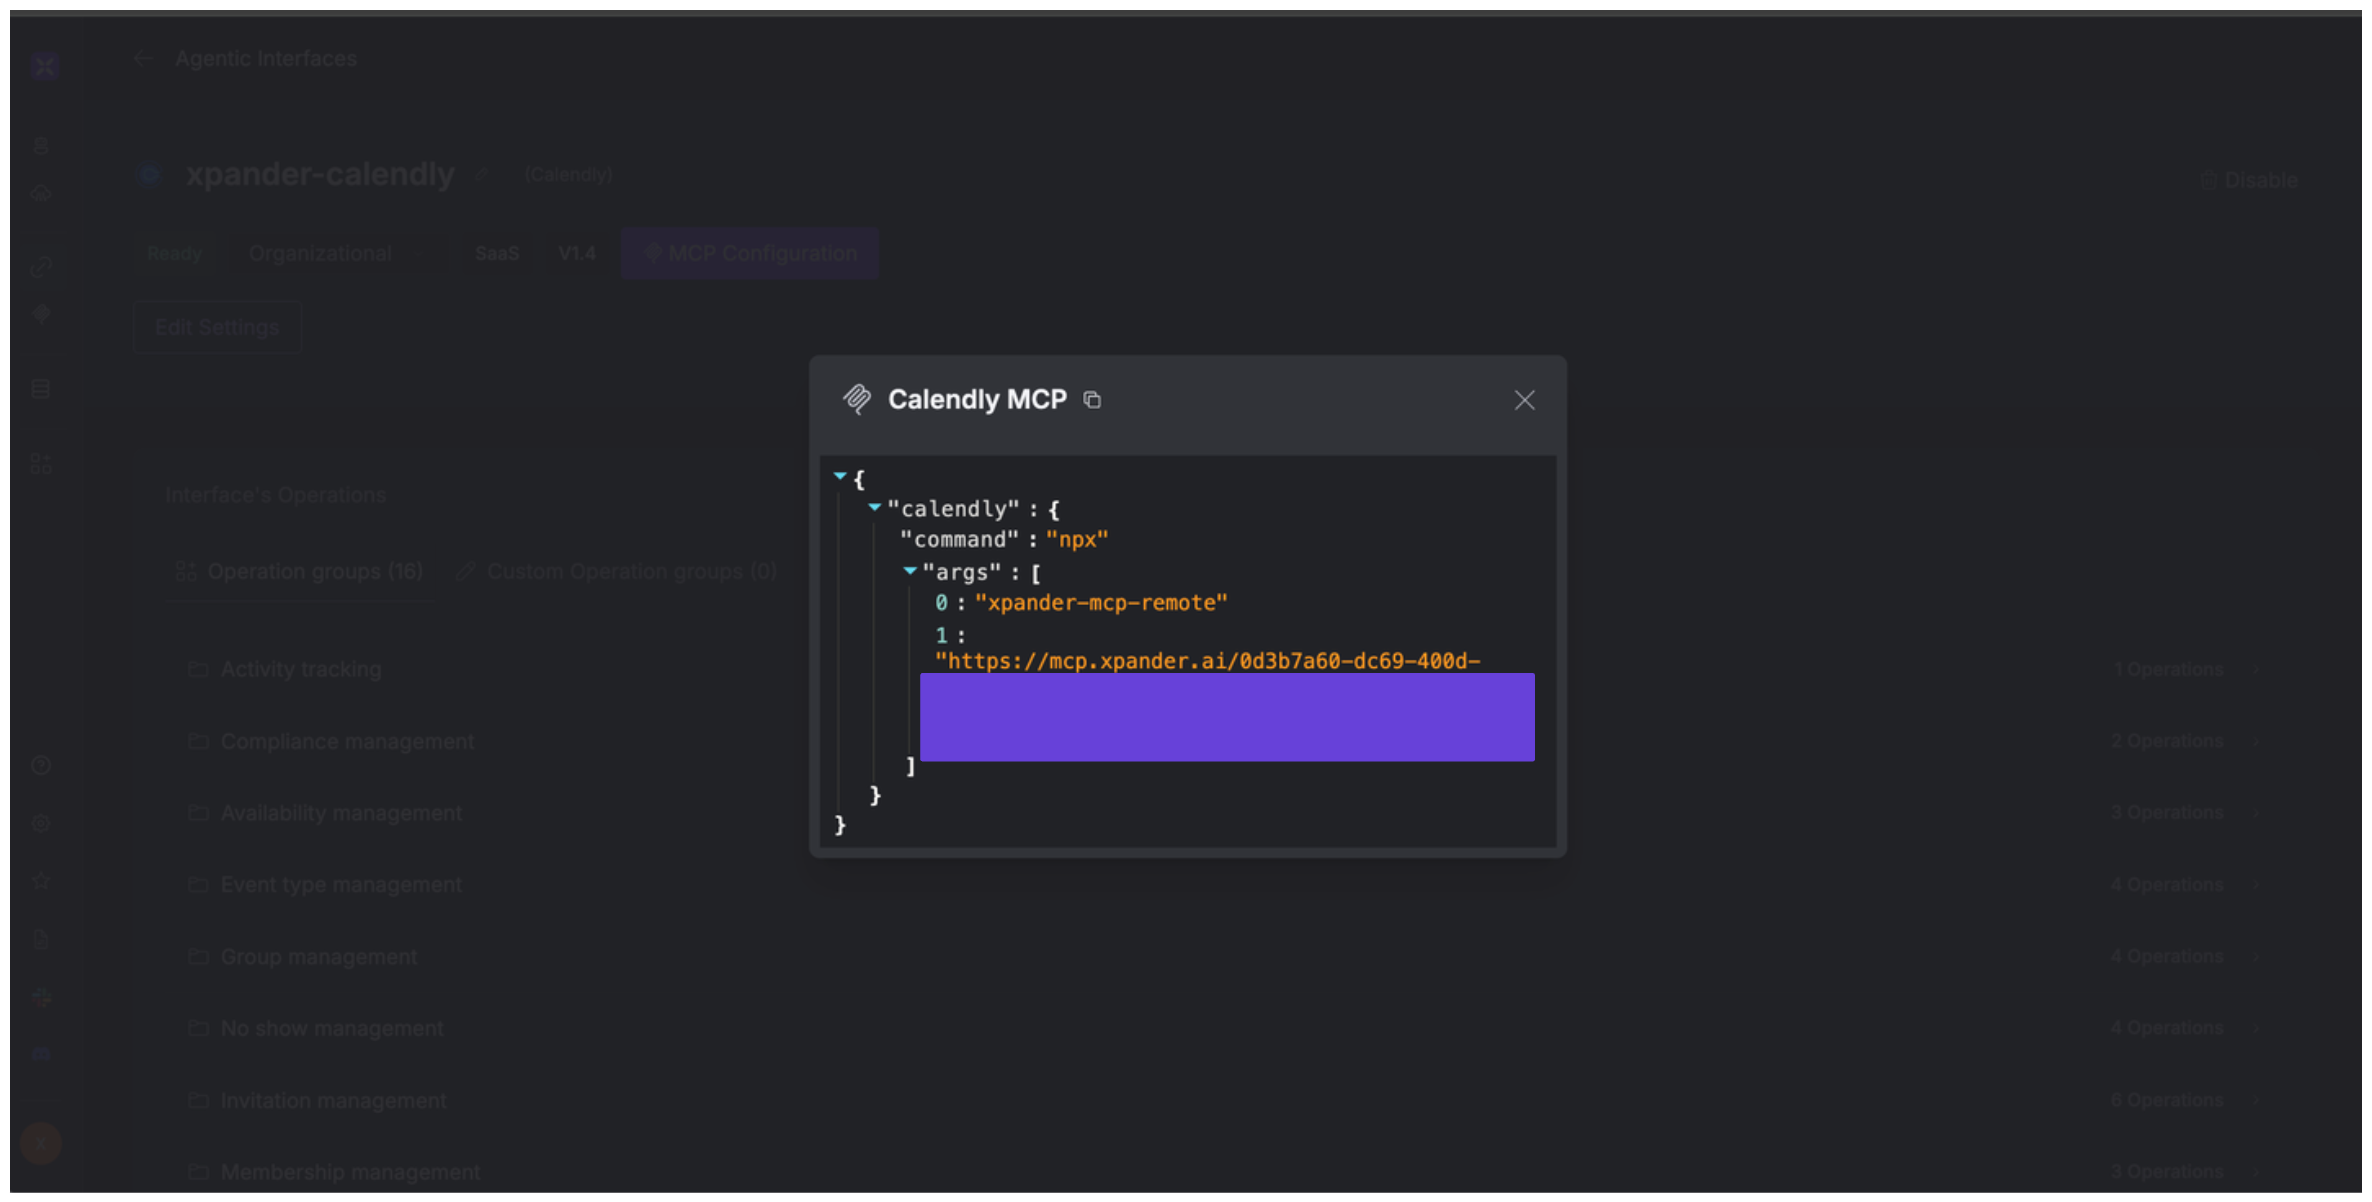
3. Click **MCP Configuration**.
4. Enter the MCP configuration into the appropriate settings of the client app you want to use (e.g., Cursor, Windsurf, Claude Desktop, etc.).
## Expose Calendly as MCP Server
Alternatively, you can also expose your Calendly account as an MCP server. To do so:
1. Go to the **Connectors** section in the sidebar of your xpander.ai dashboard.
2. Select **Calendly** with the same **connector name** you configured in the previous section (e.g., xpander-calendly).
3. Click **MCP Configuration**.
4. Enter the MCP configuration into the appropriate settings of the client app you want to use (e.g., Cursor, Windsurf, Claude Desktop, etc.).
 ## AI Agent Calendly Prompt Library
Below are possible prompts or use cases you can try after integrating Calendly into your xpander AI agent:
```
Can you show me all my scheduled events for next week?
```
```
Could you create a one-time scheduling link for the {project_name} consultation with {client_name}?
```
```
When is {team_member} available between {start_date} and {end_date}?
```
```
Who are all the hosts assigned to our {event_type_name} event?
```
## Related Resources
* [Understanding Model Context Protocol (MCP)](/guides/deploy/mcp)
* [Calendly API Documentation](https://developer.calendly.com/api-docs/4b402d5ab3edd-calendly-developer)
## AI Agent Calendly Prompt Library
Below are possible prompts or use cases you can try after integrating Calendly into your xpander AI agent:
```
Can you show me all my scheduled events for next week?
```
```
Could you create a one-time scheduling link for the {project_name} consultation with {client_name}?
```
```
When is {team_member} available between {start_date} and {end_date}?
```
```
Who are all the hosts assigned to our {event_type_name} event?
```
## Related Resources
* [Understanding Model Context Protocol (MCP)](/guides/deploy/mcp)
* [Calendly API Documentation](https://developer.calendly.com/api-docs/4b402d5ab3edd-calendly-developer)