> ## Documentation Index
> Fetch the complete documentation index at: https://docs.xpander.ai/llms.txt
> Use this file to discover all available pages before exploring further.
# Clickup
> Learn how to integrate AI agents with ClickUp using xpander.ai. Create automated workflows that leverage AI to streamline task management, generate smart task summaries, and boost team productivity.
## About ClickUp
ClickUp is a comprehensive project management and productivity platform designed to centralize tasks, collaboration, documentation, and communication in a single interface.
Key features include:
* **Task Management**: Organize work using customizable tasks, subtasks, checklists, and over 35 ClickApps (e.g., time tracking, custom fields, sprint points).
* **Multiple Views**: Choose from 15+ views, including List, Board, Calendar, Gantt, Timeline, Whiteboard, and Table, to visualize and manage projects from different perspectives.
* **Automation**: Set up conditional workflows with if-then logic to automate repetitive tasks, such as status changes or task assignments.
* **Collaboration Tools**: Utilize built-in chat, whiteboards, and real-time document editing to facilitate team communication and brainstorming.
* **AI Integration**: ClickUp Brain, introduced in 2024, offers AI-powered features like task summarization, content generation, and intelligent search across tasks and documents.
## Authentication Options
Below are possible authentication options you can choose:
The simplest way to connect ClickUp is by using xpander.ai's built-in authentication:
1. Go to the **Connectors** section in the sidebar of your xpander.ai dashboard.
2. Select **ClickUp** from the available integrations.
3. Click **Sign in with ClickUp**.
4. Grant xpander.ai permission to access your ClickUp workspace.
5. Your ClickUp integration is now ready to use.
### Generate a ClickUp API Key
1. Log in to your [ClickUp account](https://app.clickup.com/).
2. Click on your account icon in the top-right corner and select **Settings**.\\
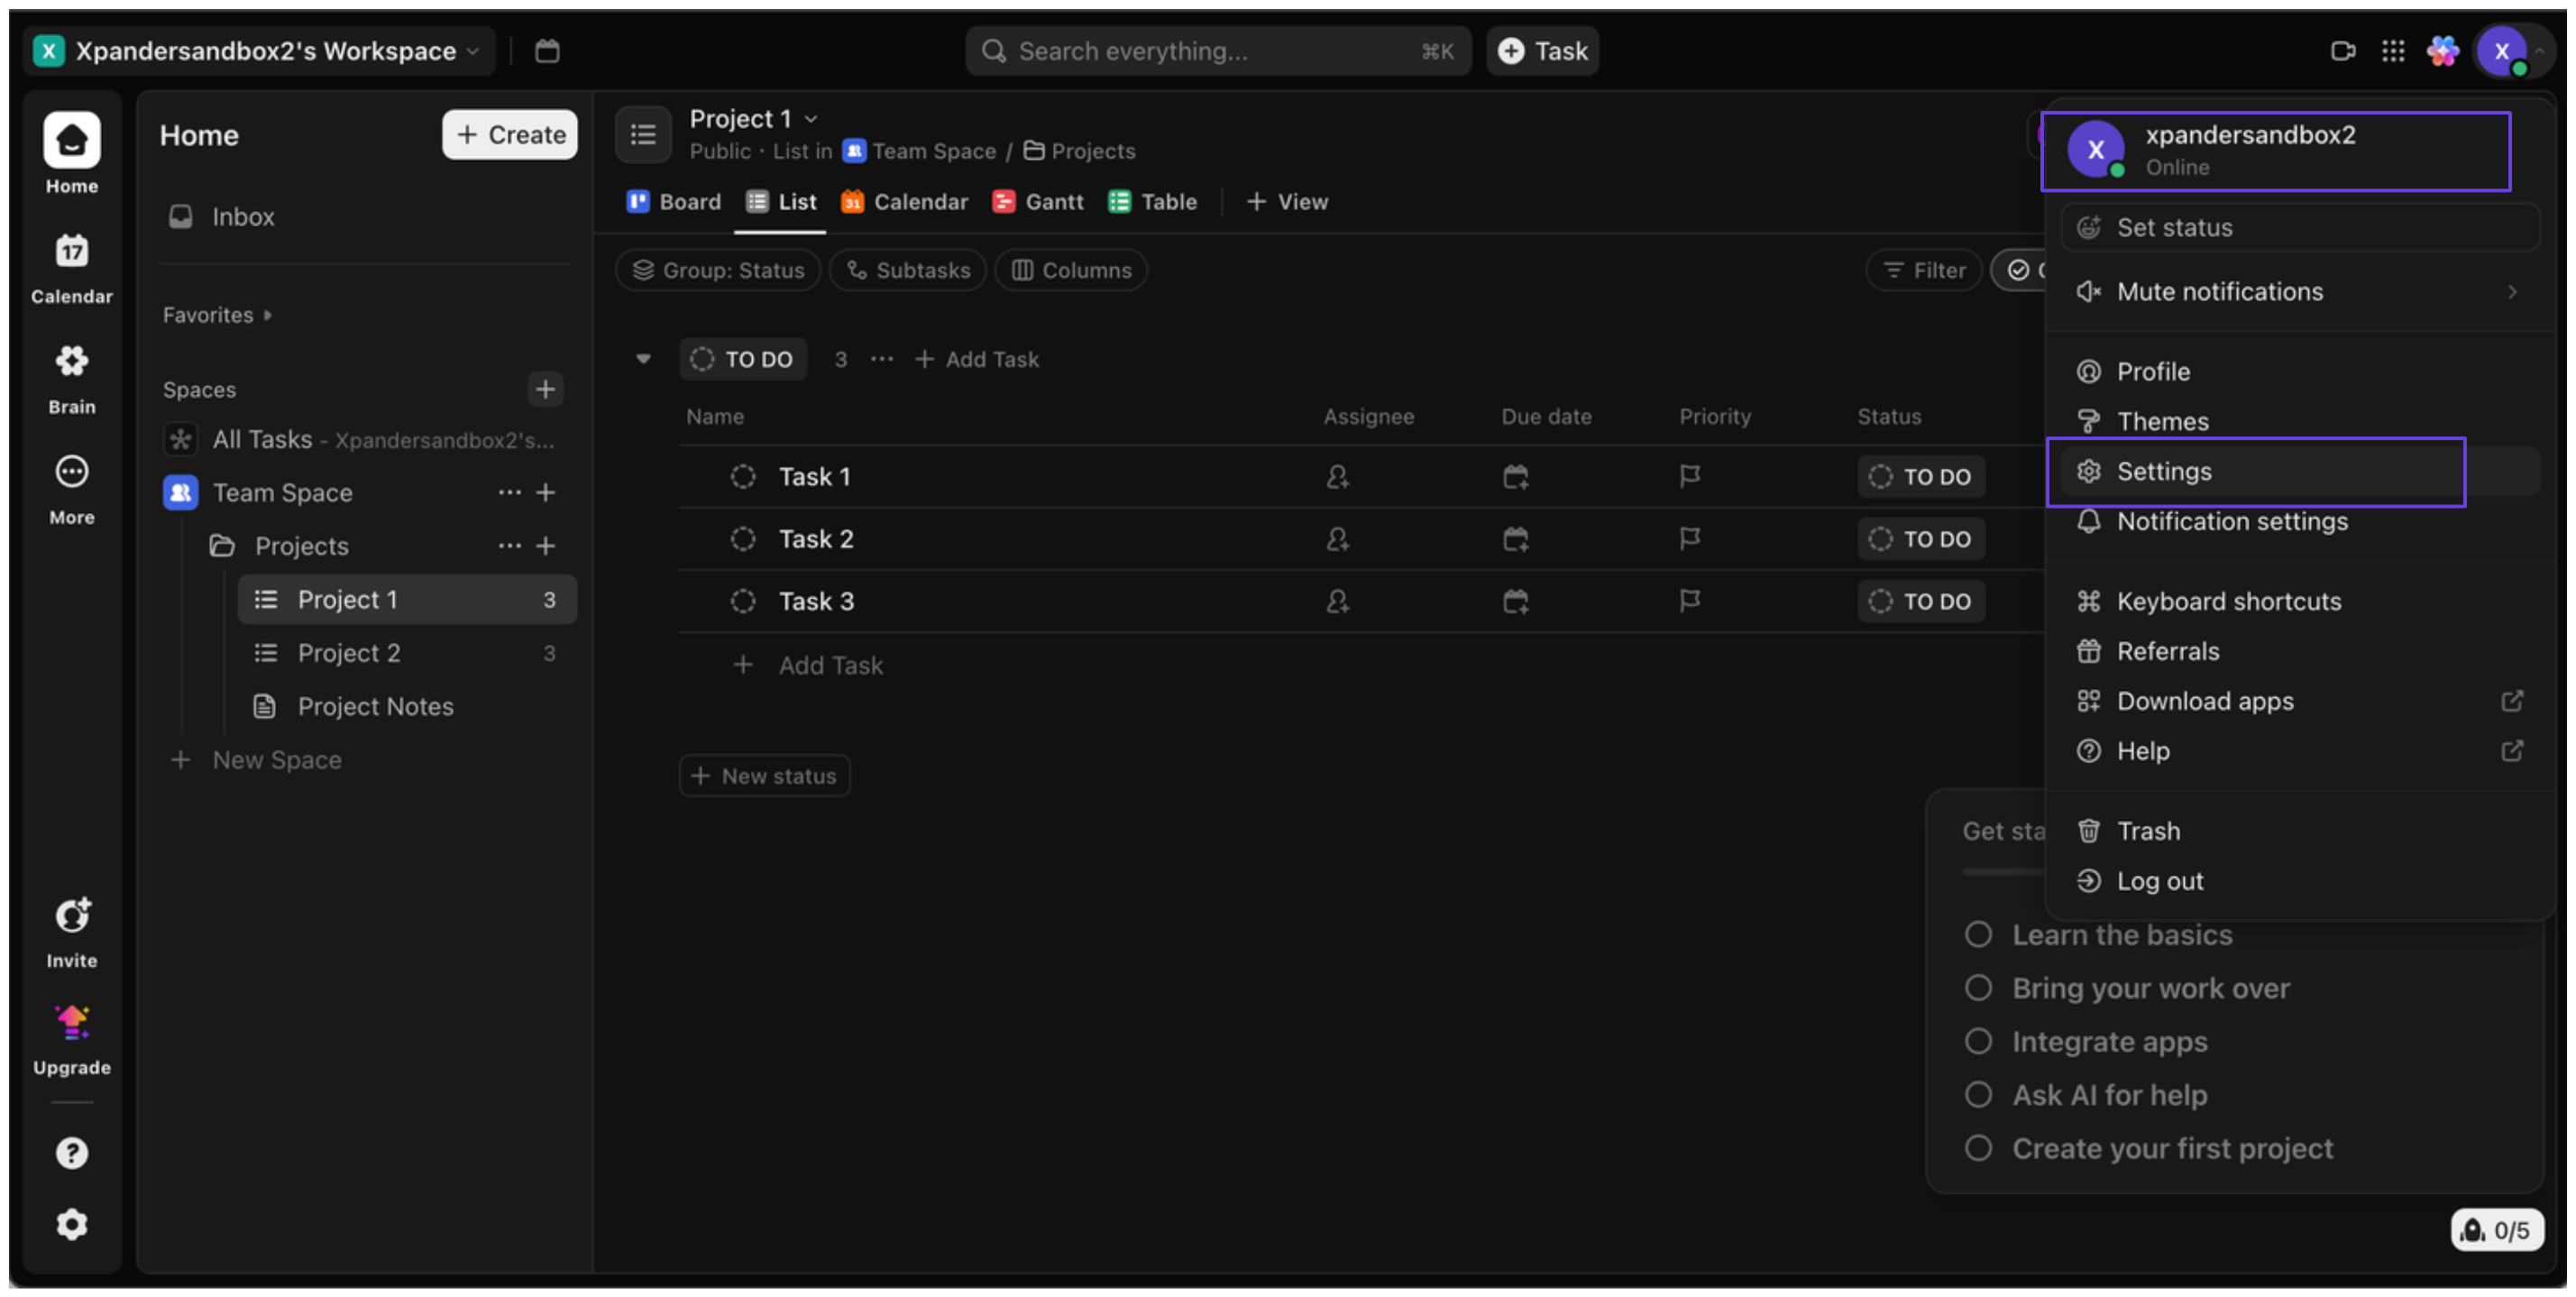 3. In the sidebar, go to **Connectors** and click **Generate**.\\
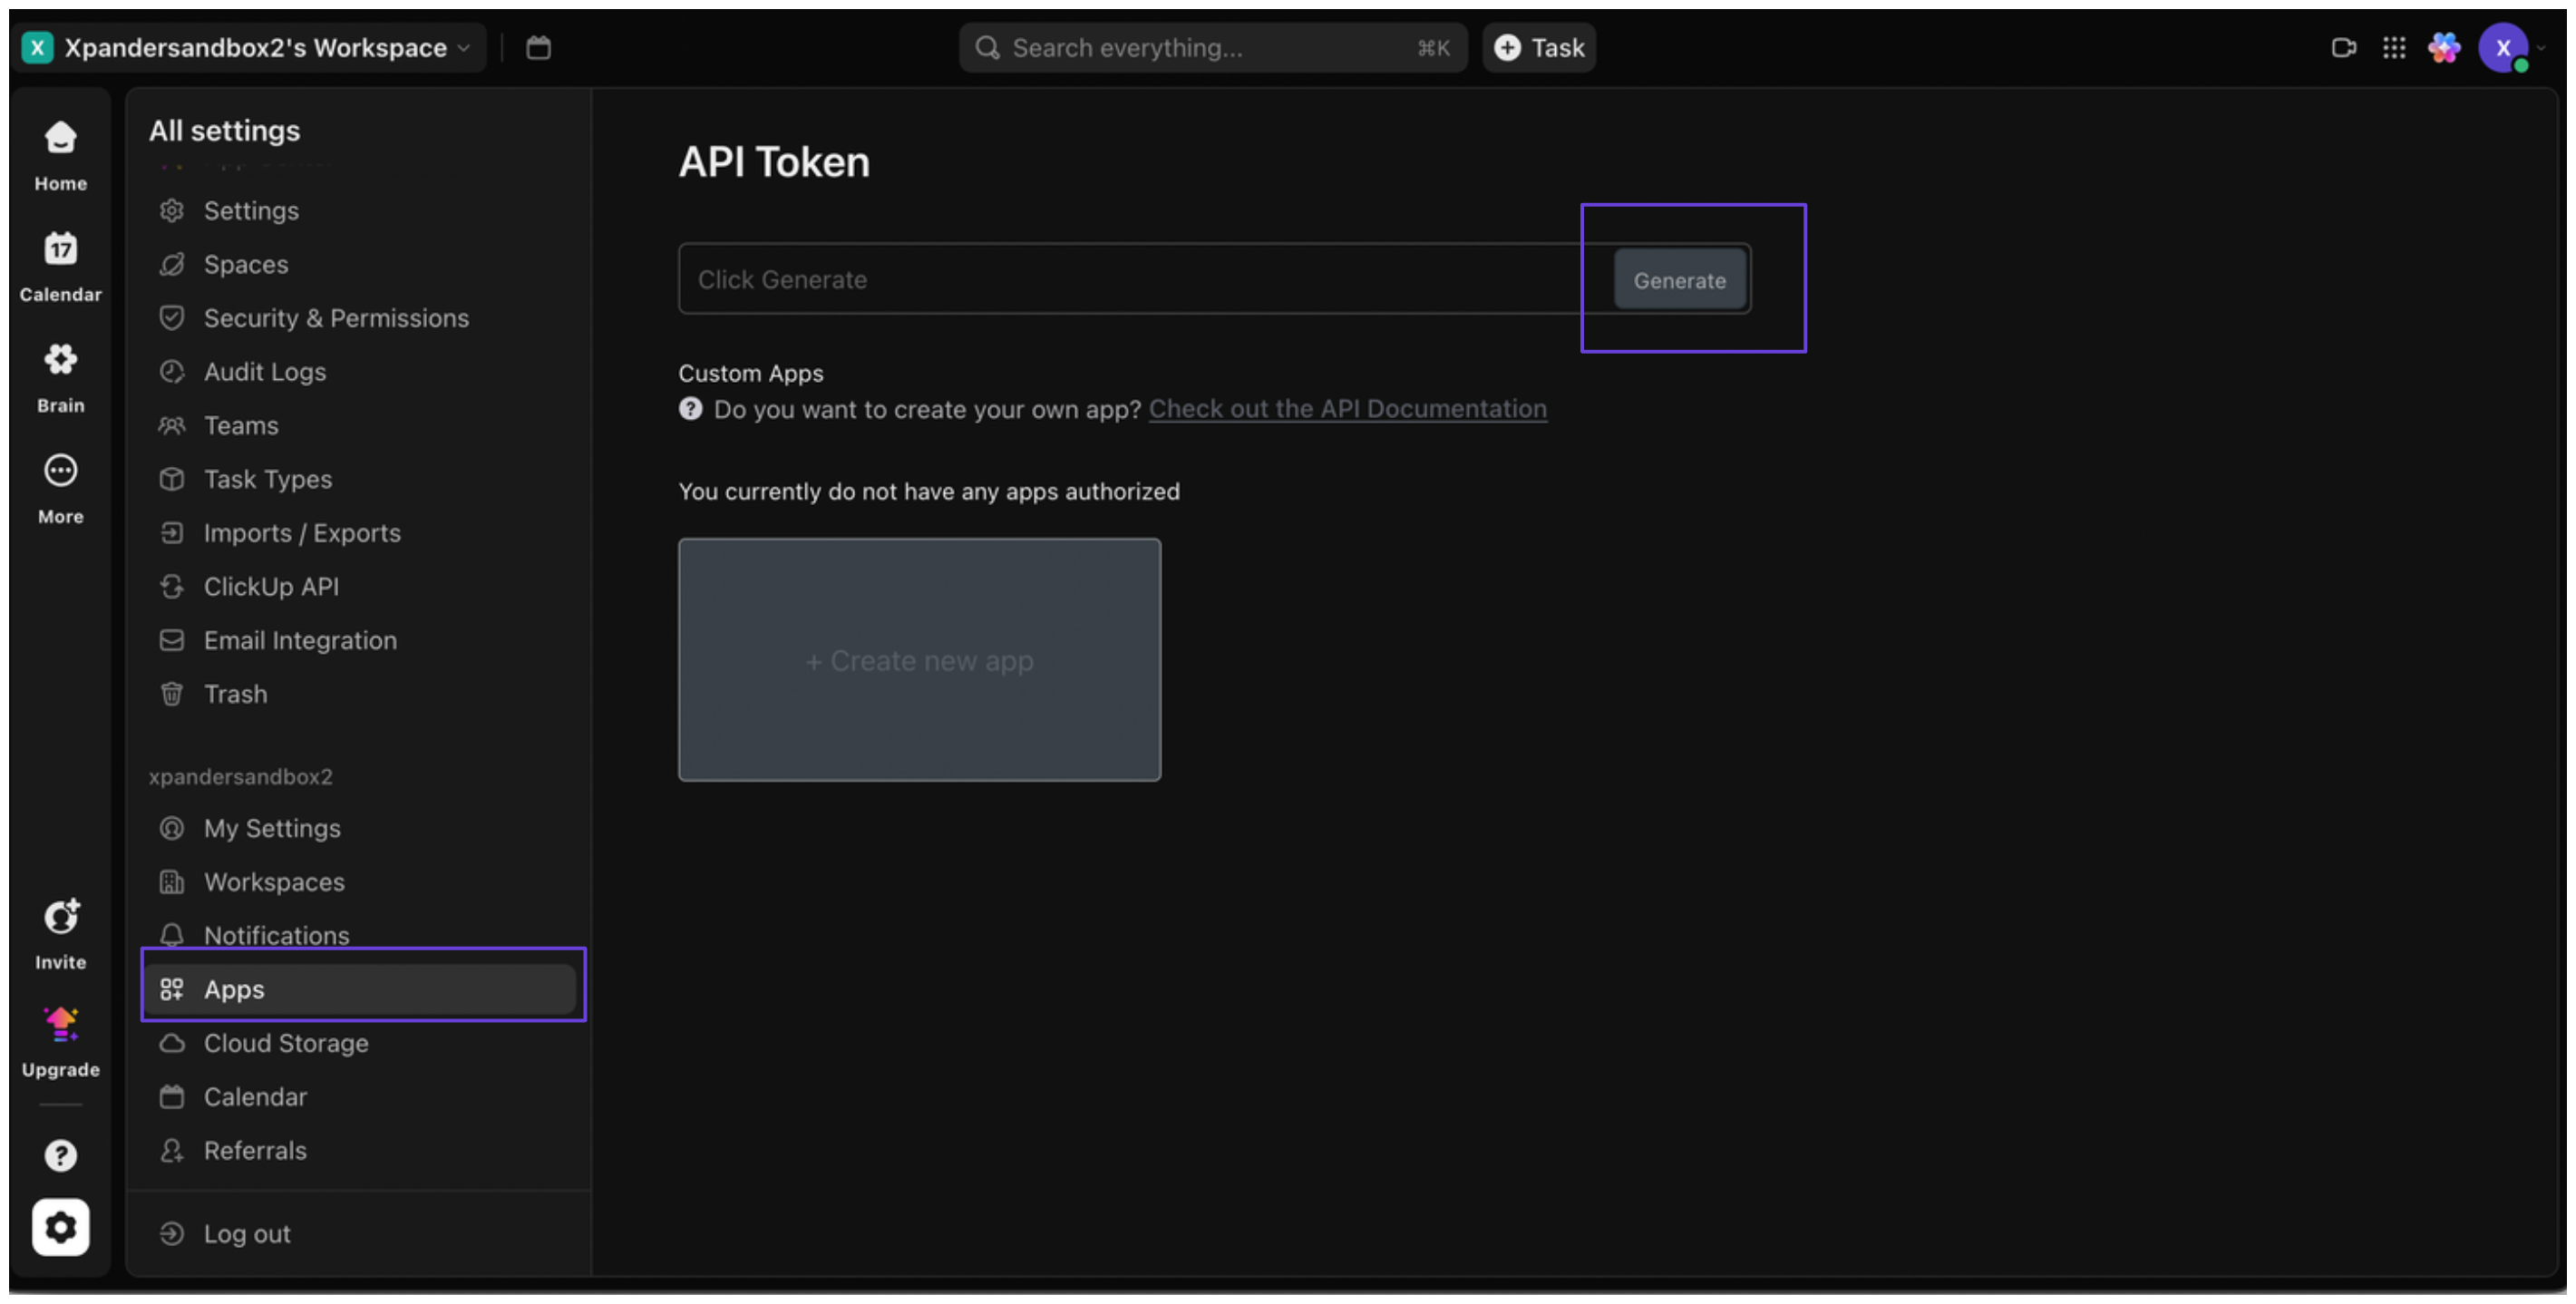 4. You'll now see your ClickUp API key—copy and store it safely.
### Integrate ClickUp into xpander.ai
1. Go to the **Connectors** section in the sidebar of your xpander.ai dashboard.
2. Select **ClickUp** from the available integrations.
3. Click **Enable**.
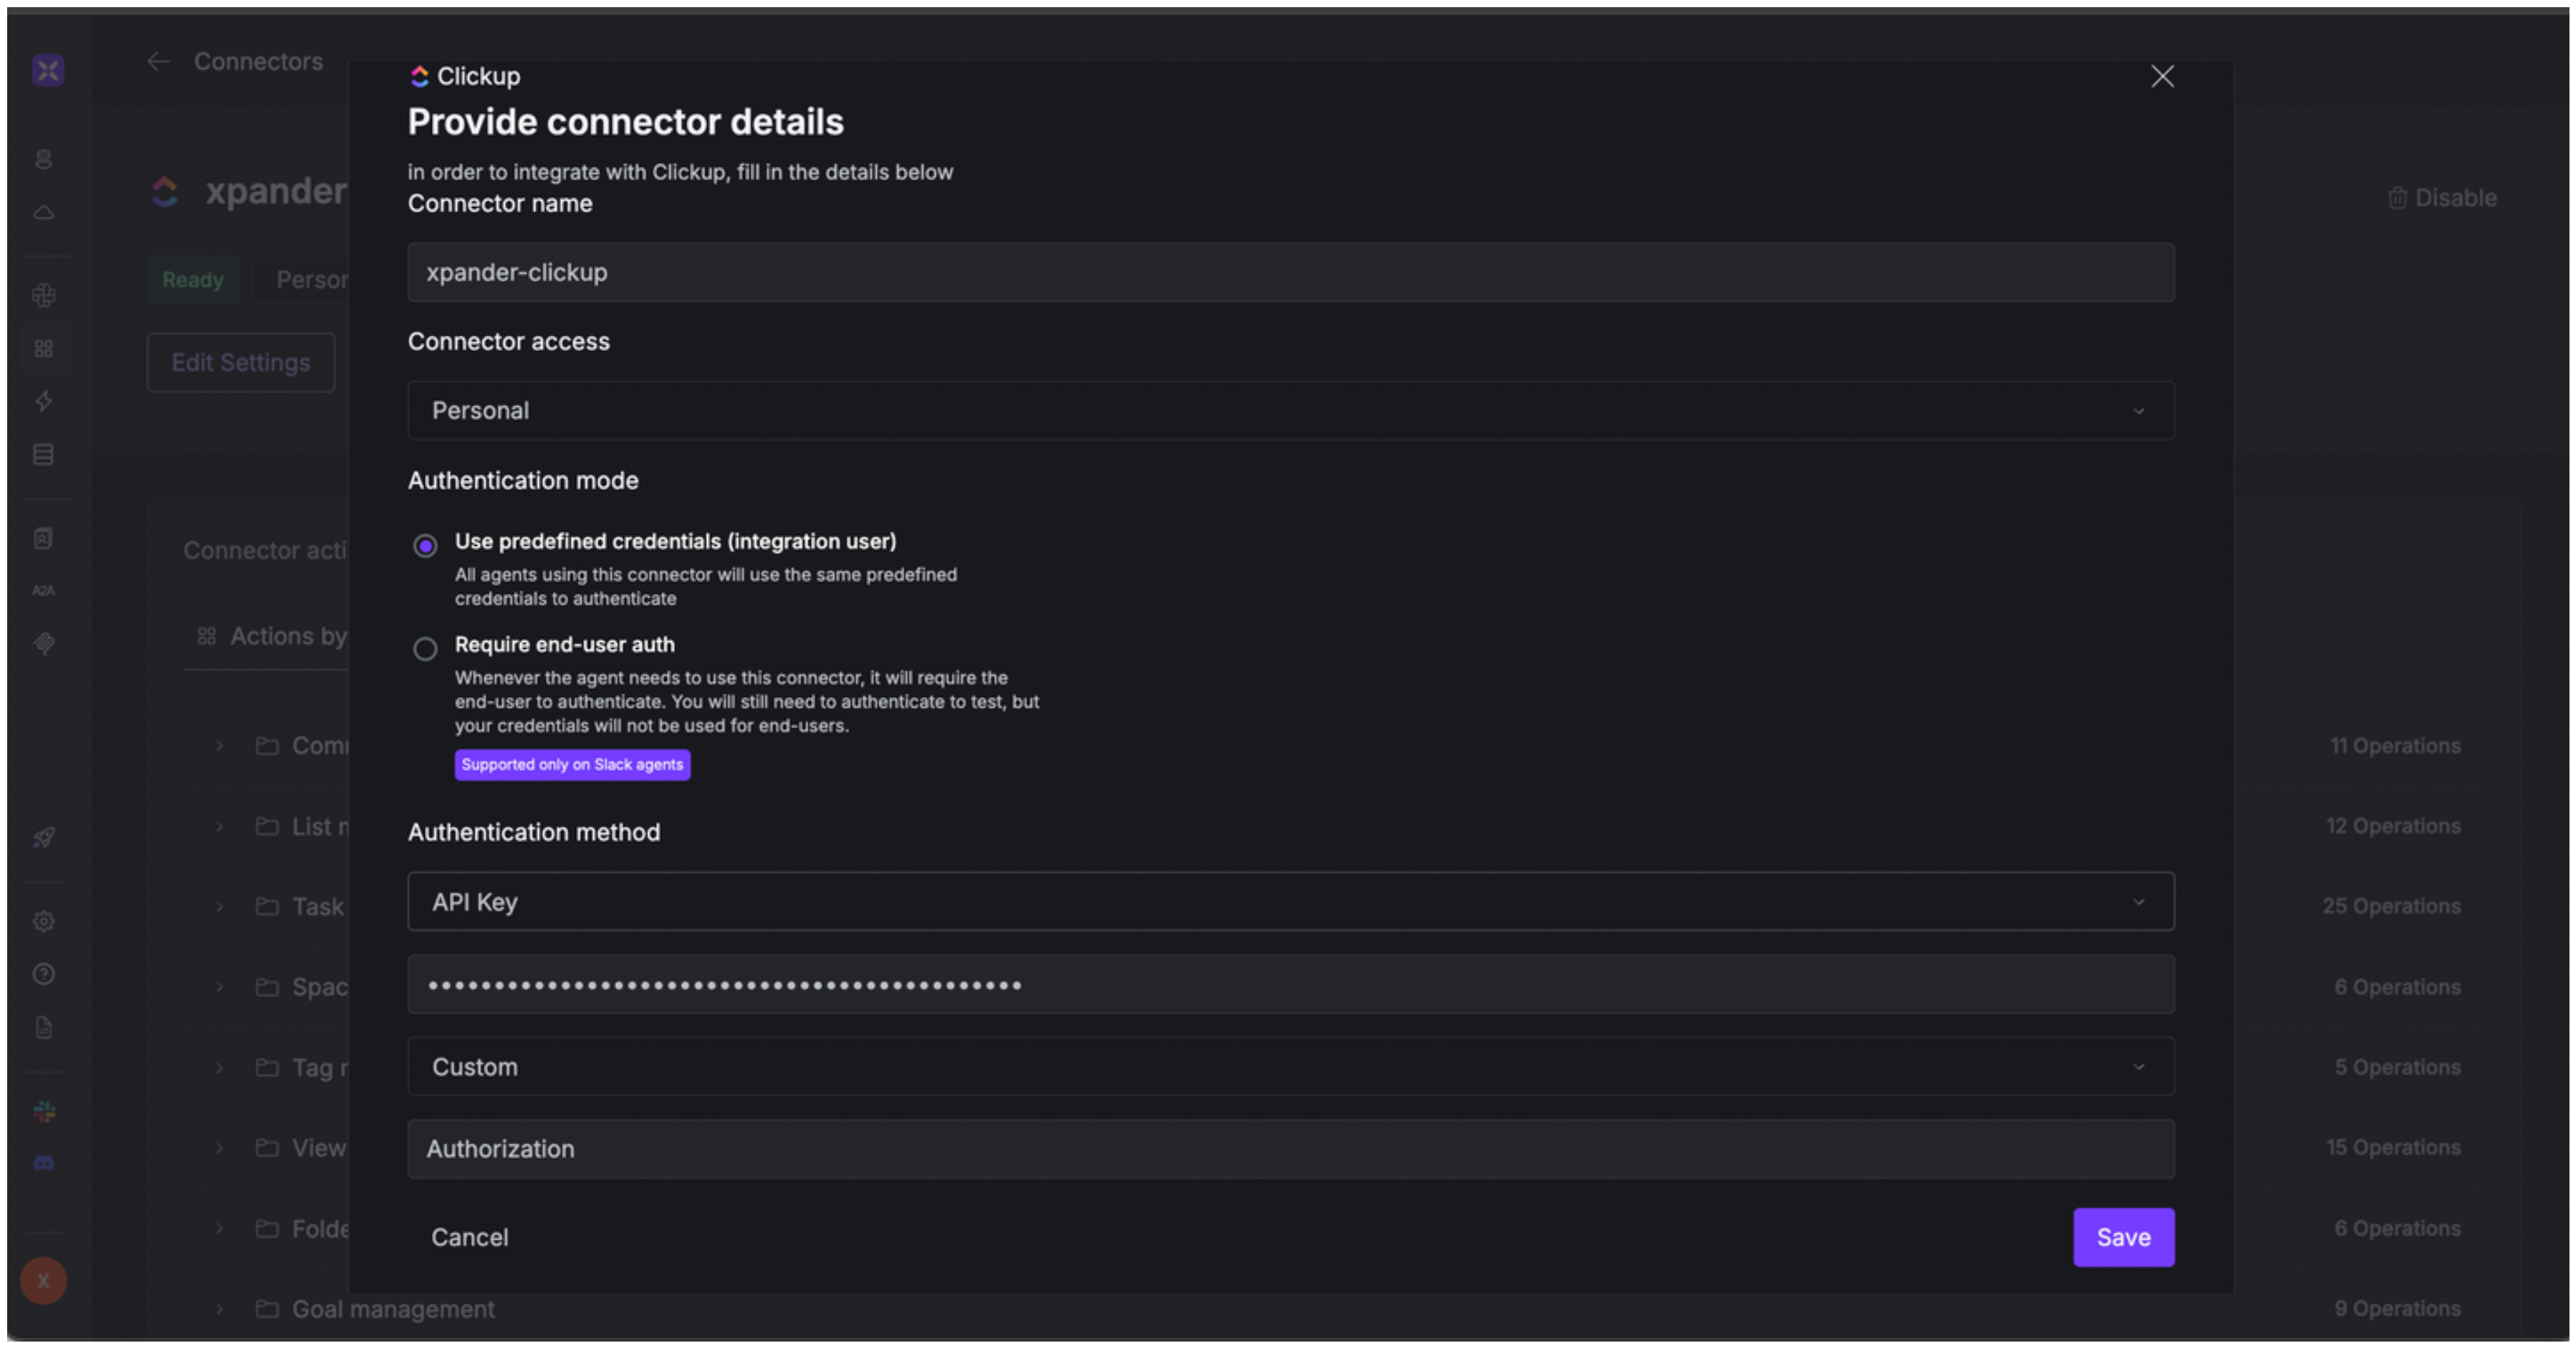
4. Enter a **connector name**, e.g., xpander-clickup.
5. Select **Integration User** as the authentication mode.
6. Select **API Key** as the authentication method.
7. Paste your ClickUp API key into the provided field.
8. Choose **Custom** as the **Auth Type**.
9. In the **Custom header name** field, enter: `Authorization`.
10. Save the configuration.
4. You'll now see your ClickUp API key—copy and store it safely.
### Integrate ClickUp into xpander.ai
1. Go to the **Connectors** section in the sidebar of your xpander.ai dashboard.
2. Select **ClickUp** from the available integrations.
3. Click **Enable**.
4. Enter a **connector name**, e.g., xpander-clickup.
5. Select **Integration User** as the authentication mode.
6. Select **API Key** as the authentication method.
7. Paste your ClickUp API key into the provided field.
8. Choose **Custom** as the **Auth Type**.
9. In the **Custom header name** field, enter: `Authorization`.
10. Save the configuration.
 ## Integration of ClickUp into AI Agent
Once you've configured your ClickUp account with the authentication option(s) described above, you can integrate it into your AI agent with xpander.ai:
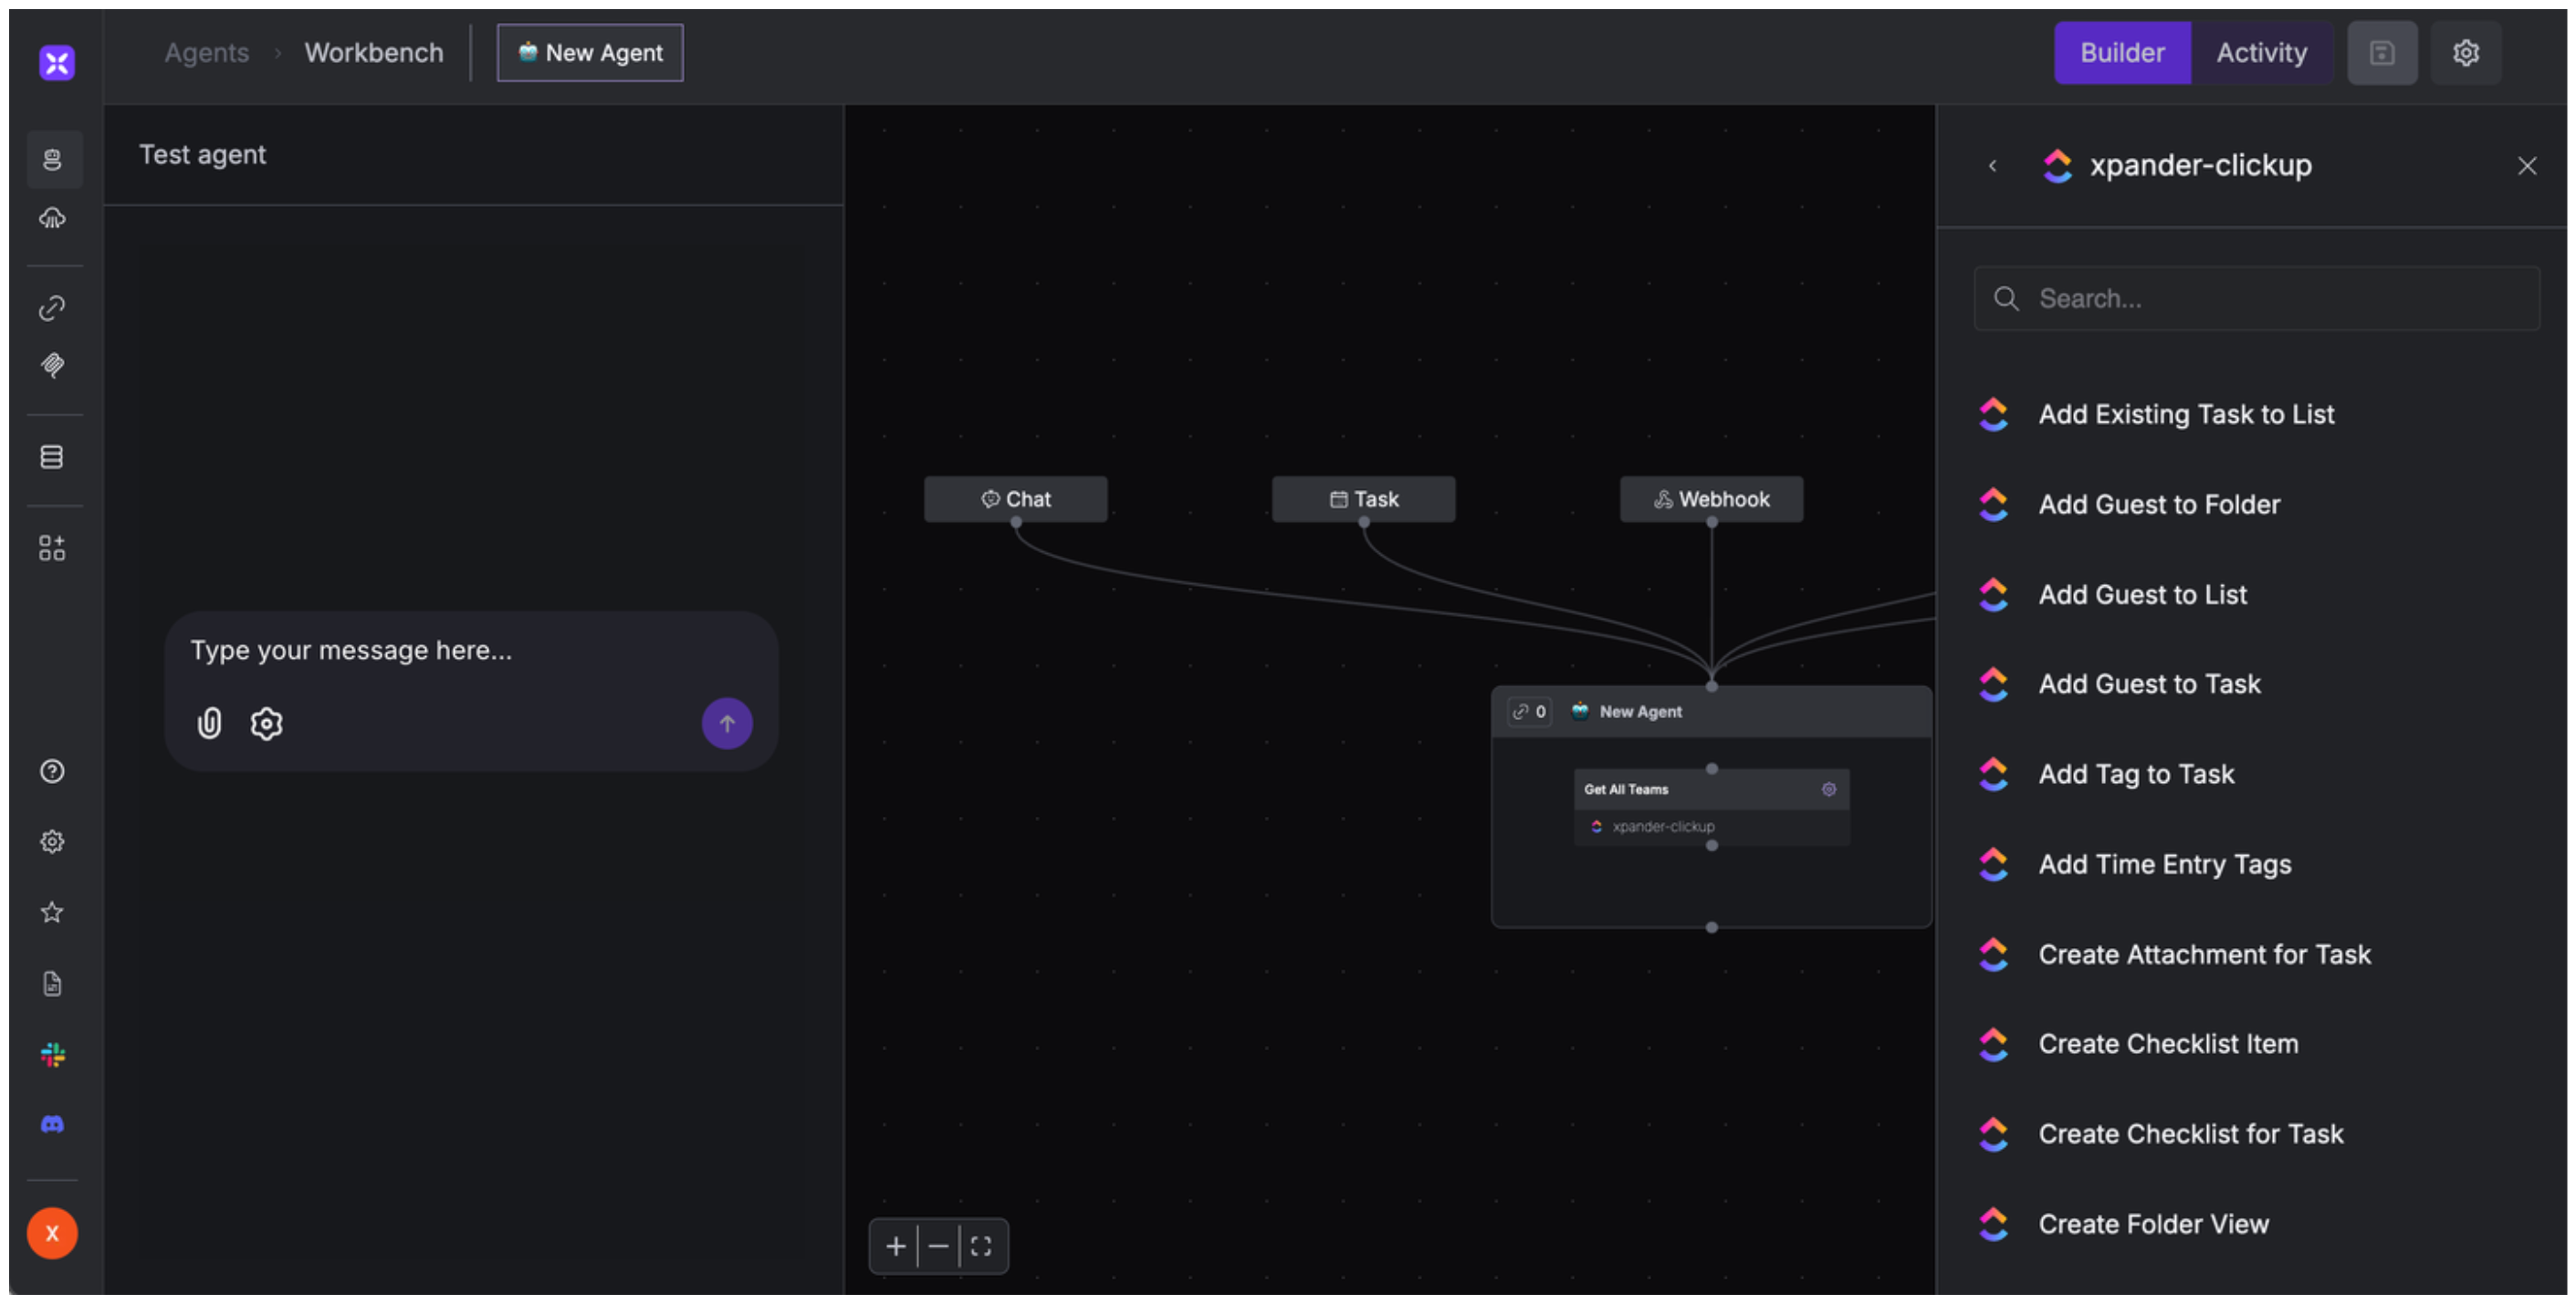
1. In your xpander.ai dashboard, go to the **Agent Configuration** tab and select **Tools**, then click **Add Tools**.
2. Select **Connectors**.
3. Choose **ClickUp** with the same **connector name** you configured in the previous section (e.g., xpander-clickup).
4. Select the available ClickUp operations that suit your use case.
## Integration of ClickUp into AI Agent
Once you've configured your ClickUp account with the authentication option(s) described above, you can integrate it into your AI agent with xpander.ai:
1. In your xpander.ai dashboard, go to the **Agent Configuration** tab and select **Tools**, then click **Add Tools**.
2. Select **Connectors**.
3. Choose **ClickUp** with the same **connector name** you configured in the previous section (e.g., xpander-clickup).
4. Select the available ClickUp operations that suit your use case.
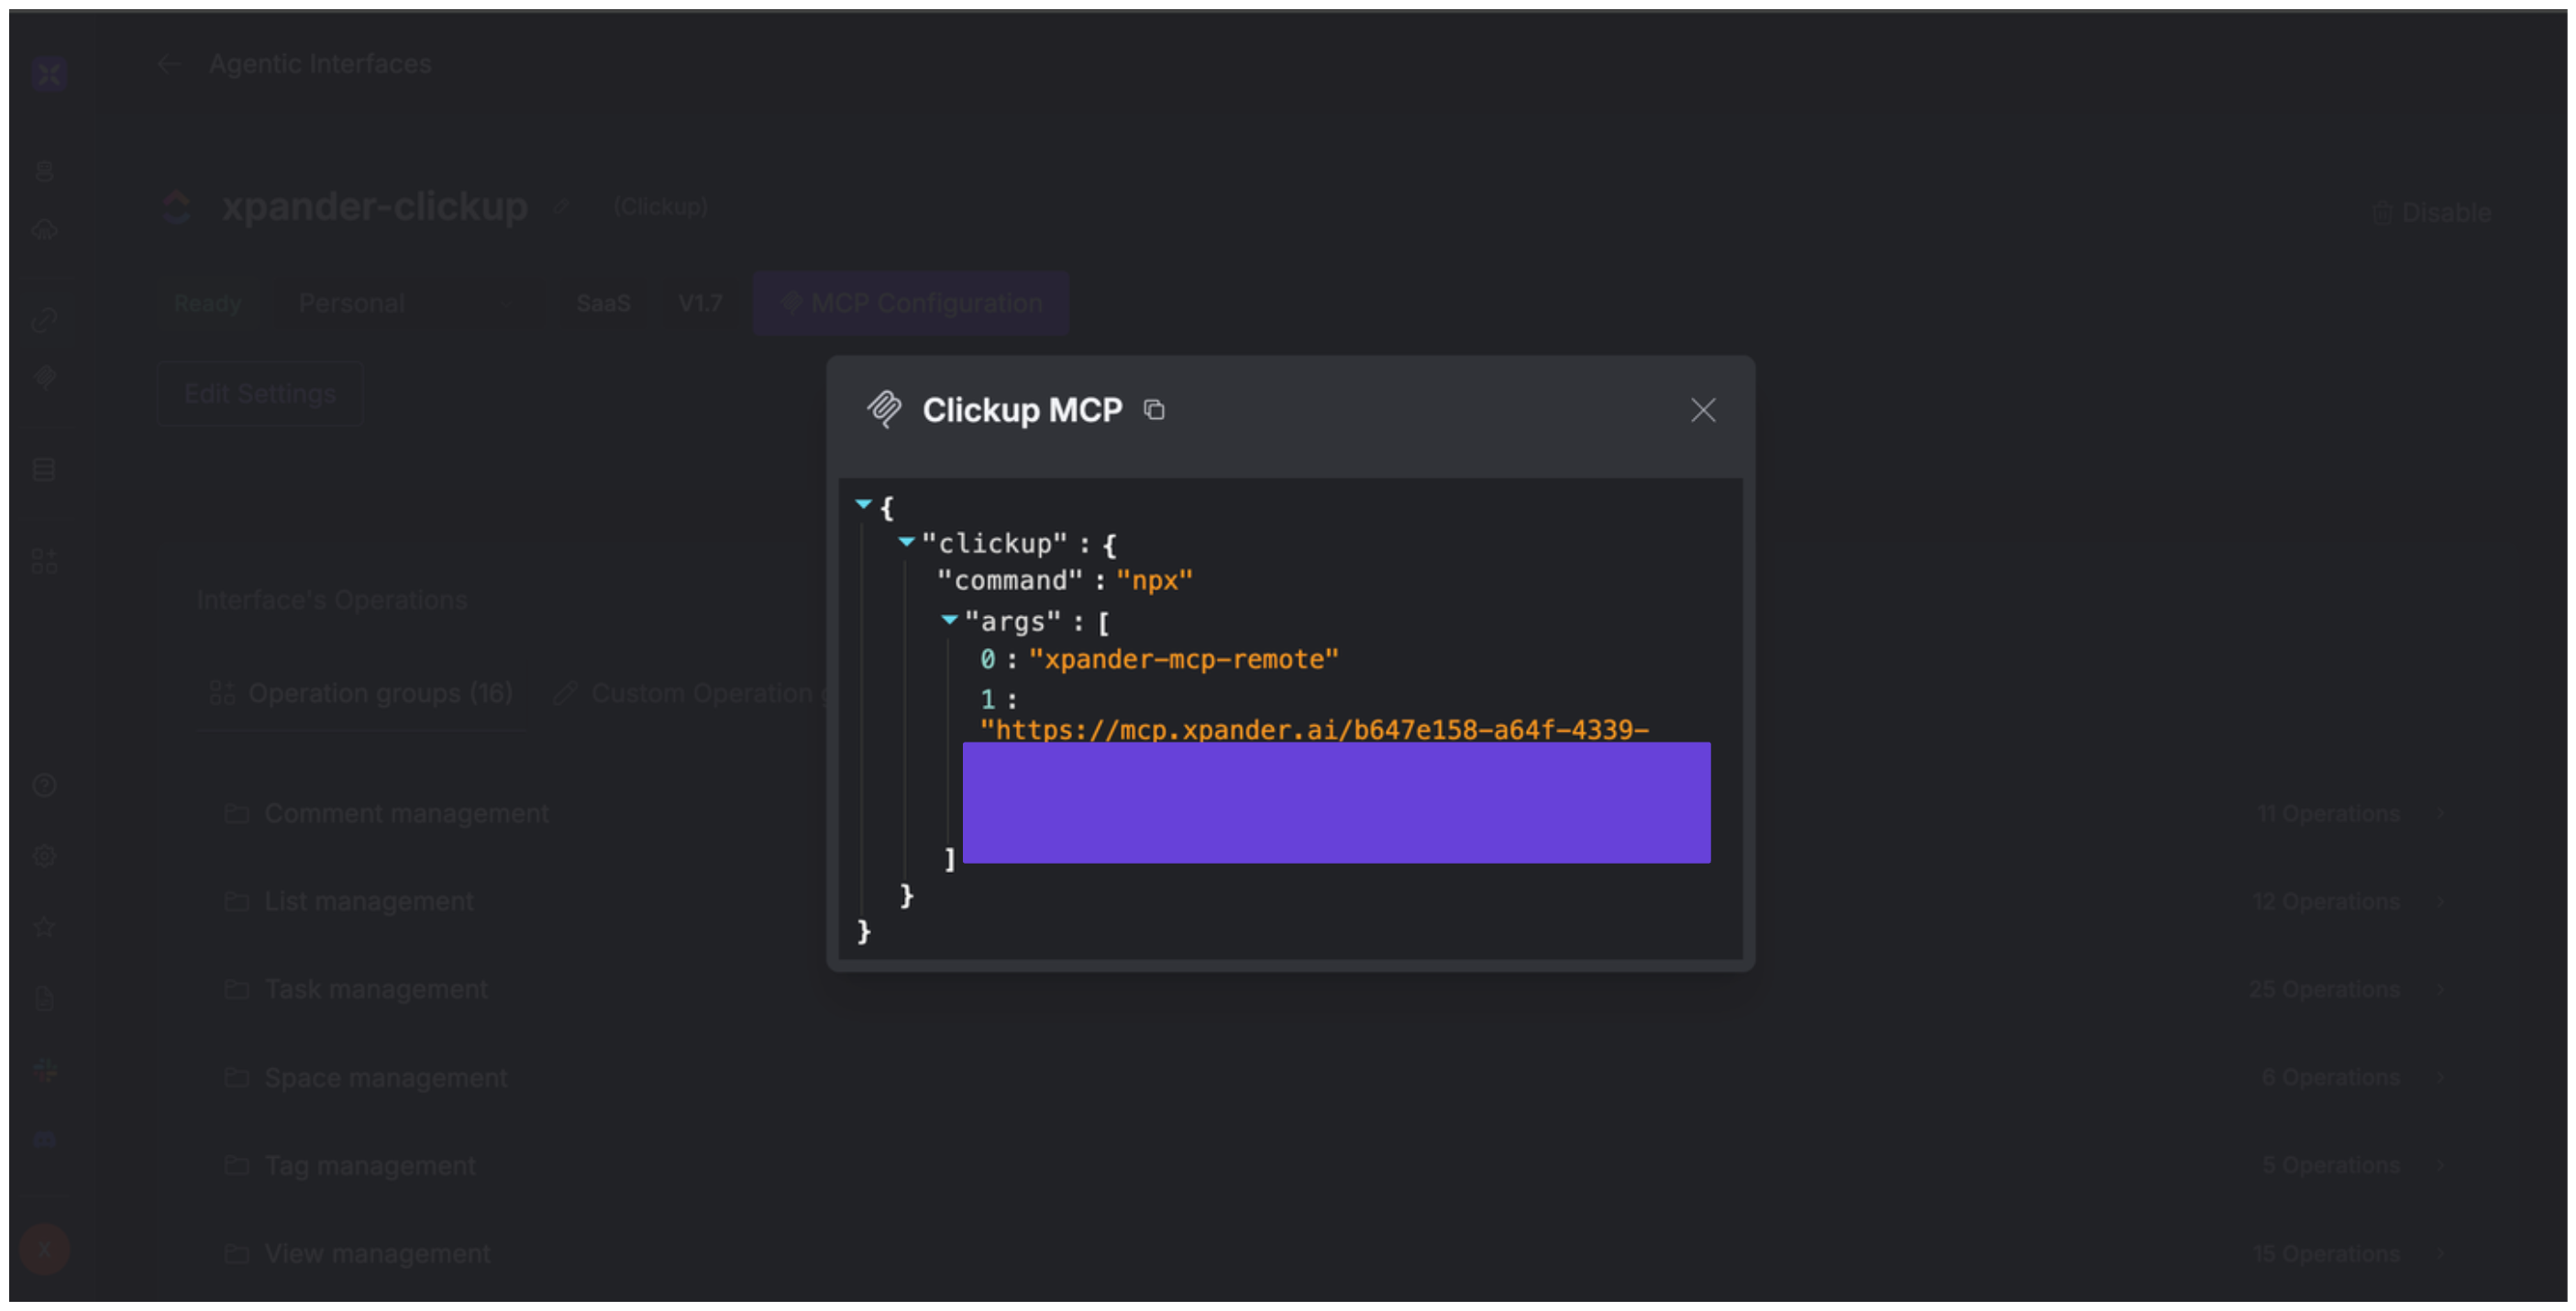
 ## Expose ClickUp as MCP Server
Alternatively, you can also expose your ClickUp account as an MCP server. To do so:
1. Go to the **Connectors** section in the sidebar of your xpander.ai dashboard.
2. Select **ClickUp** with the same **connector name** you configured in the previous section (e.g., xpander-clickup).
3. Click **MCP Configuration**.
4. Enter the MCP configuration into the appropriate settings of the client app you want to use (e.g., Cursor, Windsurf, Claude Desktop, etc.).
## Expose ClickUp as MCP Server
Alternatively, you can also expose your ClickUp account as an MCP server. To do so:
1. Go to the **Connectors** section in the sidebar of your xpander.ai dashboard.
2. Select **ClickUp** with the same **connector name** you configured in the previous section (e.g., xpander-clickup).
3. Click **MCP Configuration**.
4. Enter the MCP configuration into the appropriate settings of the client app you want to use (e.g., Cursor, Windsurf, Claude Desktop, etc.).
 ## AI Agent ClickUp Prompt Library
Below are possible prompts or use cases you can try after integrating ClickUp into your xpander AI agent:
```
Can you add a comment to the task {task_name} saying '{comment_text}'?
```
```
Can you schedule a reminder for the task {task_name} on {date}?
```
```
Can you mark the task {task_name} as completed?
```
```
Can you create a new folder named {folder_name} in the space {space_name}?
```
## Related Resources
* [Understanding Model Context Protocol (MCP)](/guides/deploy/mcp)
* [ClickUp API Documentation](https://developer.clickup.com/reference/)
## AI Agent ClickUp Prompt Library
Below are possible prompts or use cases you can try after integrating ClickUp into your xpander AI agent:
```
Can you add a comment to the task {task_name} saying '{comment_text}'?
```
```
Can you schedule a reminder for the task {task_name} on {date}?
```
```
Can you mark the task {task_name} as completed?
```
```
Can you create a new folder named {folder_name} in the space {space_name}?
```
## Related Resources
* [Understanding Model Context Protocol (MCP)](/guides/deploy/mcp)
* [ClickUp API Documentation](https://developer.clickup.com/reference/)