> ## Documentation Index
> Fetch the complete documentation index at: https://docs.xpander.ai/llms.txt
> Use this file to discover all available pages before exploring further.
# Intercom
> Learn how to integrate AI agents with Intercom using xpander.ai. Create intelligent, automated workflows that seamlessly connect your AI agent with Intercom's chat, inbox, and help center features to provide instant, context-aware support across your customer journey.
## About Intercom
Intercom is an AI-first customer service platform designed to enhance customer support through automation, real-time communication, and self-service tools.
Key Features of Intercom
* **AI Agent (Fin)**: Fin is Intercom's AI-powered chatbot that provides instant, accurate answers to customer inquiries 24/7. It learns from every interaction to improve its responses over time.
* **AI Copilot**: This tool assists support agents by offering real-time suggestions and information during customer interactions, enhancing efficiency and response quality.
* **AI Analyst**: Provides support leaders with insights and recommendations based on customer interactions, helping to identify trends and areas for improvement.
* **Integrated Help Center**: Allows businesses to create customizable, multilingual help centers that empower customers to find answers independently, reducing the load on support teams.
* **Omnichannel Support**: Intercom enables seamless communication across various channels, including chat, email, and phone, ensuring consistent support experiences.
## Authentication Options
Below are possible authentication options you can choose:
### Generate an Intercom API Key
1. Log in to your [Intercom account](https://app.intercom.com/).
2. Click **Settings** in the sidebar.
3. Navigate to the **Integrations** section and click **Developer Hub**.\\
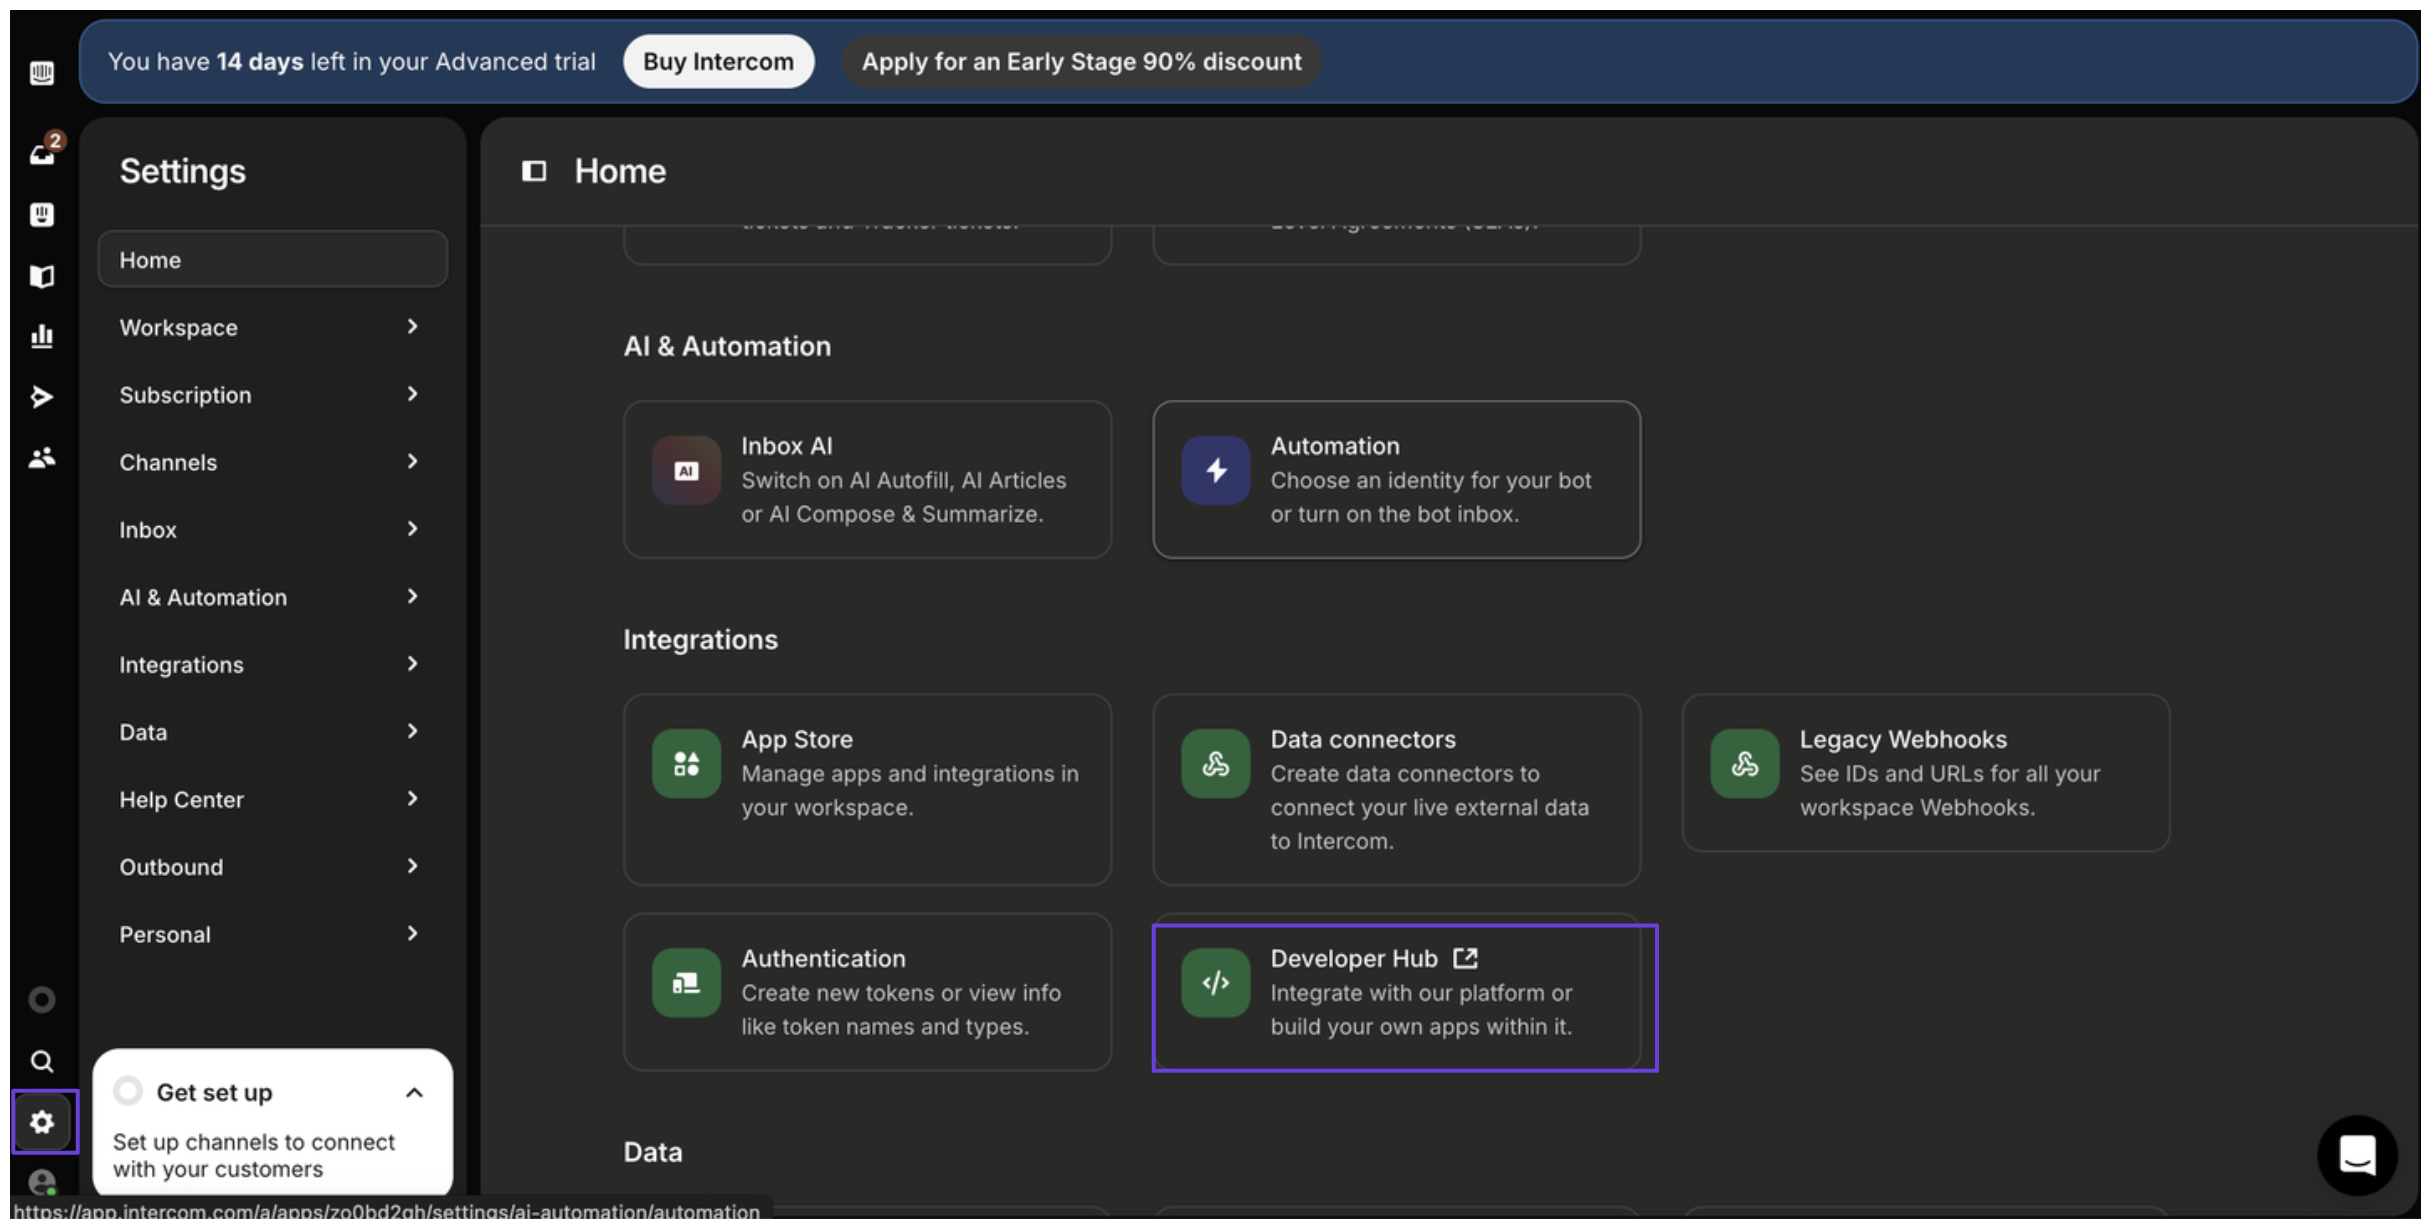 4. In the Developer Hub, click **New app**.
5. Enter a name for your app and select the appropriate workspace.\\
4. In the Developer Hub, click **New app**.
5. Enter a name for your app and select the appropriate workspace.\\
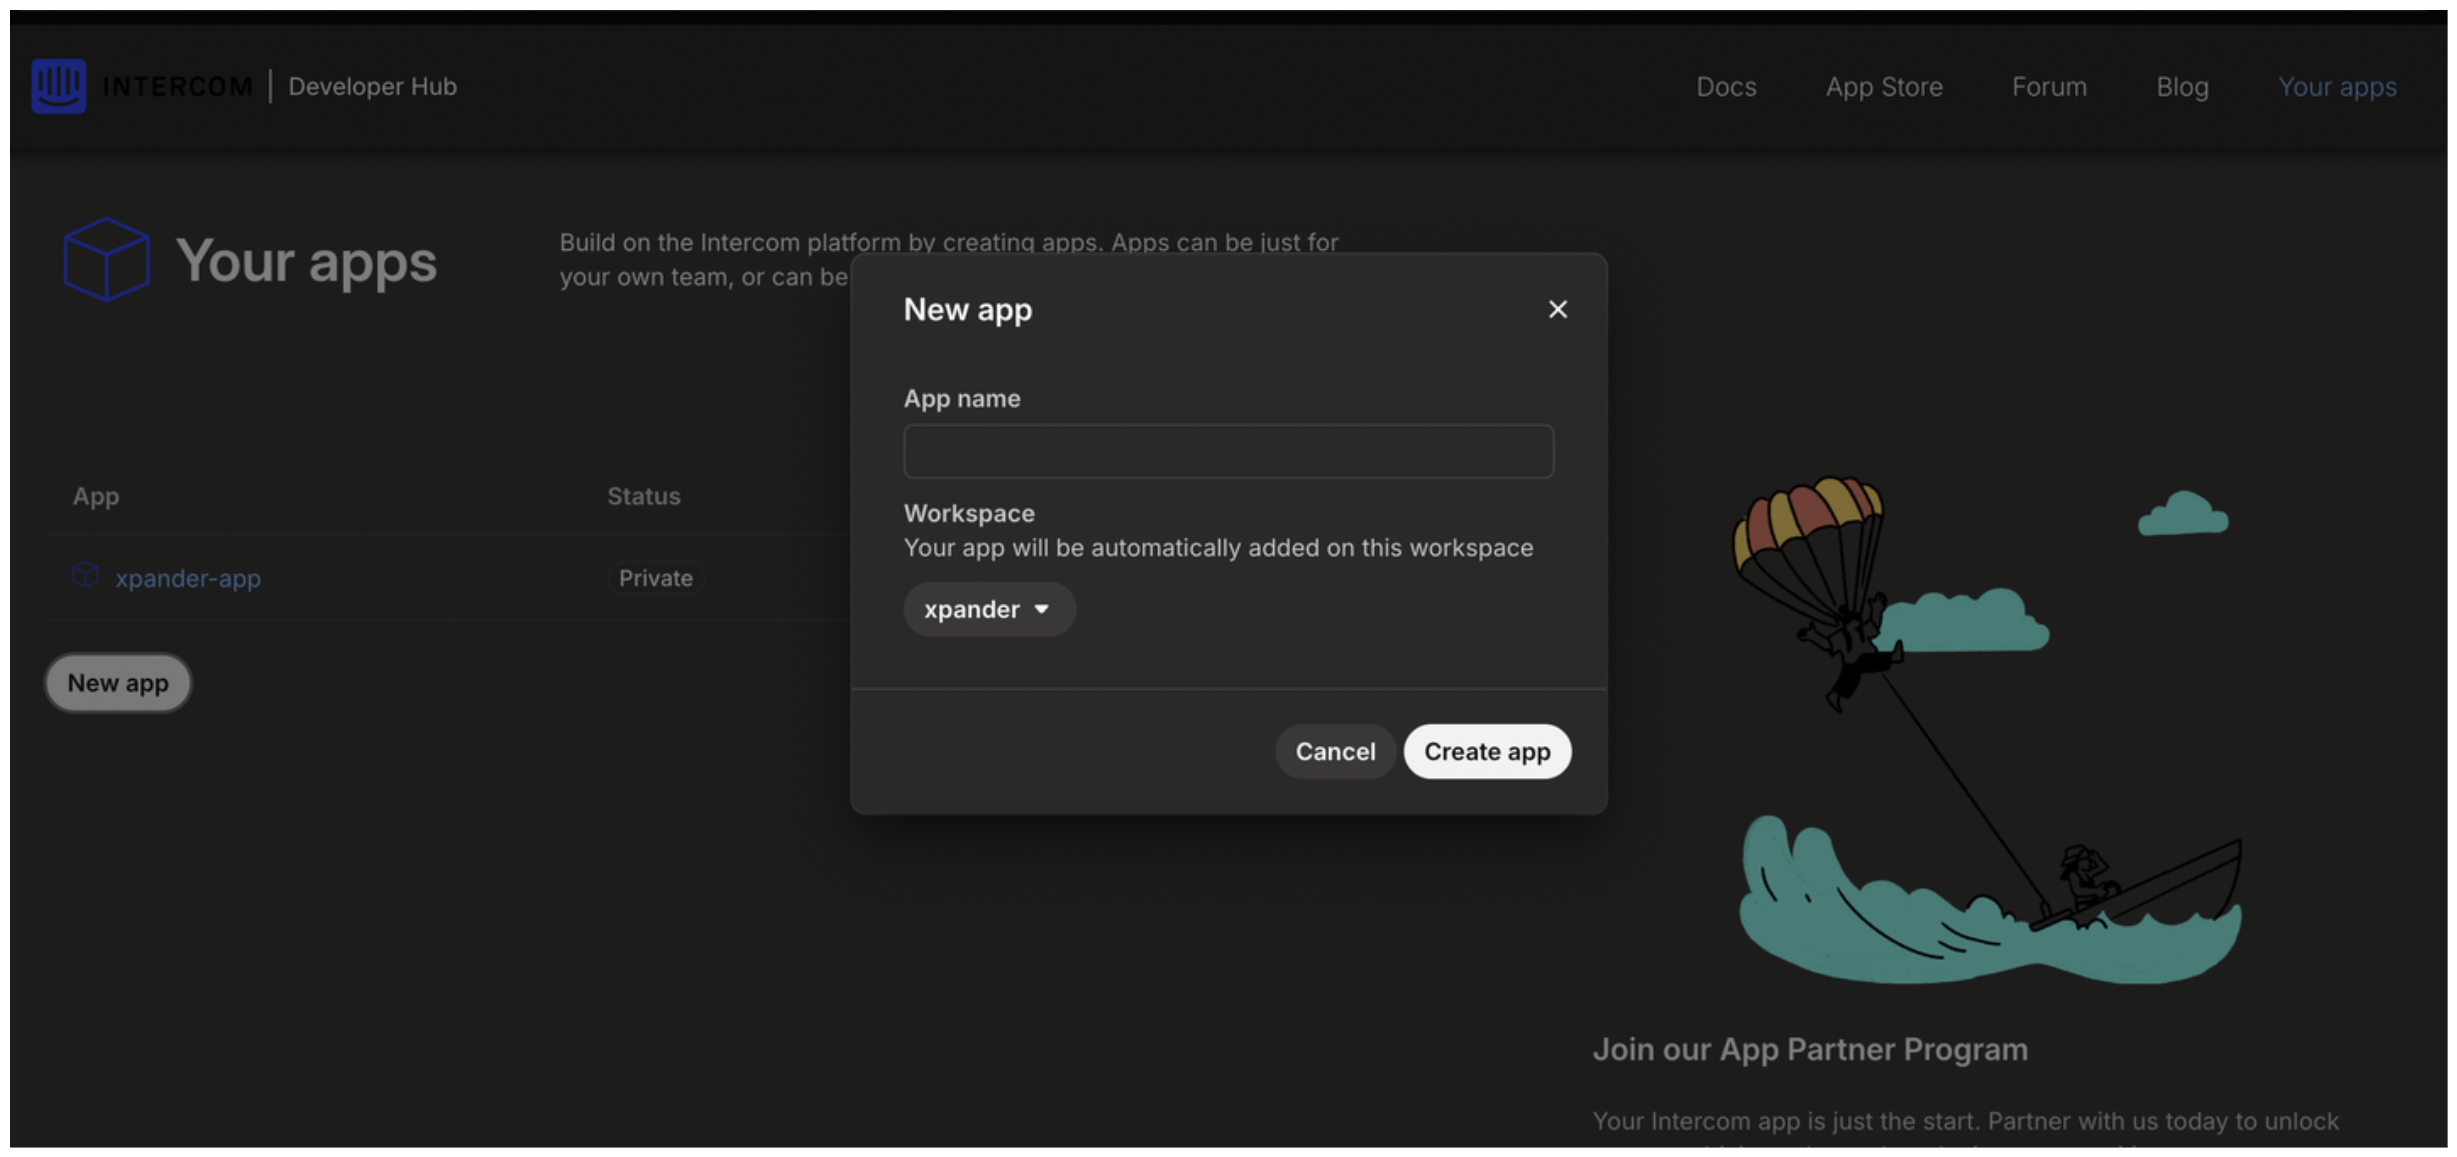 6. After clicking **Create app**, your access token will be displayed.
### Integrate Intercom into xpander.ai
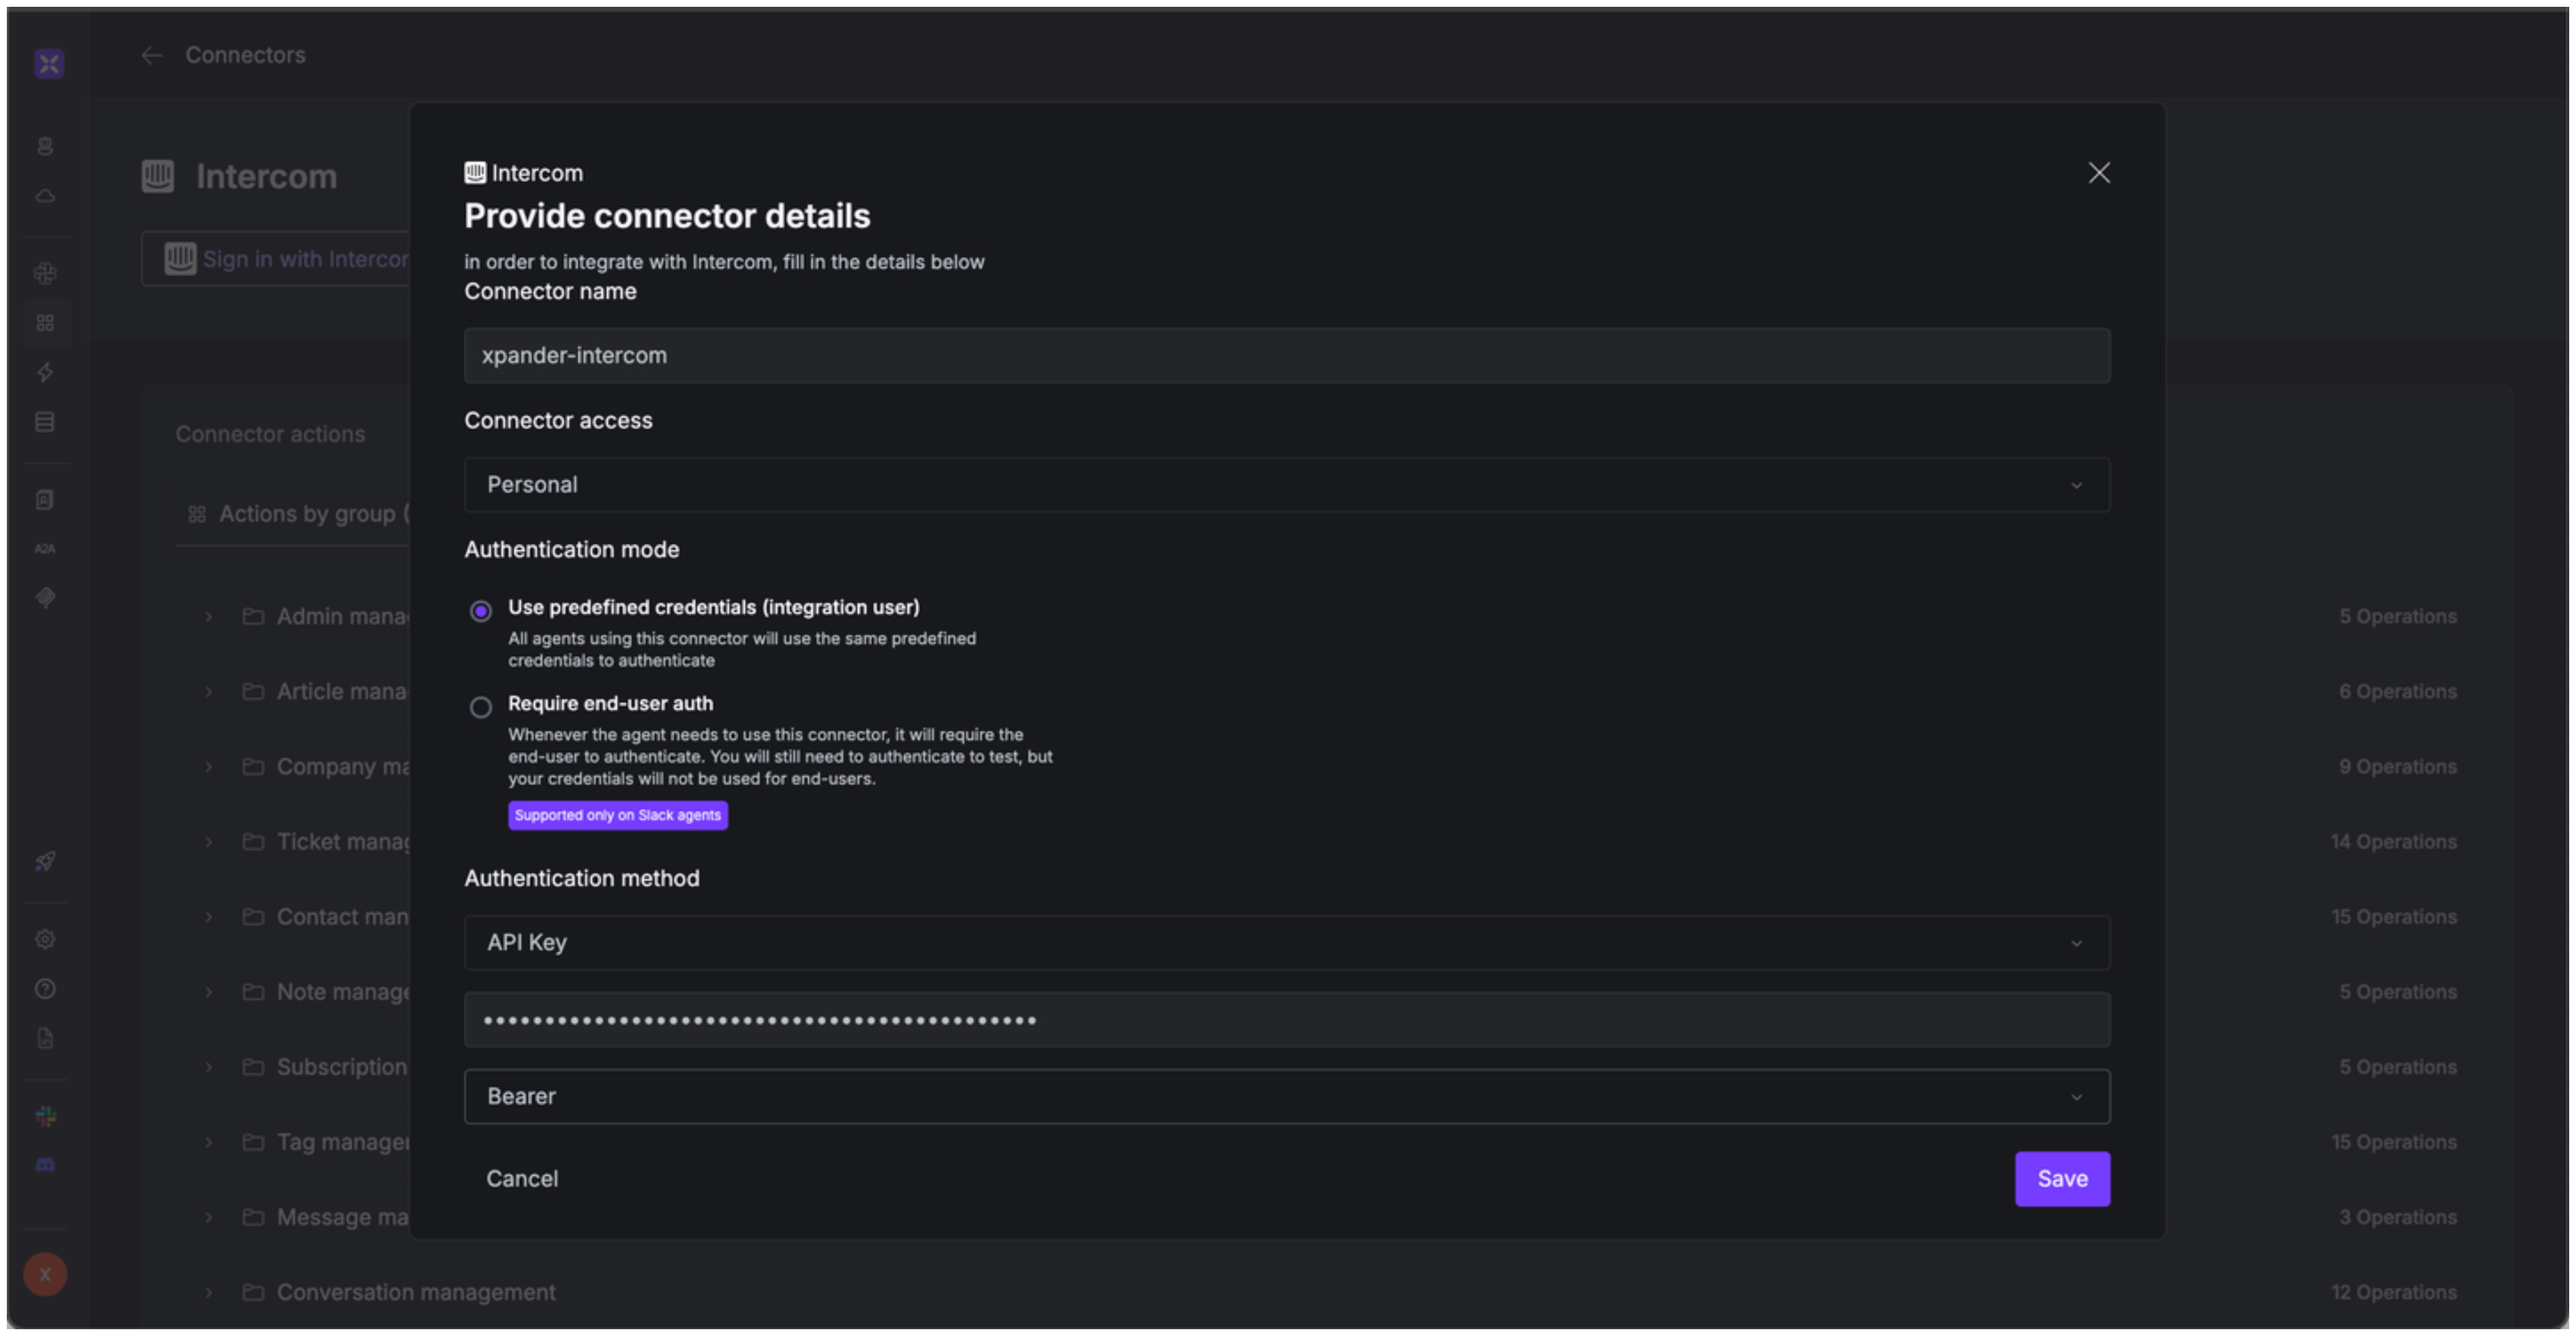
1. Go to the **Connectors** section in the sidebar of your xpander.ai dashboard.
2. Select **Intercom** from the available integrations.
3. Click **Other auth options**.
4. Enter a **connector name**, e.g., "xpander-intercom".
5. Select **Integration User** as the authentication mode.
6. Select **API Key** as the authentication method.
7. Paste the Intercom access token into the provided field.
8. Choose **Bearer** as the **Auth Type**.
9. Save the configuration.
6. After clicking **Create app**, your access token will be displayed.
### Integrate Intercom into xpander.ai
1. Go to the **Connectors** section in the sidebar of your xpander.ai dashboard.
2. Select **Intercom** from the available integrations.
3. Click **Other auth options**.
4. Enter a **connector name**, e.g., "xpander-intercom".
5. Select **Integration User** as the authentication mode.
6. Select **API Key** as the authentication method.
7. Paste the Intercom access token into the provided field.
8. Choose **Bearer** as the **Auth Type**.
9. Save the configuration.
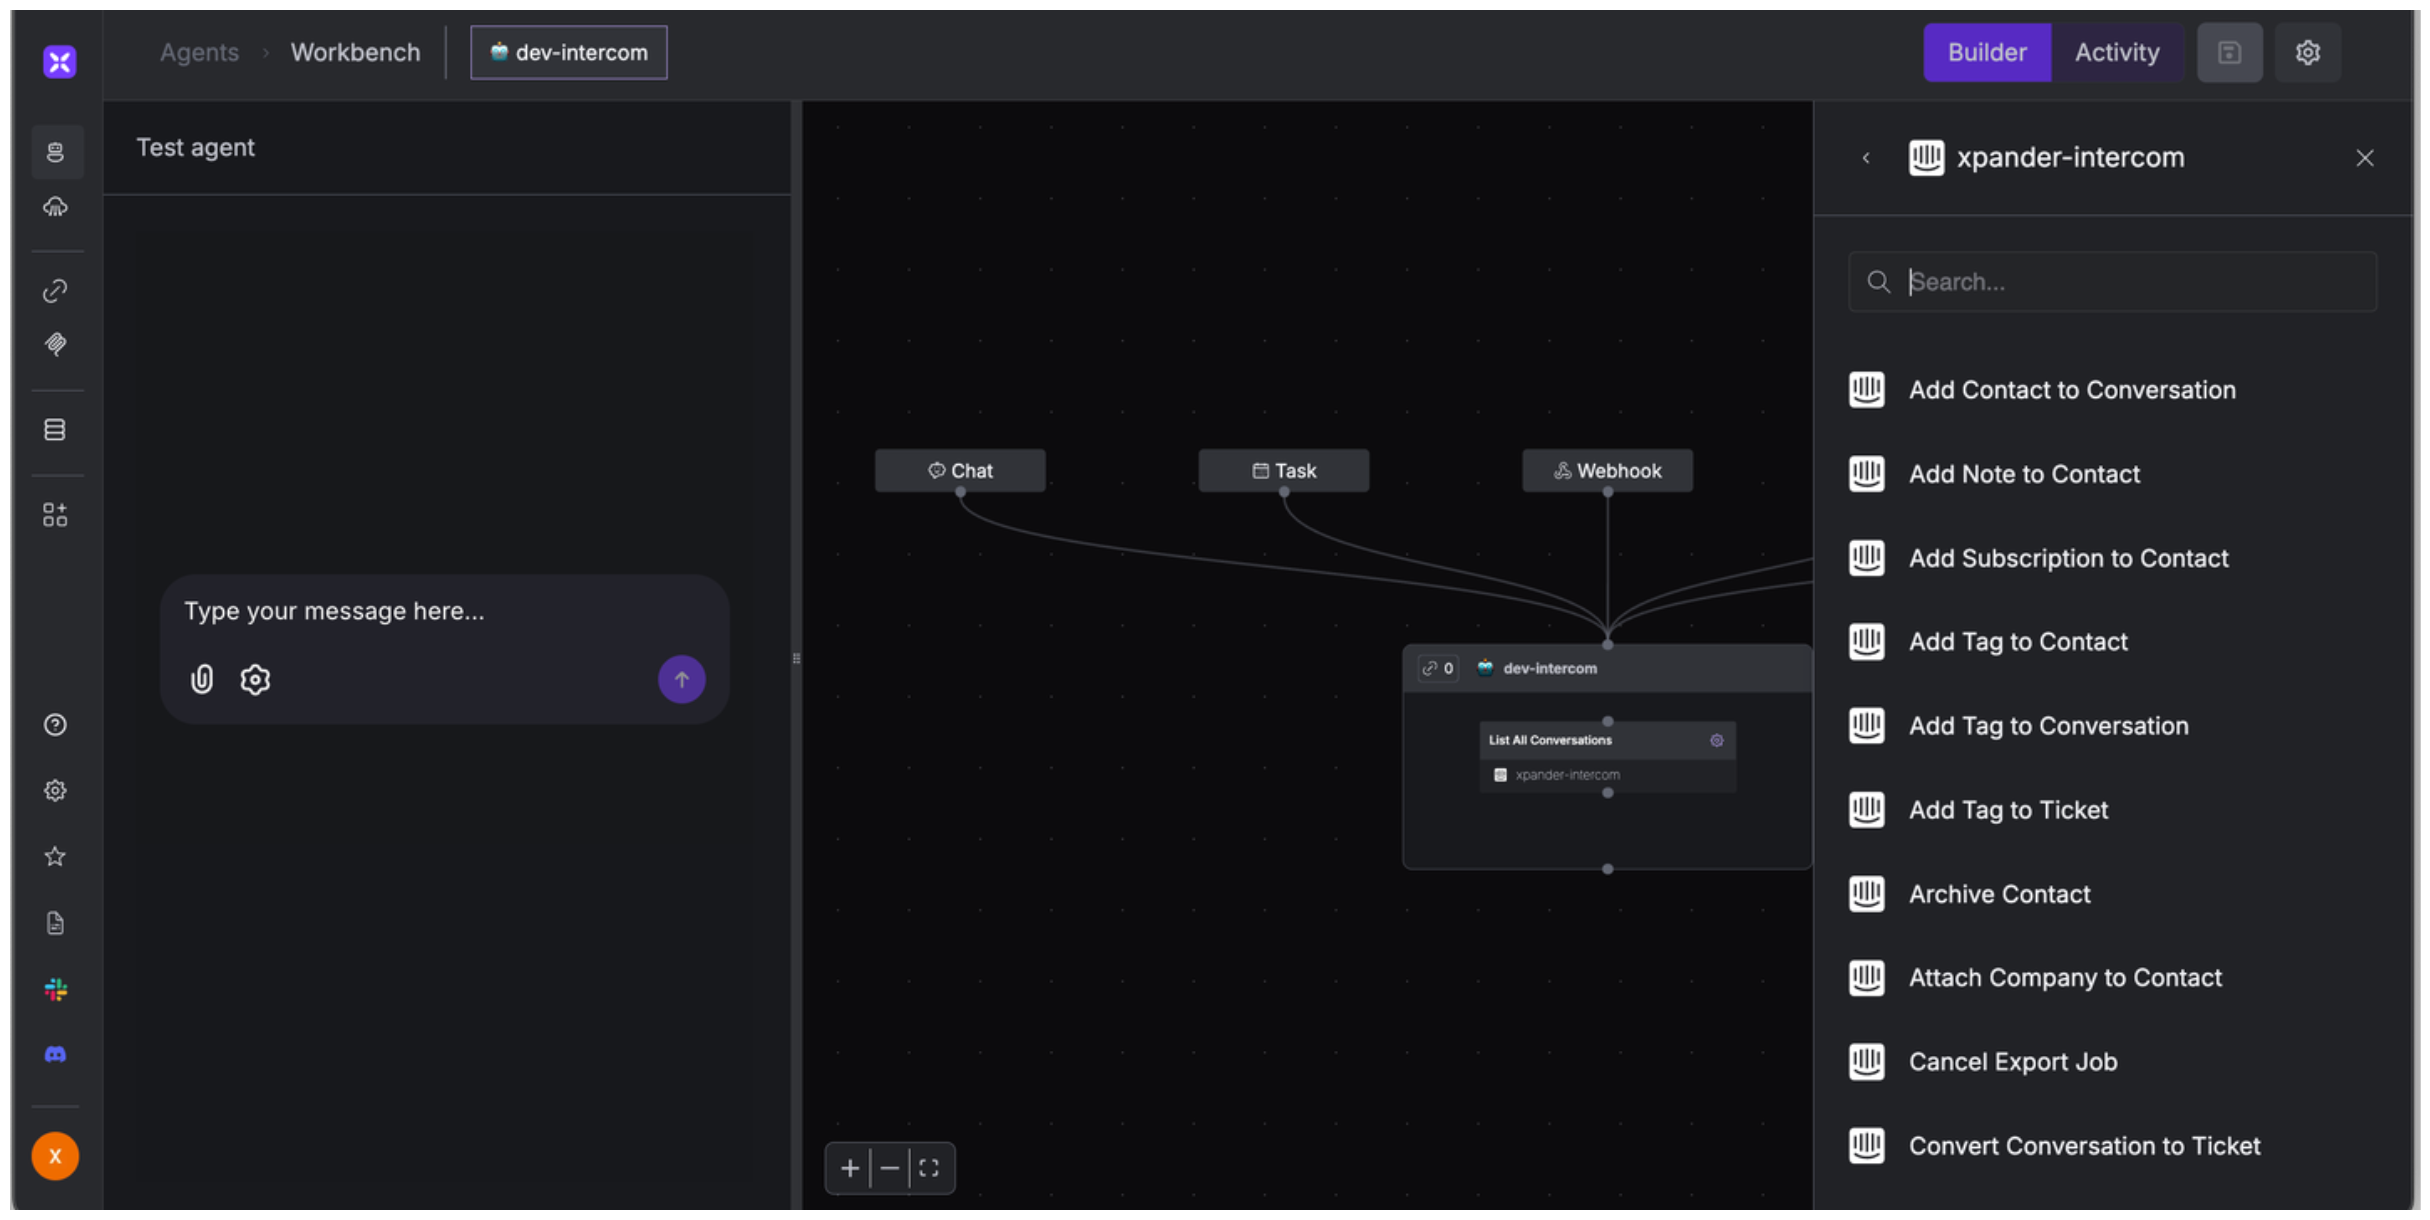
 ## Integration of Intercom into AI Agent
Once you've configured your Intercom account with the authentication option(s) described above, you can integrate it into your AI agent with xpander.ai:
1. In your xpander.ai dashboard, go to the **Agent Configuration** tab and select **Tools**, then click **Add Tools**.
2. Select **Connectors**.
3. Choose **Intercom** with the same **connector name** you configured in the previous section (e.g., xpander-intercom).
4. Select the available Intercom operations that suit your use case.
## Integration of Intercom into AI Agent
Once you've configured your Intercom account with the authentication option(s) described above, you can integrate it into your AI agent with xpander.ai:
1. In your xpander.ai dashboard, go to the **Agent Configuration** tab and select **Tools**, then click **Add Tools**.
2. Select **Connectors**.
3. Choose **Intercom** with the same **connector name** you configured in the previous section (e.g., xpander-intercom).
4. Select the available Intercom operations that suit your use case.
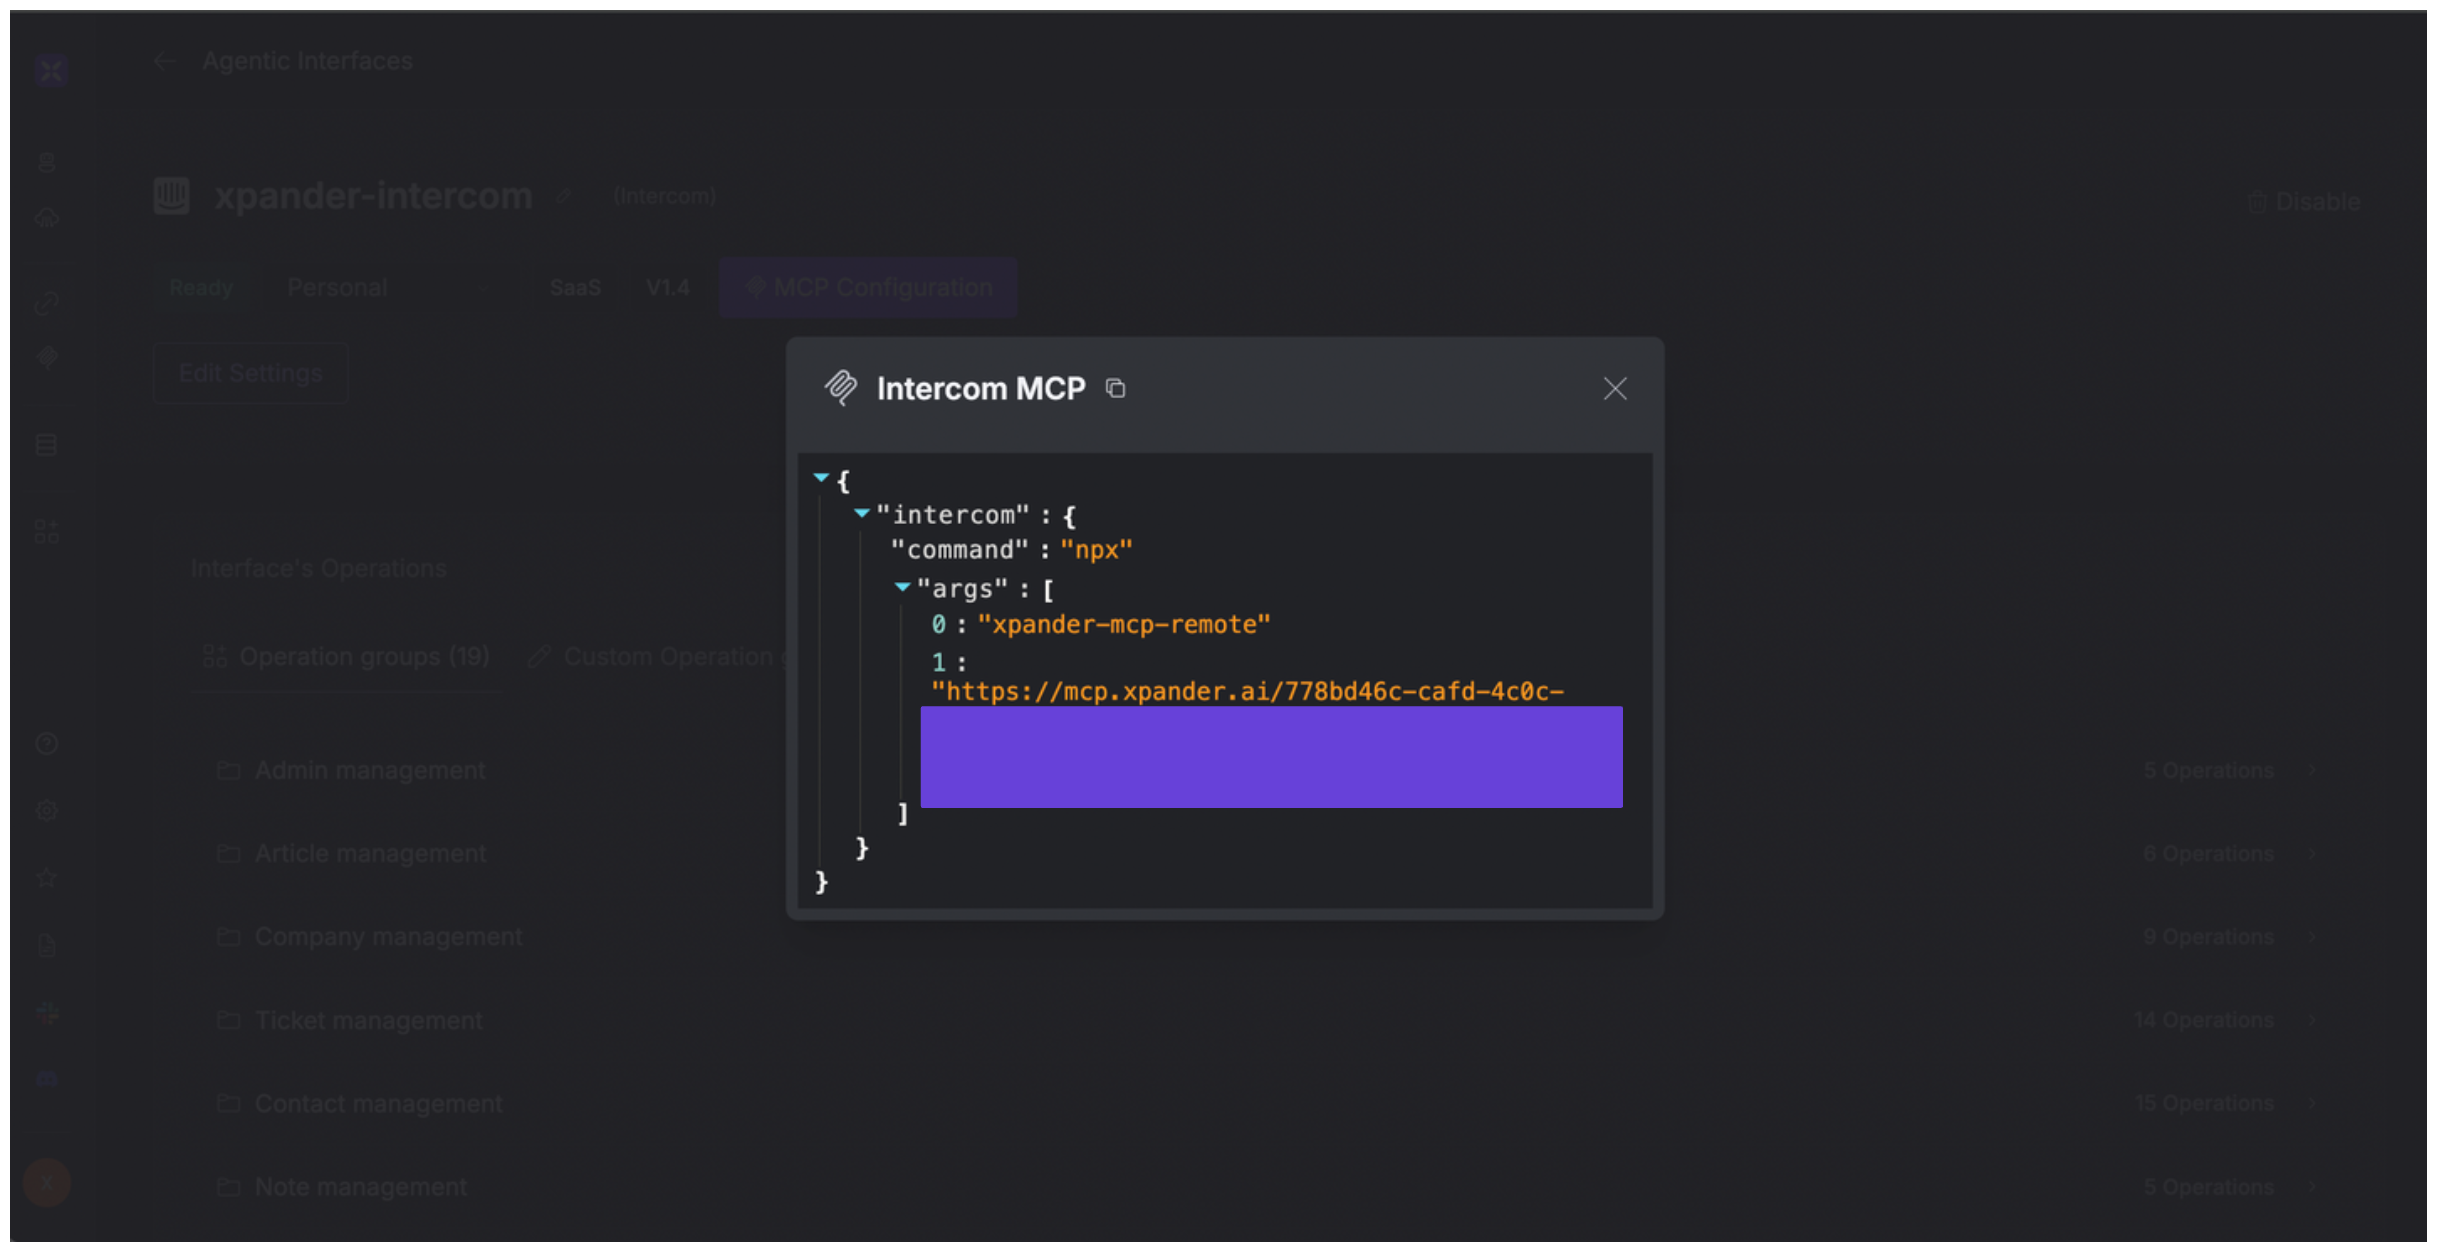
 ## Expose Intercom as MCP Server
Alternatively, you can also expose your Intercom account as an MCP server. To do so:
1. Go to the **Connectors** section in the sidebar of your xpander.ai dashboard.
2. Select **Intercom** with the same **connector name** you configured in the previous section (e.g., xpander-intercom).
3. Click **MCP Configuration**.
4. Enter the MCP configuration into the appropriate settings of the client app you want to use (e.g., Cursor, Windsurf, Claude Desktop, etc.).
## Expose Intercom as MCP Server
Alternatively, you can also expose your Intercom account as an MCP server. To do so:
1. Go to the **Connectors** section in the sidebar of your xpander.ai dashboard.
2. Select **Intercom** with the same **connector name** you configured in the previous section (e.g., xpander-intercom).
3. Click **MCP Configuration**.
4. Enter the MCP configuration into the appropriate settings of the client app you want to use (e.g., Cursor, Windsurf, Claude Desktop, etc.).
 ## AI Agent Intercom Prompt Library
Below are possible prompts or use cases you can try after integrating Intercom into your xpander AI agent:
```
Can you create a new support ticket for {customer_name} regarding an issue with {product}?
```
```
Could you create a new collection in our help center for documentation about {topic}?
```
```
Please update the article about {topic} to include new information about {feature}.
```
```
Please search our knowledge base for articles about {topic}.
```
## Related Resources
* [Understanding Model Context Protocol (MCP)](/guides/deploy/mcp)
* [Intercom API Documentation](https://developers.intercom.com/docs/references/rest-api/api.intercom.io)
## AI Agent Intercom Prompt Library
Below are possible prompts or use cases you can try after integrating Intercom into your xpander AI agent:
```
Can you create a new support ticket for {customer_name} regarding an issue with {product}?
```
```
Could you create a new collection in our help center for documentation about {topic}?
```
```
Please update the article about {topic} to include new information about {feature}.
```
```
Please search our knowledge base for articles about {topic}.
```
## Related Resources
* [Understanding Model Context Protocol (MCP)](/guides/deploy/mcp)
* [Intercom API Documentation](https://developers.intercom.com/docs/references/rest-api/api.intercom.io)