> ## Documentation Index
> Fetch the complete documentation index at: https://docs.xpander.ai/llms.txt
> Use this file to discover all available pages before exploring further.
# Zendesk
> Learn how to integrate AI agents with Zendesk using xpander.ai. Create seamless, automated customer interactions that enhance support efficiency, reduce response times, and deliver personalized experiences by leveraging AI-powered chatbots and smart ticket routing.
## About Zendesk
Zendesk is a cloud-based customer service and engagement platform designed to help businesses manage and enhance their interactions with customers across various channels.
Key features include:
* **Omnichannel Support**: Zendesk consolidates customer interactions from email, live chat, voice, social media, and messaging apps into a unified ticketing system, enabling support teams to efficiently manage and resolve inquiries from multiple channels.
* **AI-Powered Automation**: The platform includes AI agents and automation tools that assist in routing tickets, providing instant responses, and handling repetitive tasks, thereby improving efficiency and response times.
* **Self-Service Options**: Zendesk offers features like knowledge bases, community forums, and an AI-powered Answer Bot, empowering customers to find solutions independently and reducing the volume of support tickets.
* **Analytics and Reporting**: With Zendesk Explore, businesses can access real-time dashboards and detailed reports to monitor performance metrics, customer satisfaction, and team productivity, facilitating data-driven decision-making.
* **Customizable Workflows**: The platform allows for the creation of custom workflows, triggers, and automations to tailor the support process to specific business needs, ensuring consistency and efficiency in customer service operations.
## Authentication Options
Below are possible authentication options you can choose:
### Generate a Zendesk API Key
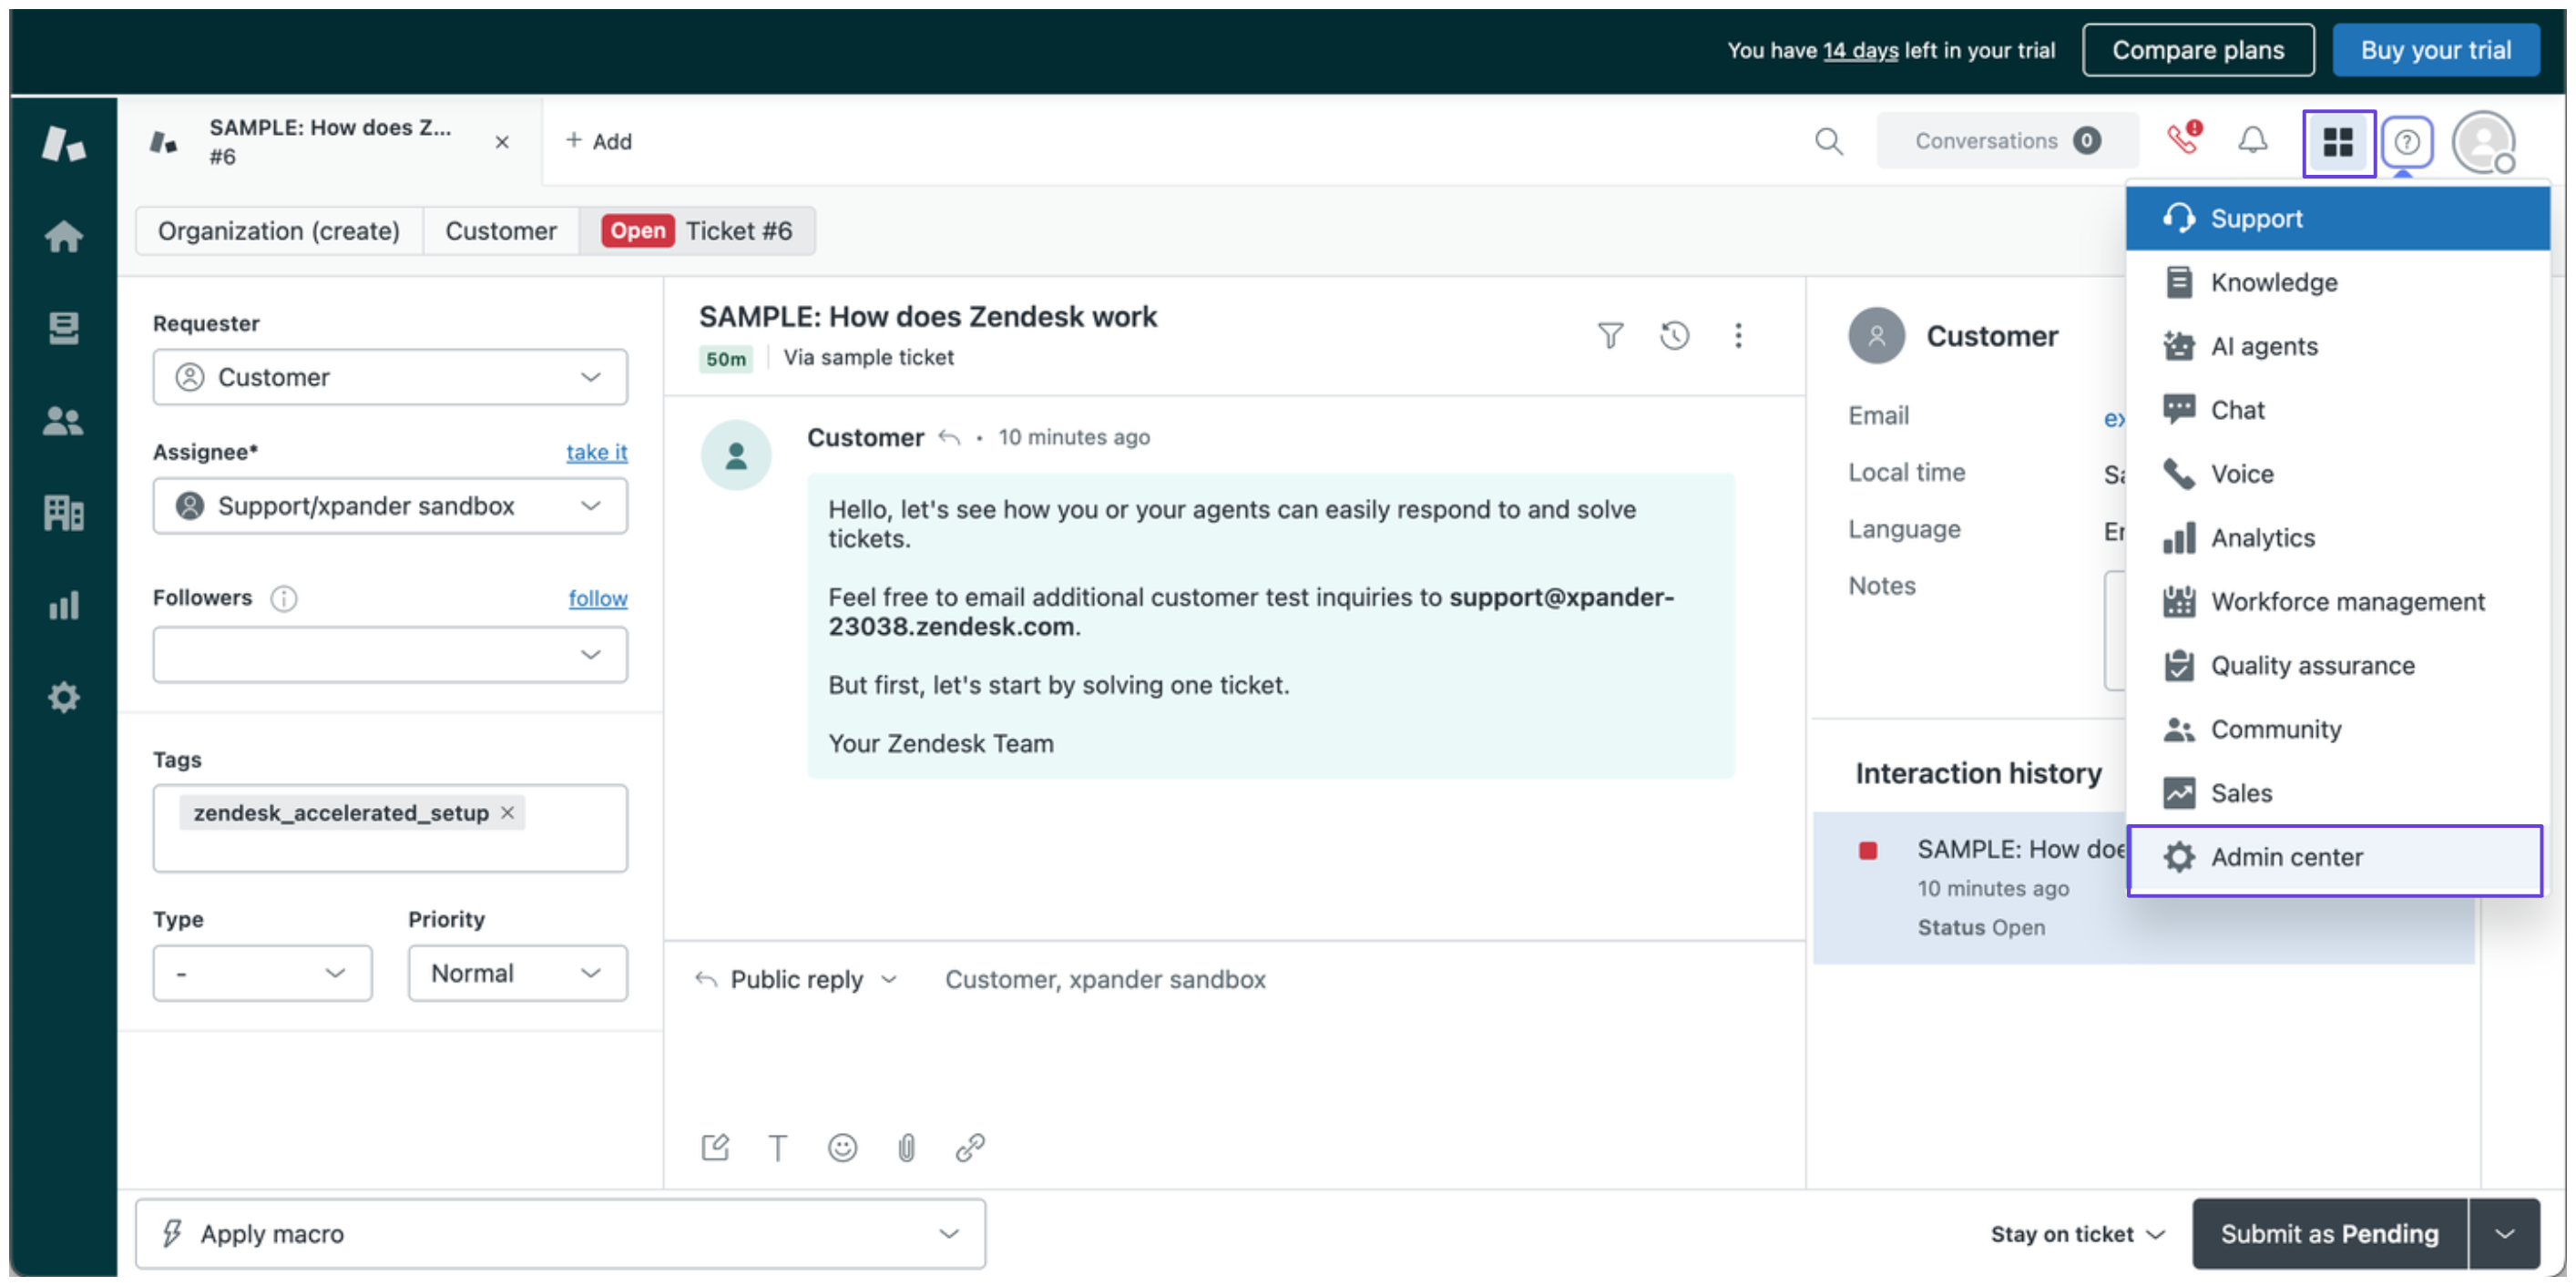
1. Log in to your [Zendesk account](https://www.zendesk.com/).
2. Click on your Zendesk app icon in the top-right corner and select **Admin Center**.
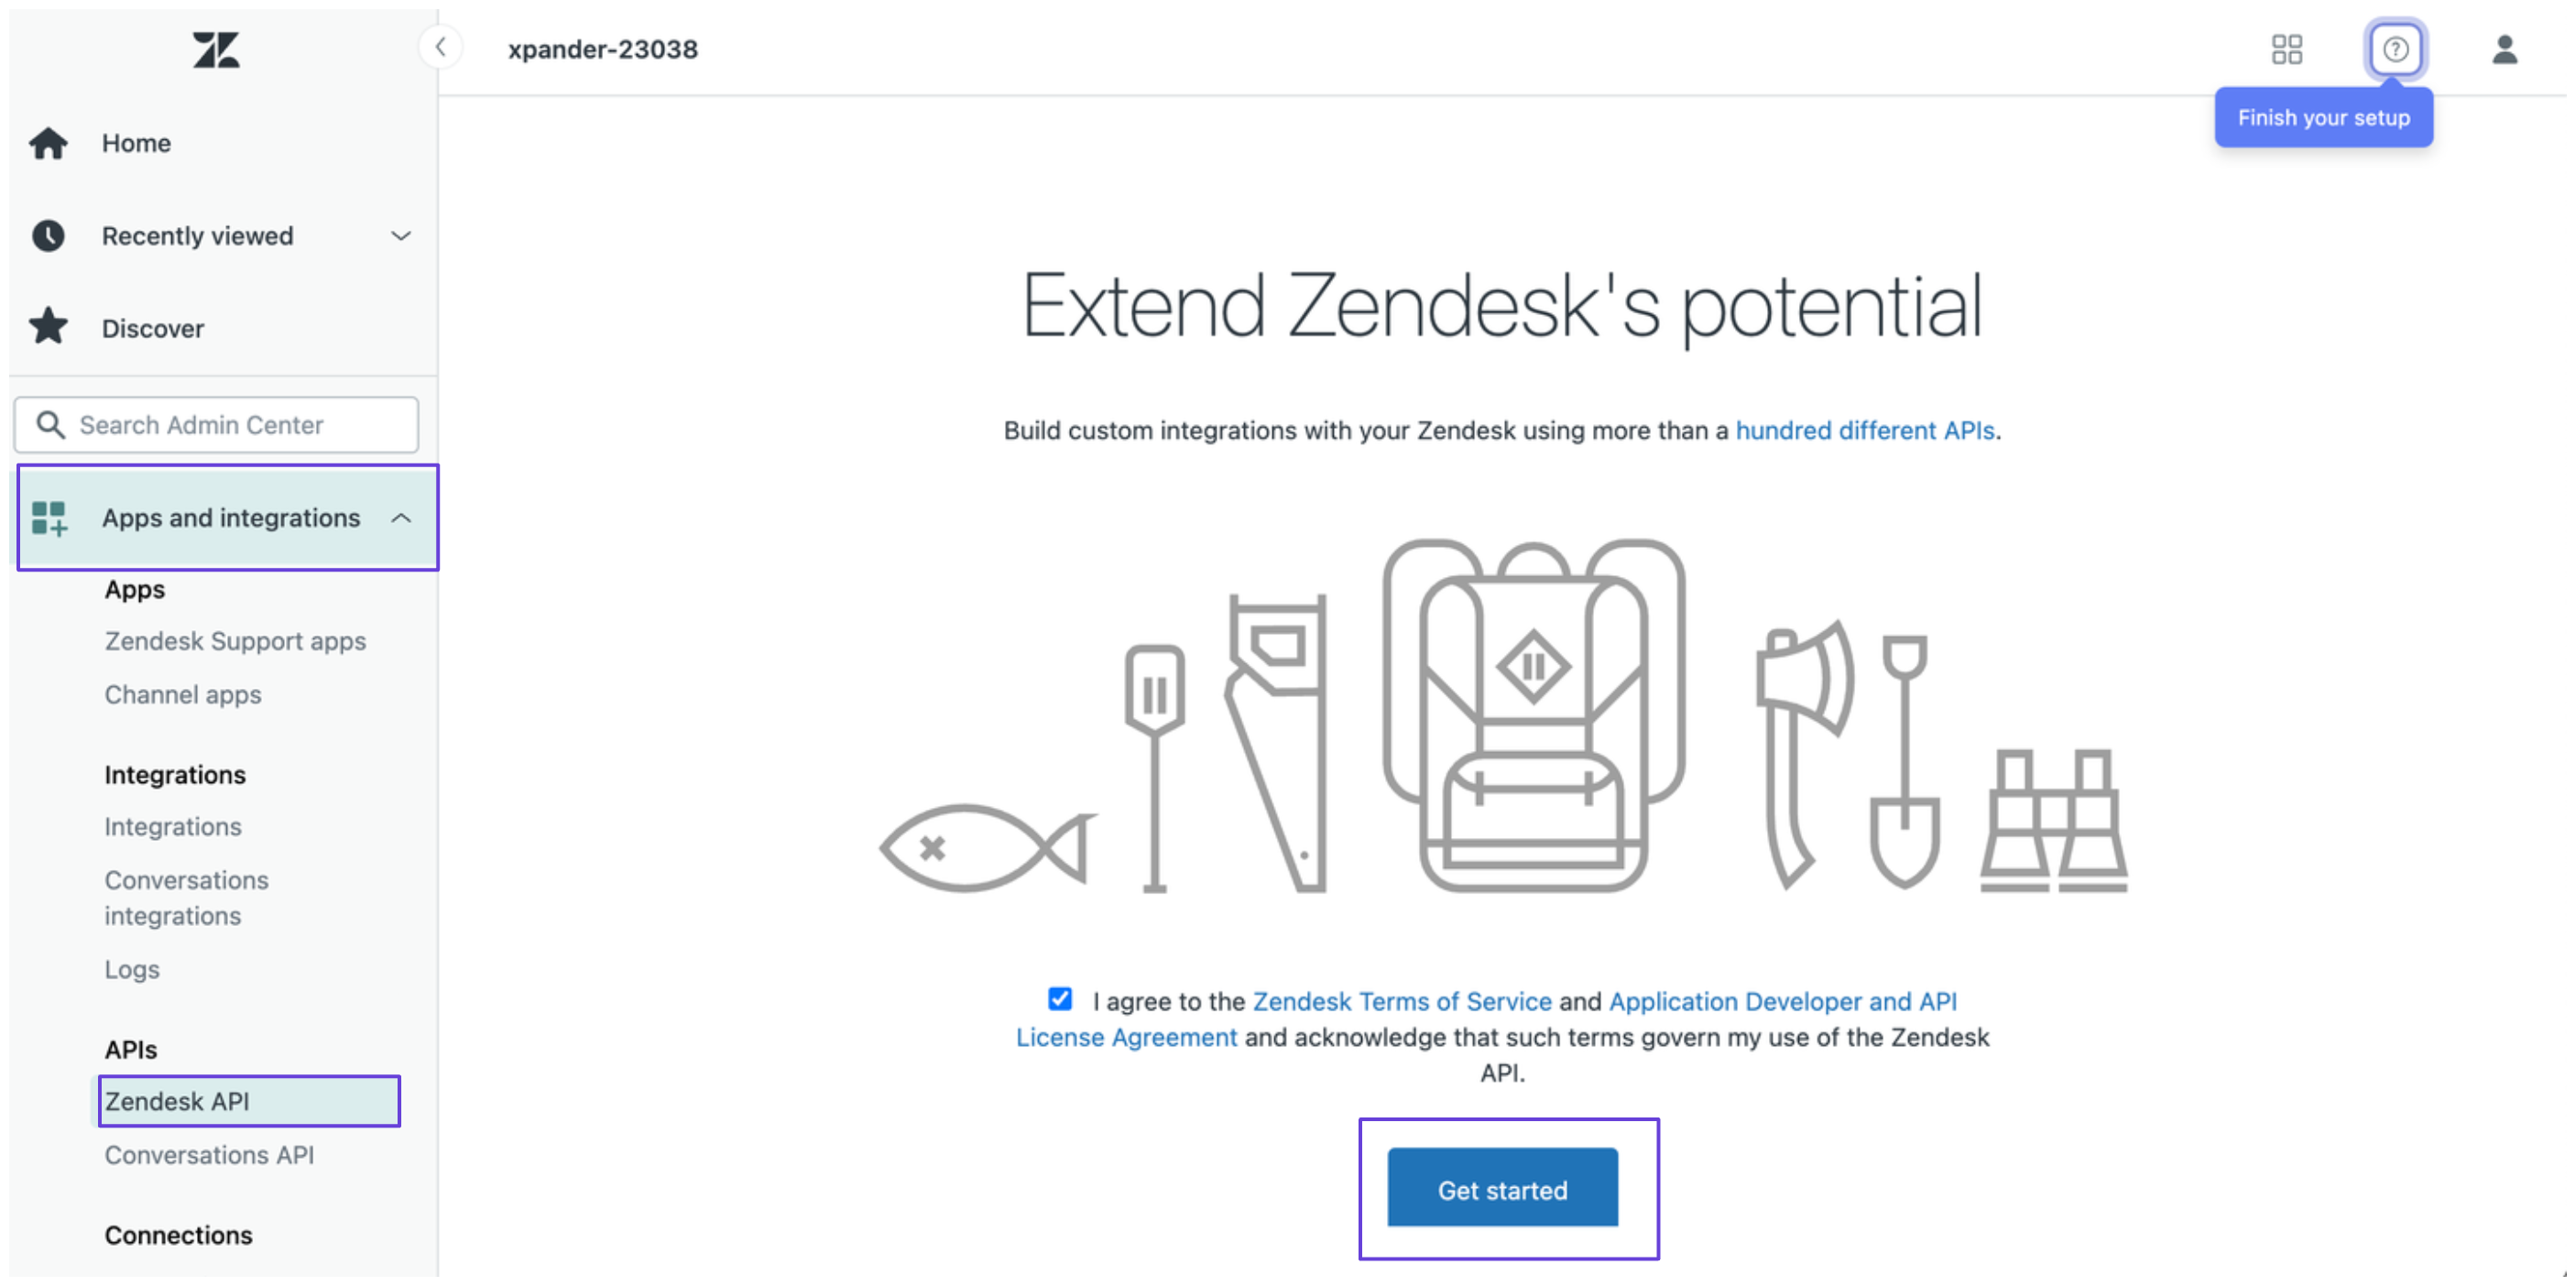
 3. In the Admin Center, click **Apps and integrations** in the sidebar, then select **Zendesk API** and click **Get Started**.
 4. Under the **Settings** tab, enable token access, then click **Add API token**.
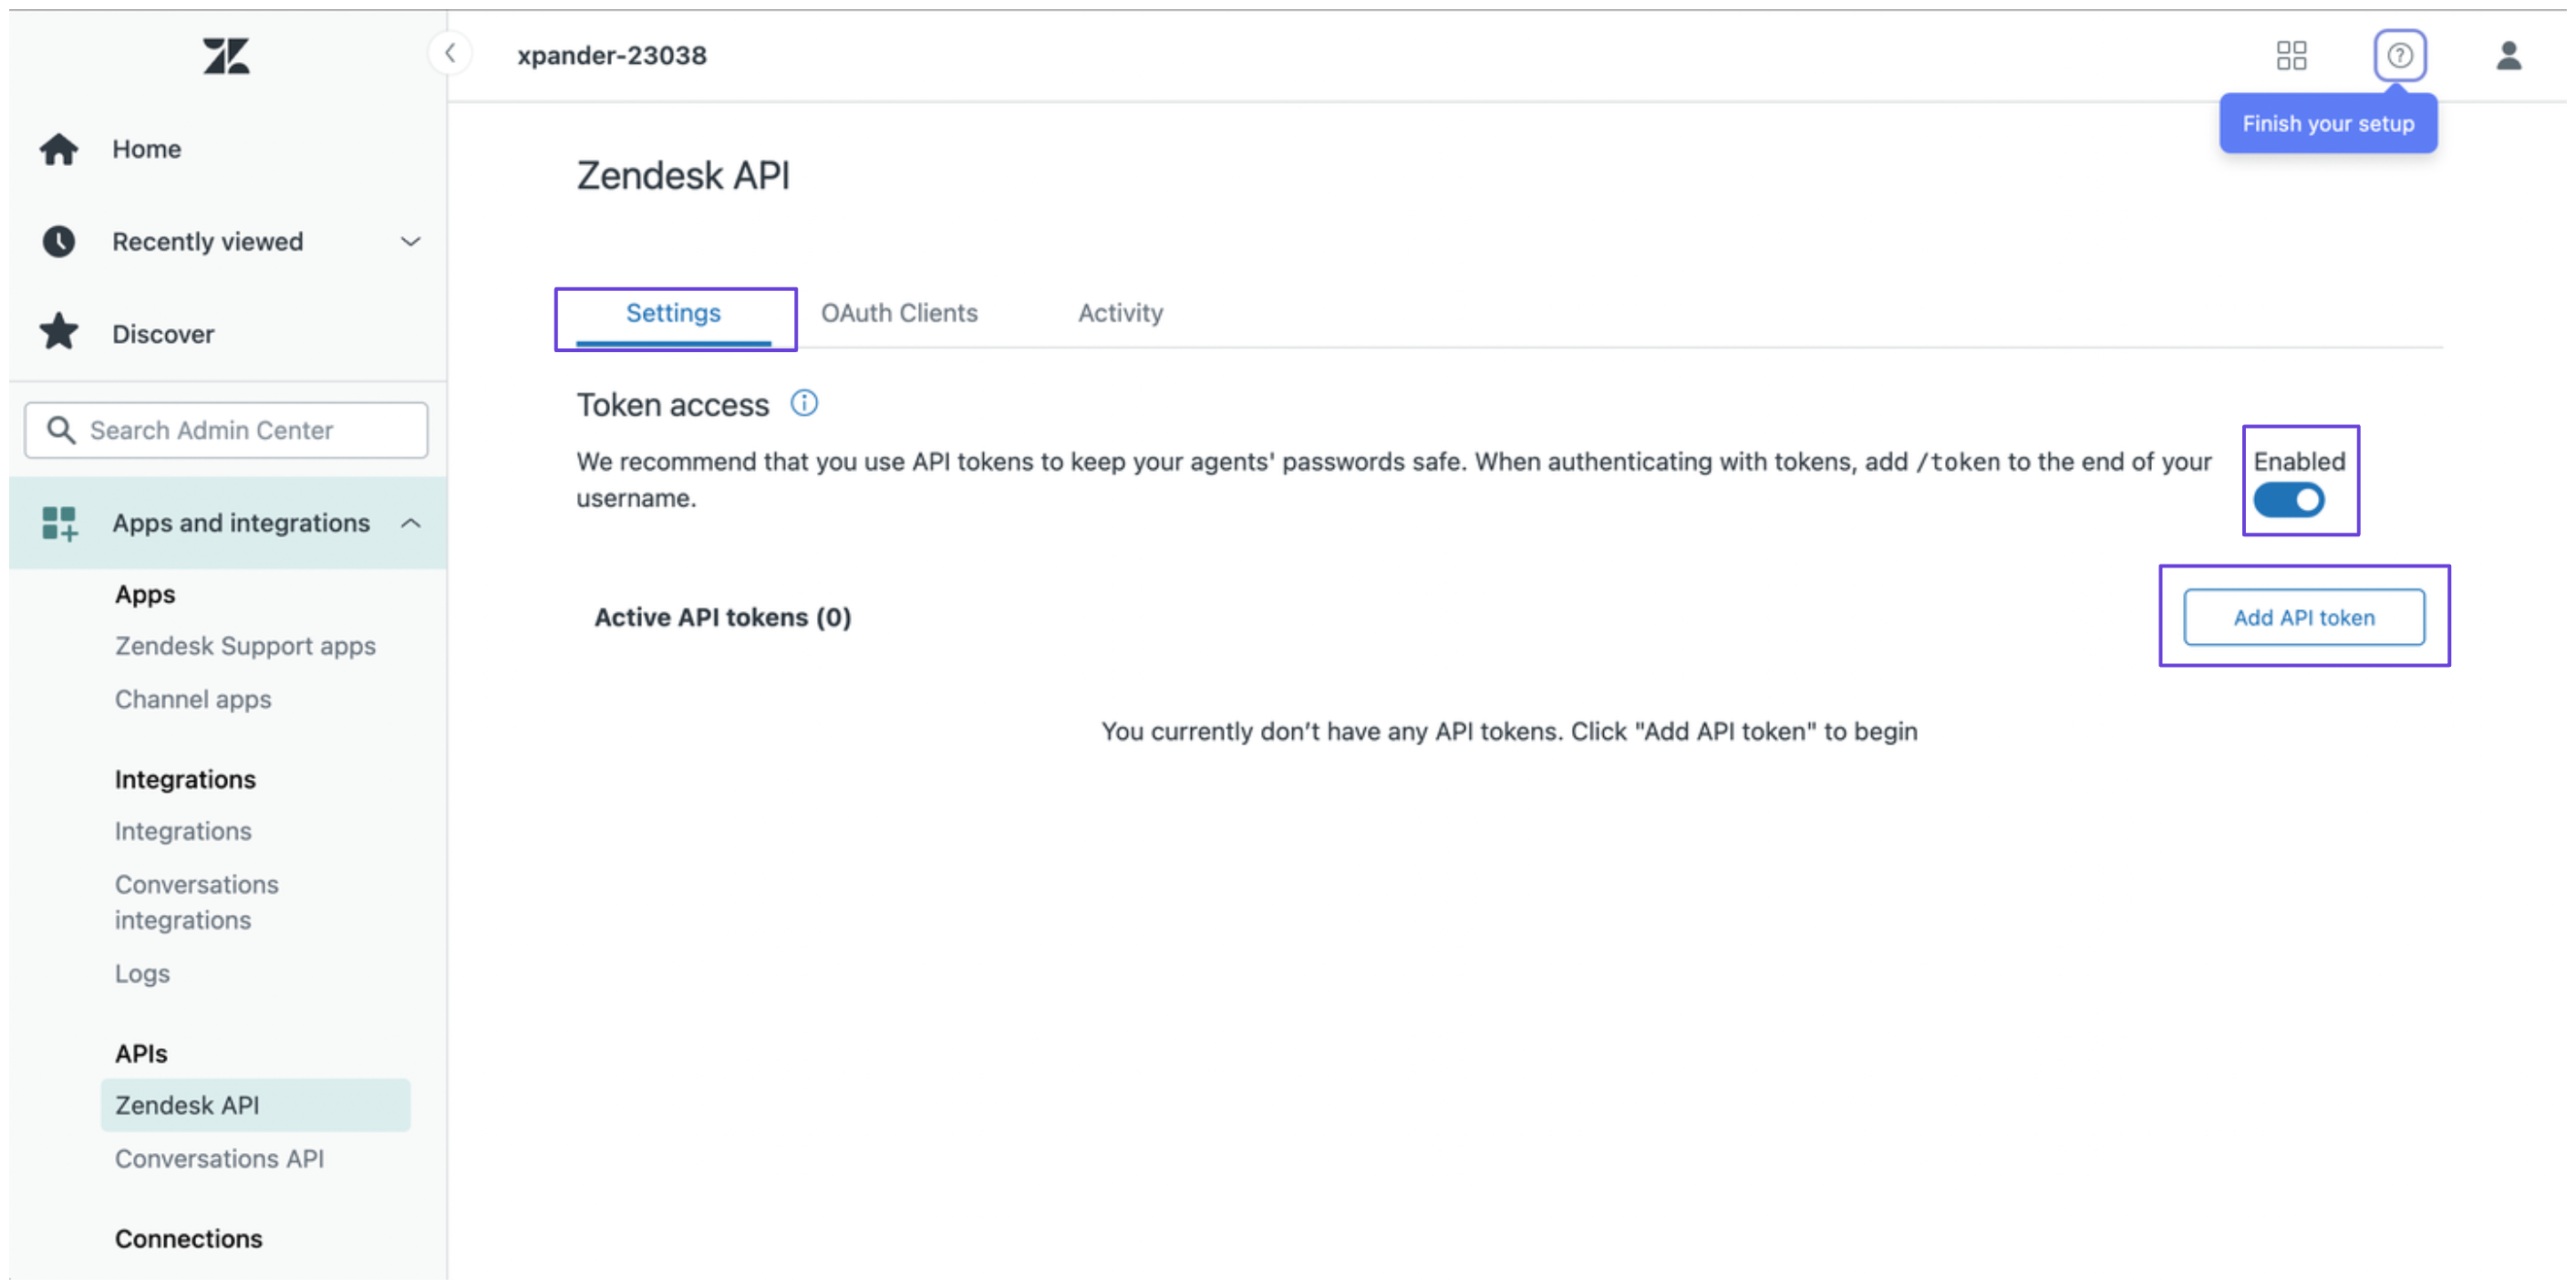 5. You'll now see your Zendesk API token—copy and store it safely.
6. Combine your Zendesk email address and API token using the following format:
```
email_address/token:zendesk_token
```
Then, encode it in Base64. You can do this in a couple of ways:
* Run the following command in your terminal (Linux/macOS):
```
echo -n 'email_address/token:zendesk_token' | base64
```
* Use an [online Base64 encoder](https://www.base64encode.org/).
7. The encoded result will serve as your Zendesk API key.
### Integrate Zendesk into xpander.ai
1. Go to the **Connectors** section in the sidebar of your xpander.ai dashboard.
2. Select **Zendesk** from the available integrations.
3. Click **Enable**.
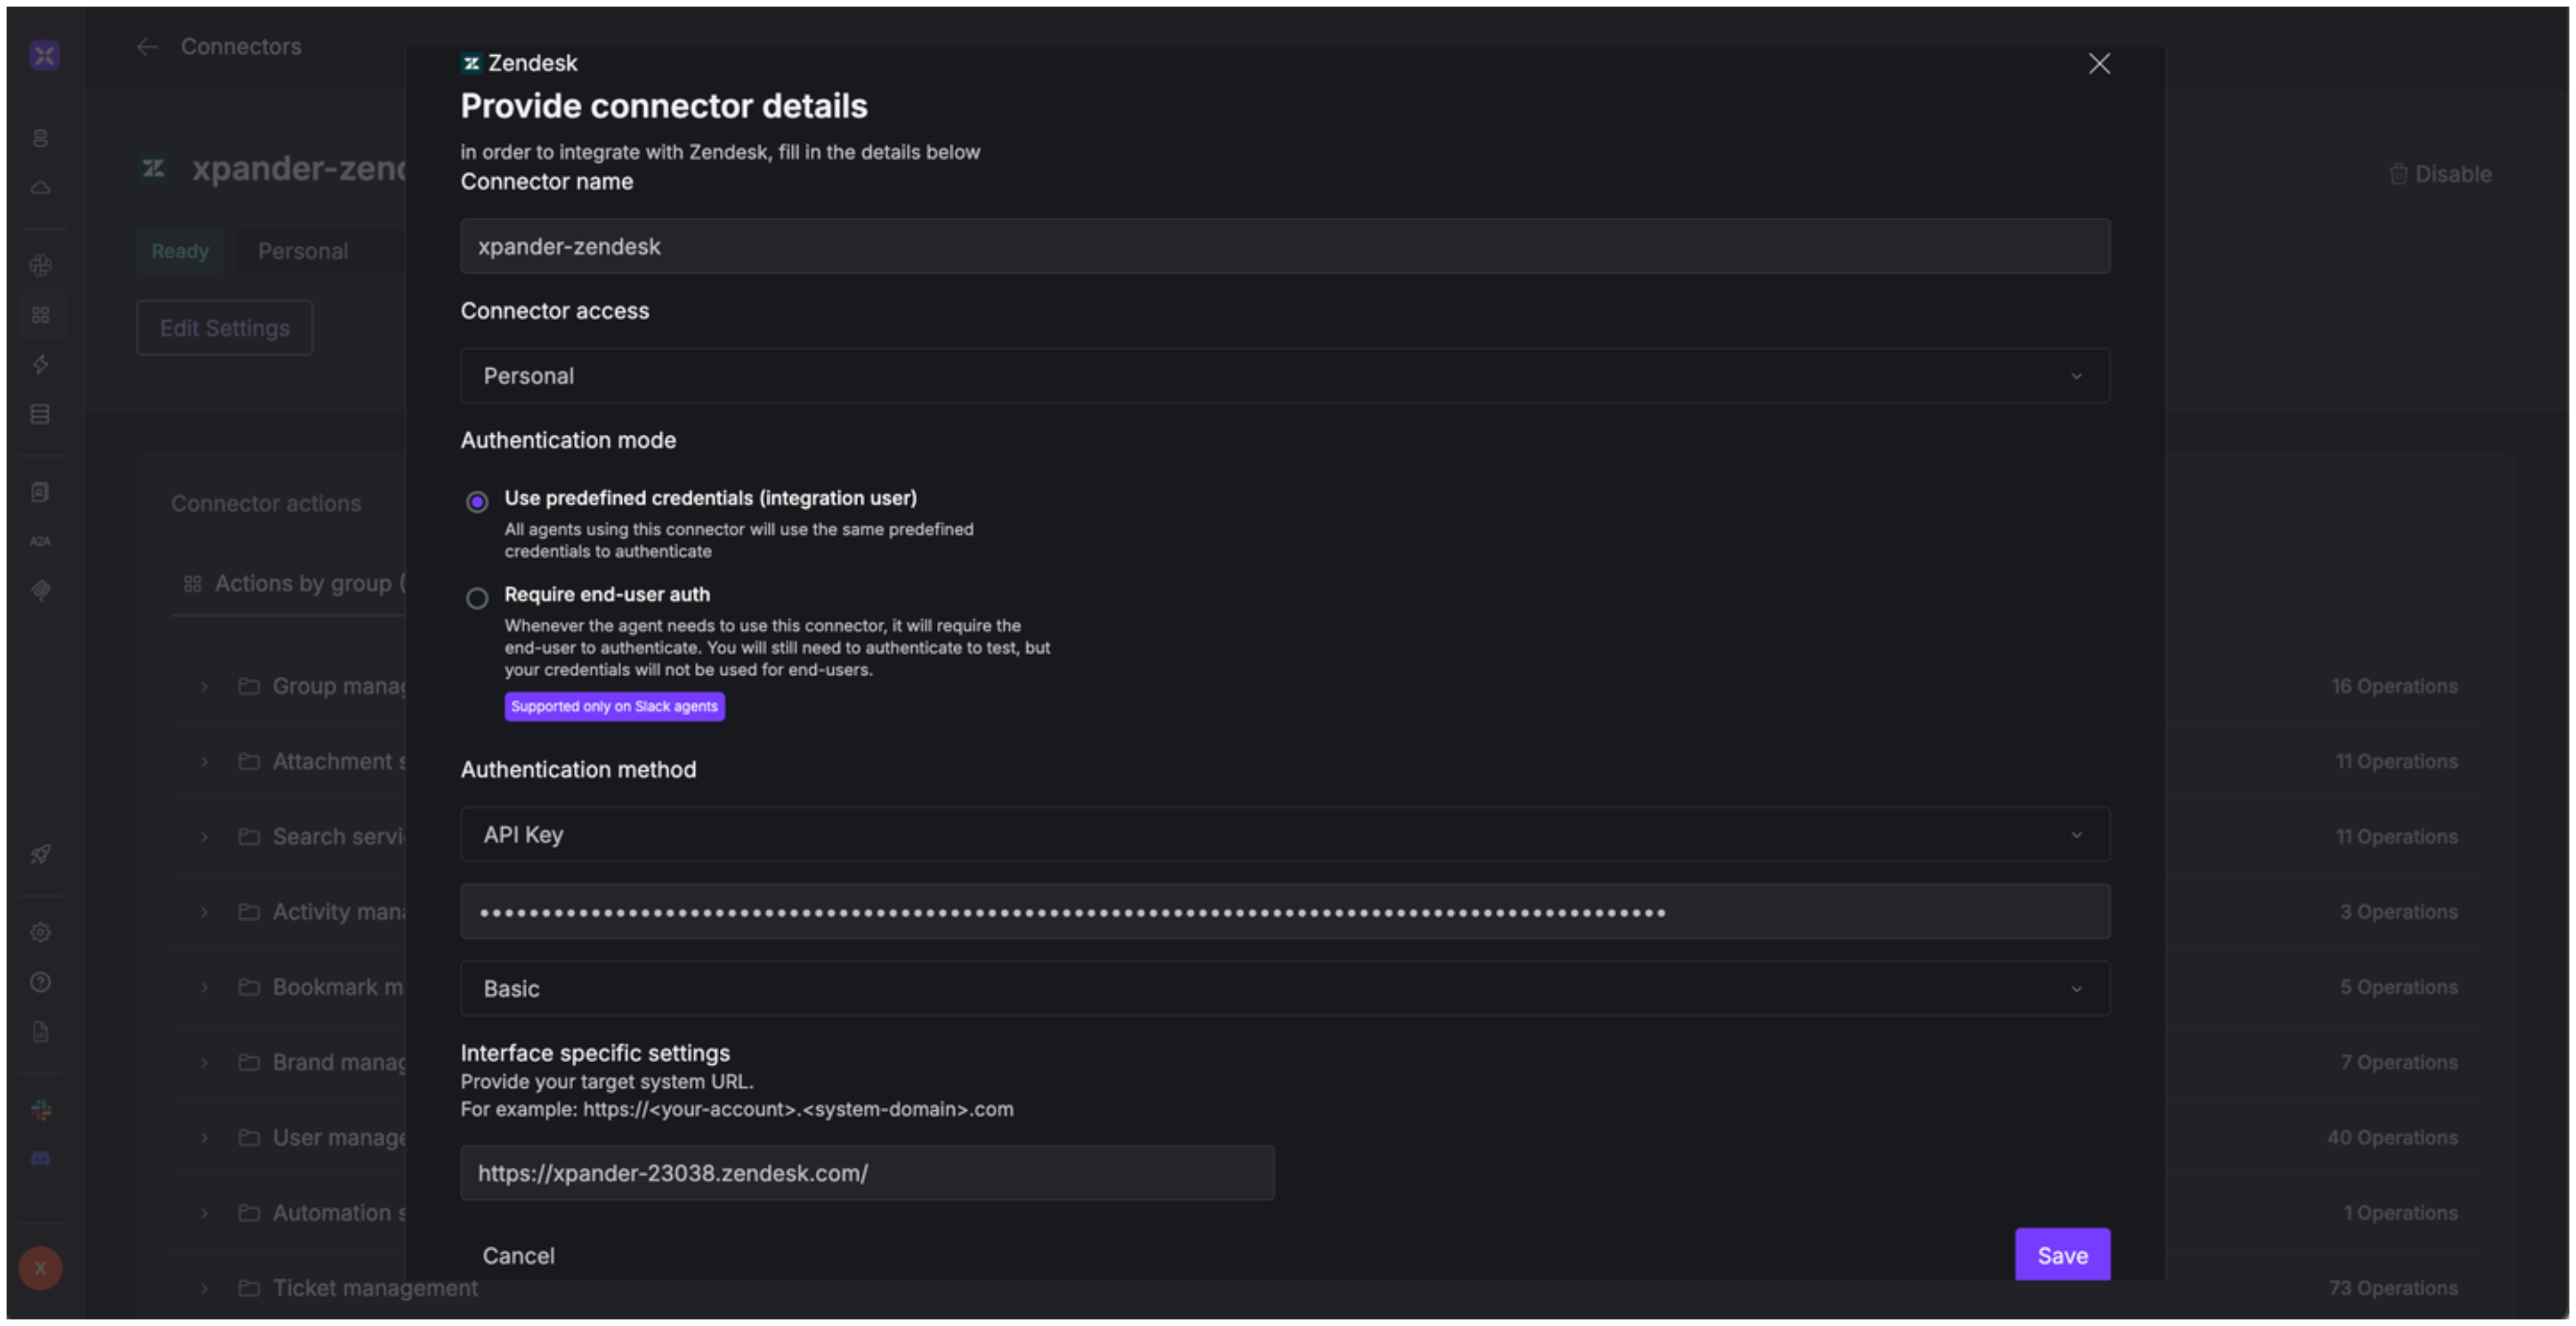
4. Enter a **connector name**, e.g., "xpander-zendesk".
5. Select **Integration User** as the authentication mode.
6. Select **API Key** as the authentication method.
7. Paste the Base64-encoded token into the provided field.
8. Choose **Basic** as the **Auth Type**.
9. Under **Interface specific settings**, enter your Zendesk domain name (e.g., `https://xpander-23038.zendesk.com`).
10. Save the configuration.
5. You'll now see your Zendesk API token—copy and store it safely.
6. Combine your Zendesk email address and API token using the following format:
```
email_address/token:zendesk_token
```
Then, encode it in Base64. You can do this in a couple of ways:
* Run the following command in your terminal (Linux/macOS):
```
echo -n 'email_address/token:zendesk_token' | base64
```
* Use an [online Base64 encoder](https://www.base64encode.org/).
7. The encoded result will serve as your Zendesk API key.
### Integrate Zendesk into xpander.ai
1. Go to the **Connectors** section in the sidebar of your xpander.ai dashboard.
2. Select **Zendesk** from the available integrations.
3. Click **Enable**.
4. Enter a **connector name**, e.g., "xpander-zendesk".
5. Select **Integration User** as the authentication mode.
6. Select **API Key** as the authentication method.
7. Paste the Base64-encoded token into the provided field.
8. Choose **Basic** as the **Auth Type**.
9. Under **Interface specific settings**, enter your Zendesk domain name (e.g., `https://xpander-23038.zendesk.com`).
10. Save the configuration.
 ## Integration of Zendesk into AI Agent
Once you've configured your Zendesk account with the authentication option(s) described above, you can integrate it into your AI agent with xpander.ai:
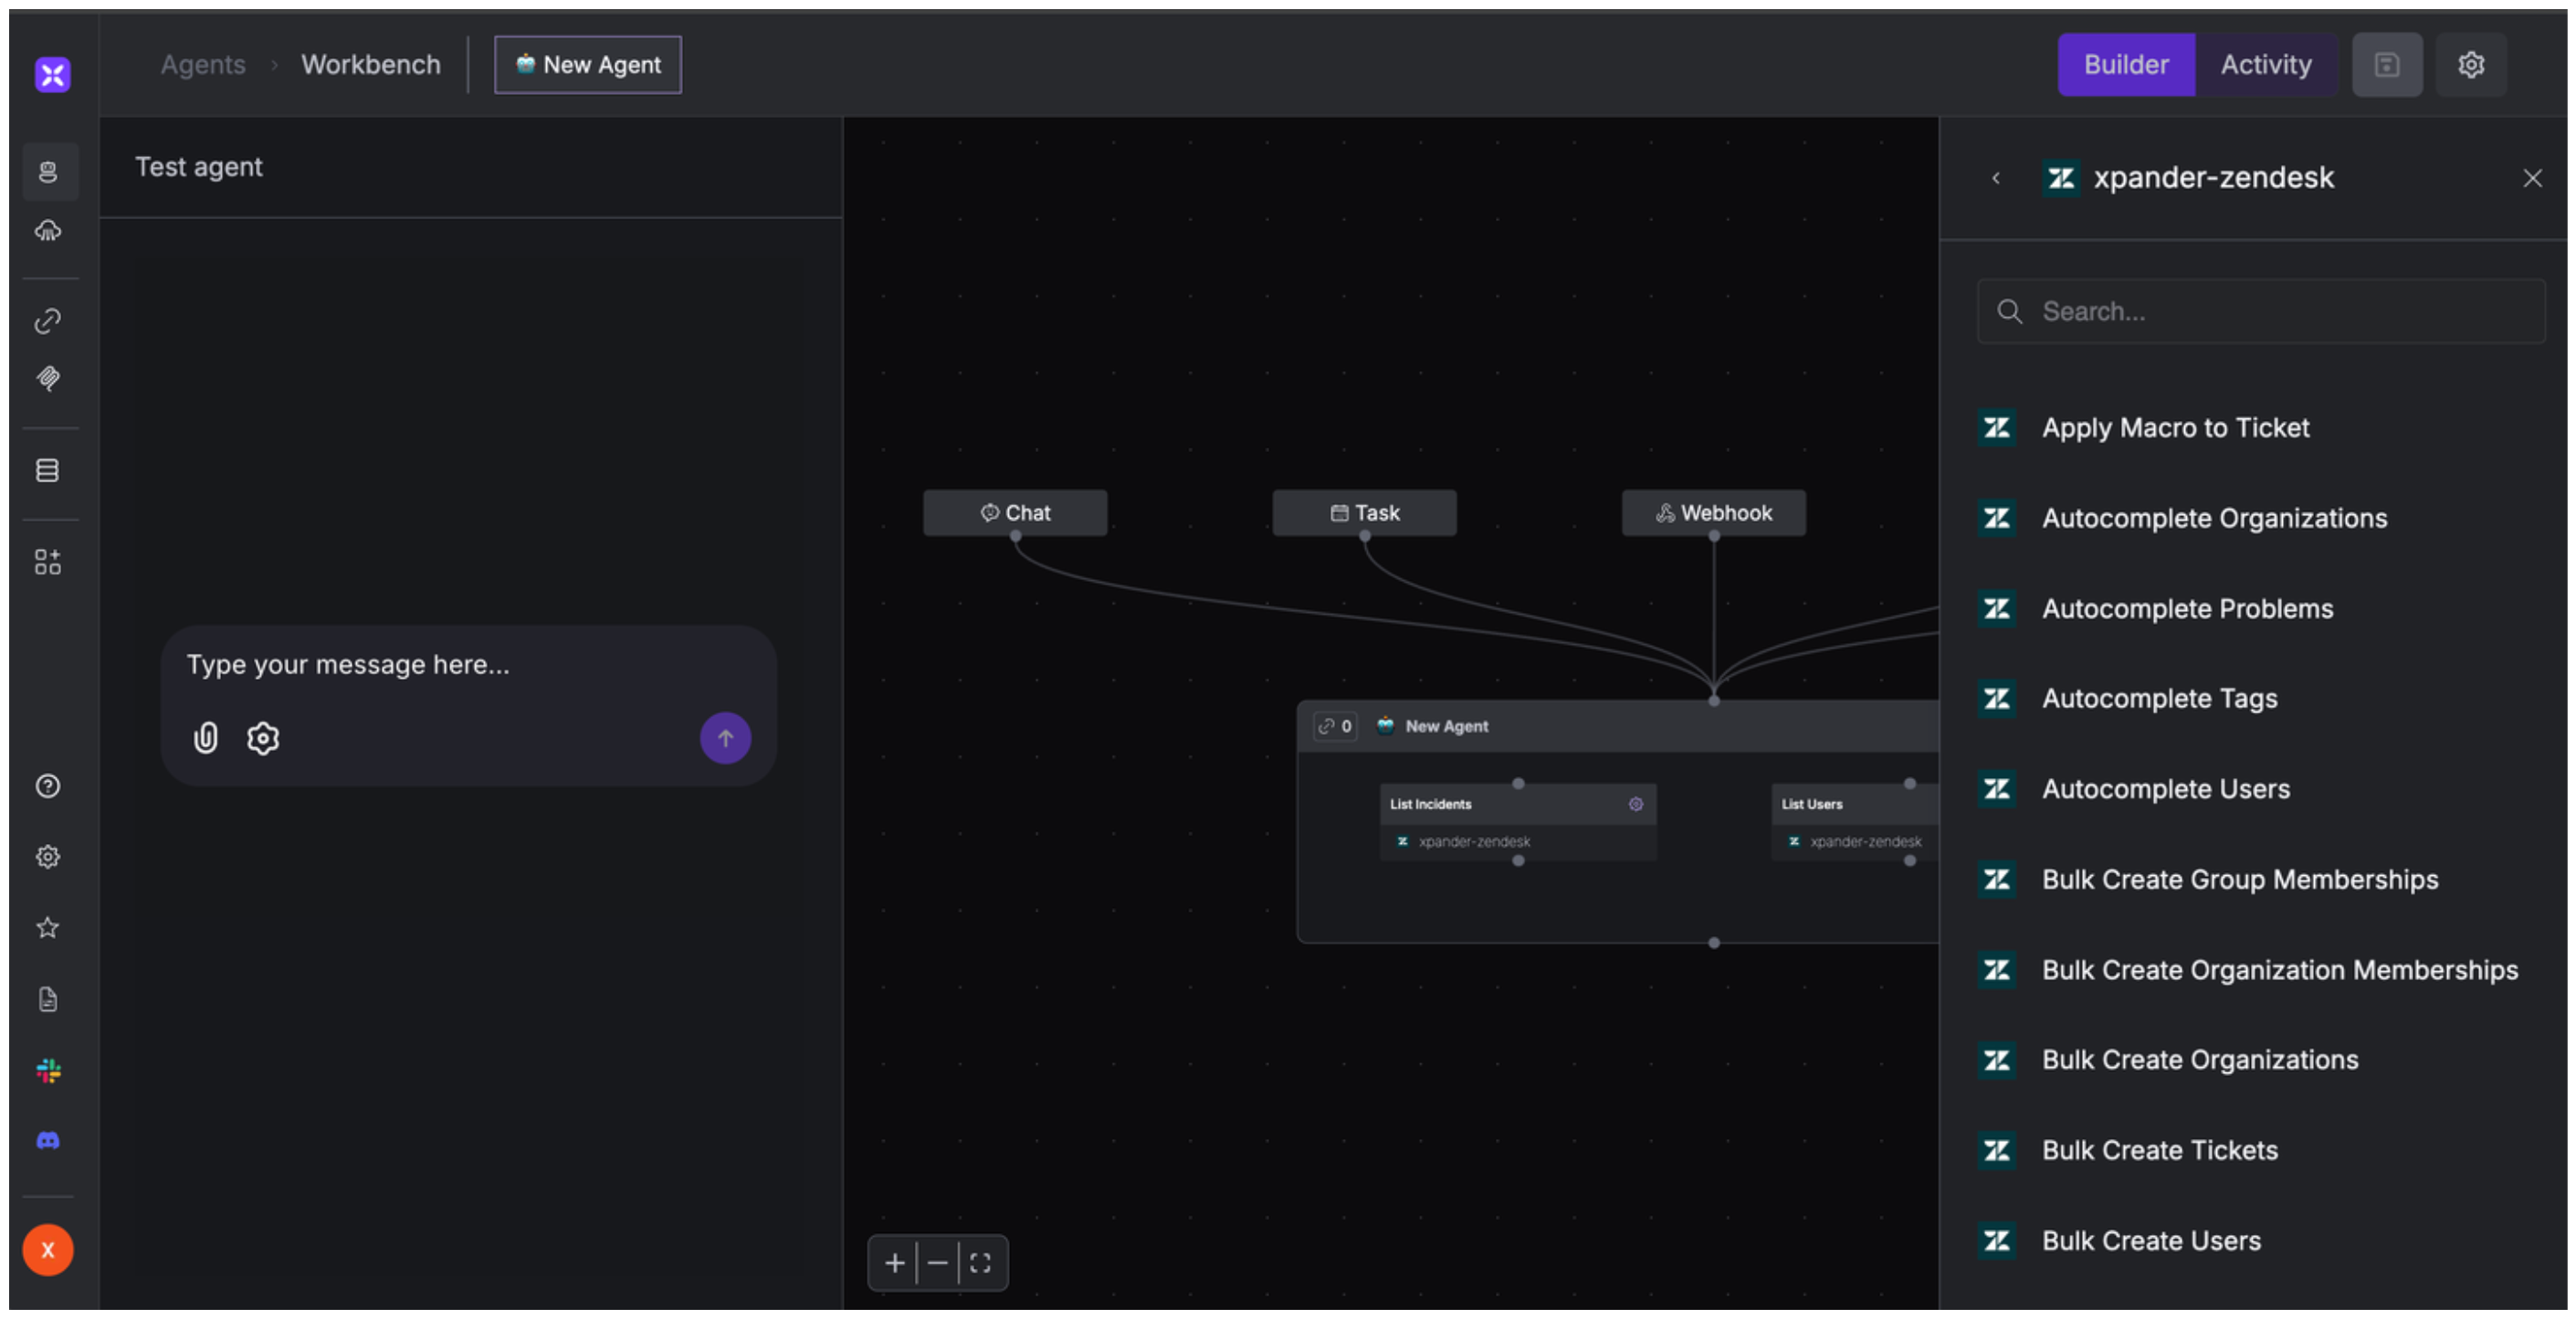
1. In your xpander.ai dashboard, go to the **Agent Configuration** tab and select **Tools**, then click **Add Tools**.
2. Select **Connectors**.
3. Choose **Zendesk** with the same **connector name** you configured in the previous section (e.g., xpander-zendesk).
4. Select the available Zendesk operations that suit your use case.
## Integration of Zendesk into AI Agent
Once you've configured your Zendesk account with the authentication option(s) described above, you can integrate it into your AI agent with xpander.ai:
1. In your xpander.ai dashboard, go to the **Agent Configuration** tab and select **Tools**, then click **Add Tools**.
2. Select **Connectors**.
3. Choose **Zendesk** with the same **connector name** you configured in the previous section (e.g., xpander-zendesk).
4. Select the available Zendesk operations that suit your use case.
 ## Expose Zendesk as MCP Server
Alternatively, you can also expose your Zendesk account as an MCP server. To do so:
1. Go to the **Connectors** section in the sidebar of your xpander.ai dashboard.
2. Select **Zendesk** with the same **connector name** you configured in the previous section (e.g., xpander-zendesk).
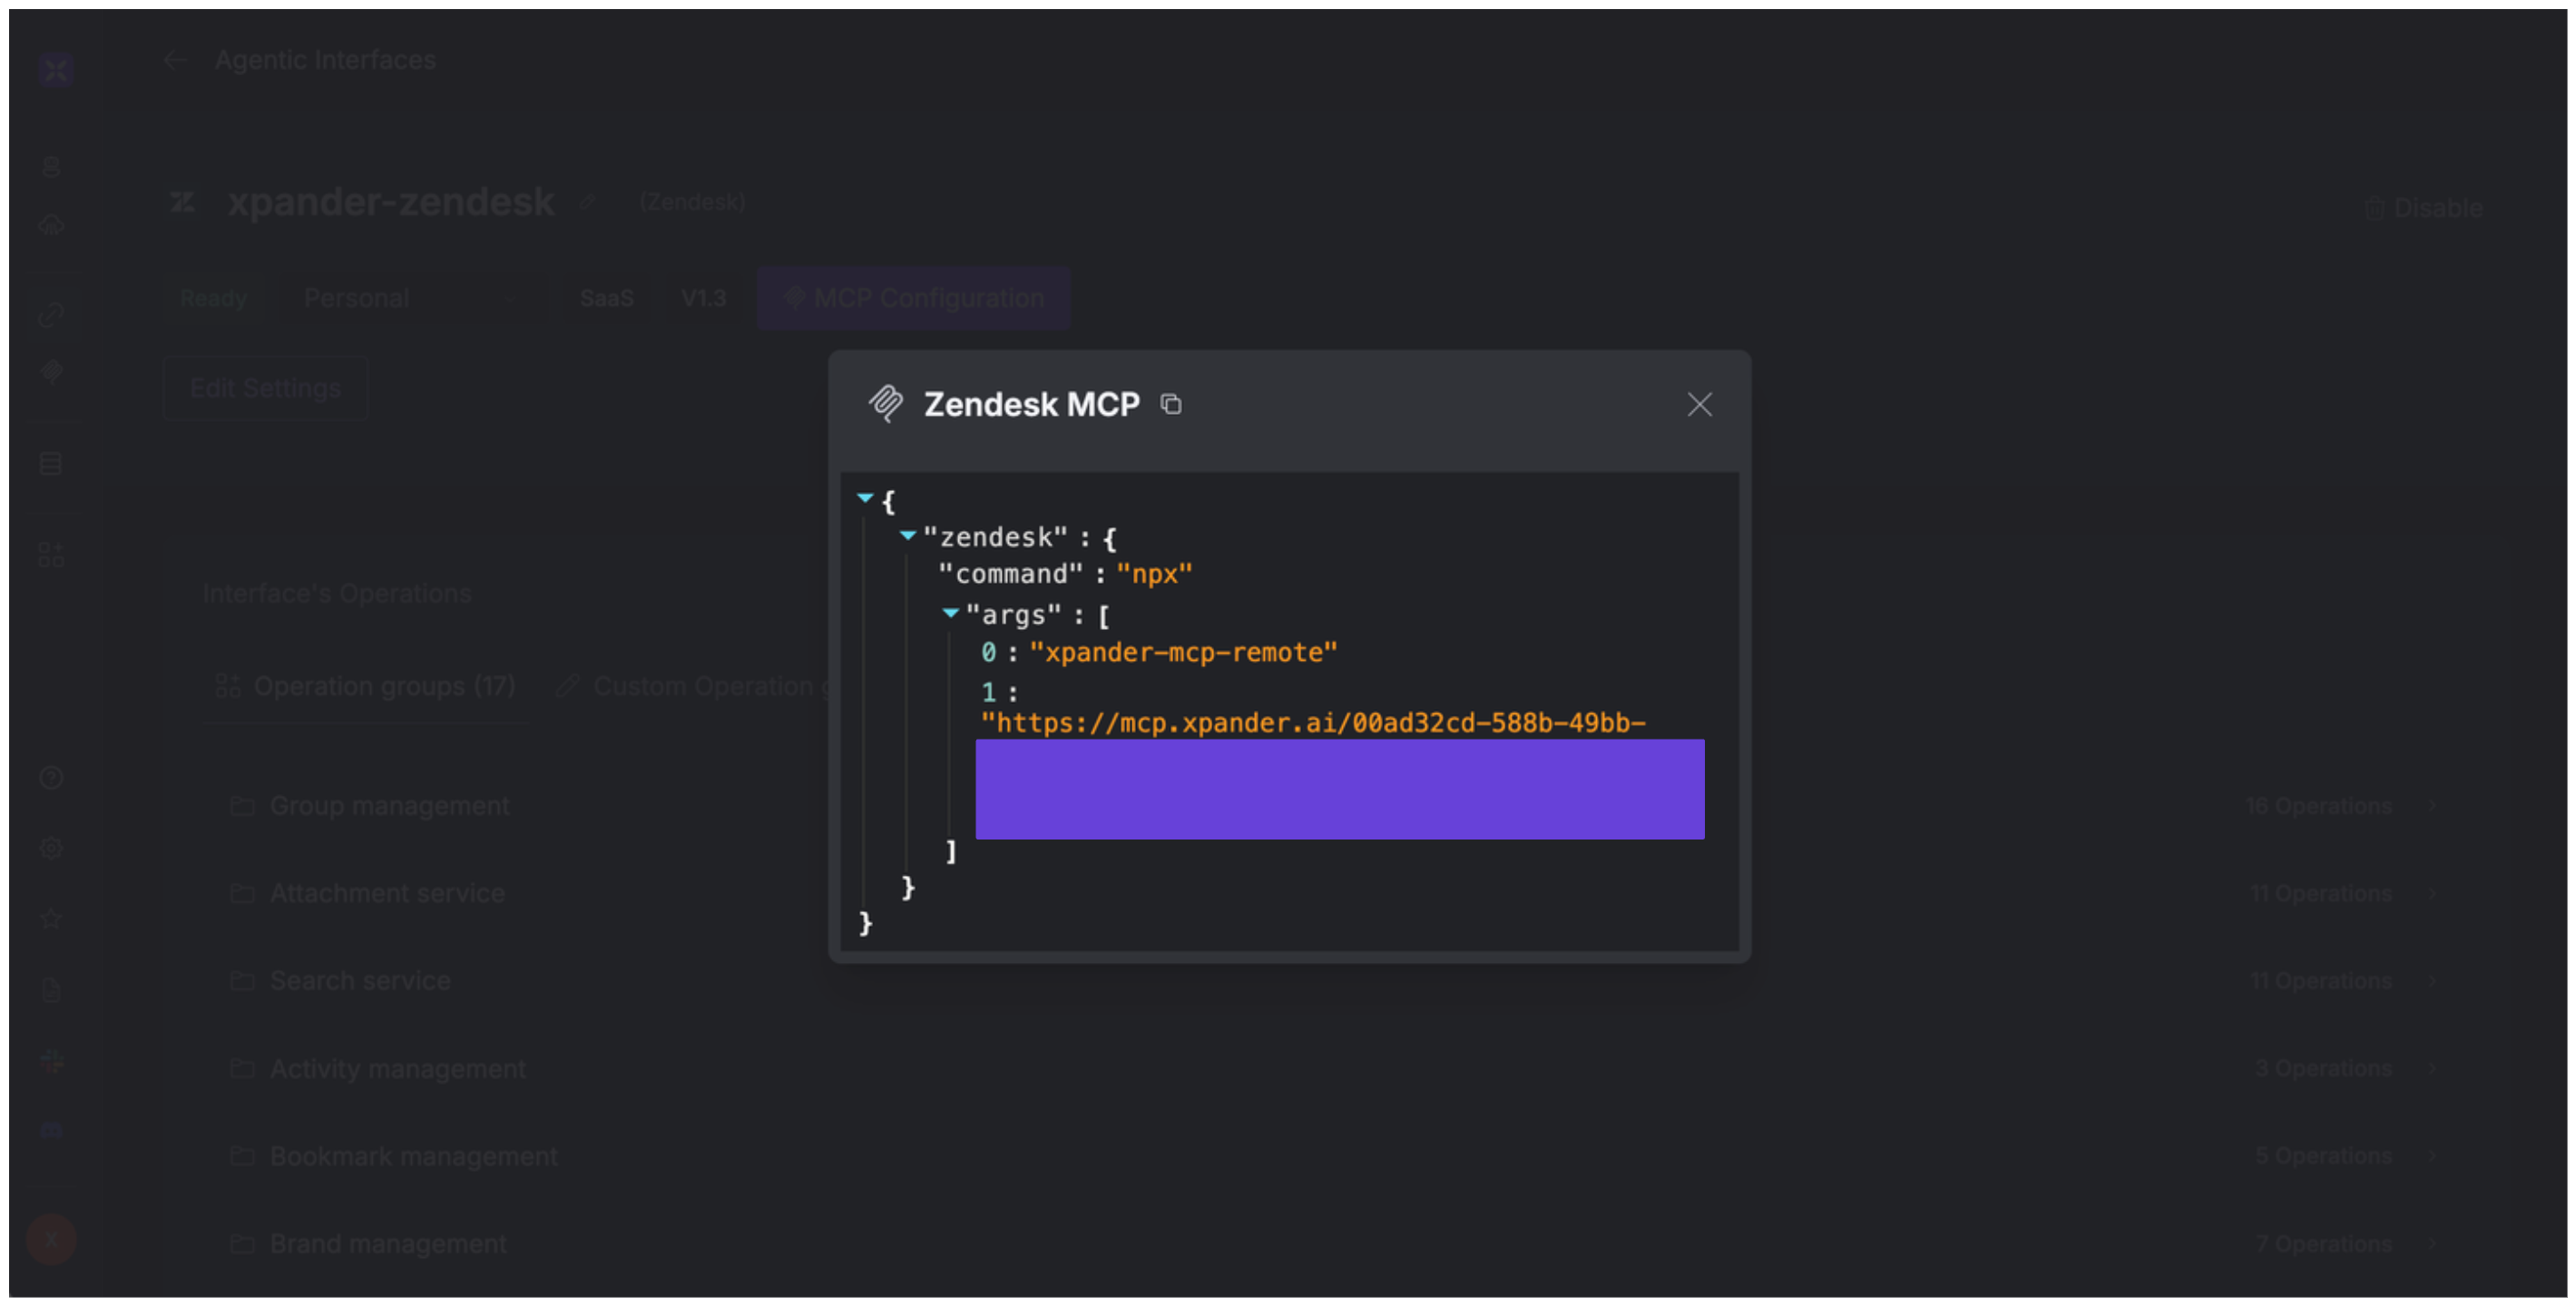
3. Click **MCP Configuration**.
4. Enter the MCP configuration into the appropriate settings of the client app you want to use (e.g., Cursor, Windsurf, Claude Desktop, etc.).
## Expose Zendesk as MCP Server
Alternatively, you can also expose your Zendesk account as an MCP server. To do so:
1. Go to the **Connectors** section in the sidebar of your xpander.ai dashboard.
2. Select **Zendesk** with the same **connector name** you configured in the previous section (e.g., xpander-zendesk).
3. Click **MCP Configuration**.
4. Enter the MCP configuration into the appropriate settings of the client app you want to use (e.g., Cursor, Windsurf, Claude Desktop, etc.).
 ## AI Agent Zendesk Prompt Library
Below are possible prompts or use cases you can try after integrating Zendesk into your xpander AI agent:
```
Can you please create a ticket for {issue_description} under {org_name}?
```
```
What's the status of ticket #{ticket_id}?
```
```
Can you close all solved tickets for {org_name}?
```
```
Can you update user {user_id} to have a new phone number {phone_number}?
```
## Related Resources
* [Understanding Model Context Protocol (MCP)](/guides/deploy/mcp)
* \[Zendesk API Documentation]\([https://developer.zendesk.com/API](https://developer.zendesk.com/API) reference/)
## AI Agent Zendesk Prompt Library
Below are possible prompts or use cases you can try after integrating Zendesk into your xpander AI agent:
```
Can you please create a ticket for {issue_description} under {org_name}?
```
```
What's the status of ticket #{ticket_id}?
```
```
Can you close all solved tickets for {org_name}?
```
```
Can you update user {user_id} to have a new phone number {phone_number}?
```
## Related Resources
* [Understanding Model Context Protocol (MCP)](/guides/deploy/mcp)
* \[Zendesk API Documentation]\([https://developer.zendesk.com/API](https://developer.zendesk.com/API) reference/)