> ## Documentation Index
> Fetch the complete documentation index at: https://docs.xpander.ai/llms.txt
> Use this file to discover all available pages before exploring further.
# Deploy an Agent
> Deploy your agent to channels, and share templates with team
Once your agent is published, you can connect it to channels so users can reach it outside the Agent Studio. This page covers setup for each channel: Chat, Slack, scheduled tasks, MCP, A2A, REST API, SDK, and webhooks.
## Deploy on Channels
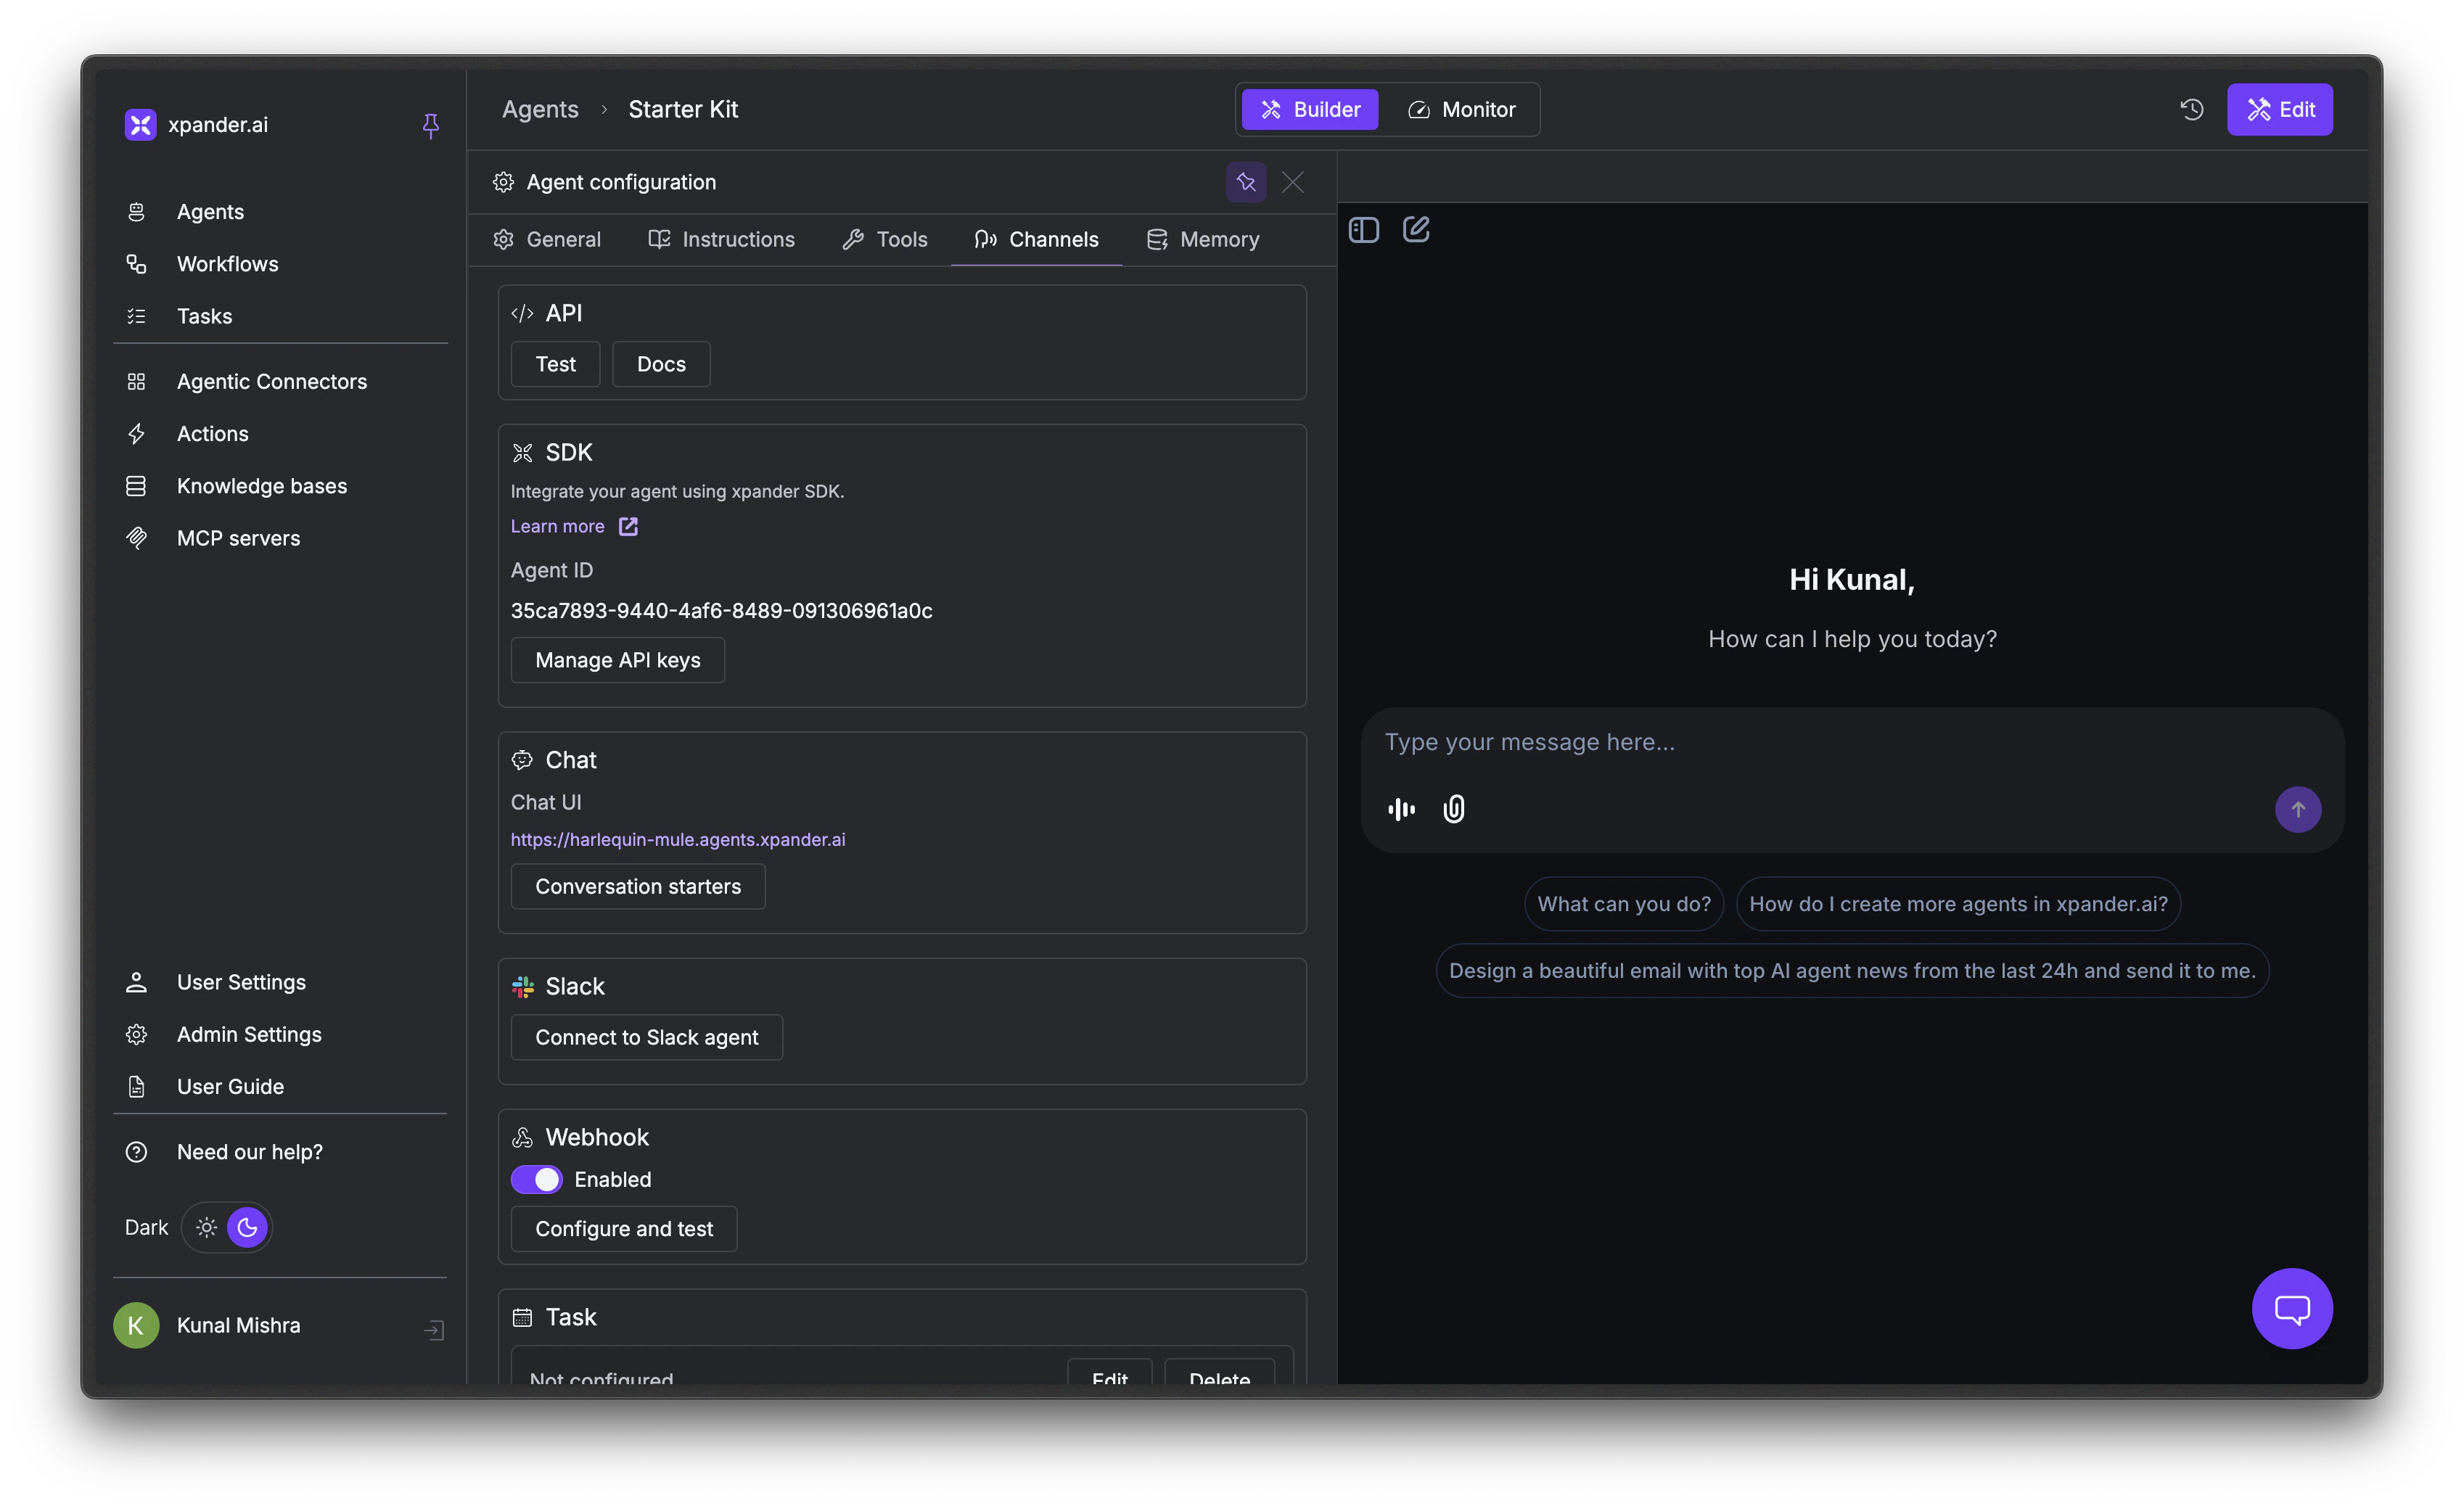
In the Agent Studio, click the gear icon and go to the **Channels** tab to see all available channels.
 | Channel | Best for | How users interact |
| ------------------- | --------------------------------------------- | --------------------------------------------------------- |
| **Chat Widget** | Internal teams, customer portals | Hosted URL or embedded iframe with threaded conversations |
| **Slack** | Teams already in Slack | DM or @mention the bot, auto-engage on topics |
| **Webhooks** | Automation platforms, CI/CD, custom apps | HTTP POST, sync or async response |
| **MCP** | Developers in Claude Desktop, Cursor, VS Code | Agent appears as a native MCP tool |
| **Scheduled Tasks** | Recurring reports, monitoring, data syncs | No user trigger, runs on a cron schedule |
### Chat
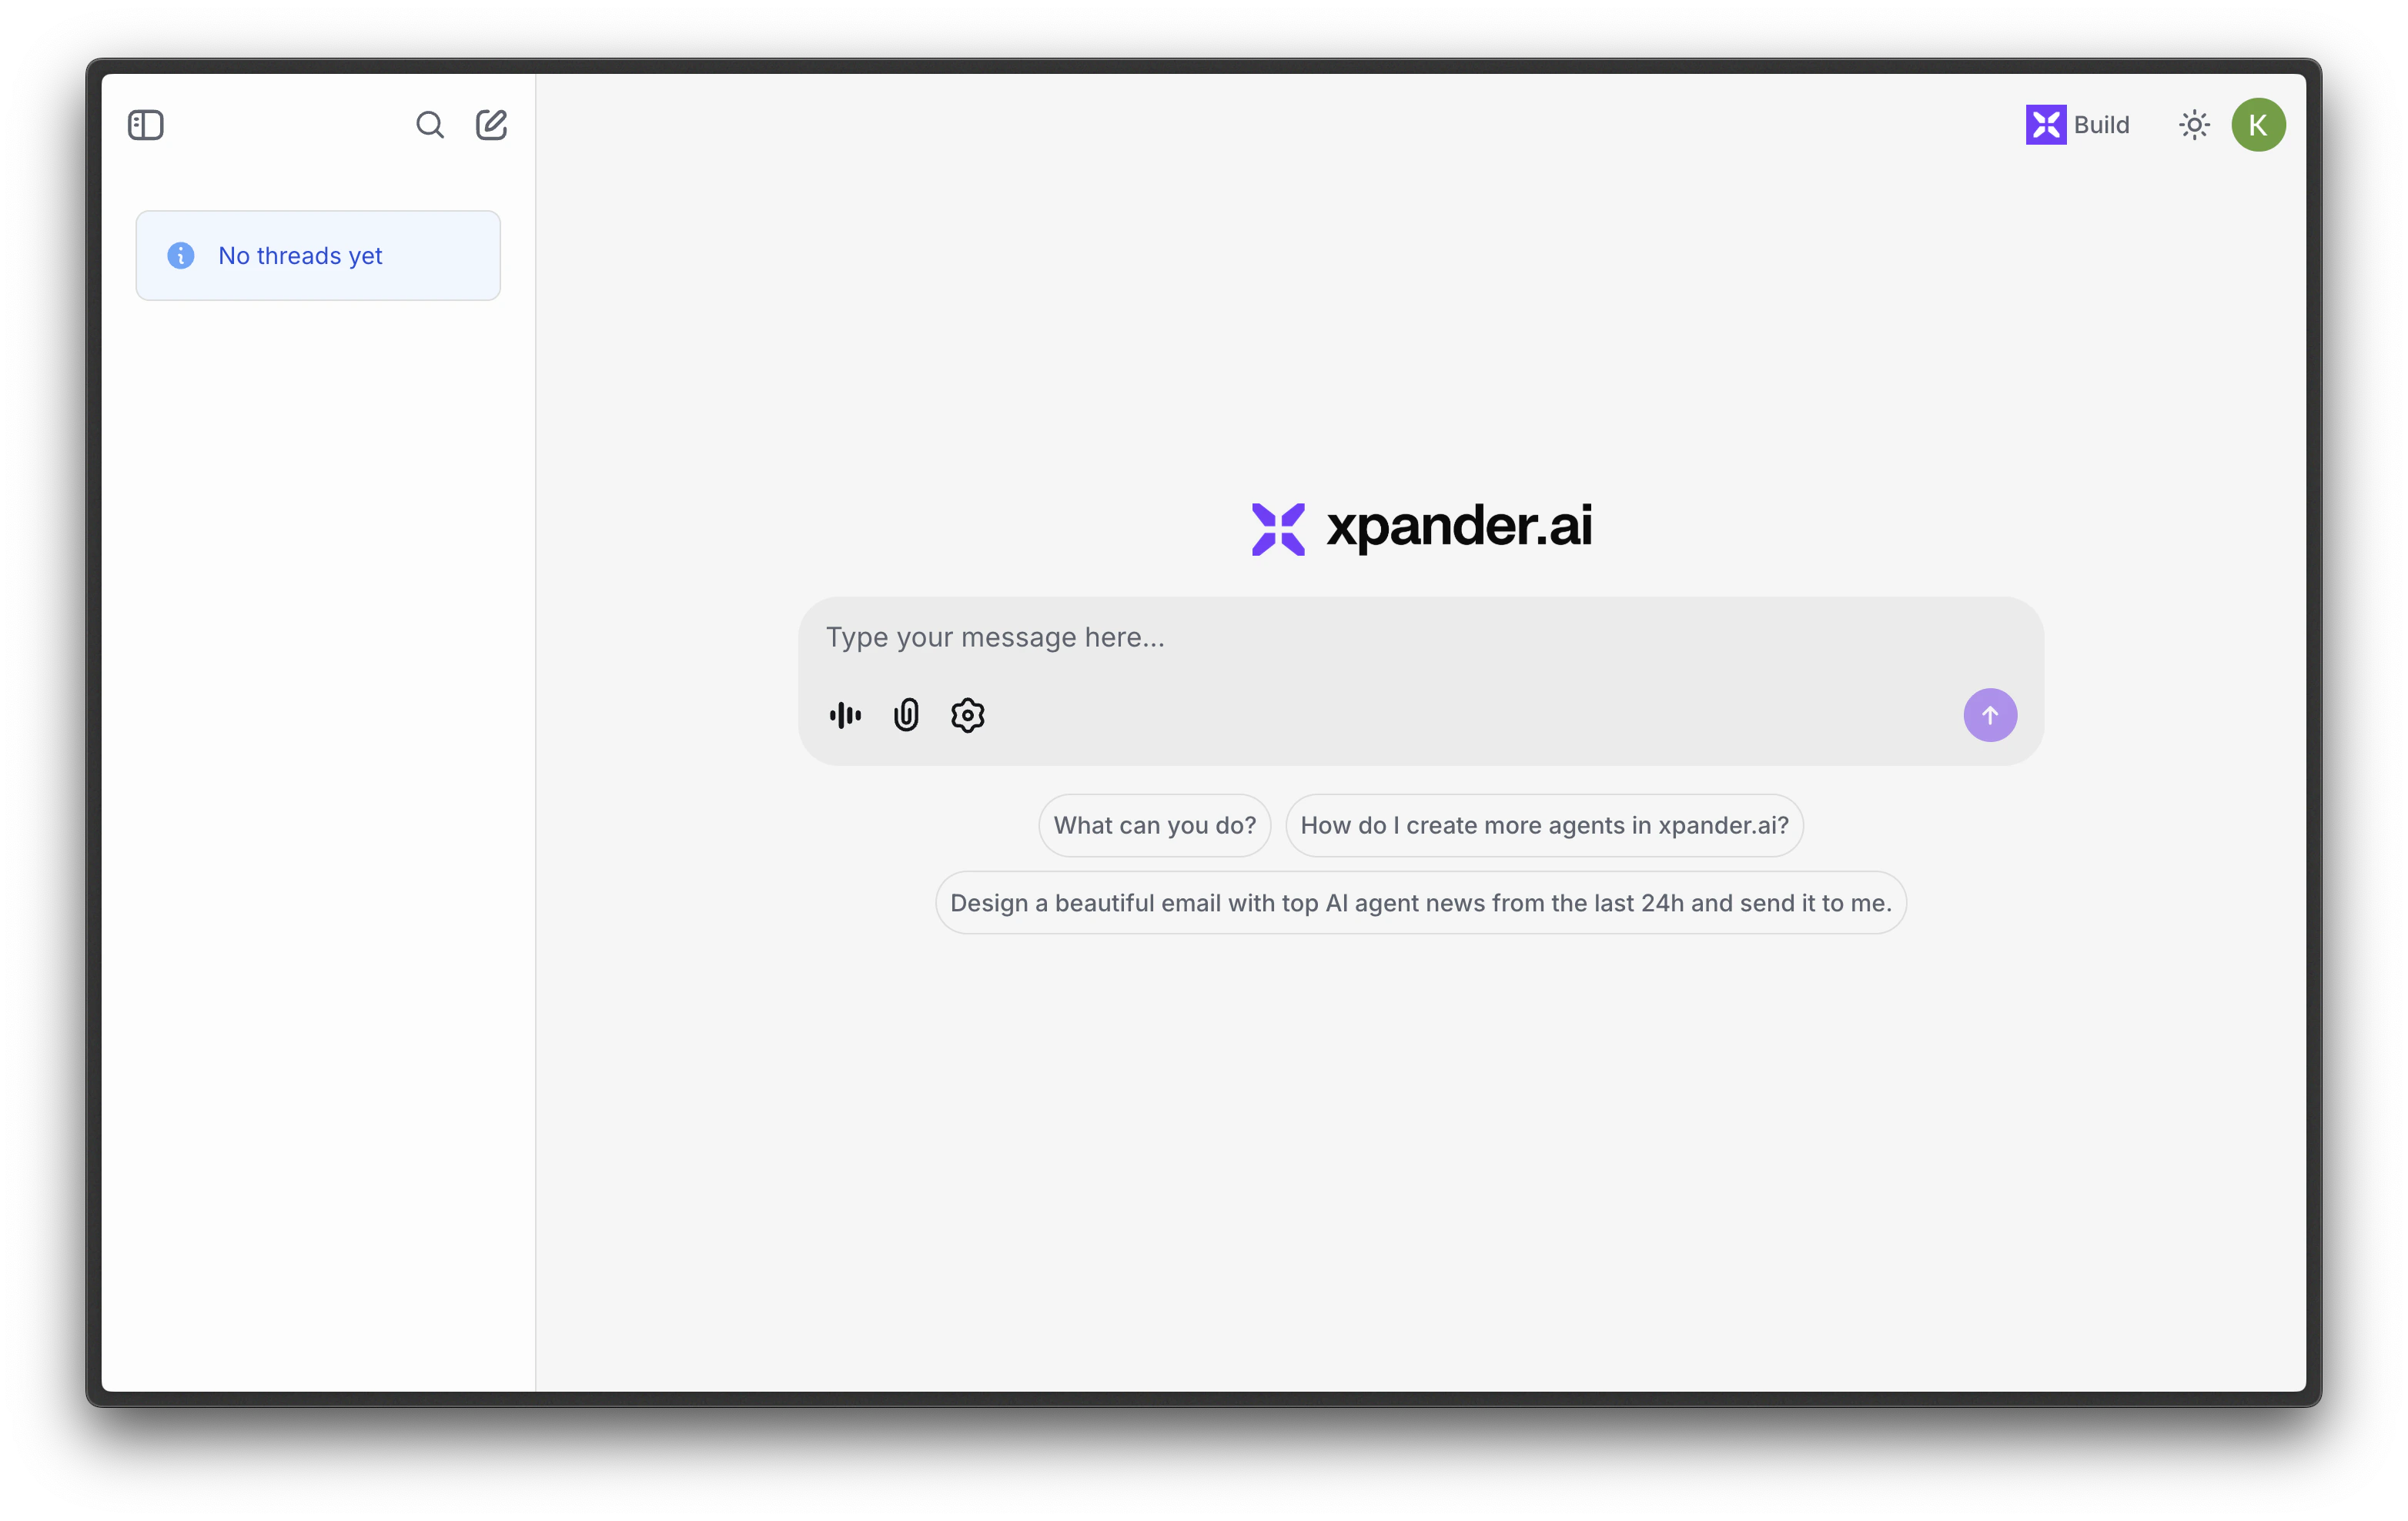
A hosted Chat UI with a unique, shareable URL. No embedding or code required.
See [Chat Widget](/guides/deploy/chat-widget) for full setup, embedding, conversation starters, and access control.
Your Chat UI URL is displayed (e.g., `https://peach-centipede.agents.xpander.ai`). Share this link directly with users who have access.
| Channel | Best for | How users interact |
| ------------------- | --------------------------------------------- | --------------------------------------------------------- |
| **Chat Widget** | Internal teams, customer portals | Hosted URL or embedded iframe with threaded conversations |
| **Slack** | Teams already in Slack | DM or @mention the bot, auto-engage on topics |
| **Webhooks** | Automation platforms, CI/CD, custom apps | HTTP POST, sync or async response |
| **MCP** | Developers in Claude Desktop, Cursor, VS Code | Agent appears as a native MCP tool |
| **Scheduled Tasks** | Recurring reports, monitoring, data syncs | No user trigger, runs on a cron schedule |
### Chat
A hosted Chat UI with a unique, shareable URL. No embedding or code required.
See [Chat Widget](/guides/deploy/chat-widget) for full setup, embedding, conversation starters, and access control.
Your Chat UI URL is displayed (e.g., `https://peach-centipede.agents.xpander.ai`). Share this link directly with users who have access.
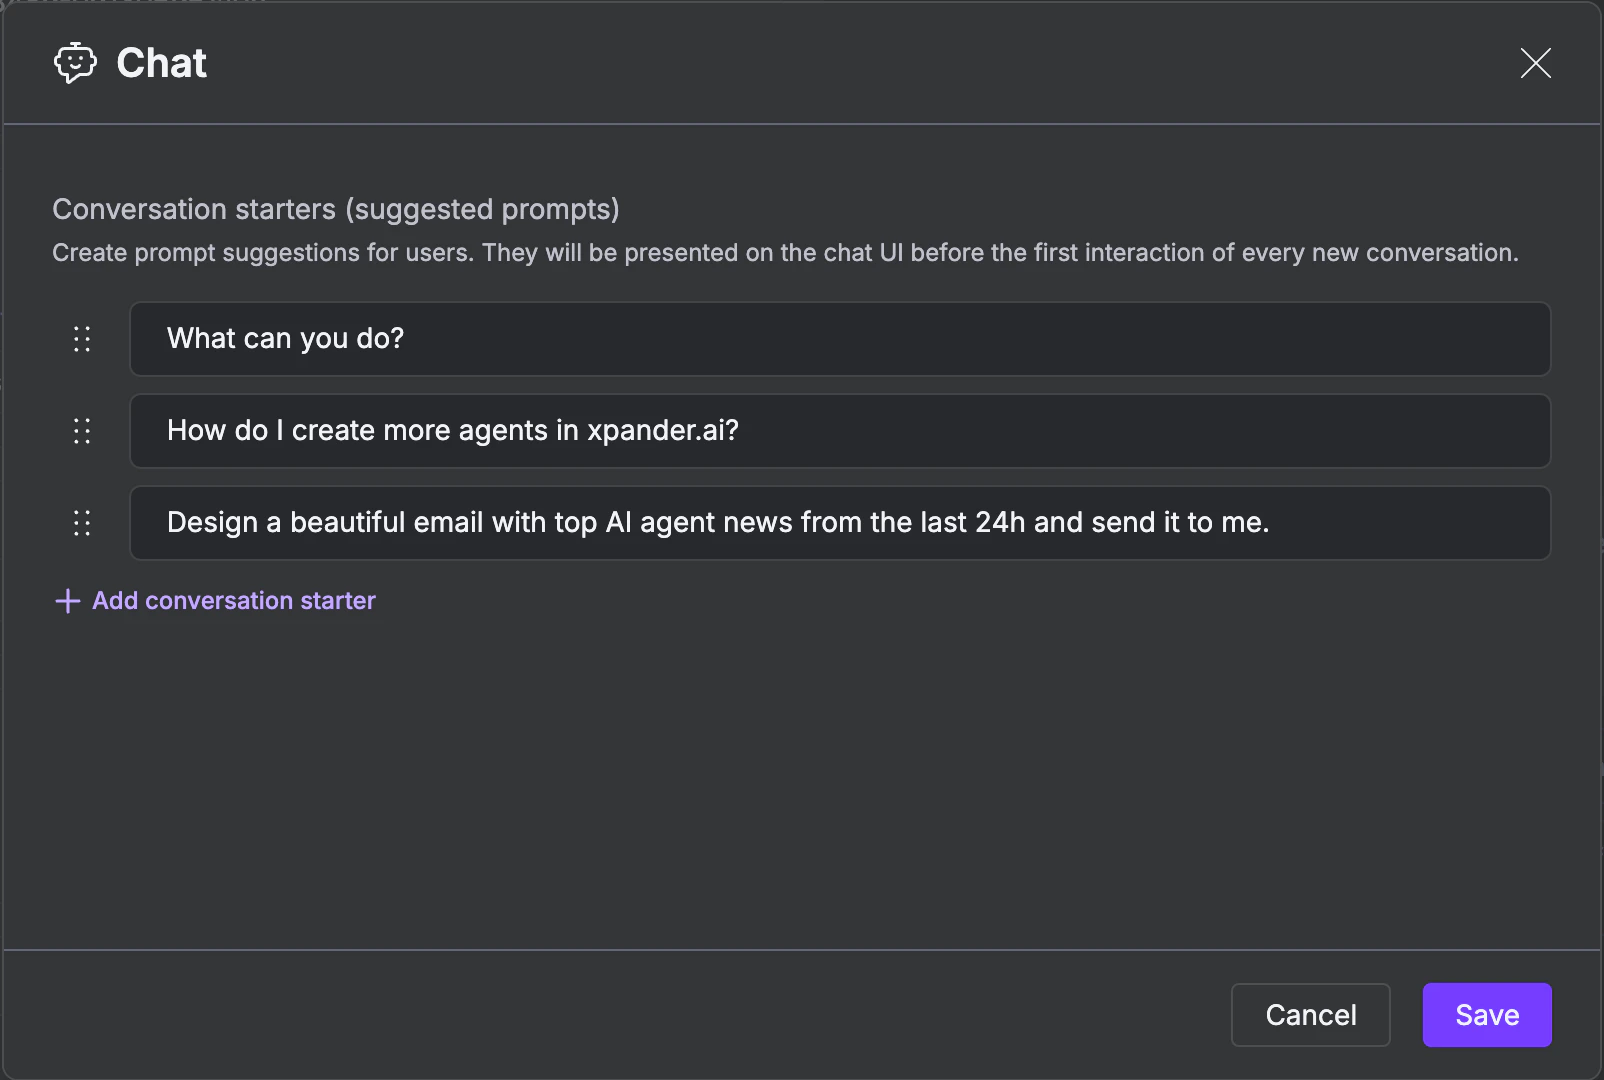
 Click Conversation starters to add prompt suggestions that appear when a user opens the chat for the first time. Add, edit, or remove starters, then click Save.
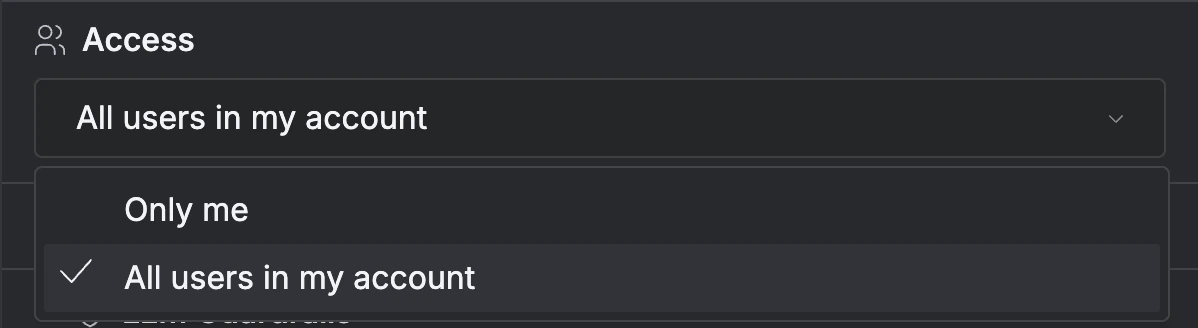
 Only users set in the **Access** setting (in the **General** tab) can access this link. Set it to **Only me** for private use or **All users in my account** to share with your team. Supports platform authentication (Xpander built-in) or SSO (SAML, OAuth 2.0 with Okta, Auth0, Azure AD).
 ### Slack
Connect your agent as a Slack bot that users can DM or @mention in channels.
See [Slack](/guides/deploy/slack) for the full setup flow, file processing capabilities, auto-engage rules, and conversation starters.
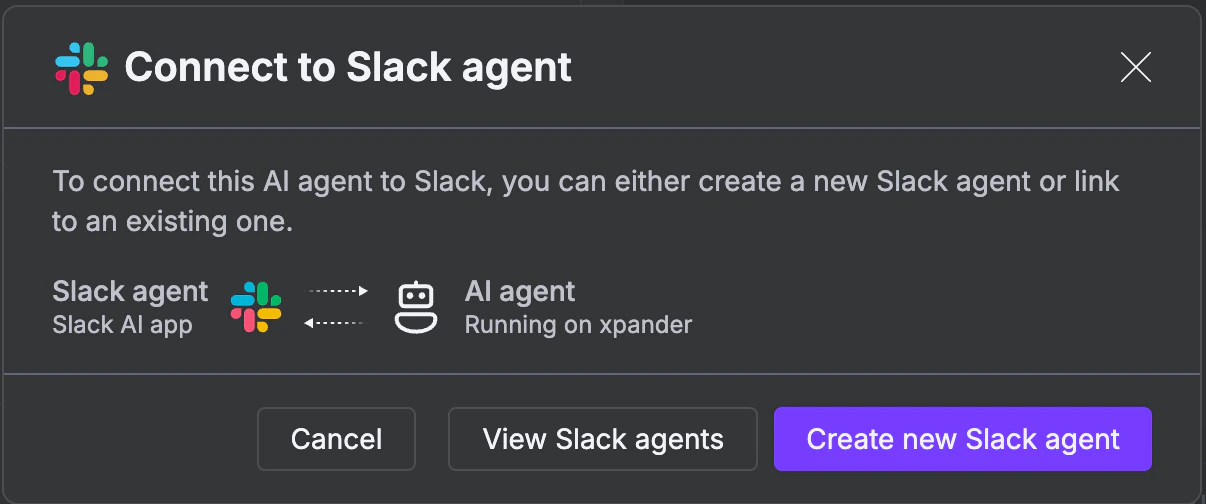
In the Channels tab, click Connect to Slack agent. A dialog opens letting you create a new Slack agent or link to an existing one.
Click Create new Slack agent.
### Slack
Connect your agent as a Slack bot that users can DM or @mention in channels.
See [Slack](/guides/deploy/slack) for the full setup flow, file processing capabilities, auto-engage rules, and conversation starters.
In the Channels tab, click Connect to Slack agent. A dialog opens letting you create a new Slack agent or link to an existing one.
Click Create new Slack agent.
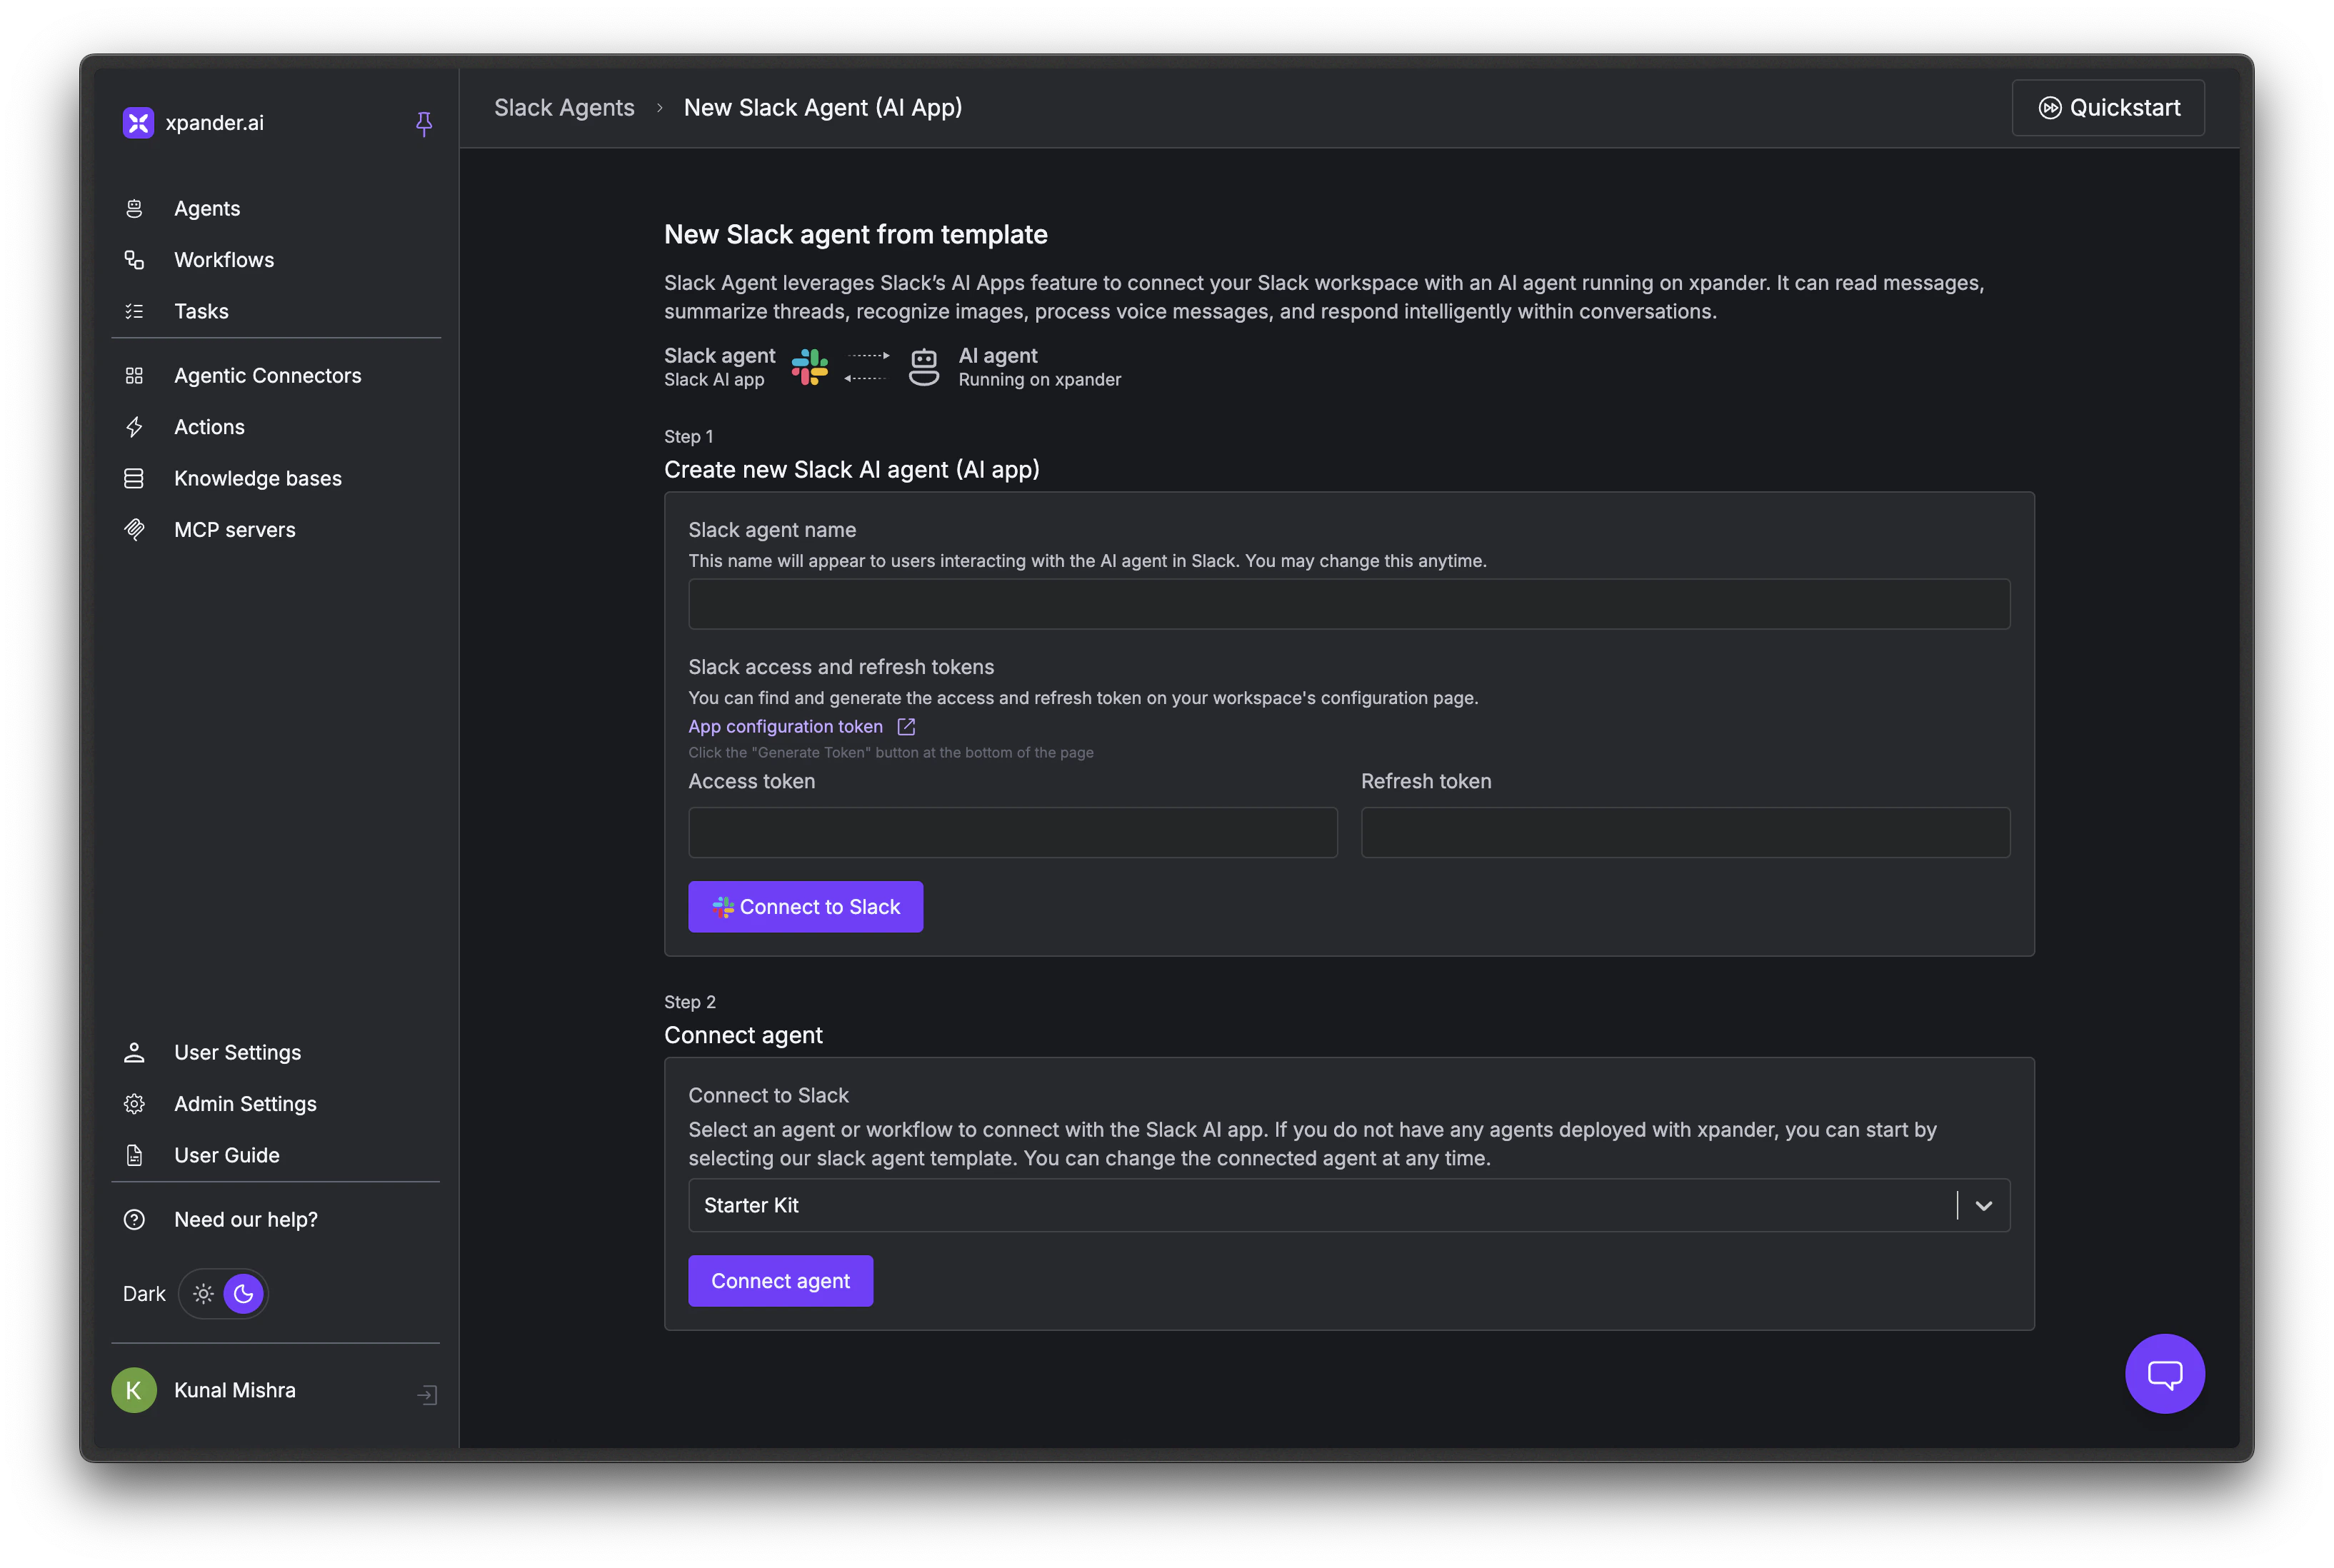
 You'll need:
* A name for your Slack bot
* Access tokens and Refresh tokens (See next step)
You'll need:
* A name for your Slack bot
* Access tokens and Refresh tokens (See next step)
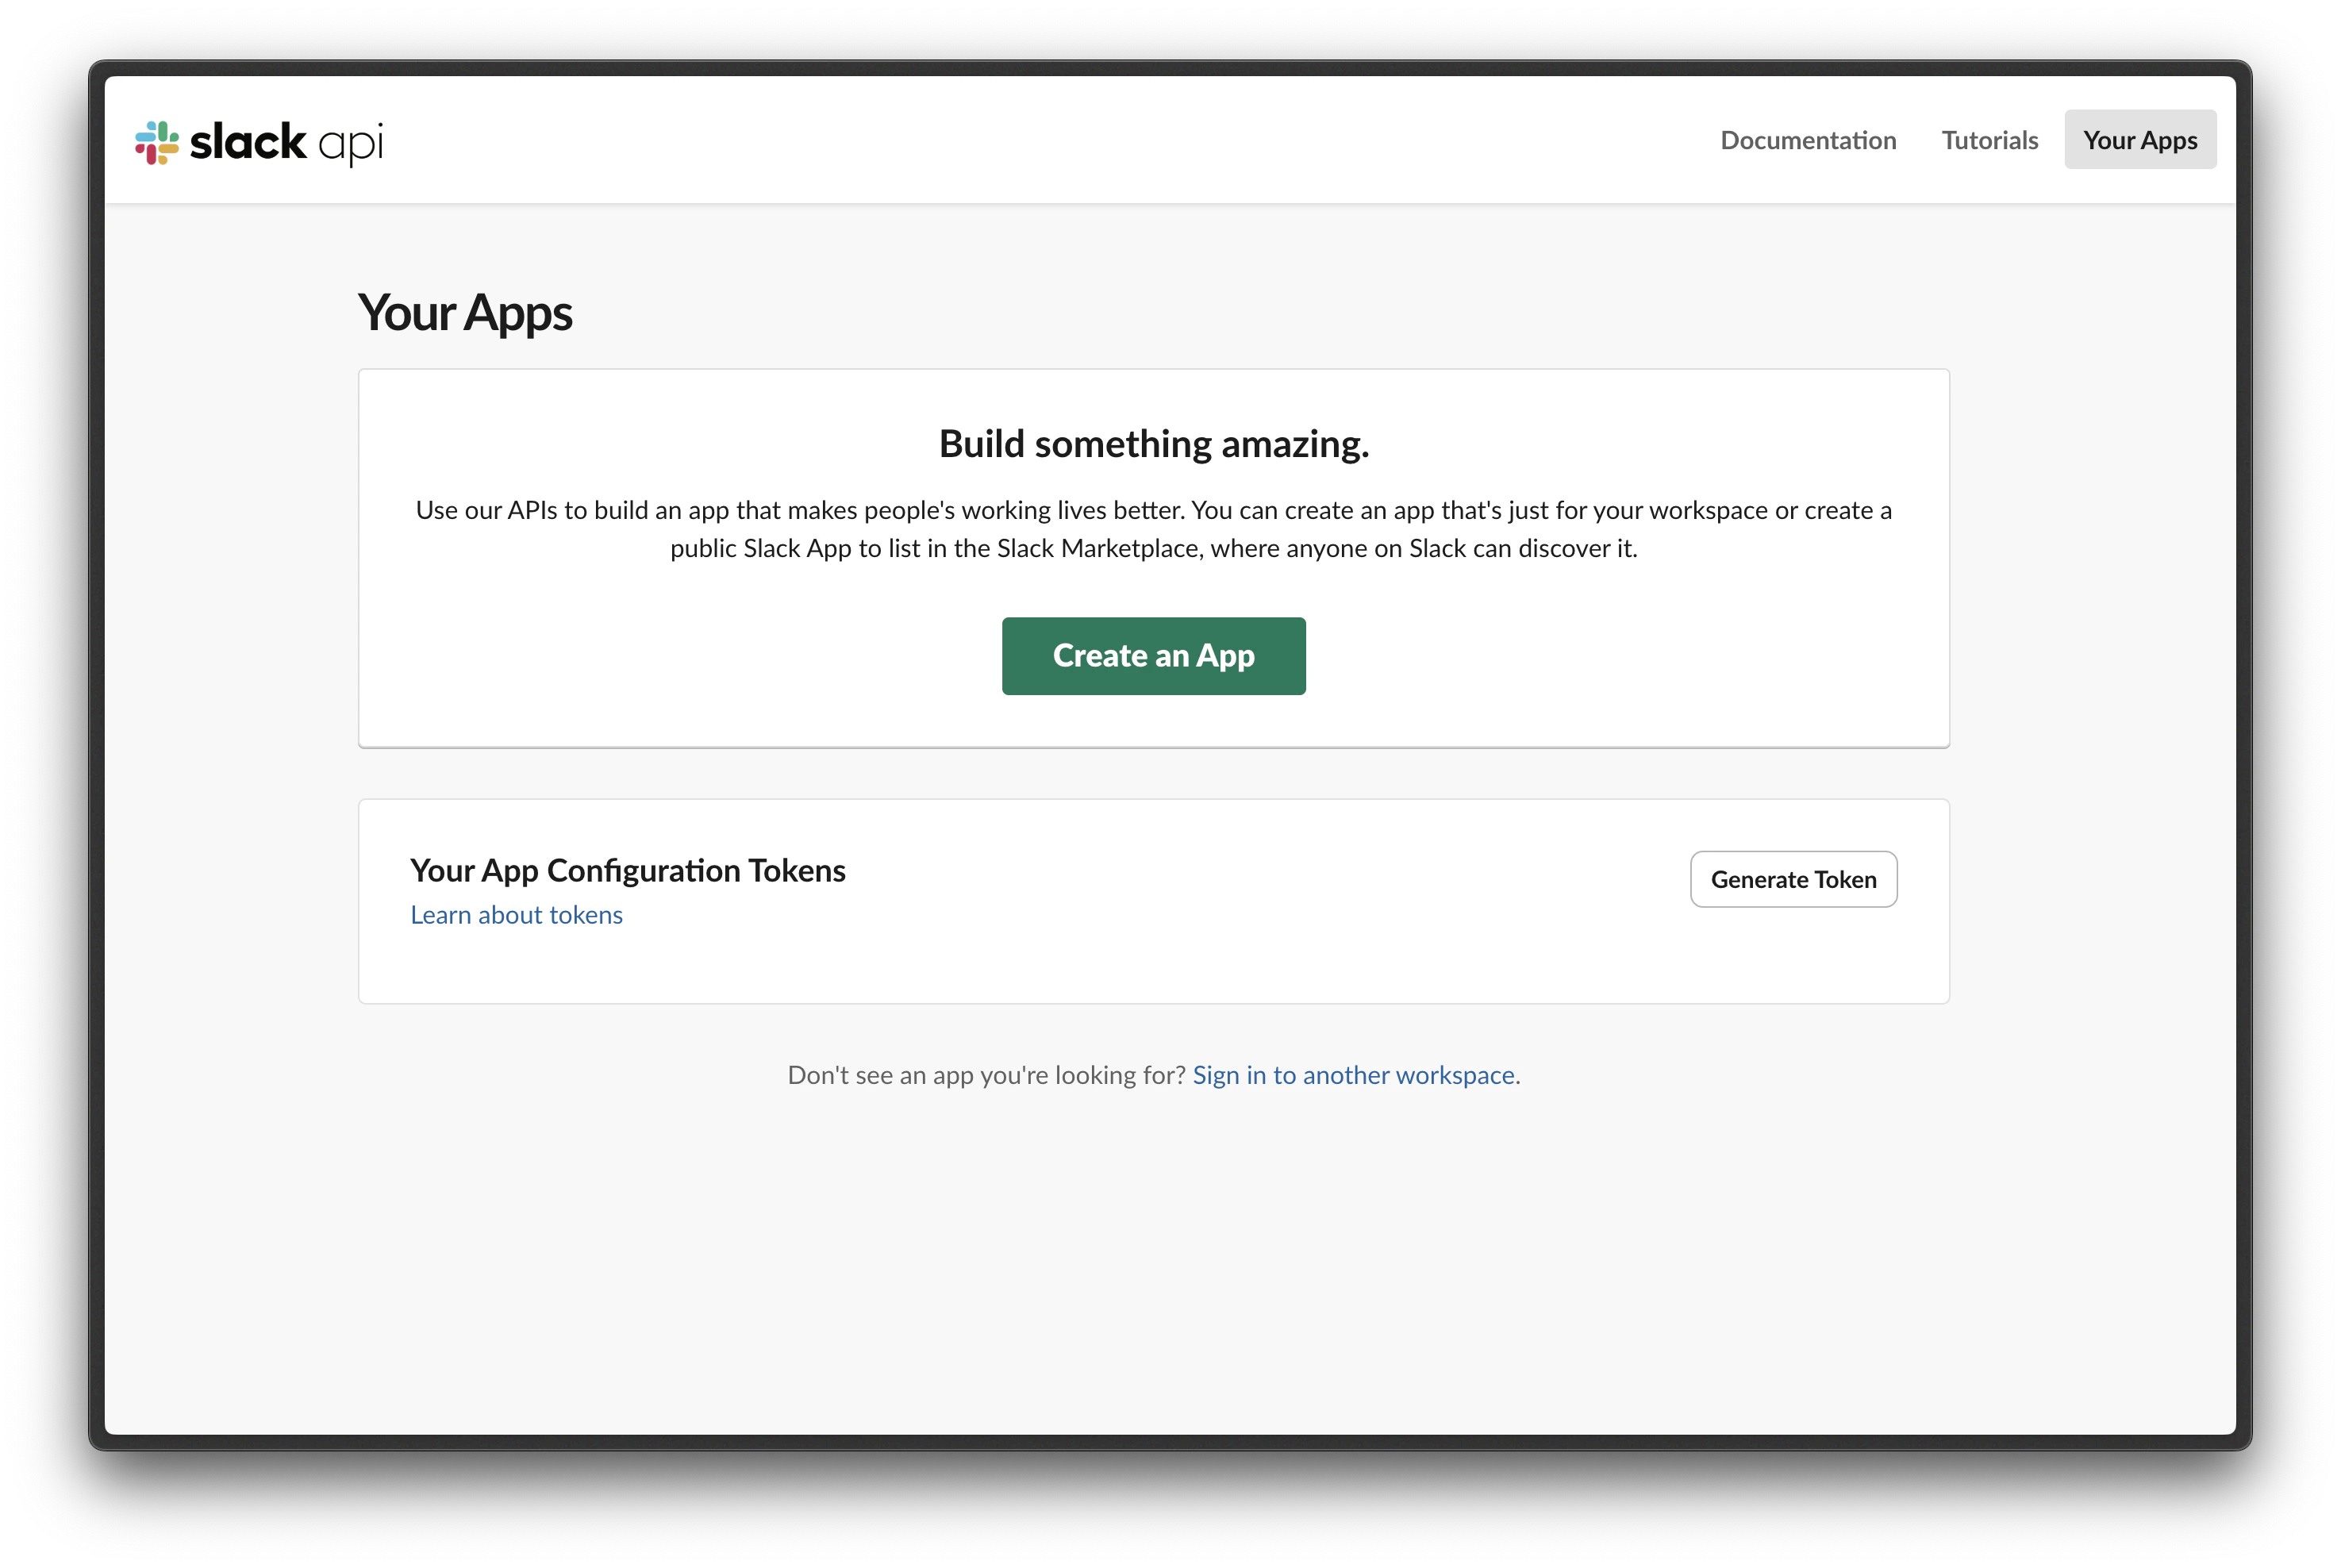
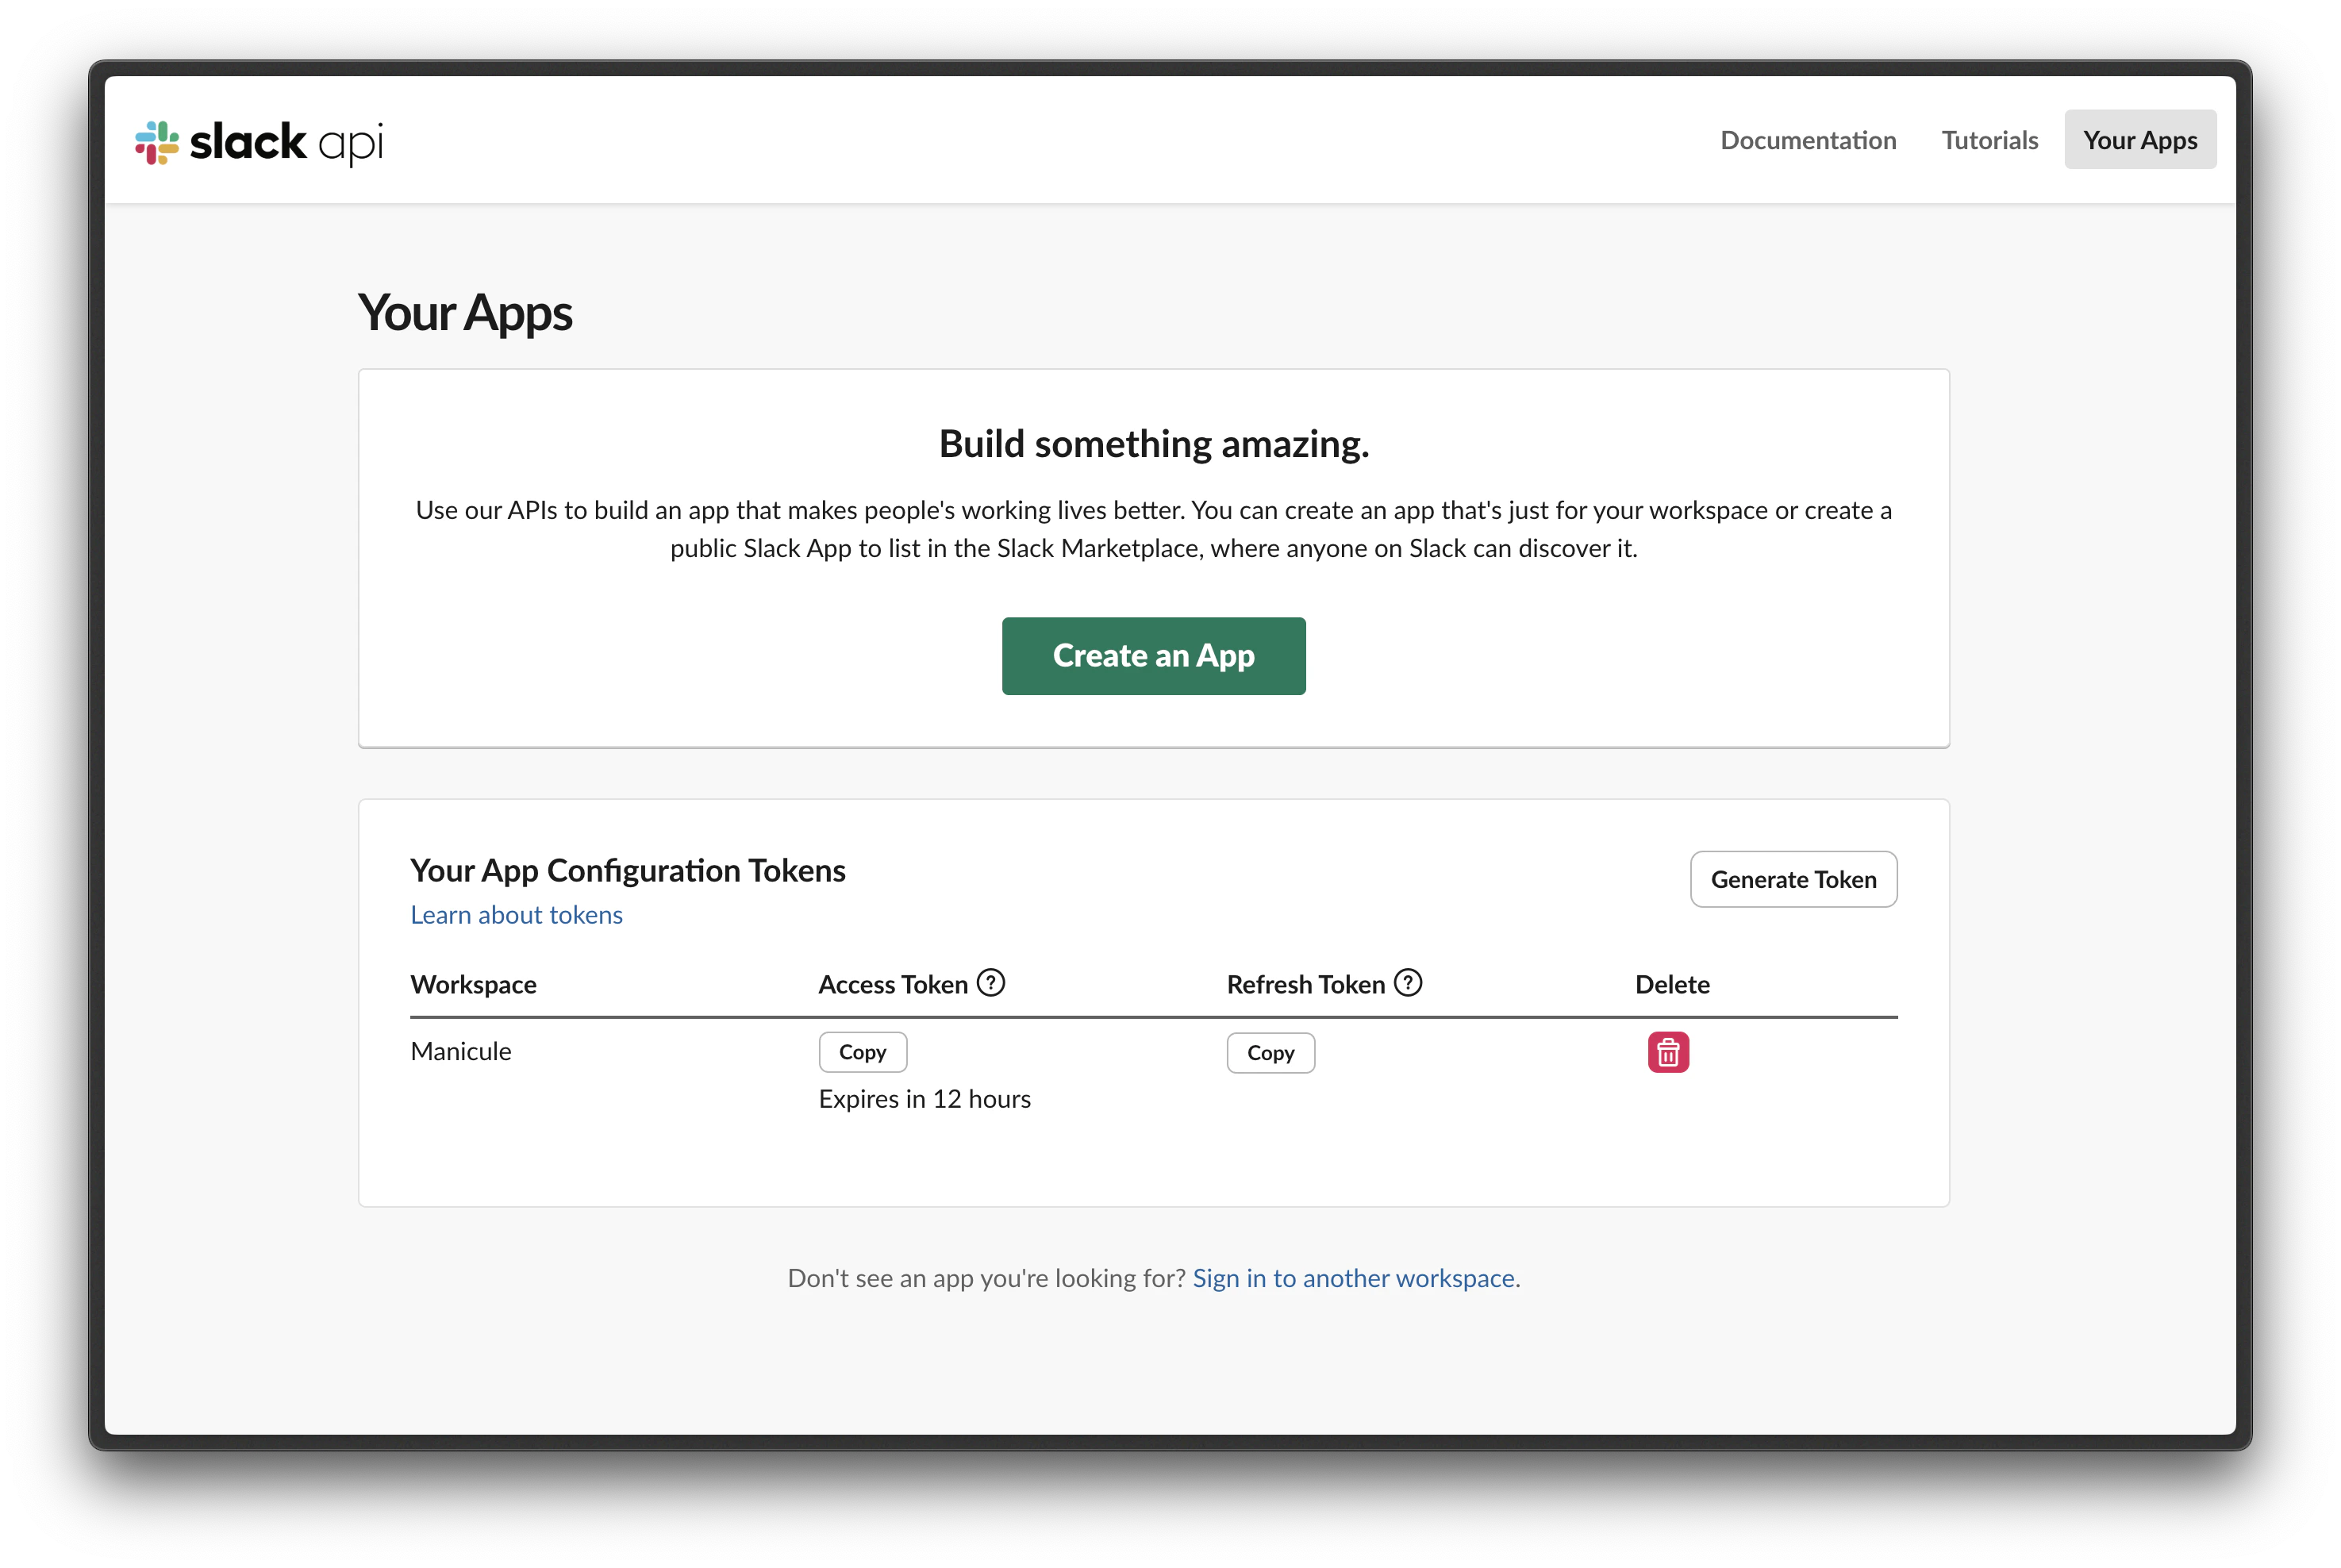
 Go to [api.slack.com/apps](https://api.slack.com/apps). Under **Your App Configuration Tokens**, click Generate Token.
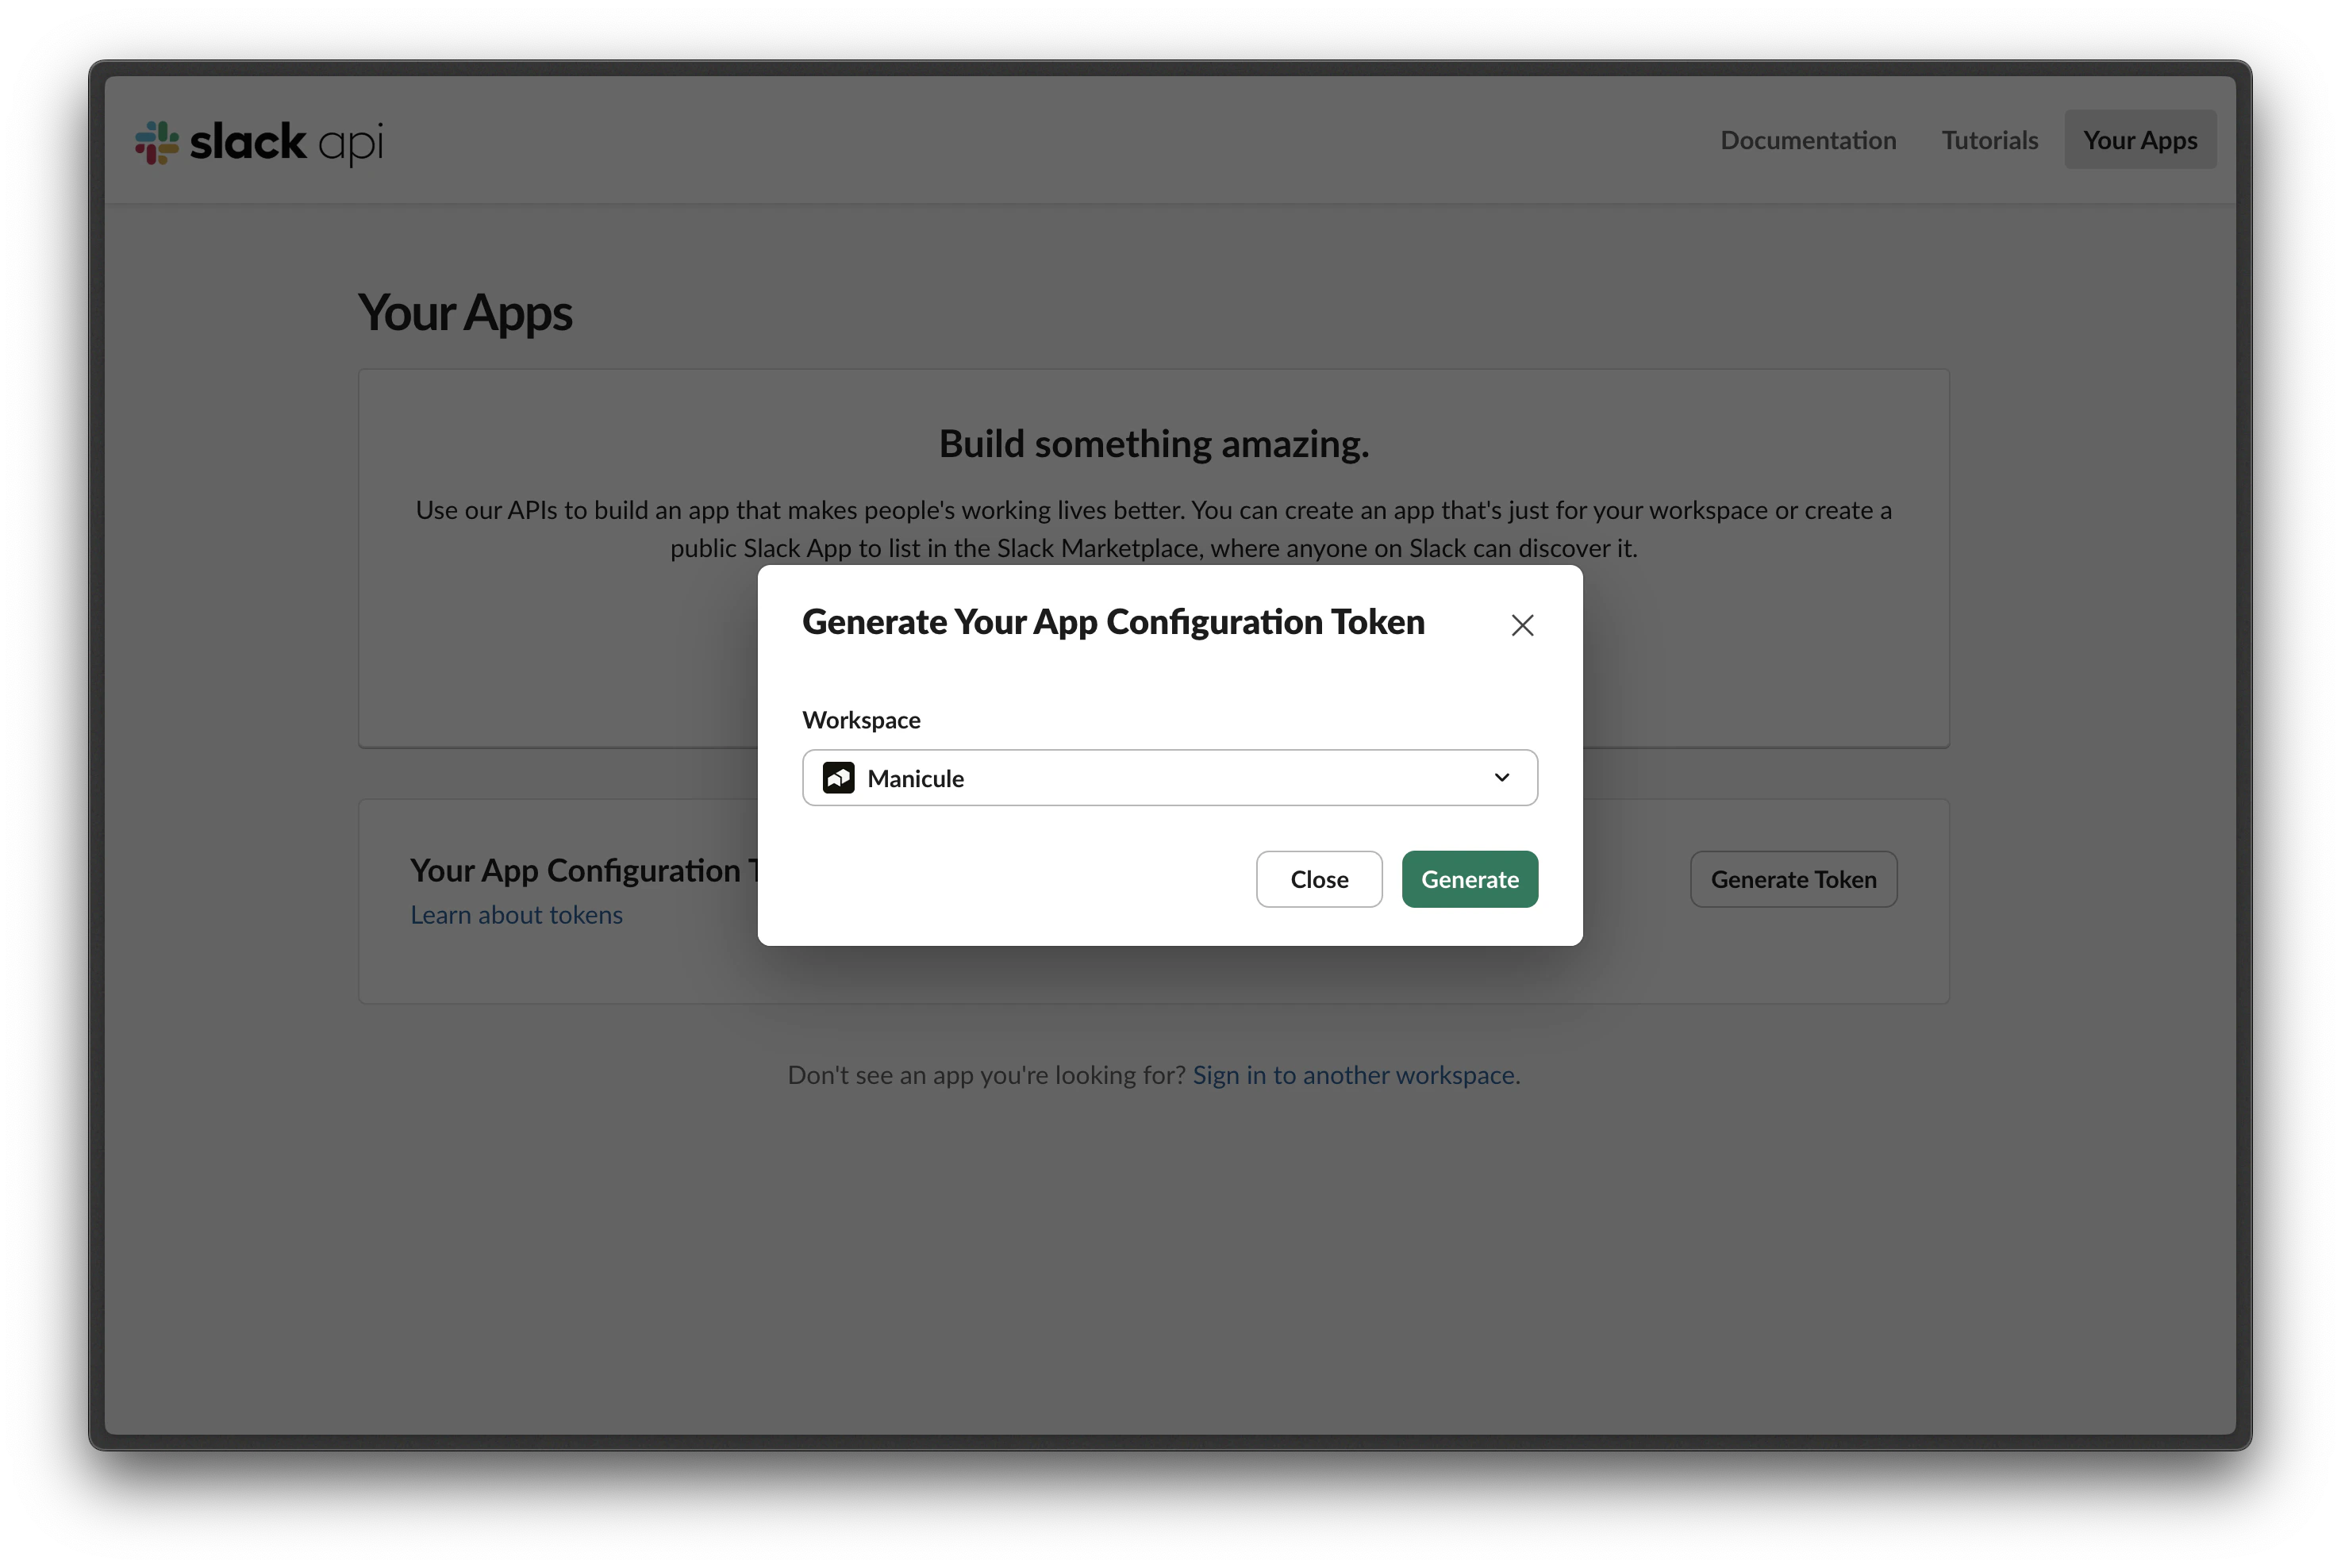
 In the dialog, select the Slack workspace you want your agent to work in from the dropdown and click Generate.
Each Slack workspace needs its own Xpander Slack agent, but you can connect a single Xpander agent to multiple Slack agents across workspaces.
In the dialog, select the Slack workspace you want your agent to work in from the dropdown and click Generate.
Each Slack workspace needs its own Xpander Slack agent, but you can connect a single Xpander agent to multiple Slack agents across workspaces.
 Once generated, you'll see your **Access Token** and **Refresh Token** with Copy buttons. Copy both.
 Back on the Xpander setup page, enter a **Slack agent name**, paste the **Access Token** and **Refresh Token**, then click Connect to Slack.
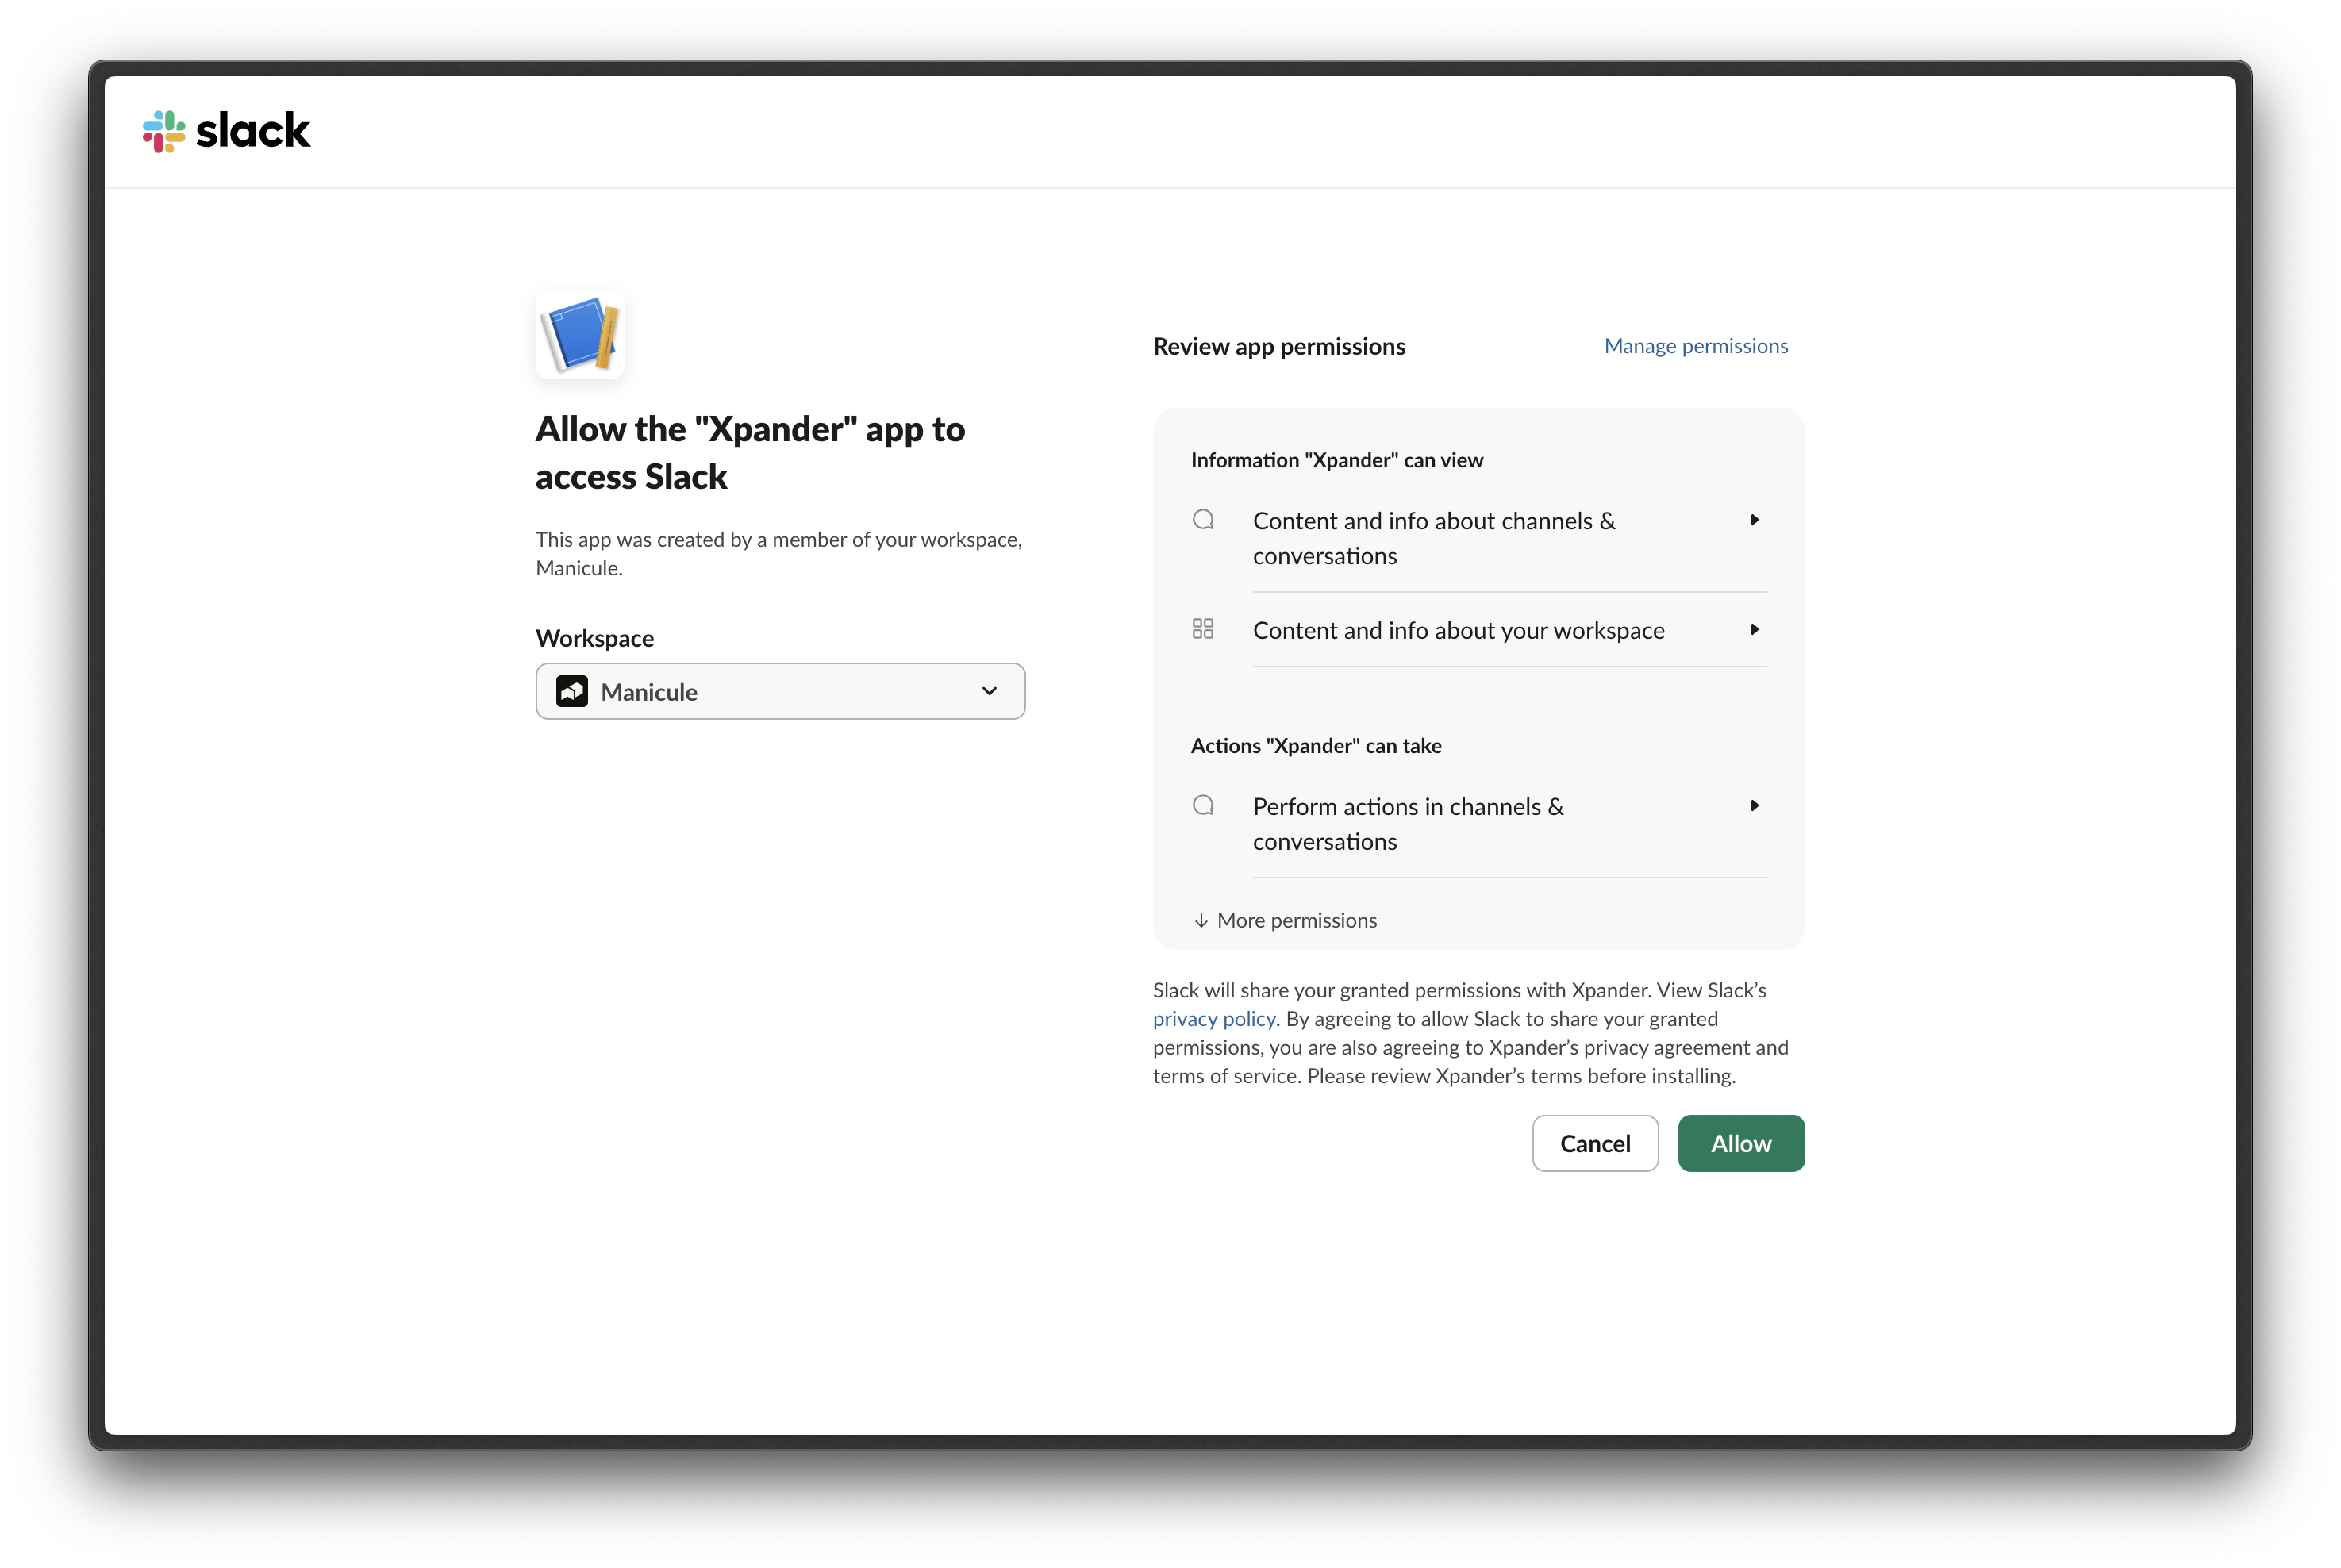
Slack will prompt you to review permissions for the Xpander app. Click Allow.
Back on the Xpander setup page, enter a **Slack agent name**, paste the **Access Token** and **Refresh Token**, then click Connect to Slack.
Slack will prompt you to review permissions for the Xpander app. Click Allow.
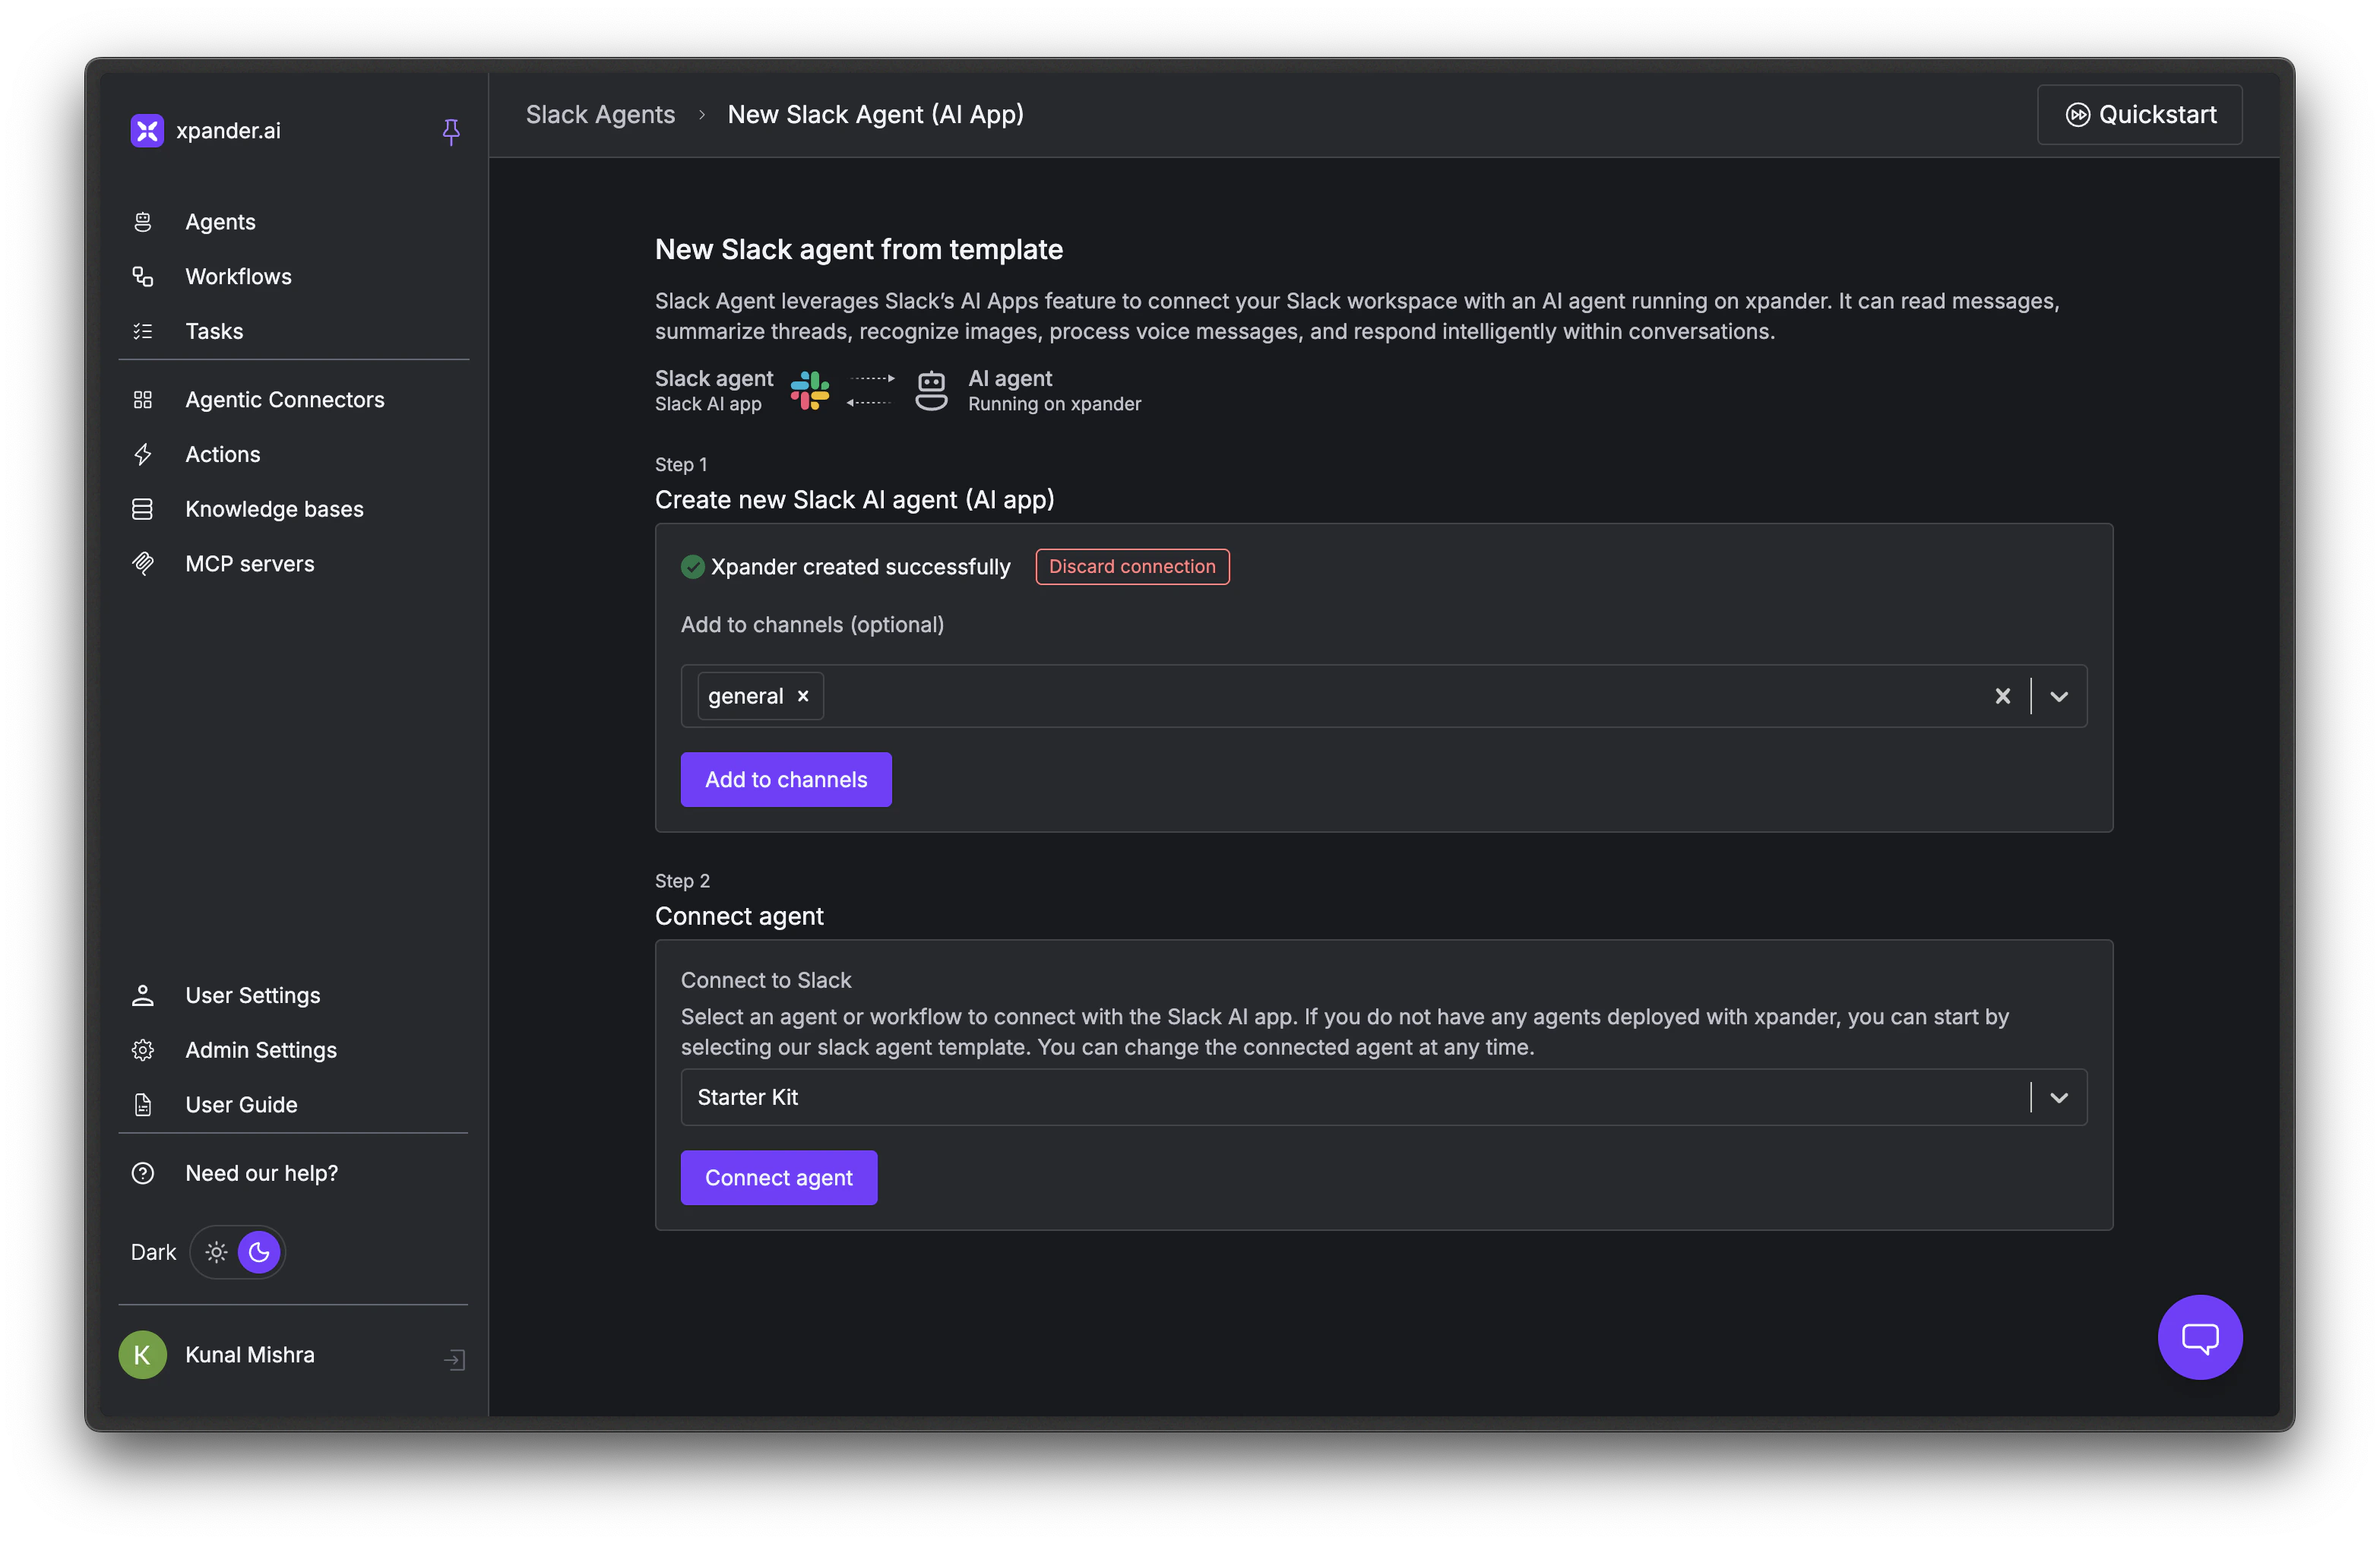
 Once connected, you'll see "Xpander created successfully". Add the Slack channels the bot should be active in and click Add to channels. Then in the **Connect agent** section below, select the Xpander agent (or workflow) to connect and click Connect agent.
 Back in the Agent Studio, click Publish to make the agent live in Slack.
To manage, customize, or delete Slack agents after setup, go to the [Slack Agents page](https://app.xpander.ai/slack_agents/). From there you can change the connected Xpander agent, configure capabilities (OCR, audio transcription), set auto-engage rules, or delete the Slack agent entirely to revoke access.
### Task (Scheduled)
Run your agent on a recurring schedule. Use this for daily reports, periodic data syncs, monitoring checks, or other automated work.
See [Scheduled Tasks](/guides/deploy/scheduled-tasks) for cron expressions, custom schedules, run-as-user context, and monitoring scheduled runs.
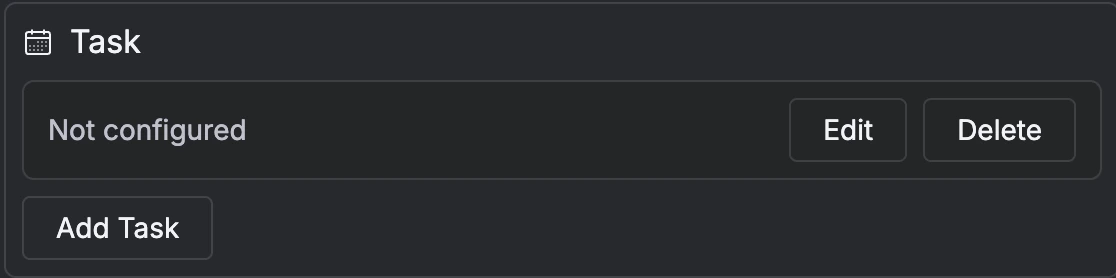
Open the **Task** section in the Channels tab and click Add Task.
Back in the Agent Studio, click Publish to make the agent live in Slack.
To manage, customize, or delete Slack agents after setup, go to the [Slack Agents page](https://app.xpander.ai/slack_agents/). From there you can change the connected Xpander agent, configure capabilities (OCR, audio transcription), set auto-engage rules, or delete the Slack agent entirely to revoke access.
### Task (Scheduled)
Run your agent on a recurring schedule. Use this for daily reports, periodic data syncs, monitoring checks, or other automated work.
See [Scheduled Tasks](/guides/deploy/scheduled-tasks) for cron expressions, custom schedules, run-as-user context, and monitoring scheduled runs.
Open the **Task** section in the Channels tab and click Add Task.
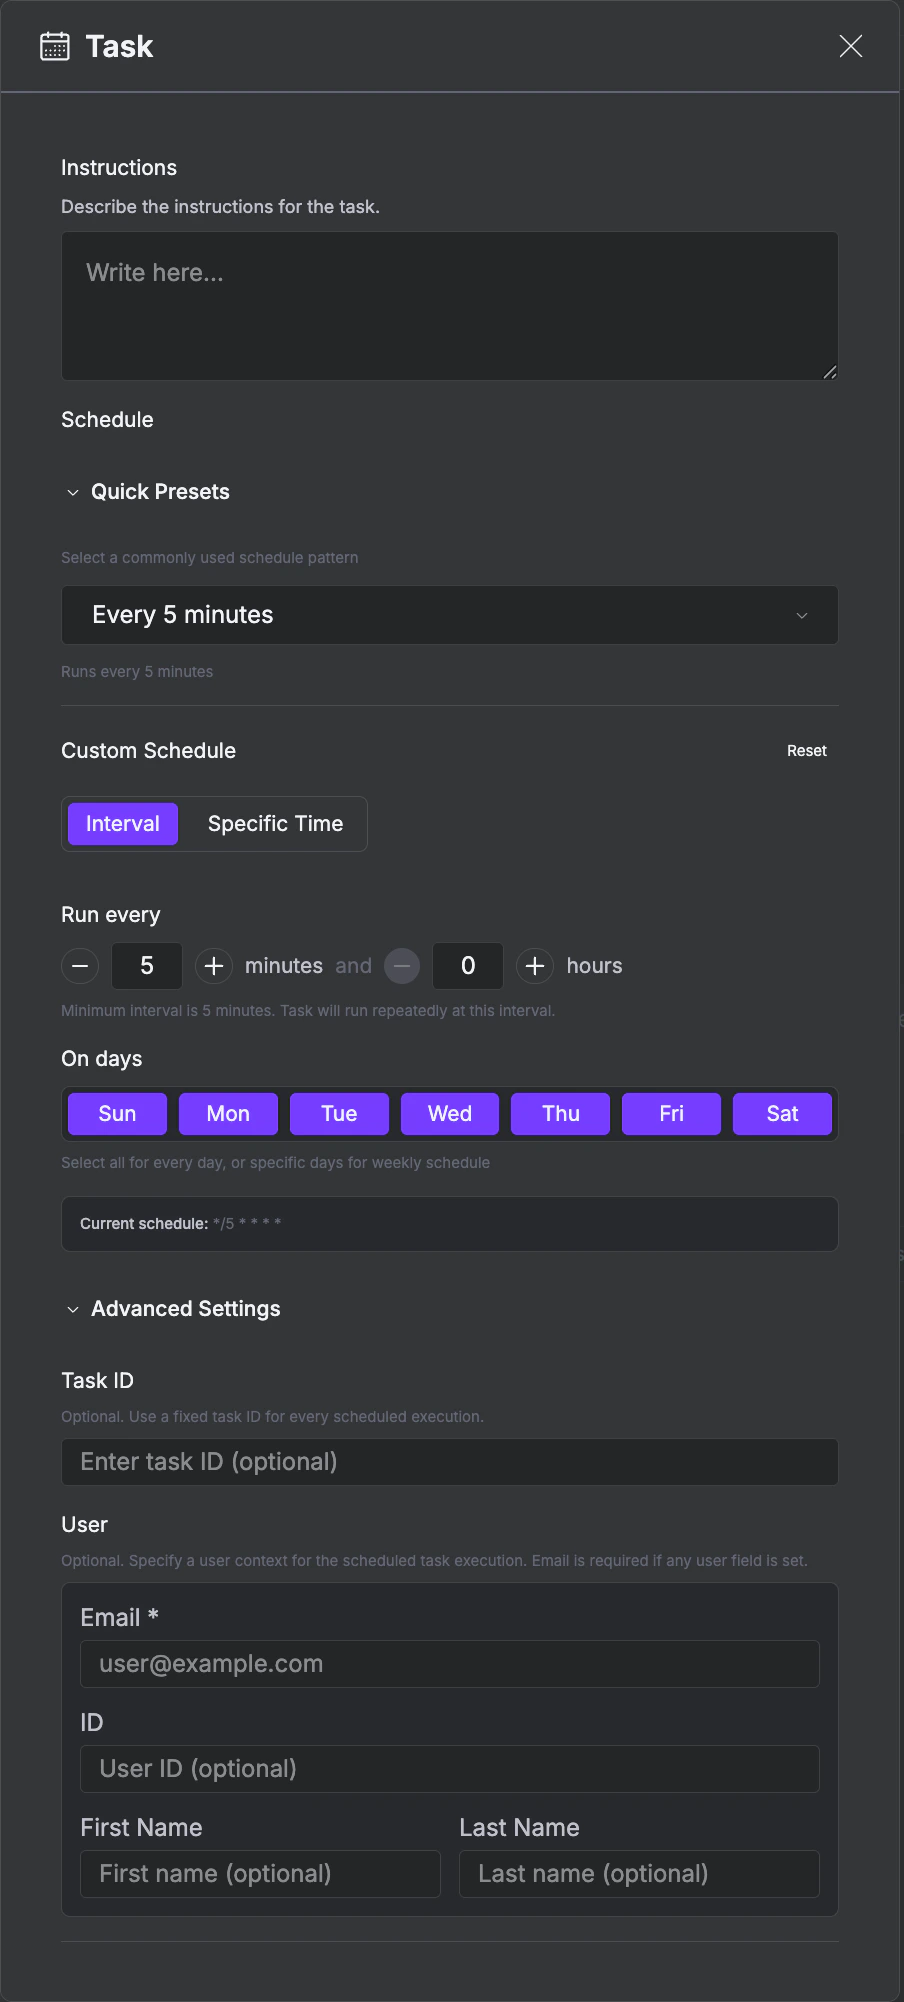
 Fill in the task configuration:
* **Instructions**: Describe what the agent should do on each scheduled run
* **Schedule**: Choose a **Quick Preset** (e.g., every 5 minutes) or set a **Custom Schedule** with interval, specific time, and active days
* **User context** (under Advanced Settings): Provide an email, user ID, and name so the agent runs with a specific user identity. Without it, the agent runs as an anonymous user with no memory context.
Fill in the task configuration:
* **Instructions**: Describe what the agent should do on each scheduled run
* **Schedule**: Choose a **Quick Preset** (e.g., every 5 minutes) or set a **Custom Schedule** with interval, specific time, and active days
* **User context** (under Advanced Settings): Provide an email, user ID, and name so the agent runs with a specific user identity. Without it, the agent runs as an anonymous user with no memory context.
 ### MCP (Model Context Protocol)
Expose your agent as an MCP server so any MCP client can invoke it.
See [MCP Protocol](/guides/deploy/mcp) for client-specific configurations (Claude Desktop, Cursor, VS Code, ChatGPT), available MCP tools, and OAuth flow.
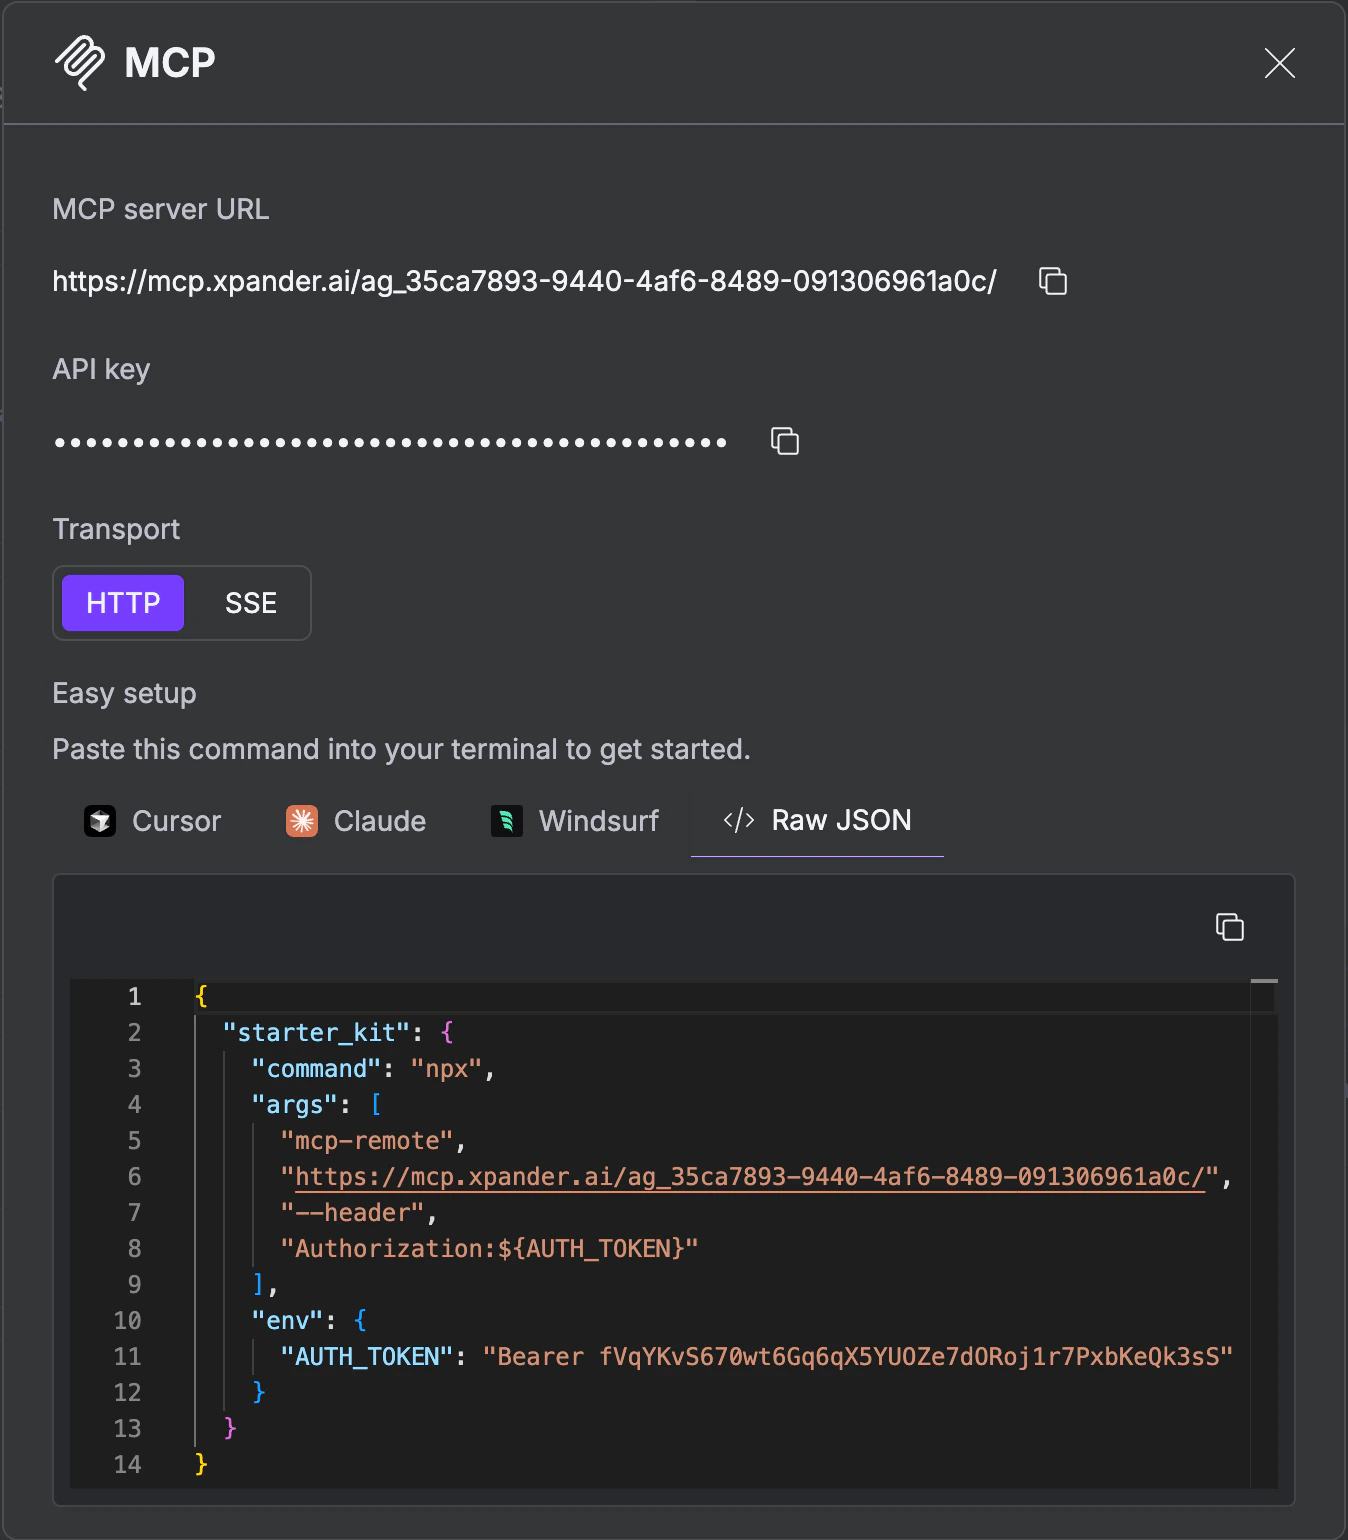
Toggle MCP on in the Channels tab, then click Details. The modal shows your **MCP server URL**, **API key**, and **transport** options (HTTP or SSE).
The modal provides ready-to-paste configuration for **Cursor**, **Claude**, **Windsurf**, or **Raw JSON**. Copy and paste it into your MCP client's config file.
### MCP (Model Context Protocol)
Expose your agent as an MCP server so any MCP client can invoke it.
See [MCP Protocol](/guides/deploy/mcp) for client-specific configurations (Claude Desktop, Cursor, VS Code, ChatGPT), available MCP tools, and OAuth flow.
Toggle MCP on in the Channels tab, then click Details. The modal shows your **MCP server URL**, **API key**, and **transport** options (HTTP or SSE).
The modal provides ready-to-paste configuration for **Cursor**, **Claude**, **Windsurf**, or **Raw JSON**. Copy and paste it into your MCP client's config file.
 ### A2A (Agent-to-Agent)
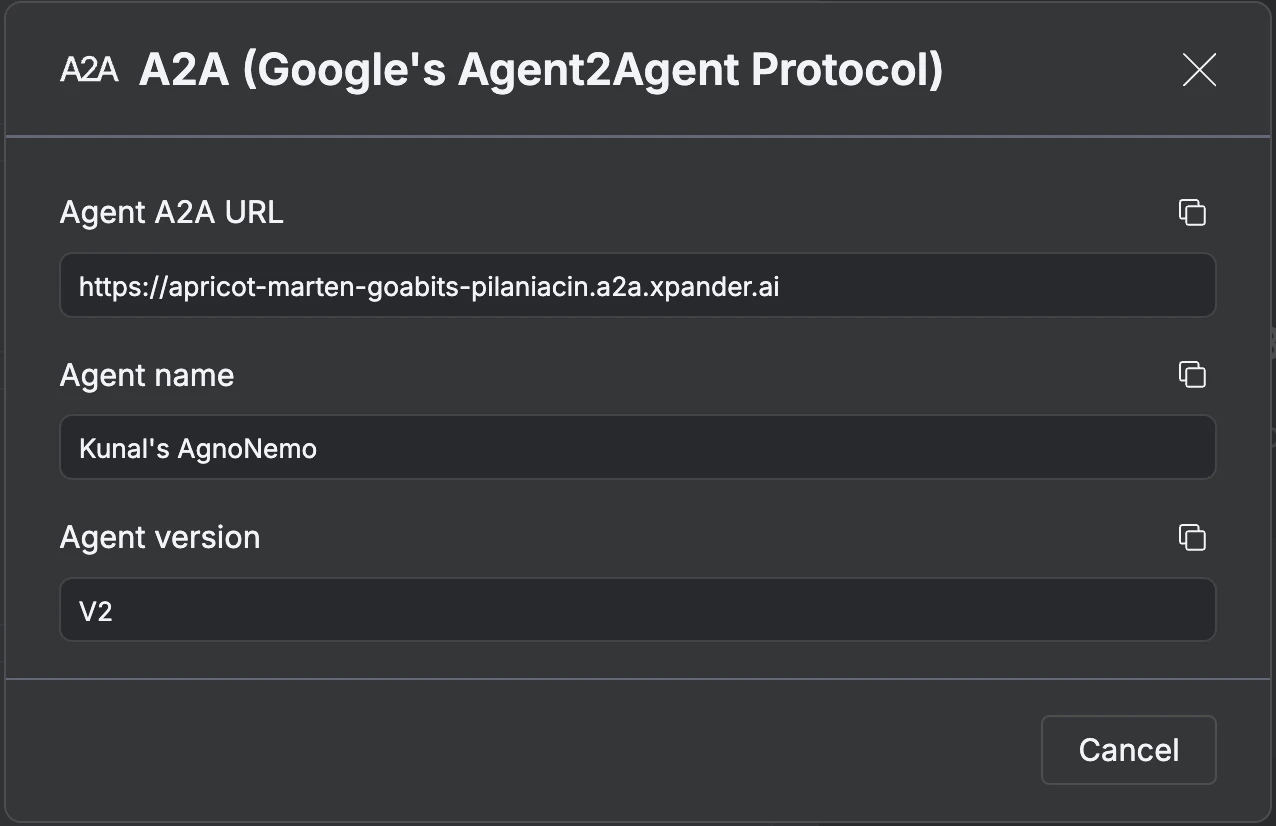
 Let other agents (inside or outside your organization) discover and invoke this agent via Google's Agent2Agent protocol.
Open the **A2A** section in the Channels tab and enable it.
Click Agent card to see your agent's A2A identity, including the Agent A2A URL, name and version.
Let other agents (inside or outside your organization) discover and invoke this agent via Google's Agent2Agent protocol.
Open the **A2A** section in the Channels tab and enable it.
Click Agent card to see your agent's A2A identity, including the Agent A2A URL, name and version.
 Click Manage API keys to open the A2A key manager.
Click Assign API Keys to generate credentials that external agents use to authenticate.
Click Manage API keys to open the A2A key manager.
Click Assign API Keys to generate credentials that external agents use to authenticate.
 ### API
Call your agent programmatically via the REST API.
Click Test to open the Agent API Tester.
### API
Call your agent programmatically via the REST API.
Click Test to open the Agent API Tester.
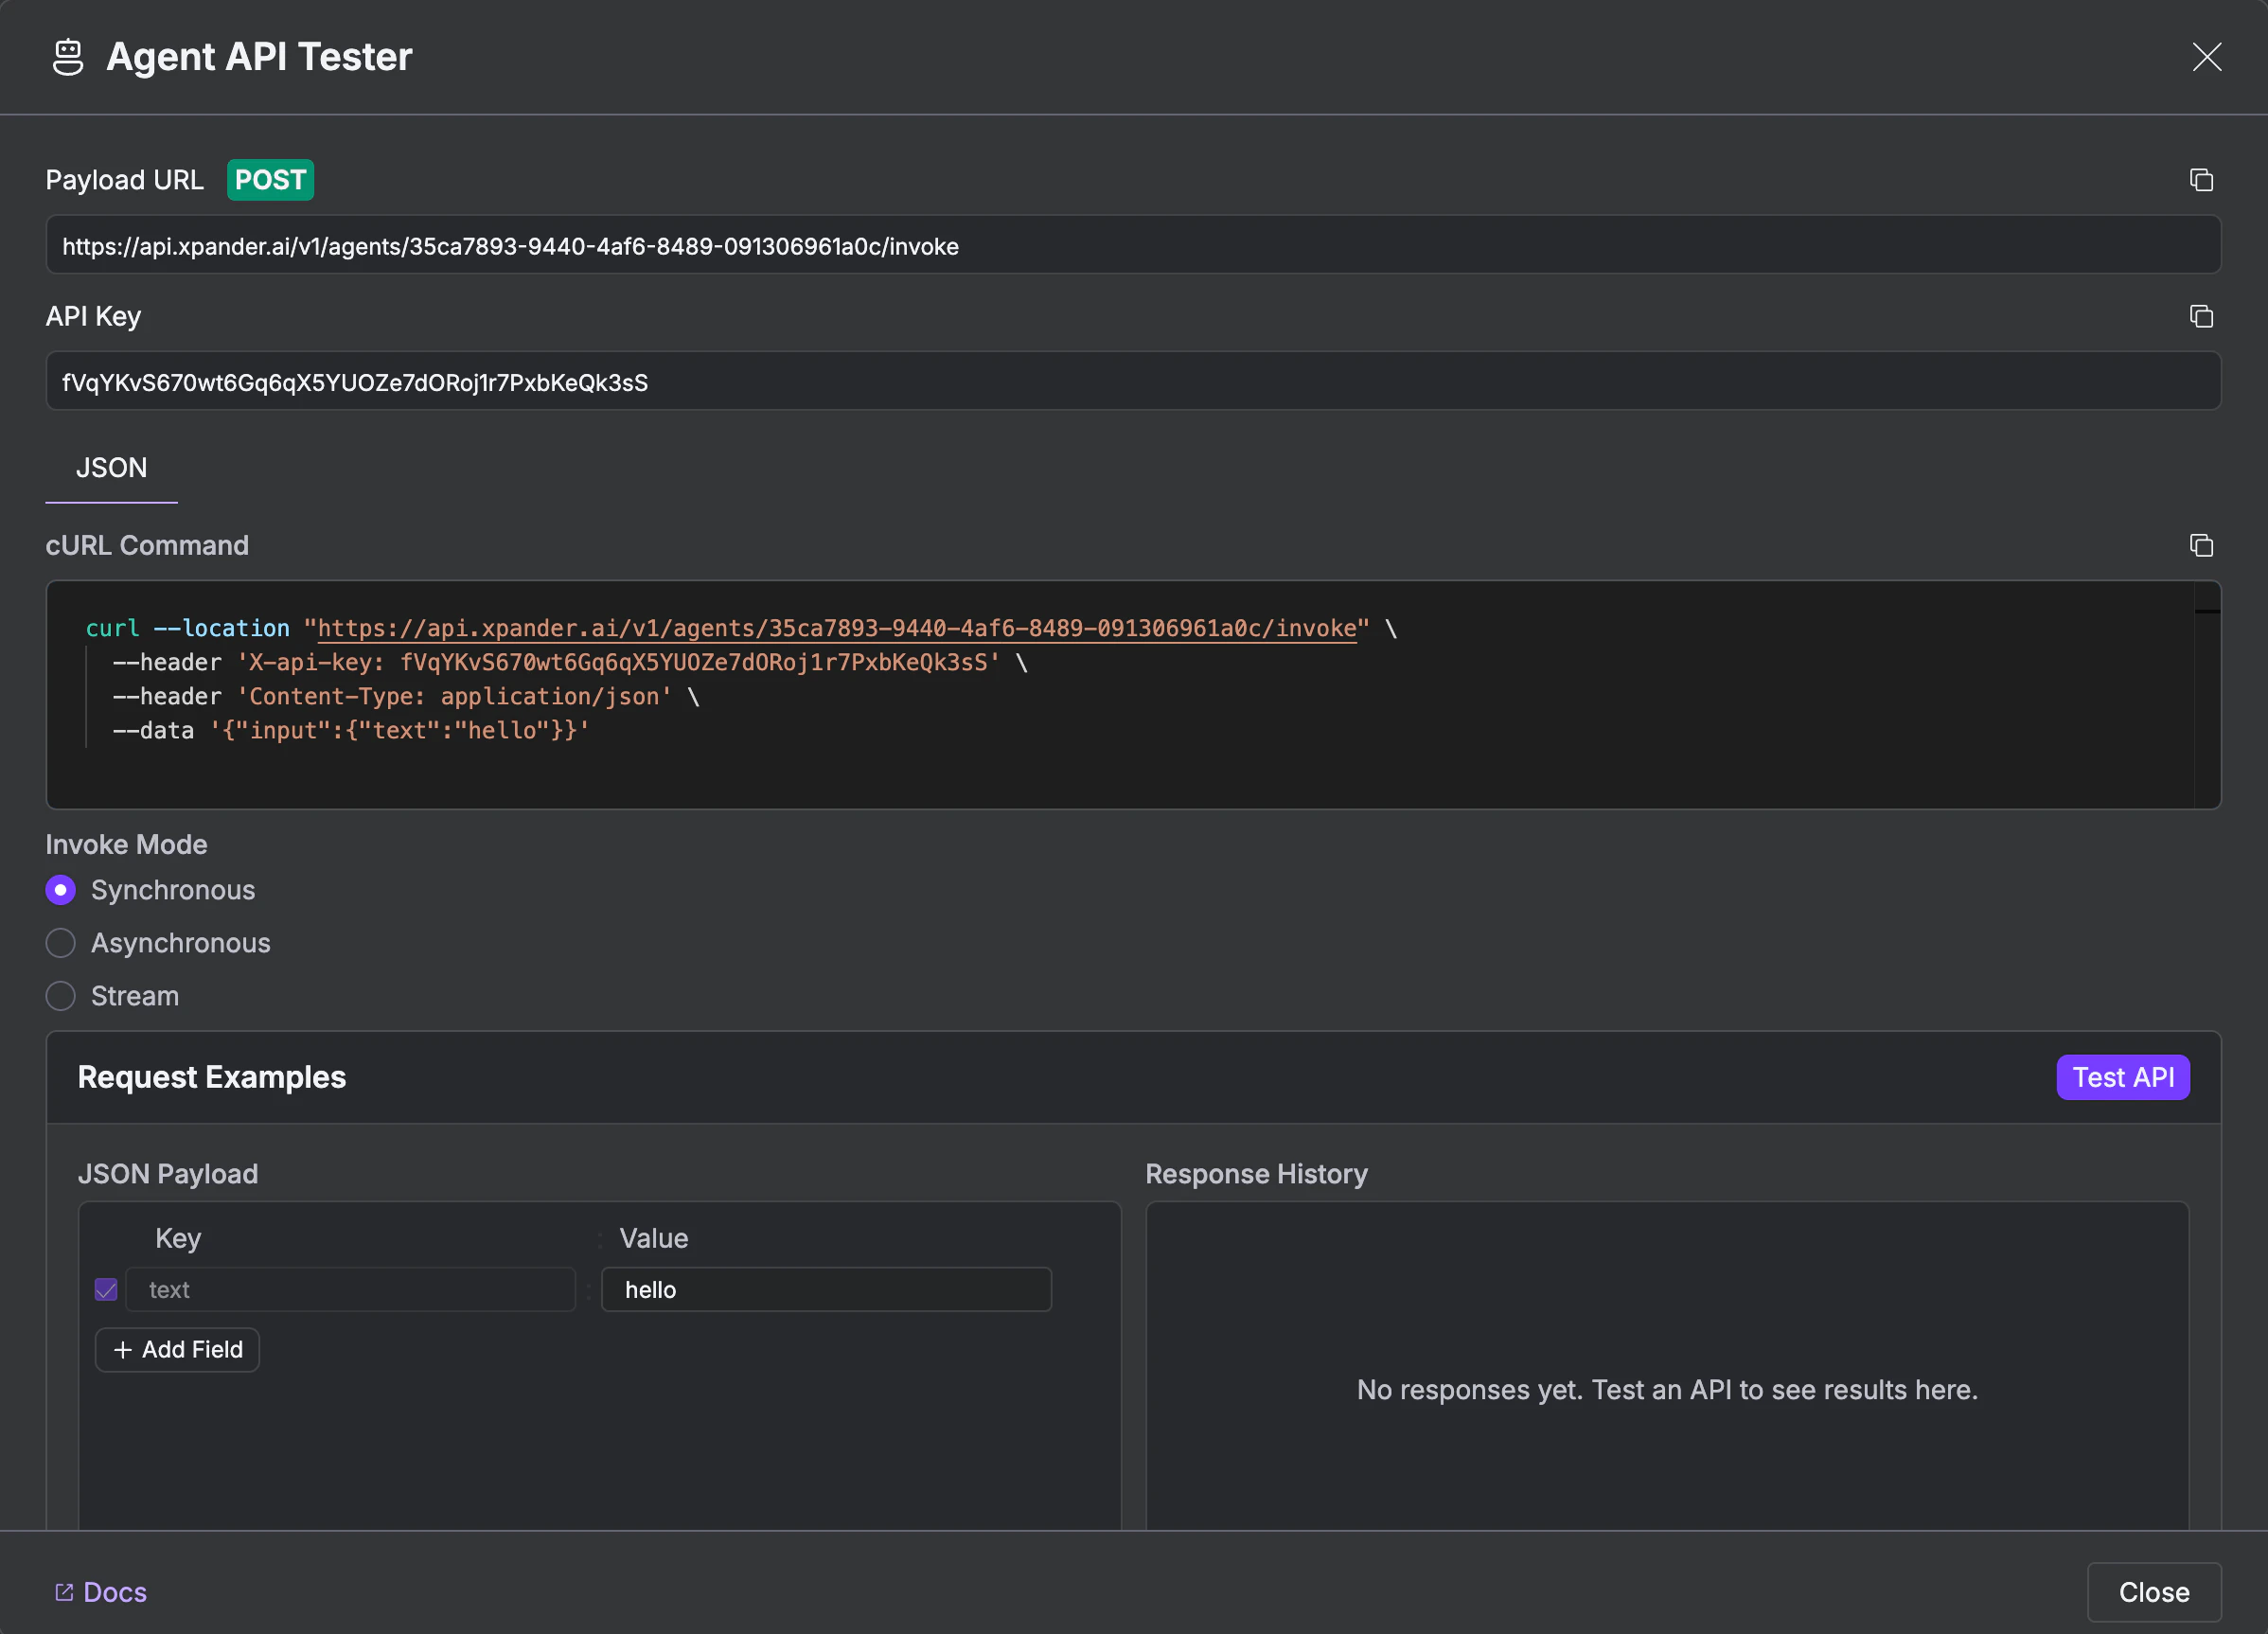 The tester shows your **Payload URL** and **API Key** at the top. Copy these for your integration. It also generates a ready-to-use **cURL command**. Choose an invocation mode:
| Method | Endpoint | When to use |
| ------------ | ------------------------------------------ | ----------------------------------------------------- |
| Synchronous | `POST /v1/agents/{agent_id}/invoke` | Simple integrations. Blocks until the agent finishes. |
| Asynchronous | `POST /v1/agents/{agent_id}/invoke/async` | Background jobs. Returns a task ID immediately. |
| Streaming | `POST /v1/agents/{agent_id}/invoke/stream` | Chat UIs. Delivers SSE events in real-time. |
All three support multimodal input (text, files, and images in the same request).
Set a JSON payload in the **Request Examples** section and click Test API. The response appears in the **Response History** panel.
### SDK
The tester shows your **Payload URL** and **API Key** at the top. Copy these for your integration. It also generates a ready-to-use **cURL command**. Choose an invocation mode:
| Method | Endpoint | When to use |
| ------------ | ------------------------------------------ | ----------------------------------------------------- |
| Synchronous | `POST /v1/agents/{agent_id}/invoke` | Simple integrations. Blocks until the agent finishes. |
| Asynchronous | `POST /v1/agents/{agent_id}/invoke/async` | Background jobs. Returns a task ID immediately. |
| Streaming | `POST /v1/agents/{agent_id}/invoke/stream` | Chat UIs. Delivers SSE events in real-time. |
All three support multimodal input (text, files, and images in the same request).
Set a JSON payload in the **Request Examples** section and click Test API. The response appears in the **Response History** panel.
### SDK
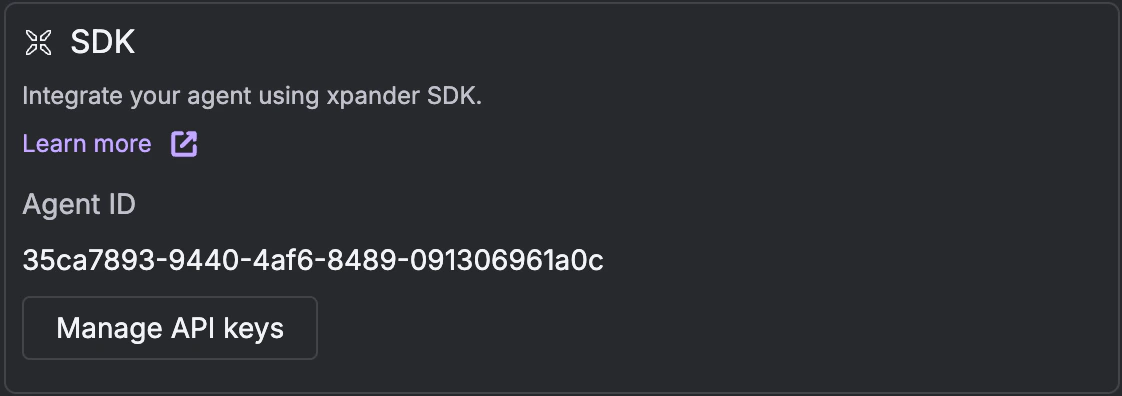 Integrate your agent into custom applications using the Xpander SDK.
Open the **SDK** section in the Channels tab. Your Agent ID is displayed there.
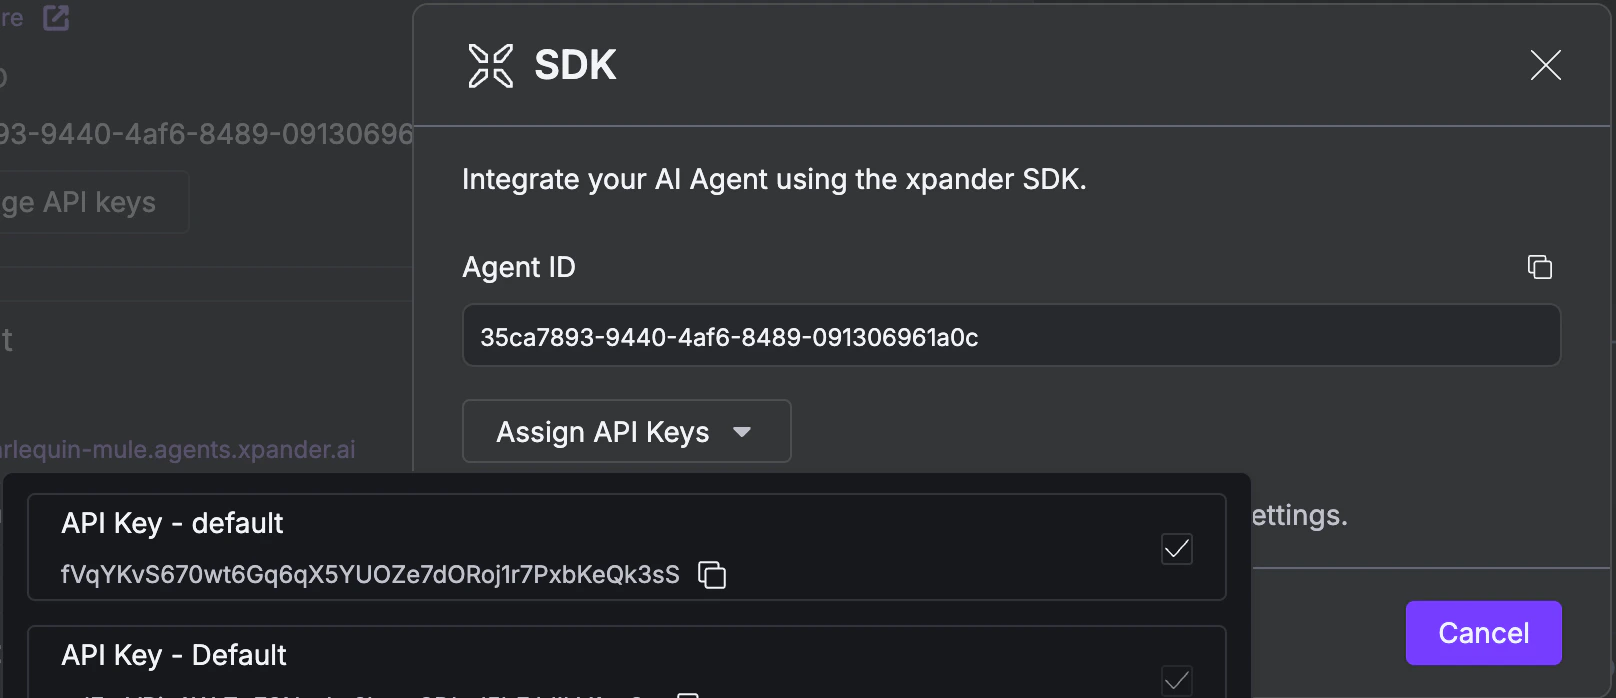
Click Manage API keys to open the SDK modal. Click Assign API Keys to generate or select a key for your application.
Integrate your agent into custom applications using the Xpander SDK.
Open the **SDK** section in the Channels tab. Your Agent ID is displayed there.
Click Manage API keys to open the SDK modal. Click Assign API Keys to generate or select a key for your application.
 Expand the Assign API Keys dropdown to reveal your key. Copy it for use in your application.
 Follow the [SDK documentation](/api-reference/backend) to integrate the agent into your app.
### Webhook
Trigger your agent from Zapier, Make, n8n, etc.
See [Webhooks](/guides/deploy/webhooks) for sync vs async modes, file uploads, response field extraction, dynamic parameter mapping, and MCP OAuth pass-through.
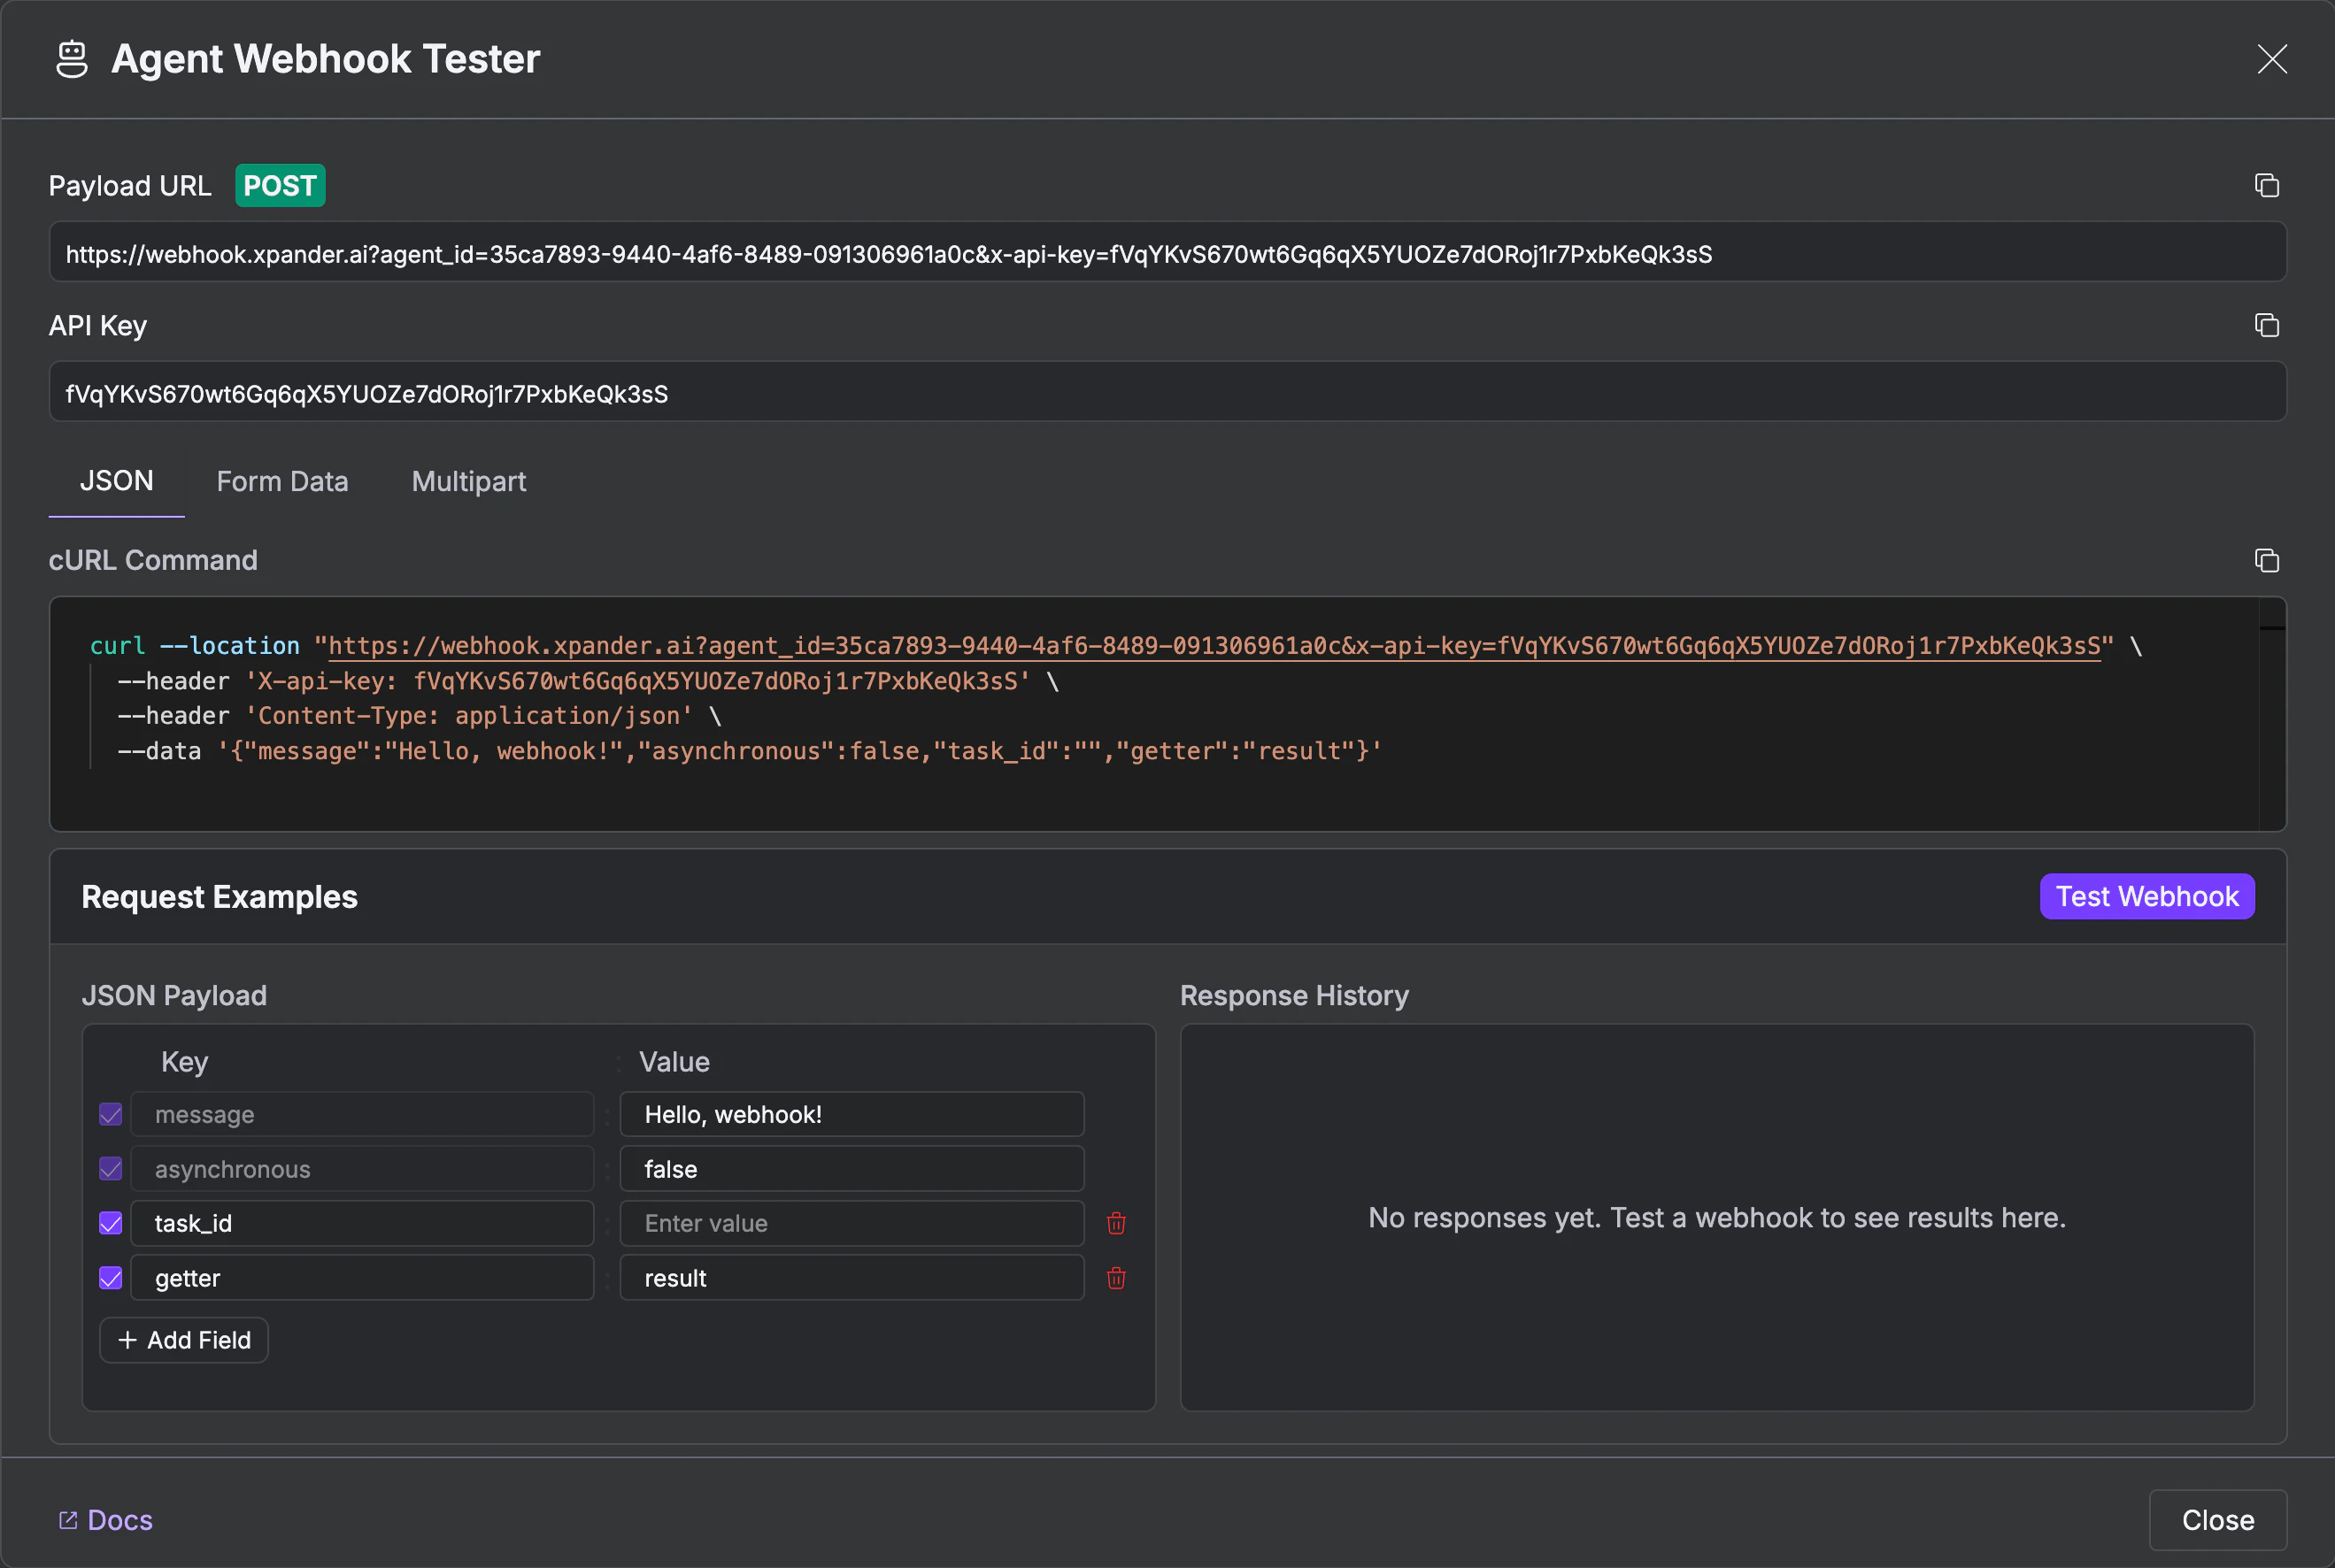
Open the **Webhook** section in the Channels tab and toggle it on. Then click Configure and test to open the Agent Webhook Tester.
The tester shows your **Payload URL** (with agent ID and API key embedded) and a ready-to-use **cURL command**. Copy these for your integration.
Key parameters you can set in the payload:
* **message**: the prompt to send to the agent
* **asynchronous**: set to `true` for async mode (returns task ID immediately)
* **task\_id**: optionally continue an existing conversation thread
* **getter**: extract a specific field from the agent's response (e.g., `result`)
Choose an input format: **JSON**, **Form Data**, or **Multipart**. Set your payload fields. Click Test Webhook to send a test request. The response appears in the **Response History** panel.
Follow the [SDK documentation](/api-reference/backend) to integrate the agent into your app.
### Webhook
Trigger your agent from Zapier, Make, n8n, etc.
See [Webhooks](/guides/deploy/webhooks) for sync vs async modes, file uploads, response field extraction, dynamic parameter mapping, and MCP OAuth pass-through.
Open the **Webhook** section in the Channels tab and toggle it on. Then click Configure and test to open the Agent Webhook Tester.
The tester shows your **Payload URL** (with agent ID and API key embedded) and a ready-to-use **cURL command**. Copy these for your integration.
Key parameters you can set in the payload:
* **message**: the prompt to send to the agent
* **asynchronous**: set to `true` for async mode (returns task ID immediately)
* **task\_id**: optionally continue an existing conversation thread
* **getter**: extract a specific field from the agent's response (e.g., `result`)
Choose an input format: **JSON**, **Form Data**, or **Multipart**. Set your payload fields. Click Test Webhook to send a test request. The response appears in the **Response History** panel.
 ## Share Agent Template
You can share your agent's configuration with your team as a reusable template.
Use this to:
* Create similar agents quickly
* Share proven configurations with your team
* Backup a known-good configuration before making major changes
In the Agent Studio **General** tab, expand the **Templates** section.
## Share Agent Template
You can share your agent's configuration with your team as a reusable template.
Use this to:
* Create similar agents quickly
* Share proven configurations with your team
* Backup a known-good configuration before making major changes
In the Agent Studio **General** tab, expand the **Templates** section.
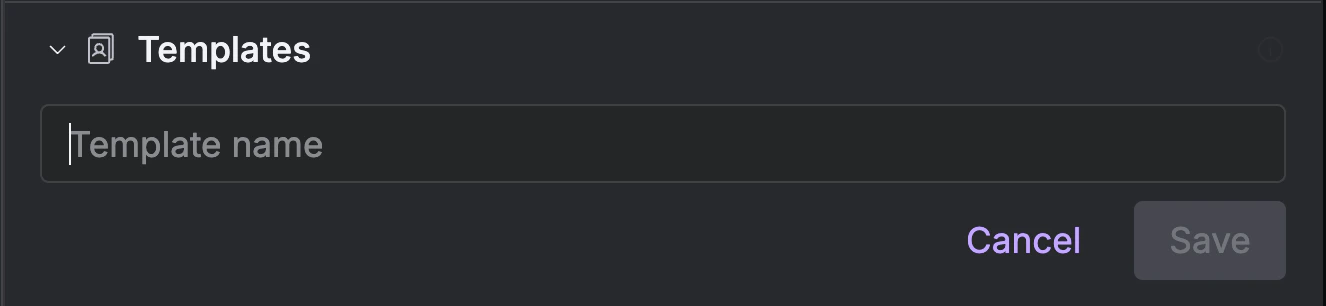 Click Save as template. This captures your agent's complete configuration (instructions, tools, memory settings, model, and channels) as a named template with a timestamp.
Saved templates appear in the list with a Use template button. Click it to create a new agent pre-configured with that template's settings.
## Next Steps
Adjust settings and re-publish
Debug issues found in production
Add more capabilities to your deployed agent
Tune memory for production workloads
Click Save as template. This captures your agent's complete configuration (instructions, tools, memory settings, model, and channels) as a named template with a timestamp.
Saved templates appear in the list with a Use template button. Click it to create a new agent pre-configured with that template's settings.
## Next Steps
Adjust settings and re-publish
Debug issues found in production
Add more capabilities to your deployed agent
Tune memory for production workloads