> ## Documentation Index
> Fetch the complete documentation index at: https://docs.xpander.ai/llms.txt
> Use this file to discover all available pages before exploring further.
# Tools & Connectors
> Browse the connector catalog, authenticate services, and configure tool behavior
Without tools, your agent can only talk. Tools and connectors let your agent **do things** like sending emails, searching the web, creating calendar events, etc.
Xpander has 2,000+ pre-built connectors for popular services like Slack, Google Drive, Salesforce, Jira, GitHub, and more.
You can sign in using OAuth or provide API keys to connect your account and let your agent use these services.
 This page covers:
* [Create a new connection](#create-a-new-connection): authenticate an external service
* [Create a custom connector](#create-a-custom-connector): add your own APIs to the catalog
* [Add tools to your agent](#add-tools-to-your-agent): attach specific actions to an agent
* [Tool dependencies](#tool-dependencies): enforce tool execution order
## Create a New Connection
Before your agent can use a connector, you need to create a **connection**. This authenticates your account with the external service. Each connector can have multiple connections (e.g., different Slack workspaces or different AWS accounts).
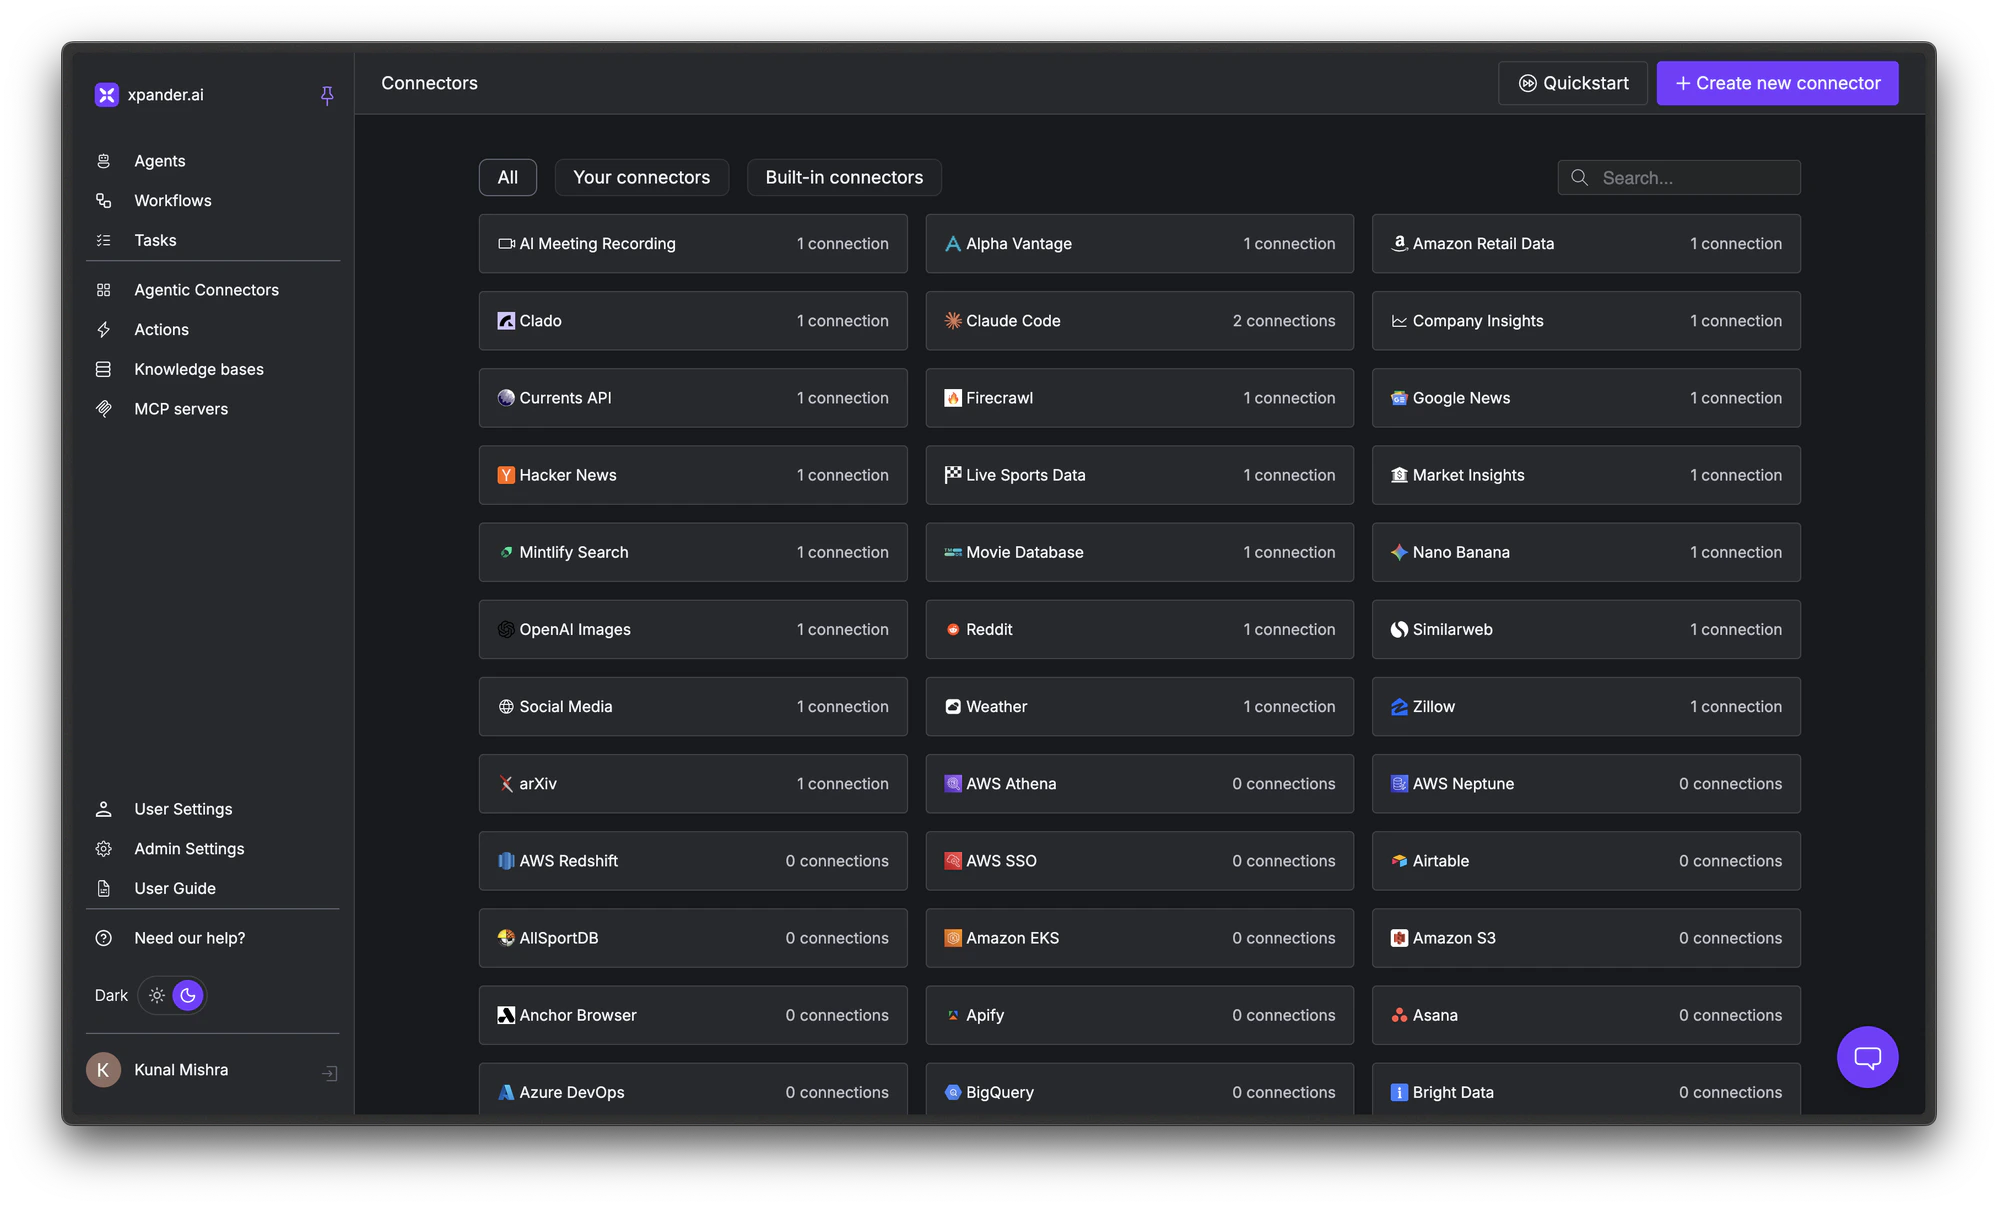
Open the [Agentic Connectors page](https://app.xpander.ai/connectors) and choose a connector you want to use (e.g., Calendly, Slack, Google Drive, Salesforce).
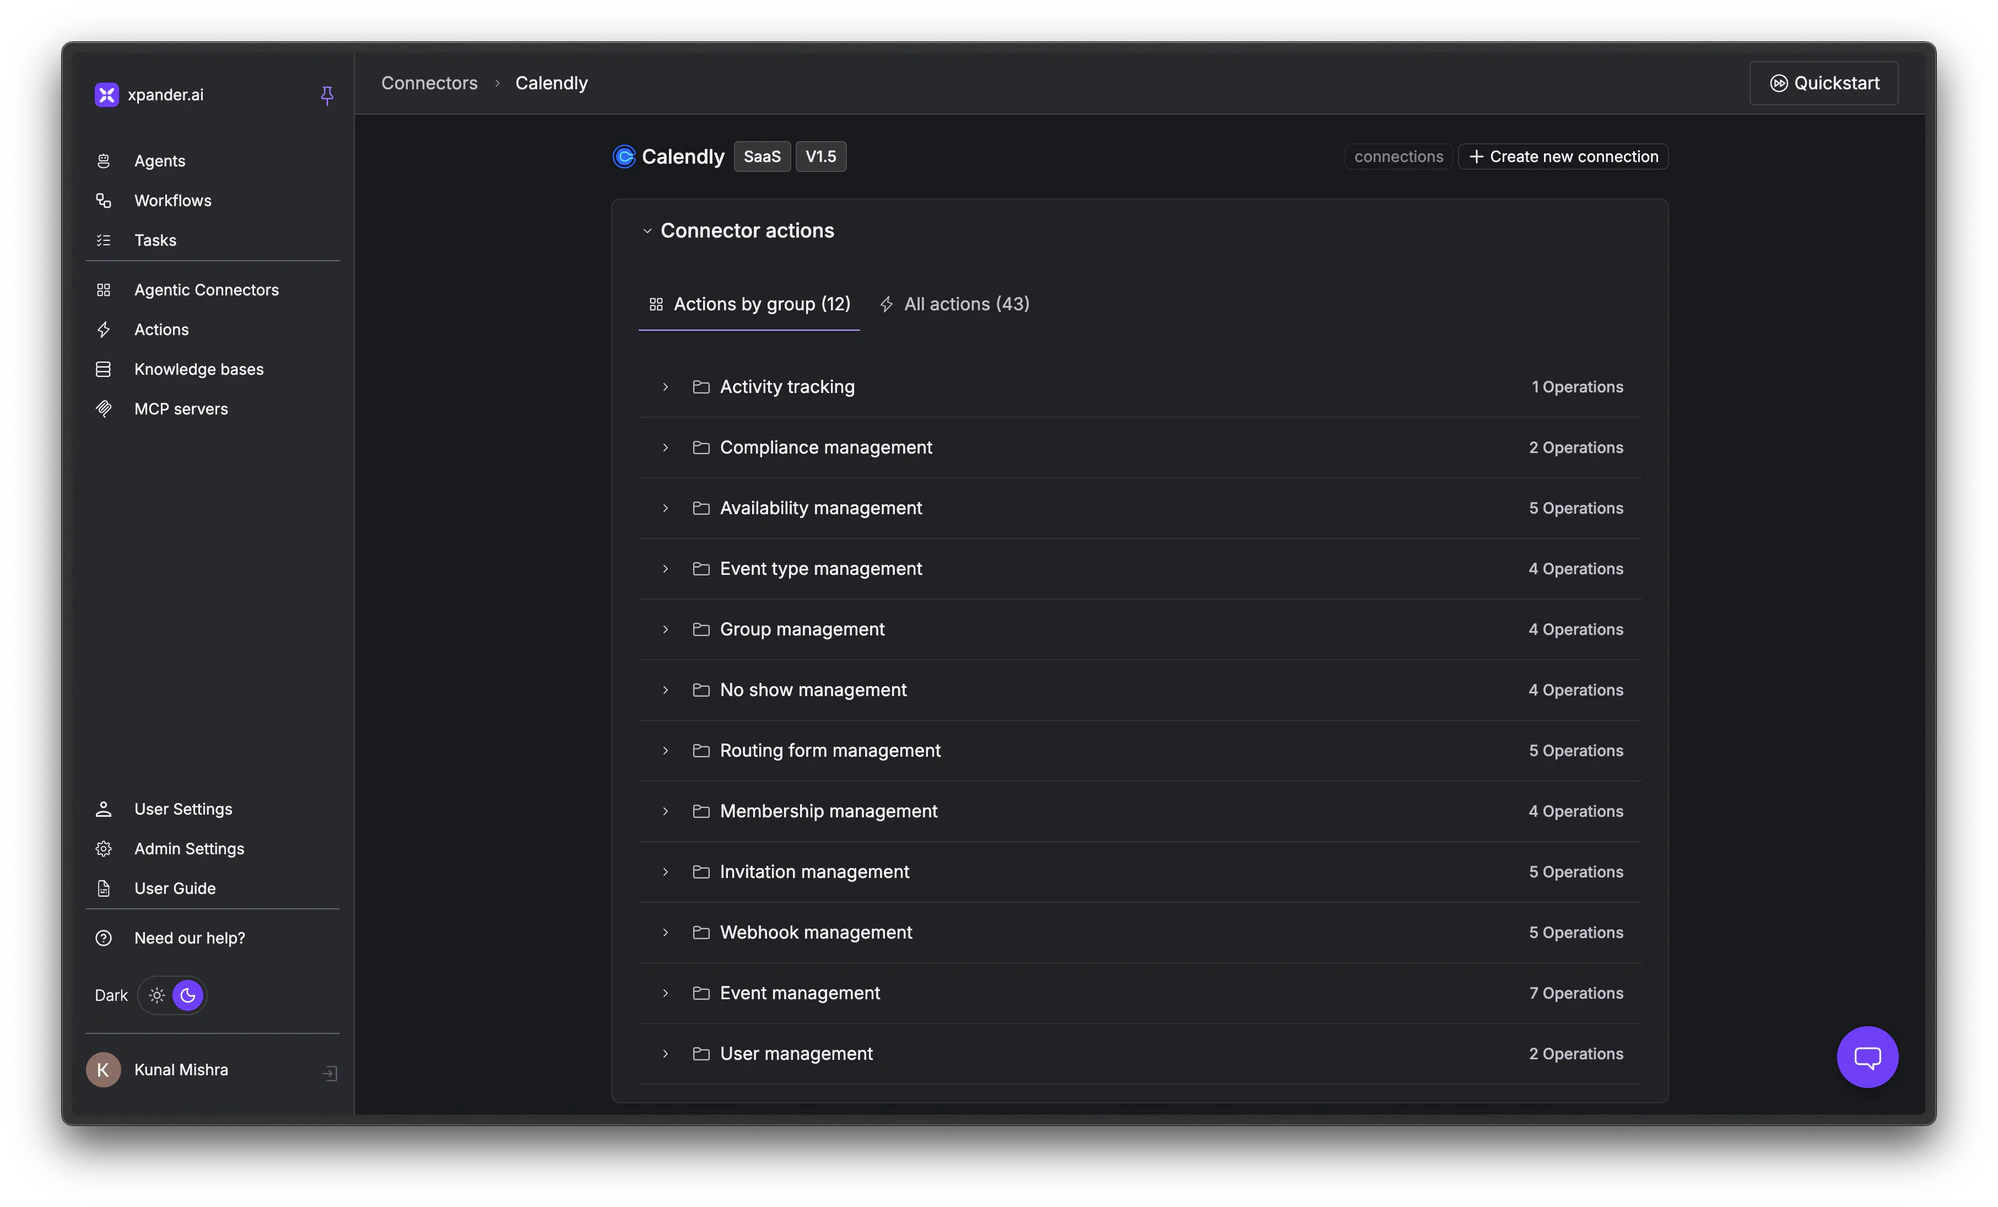
This opens its **Connector Actions** list. Each action is a tool your agent can call once you've authenticated.
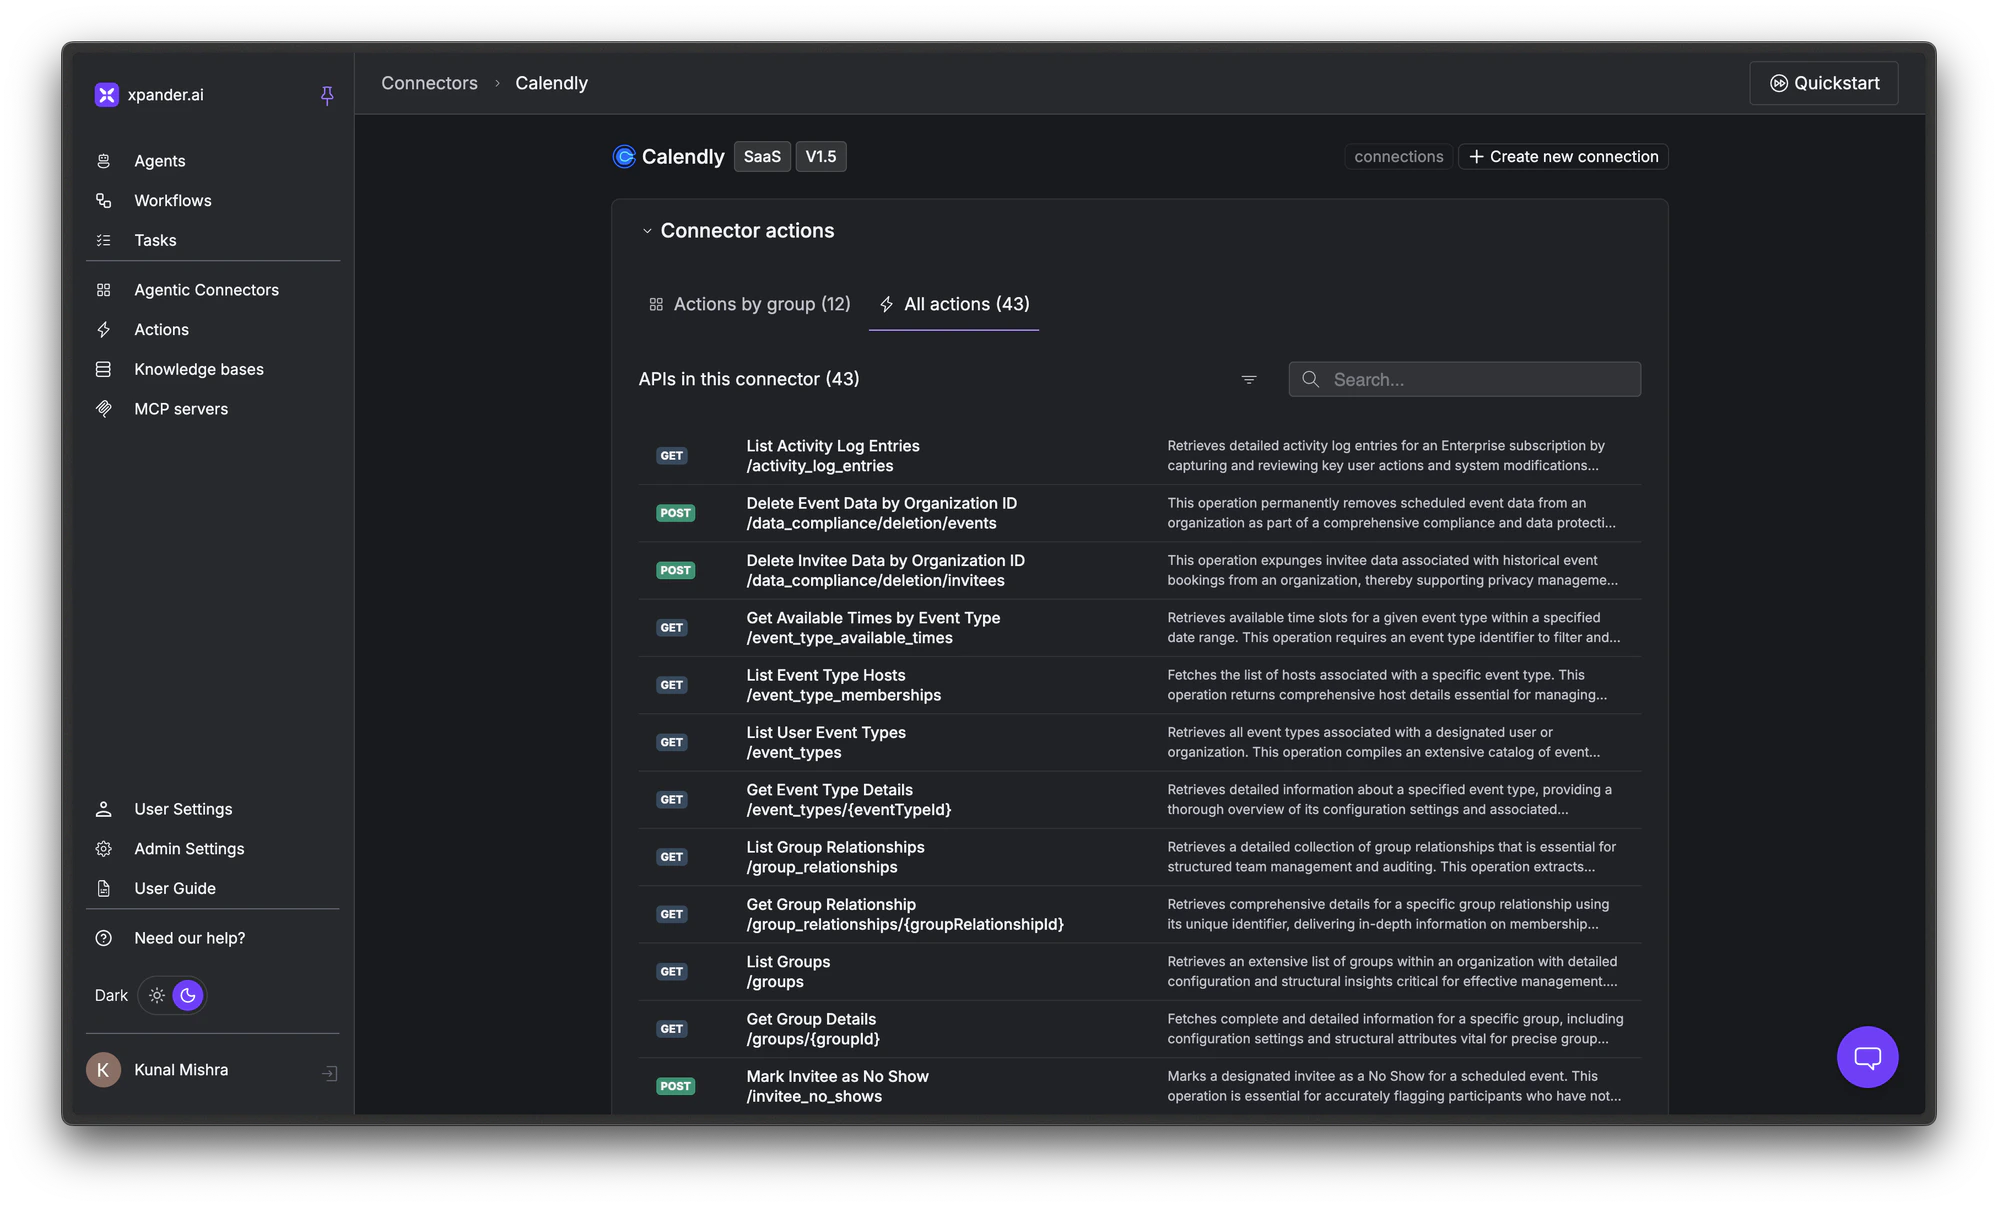
You can see all actions grouped by category or as a flat list of API endpoints.
This page covers:
* [Create a new connection](#create-a-new-connection): authenticate an external service
* [Create a custom connector](#create-a-custom-connector): add your own APIs to the catalog
* [Add tools to your agent](#add-tools-to-your-agent): attach specific actions to an agent
* [Tool dependencies](#tool-dependencies): enforce tool execution order
## Create a New Connection
Before your agent can use a connector, you need to create a **connection**. This authenticates your account with the external service. Each connector can have multiple connections (e.g., different Slack workspaces or different AWS accounts).
Open the [Agentic Connectors page](https://app.xpander.ai/connectors) and choose a connector you want to use (e.g., Calendly, Slack, Google Drive, Salesforce).
This opens its **Connector Actions** list. Each action is a tool your agent can call once you've authenticated.
You can see all actions grouped by category or as a flat list of API endpoints.
 In the top right of the Connector Actions page, click + Create new connection.
Enter connection details:
* **Name**: Give the connection a descriptive name (e.g., "Marketing Team Slack")
* **Access scope**:
* **Personal** (only you can use it), or
* **Organization** (anyone in your workspace can use it)
In the top right of the Connector Actions page, click + Create new connection.
Enter connection details:
* **Name**: Give the connection a descriptive name (e.g., "Marketing Team Slack")
* **Access scope**:
* **Personal** (only you can use it), or
* **Organization** (anyone in your workspace can use it)
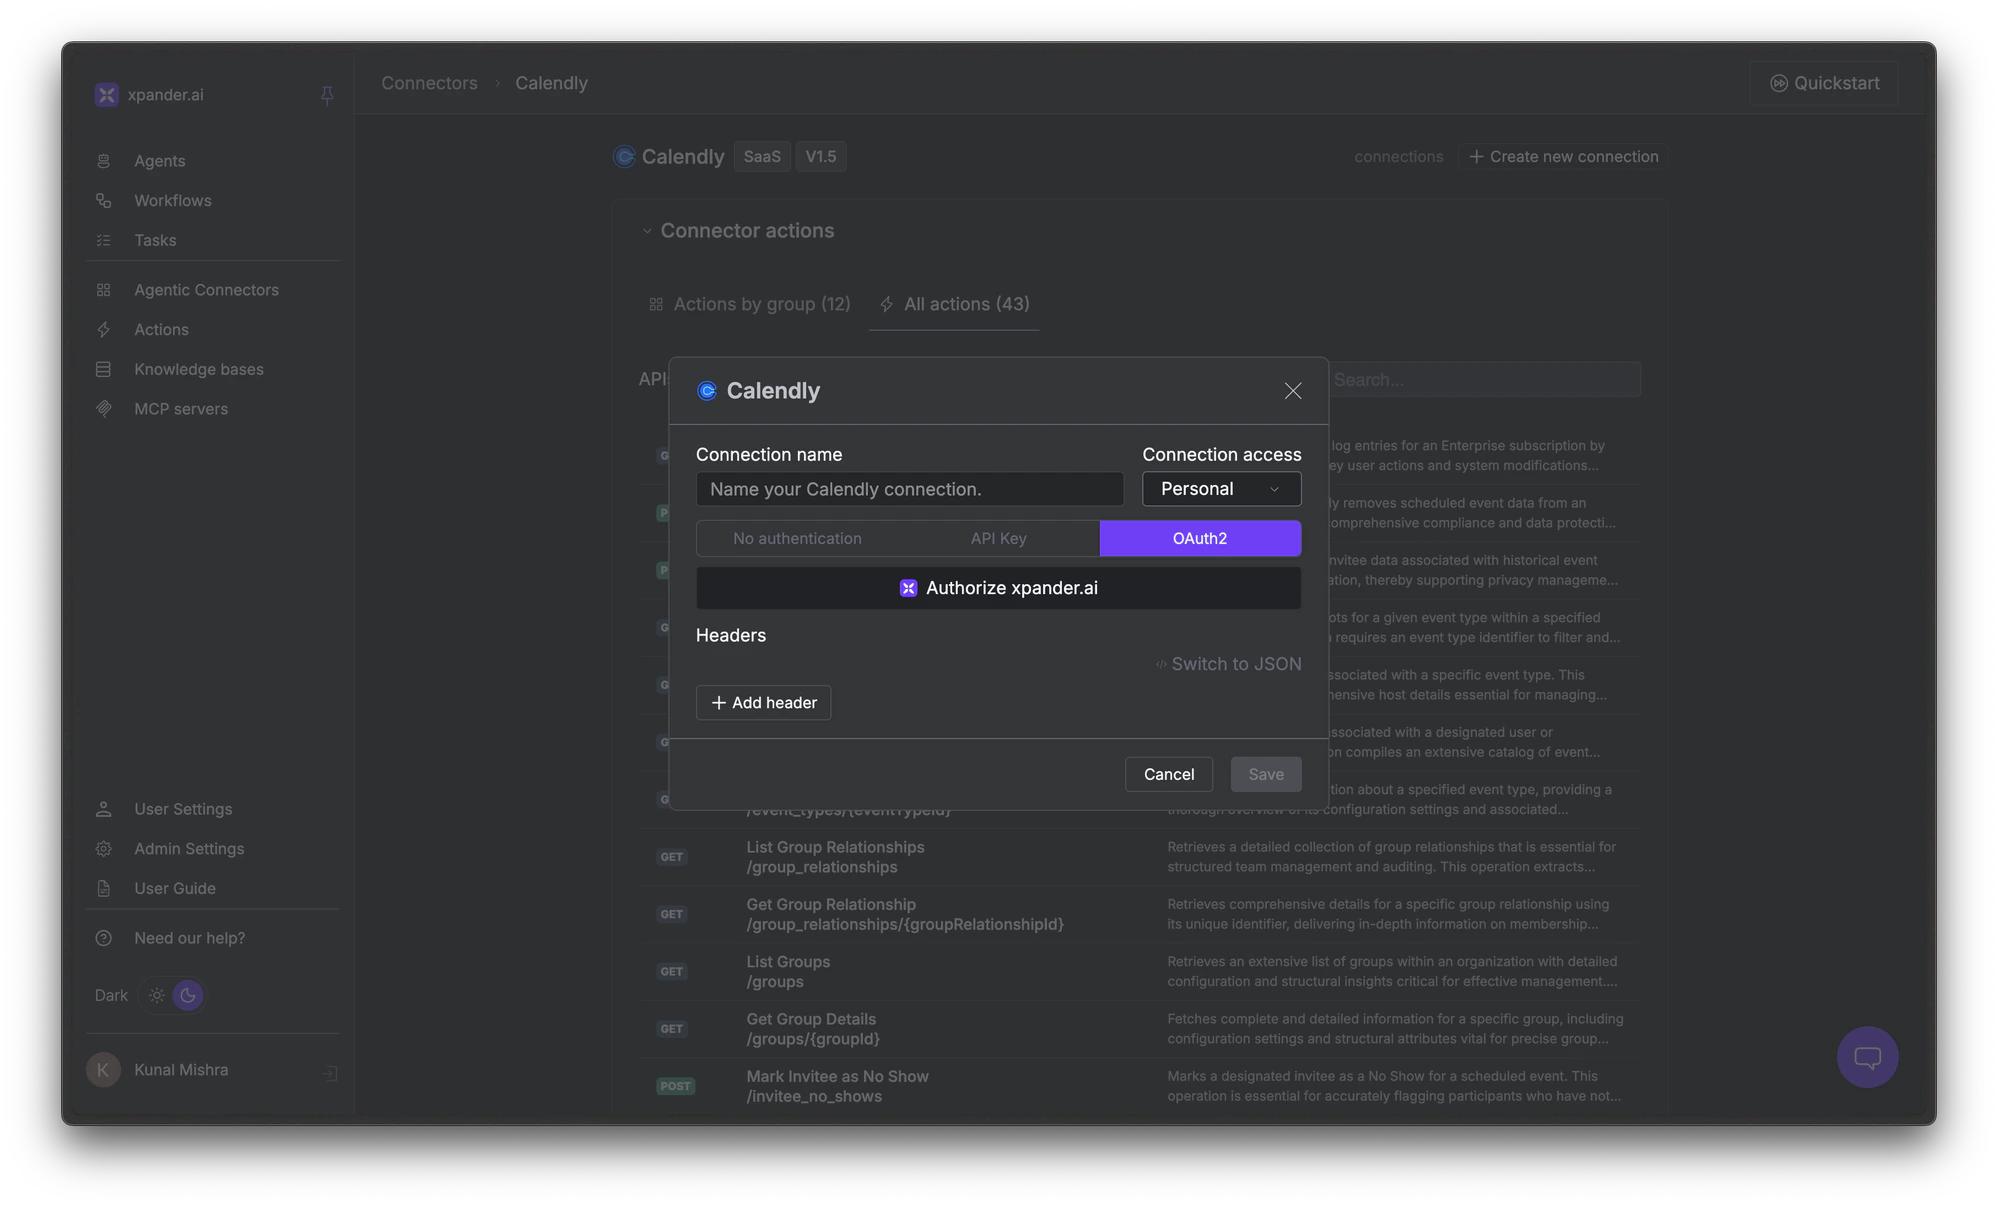 Select the authentication method based on what the service supports:
* Choose **No authentication** for public APIs that don't require credentials
* Choose **API Key** for services that use API keys or tokens
* Choose **OAuth 2.0** for services with own sign-in flow like Calendly, Slack, Google
1. Select the **No authentication** tab
2. Click **Save**
Select the authentication method based on what the service supports:
* Choose **No authentication** for public APIs that don't require credentials
* Choose **API Key** for services that use API keys or tokens
* Choose **OAuth 2.0** for services with own sign-in flow like Calendly, Slack, Google
1. Select the **No authentication** tab
2. Click **Save**
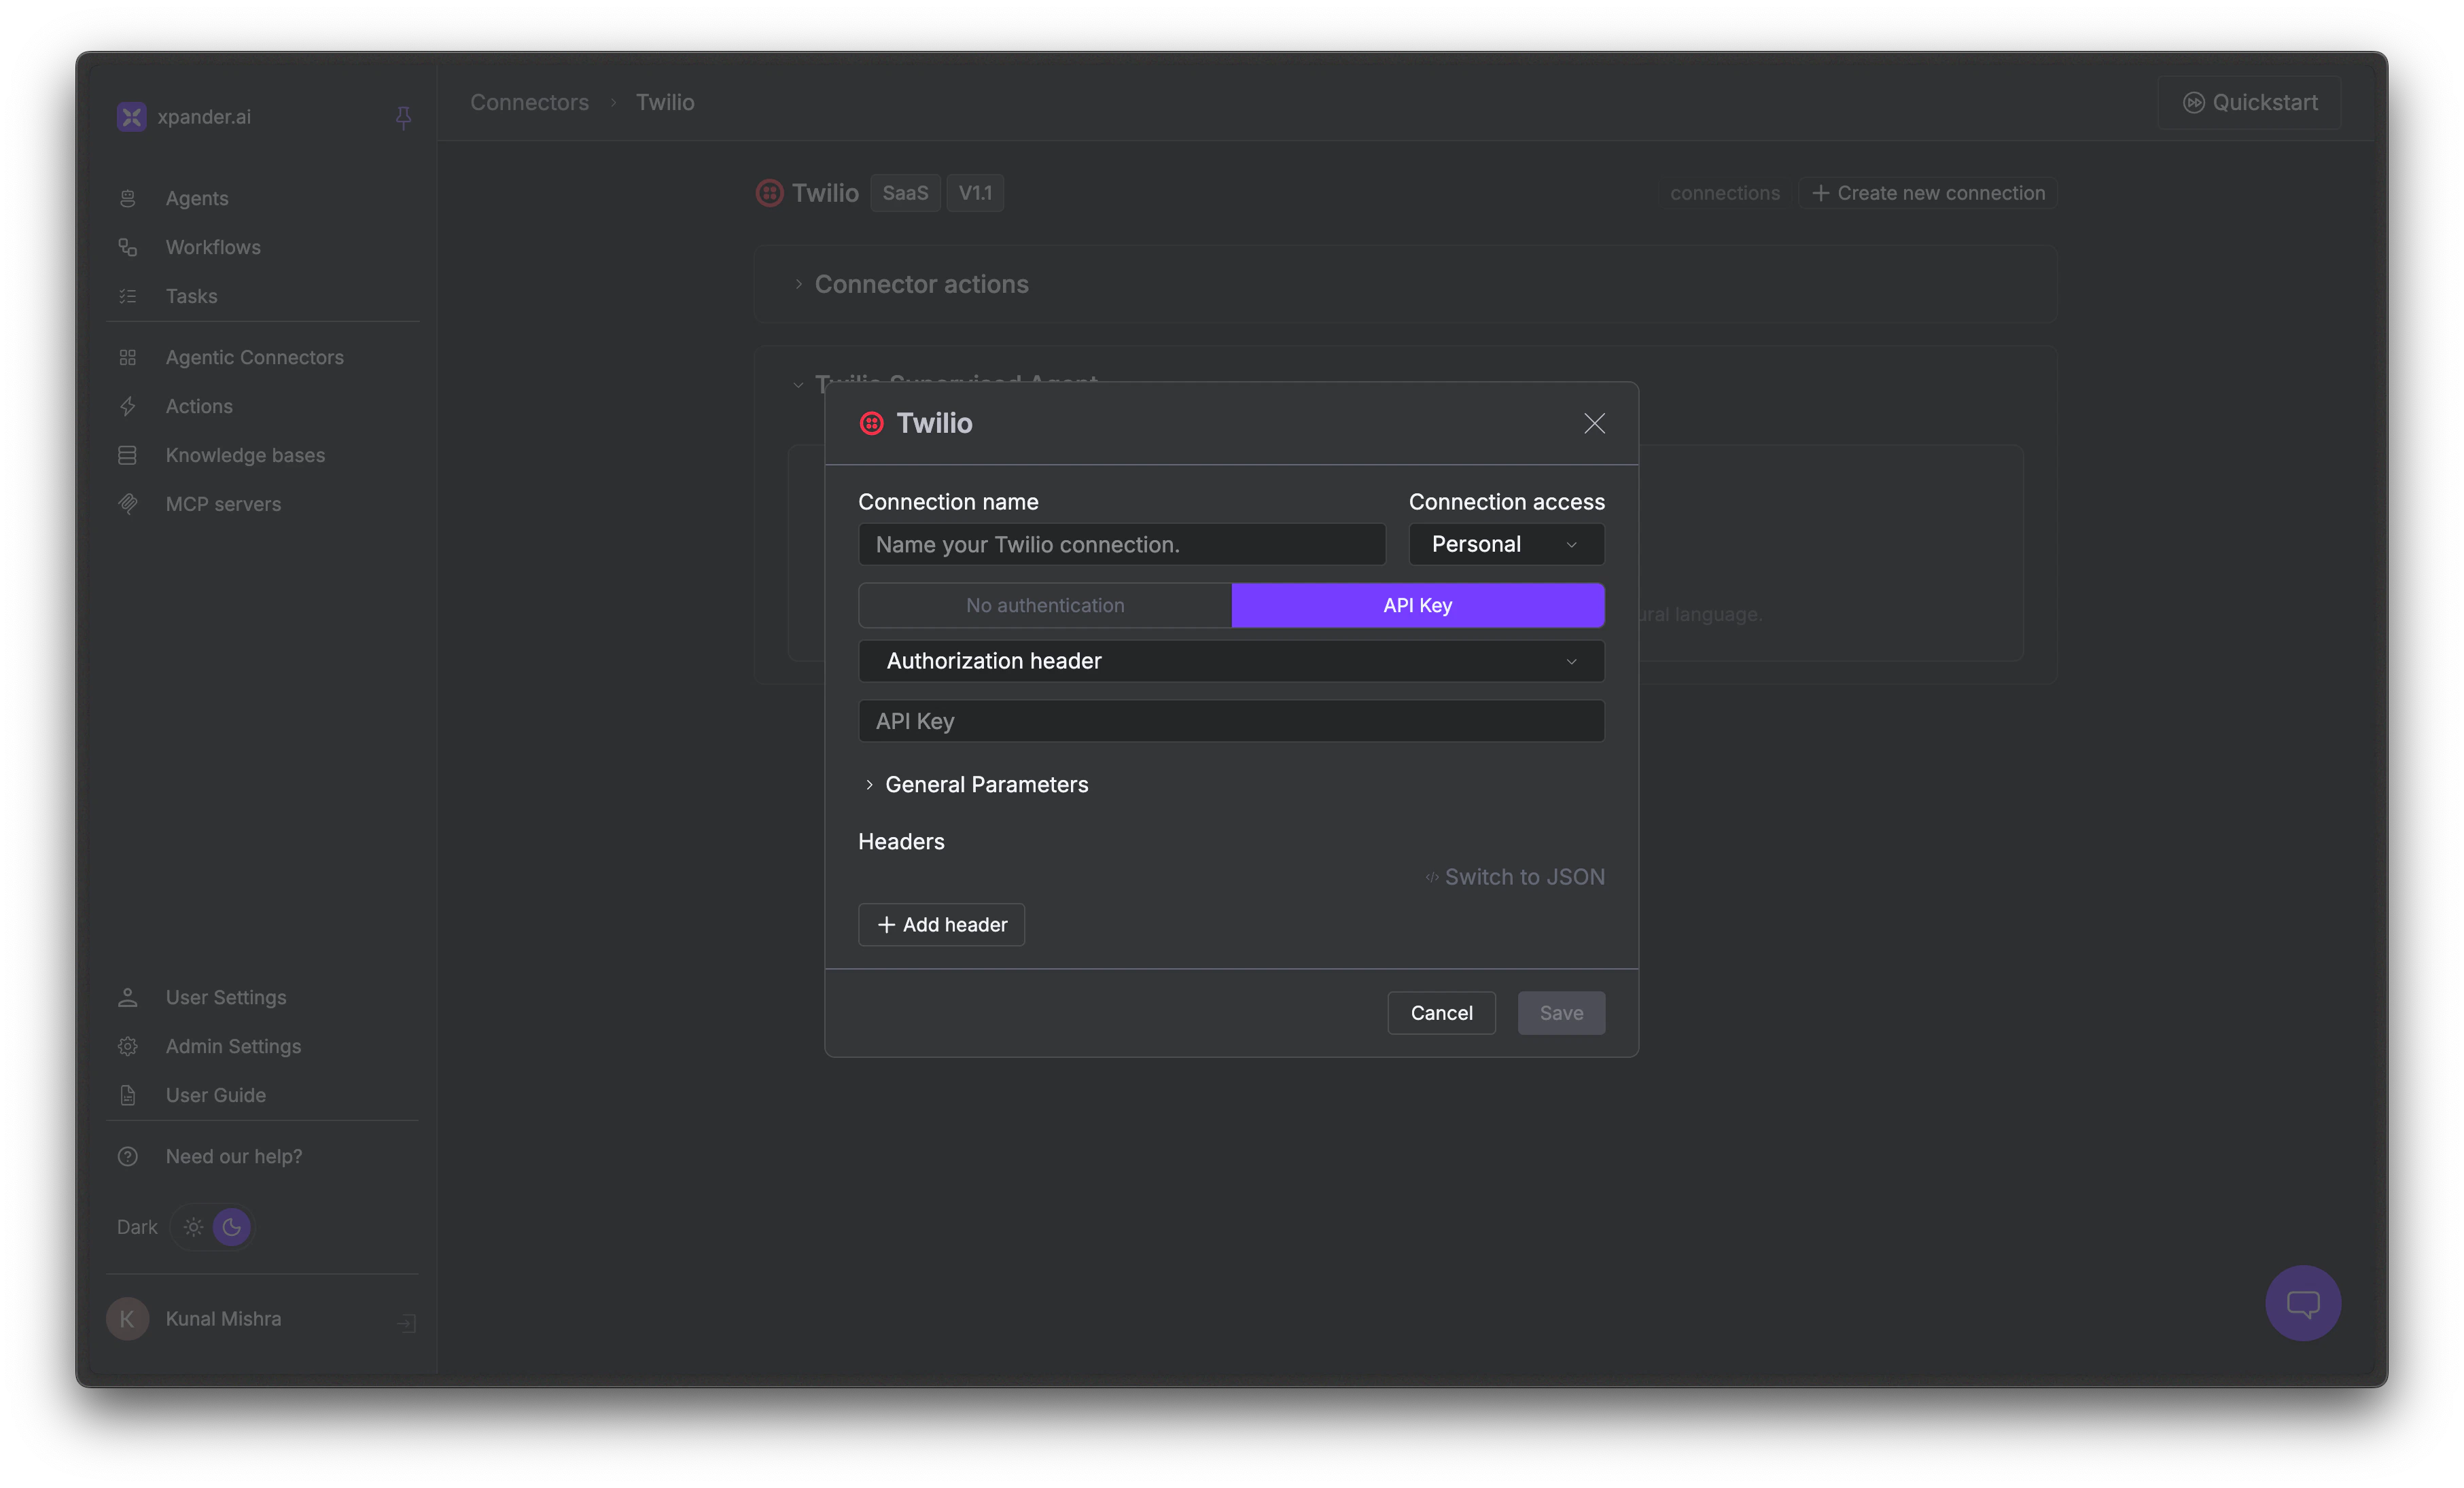 1. Select the **API Key** tab
2. Enter your API key or token
3. Choose the auth type:
* **Authorization header**: Standard `Authorization` header
* **Basic**: Base64 encoded credentials (`Authorization: Basic {encoded}`)
* **Bearer**: `Authorization: Bearer {token}`
* **In-URL**: Adds the key as a URL query parameter
* **Custom**: Define your own header name and format
4. Optionally add custom headers
5. Click Save
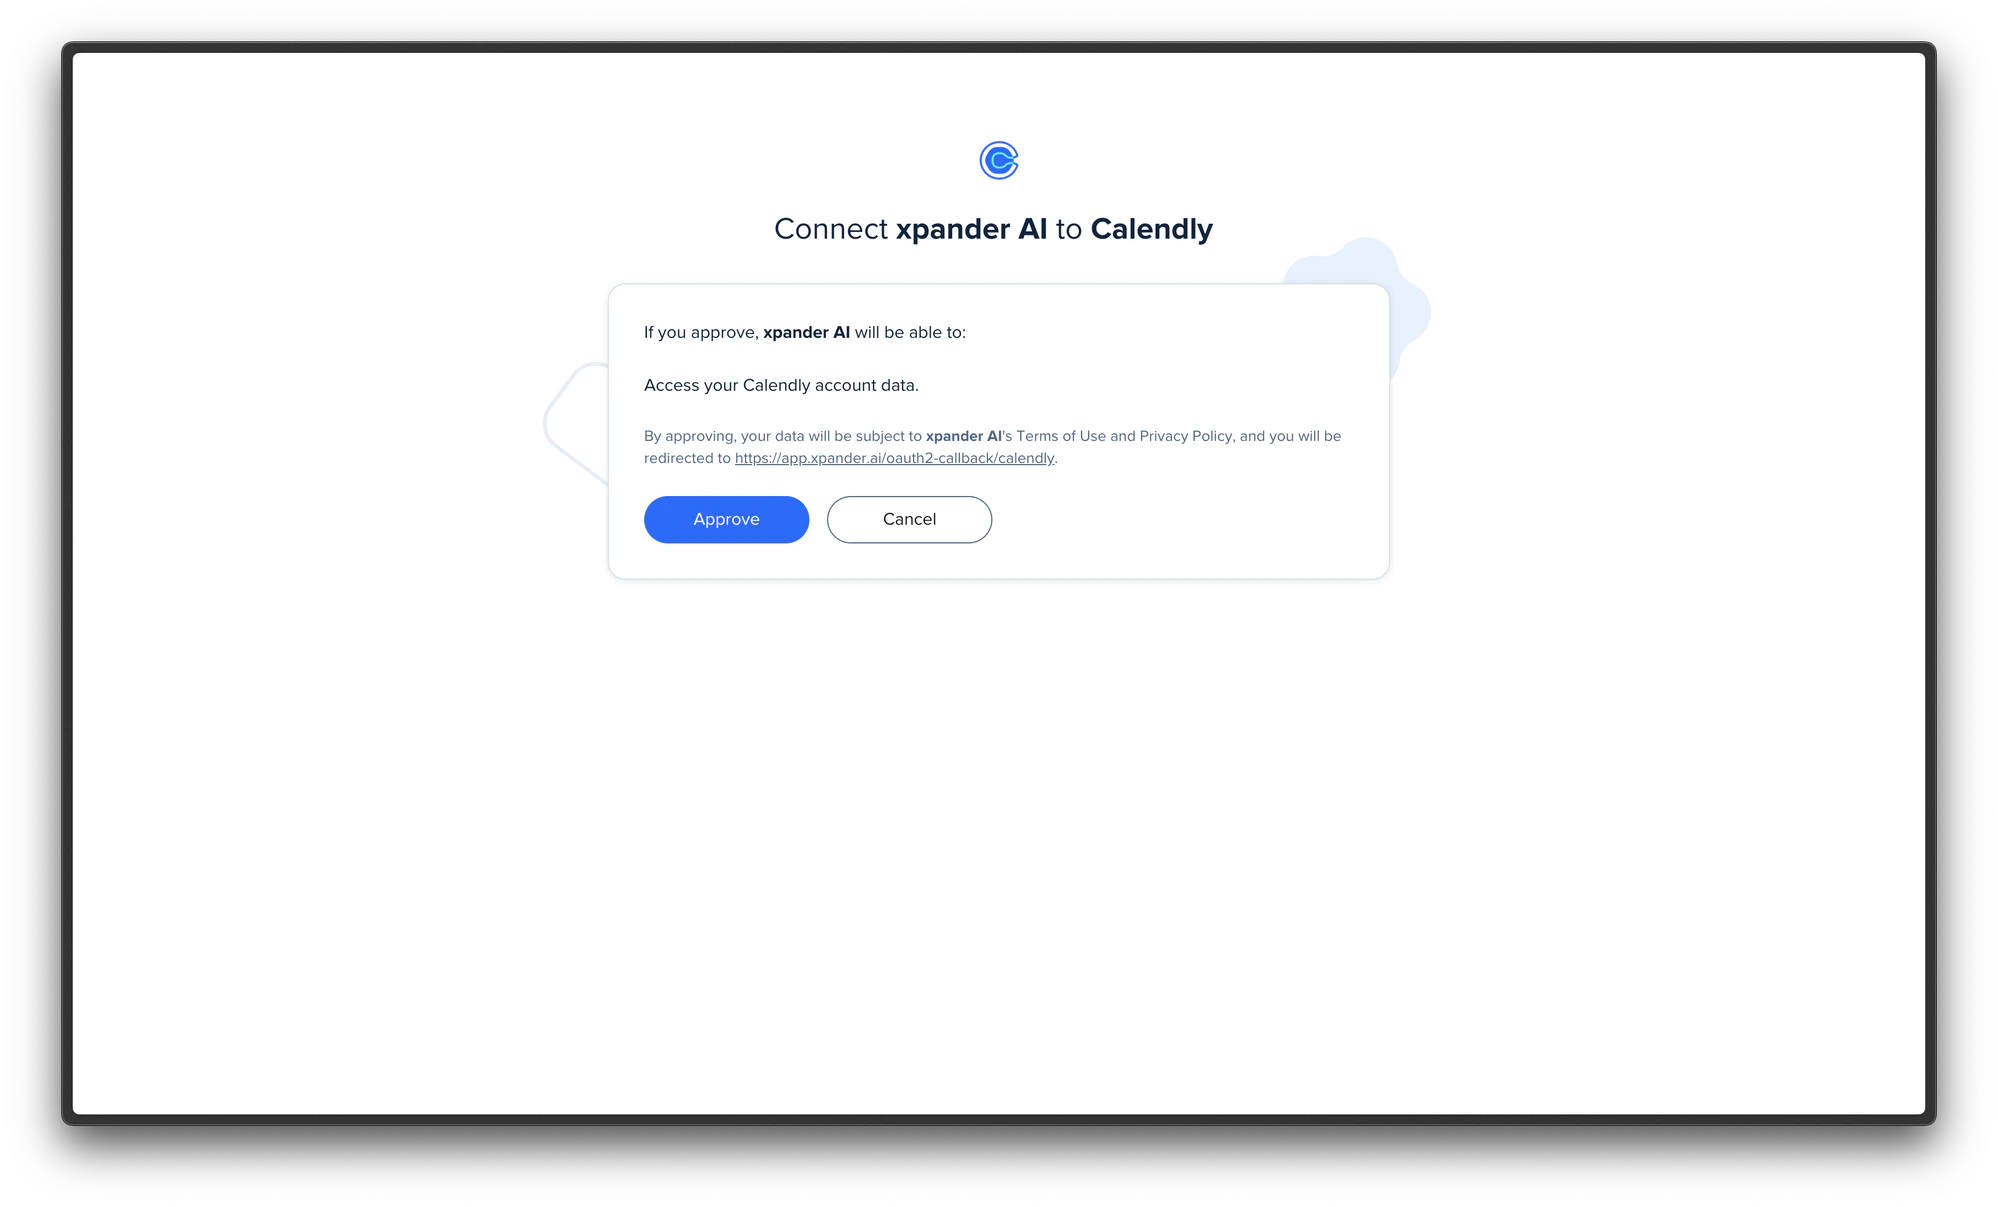
1. Click **OAuth2** and then Authorize Xpander.ai
2. The service's consent screen opens in a new window
3. Review the permissions and click **Approve**
1. Select the **API Key** tab
2. Enter your API key or token
3. Choose the auth type:
* **Authorization header**: Standard `Authorization` header
* **Basic**: Base64 encoded credentials (`Authorization: Basic {encoded}`)
* **Bearer**: `Authorization: Bearer {token}`
* **In-URL**: Adds the key as a URL query parameter
* **Custom**: Define your own header name and format
4. Optionally add custom headers
5. Click Save
1. Click **OAuth2** and then Authorize Xpander.ai
2. The service's consent screen opens in a new window
3. Review the permissions and click **Approve**
 **Private OAuth.** If you want to use your own OAuth client ID and secret instead of xpander's shared credentials, contact support and we'll enable and manage private OAuth for you.
After creating a connection, you can view and manage all connections for a connector by clicking connections in the top right of the connector's detail page.
**Private OAuth.** If you want to use your own OAuth client ID and secret instead of xpander's shared credentials, contact support and we'll enable and manage private OAuth for you.
After creating a connection, you can view and manage all connections for a connector by clicking connections in the top right of the connector's detail page.
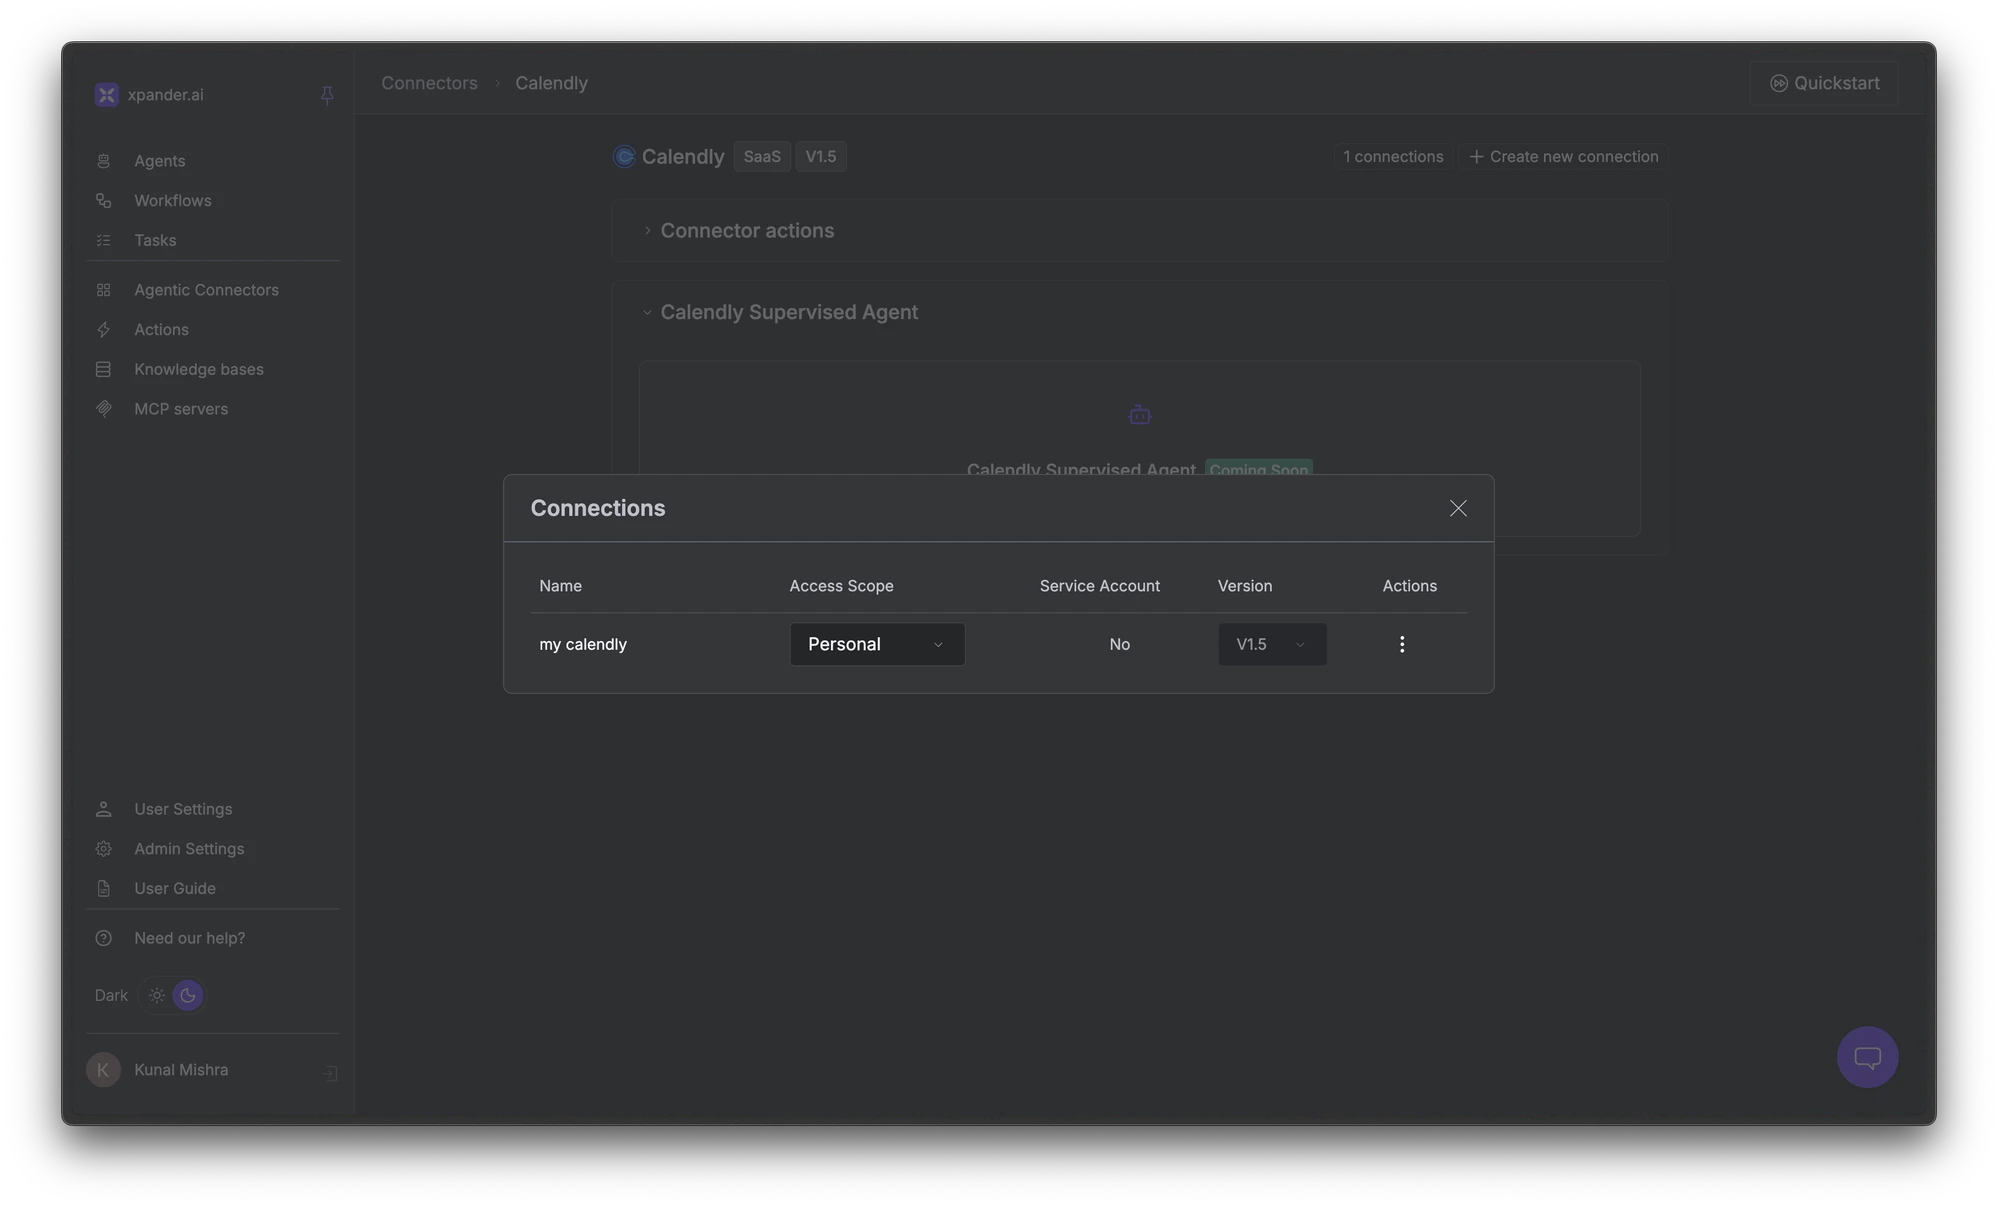 From here you can change the access scope, switch versions, or remove connections.
## Create a Custom Connector
If the catalog doesn't have what you need, for example, an internal tool API, you can create your own connector.
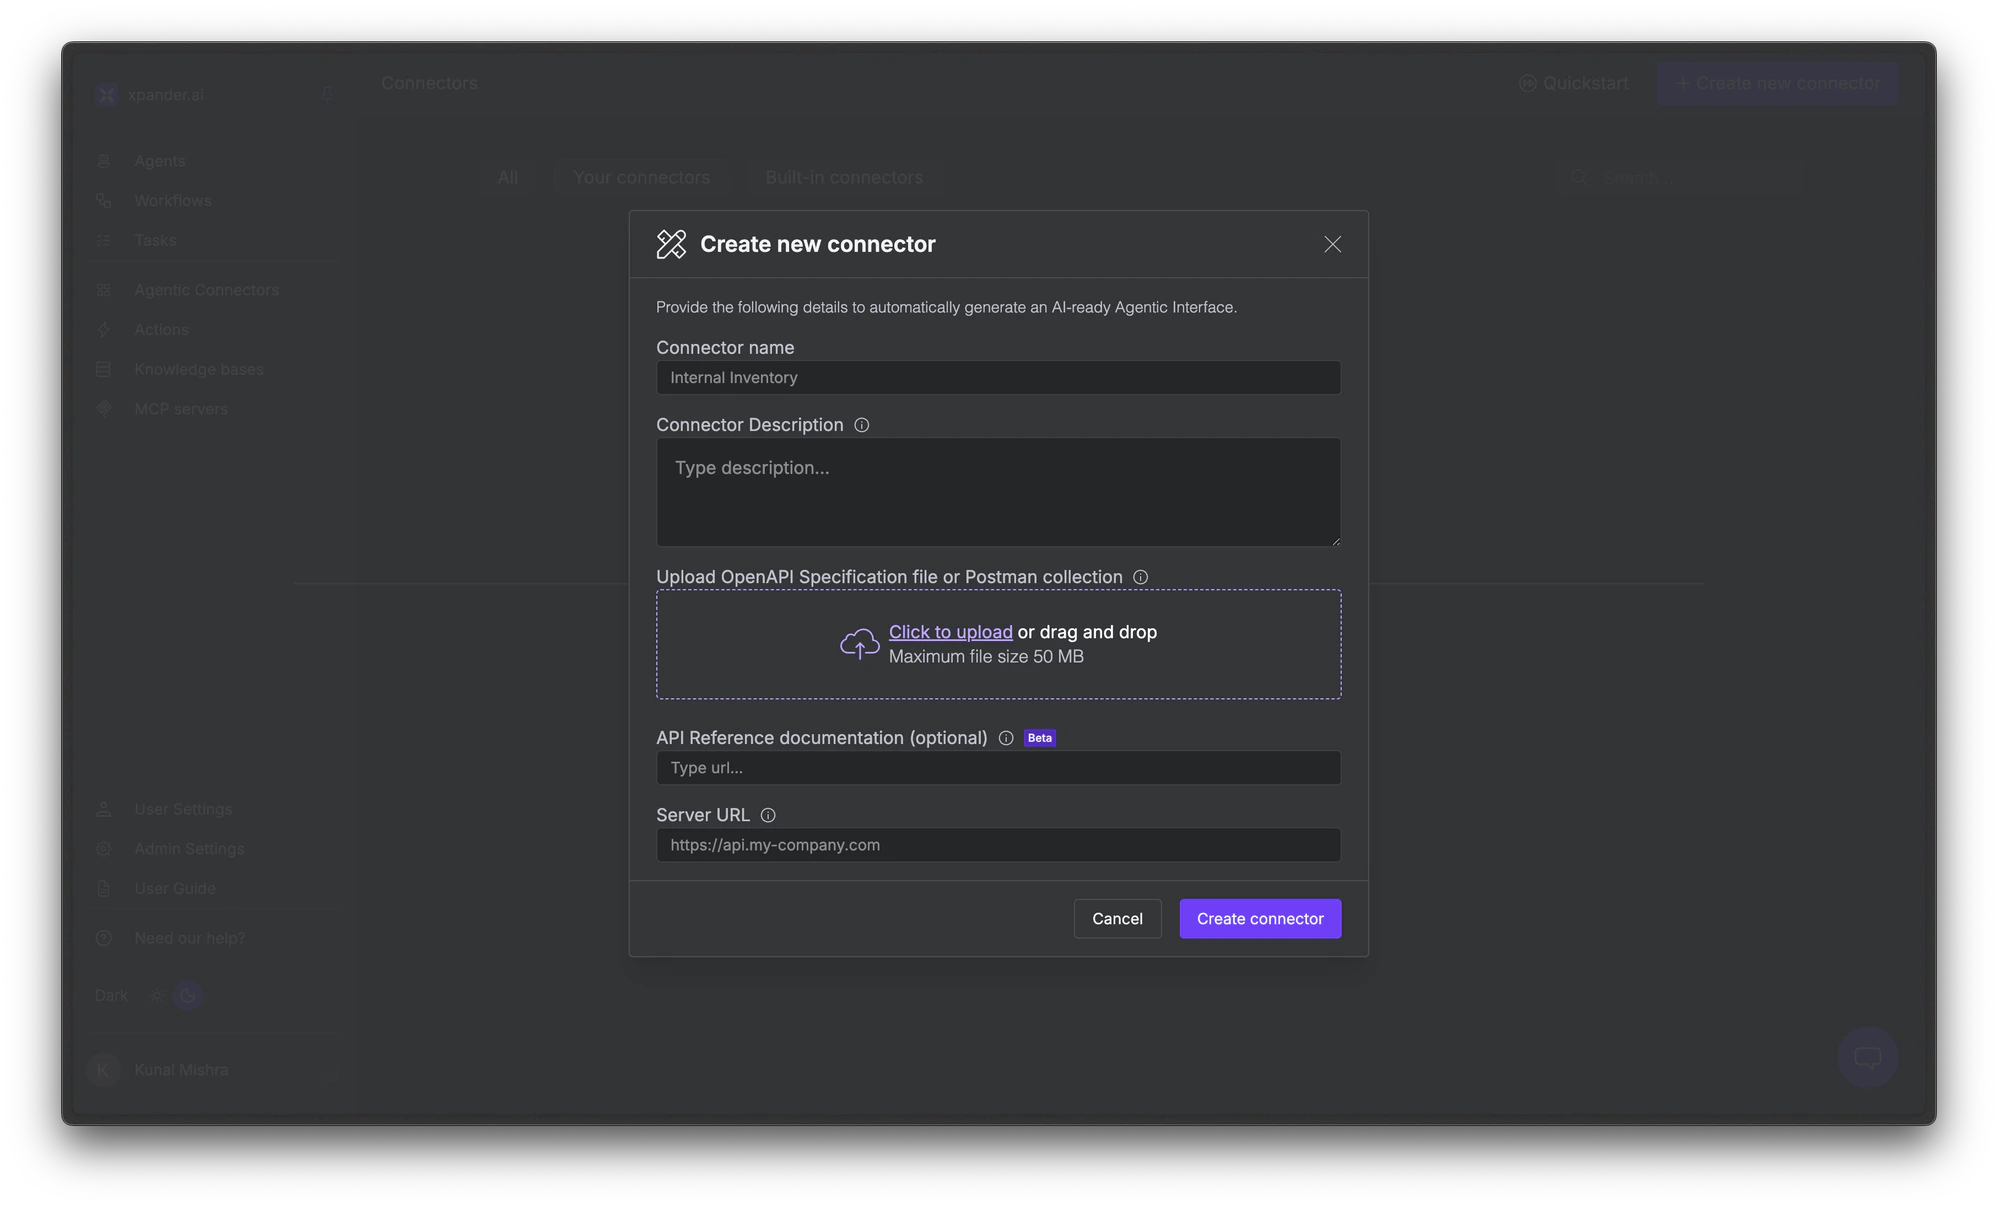
In the top right of the Connectors Catalog page, click + Create new connector.
* **Name**: A descriptive name for your connector
* **Description**: Optional context about what this connector does
* **OpenAPI specification or Postman collection**: Upload a spec file (up to 50 MB)
* **API reference URL**: Optional link to your API documentation
* **Server URL**: The base URL for your API
From here you can change the access scope, switch versions, or remove connections.
## Create a Custom Connector
If the catalog doesn't have what you need, for example, an internal tool API, you can create your own connector.
In the top right of the Connectors Catalog page, click + Create new connector.
* **Name**: A descriptive name for your connector
* **Description**: Optional context about what this connector does
* **OpenAPI specification or Postman collection**: Upload a spec file (up to 50 MB)
* **API reference URL**: Optional link to your API documentation
* **Server URL**: The base URL for your API
 Click Create connector. Xpander will turn each endpoint in your API spec into a tool your agent can call.
Your custom connector now appears in the catalog. Create a connection to authenticate it (see [Create a new connection](#create-a-new-connection) above), then add its actions to your agents.
## Add Tools to Your Agent
Once you've created connections, you can add tools to your agent. Tools come in two types: **Built-in tools** (pre-configured actions) and **Connector tools** (actions from authenticated services).
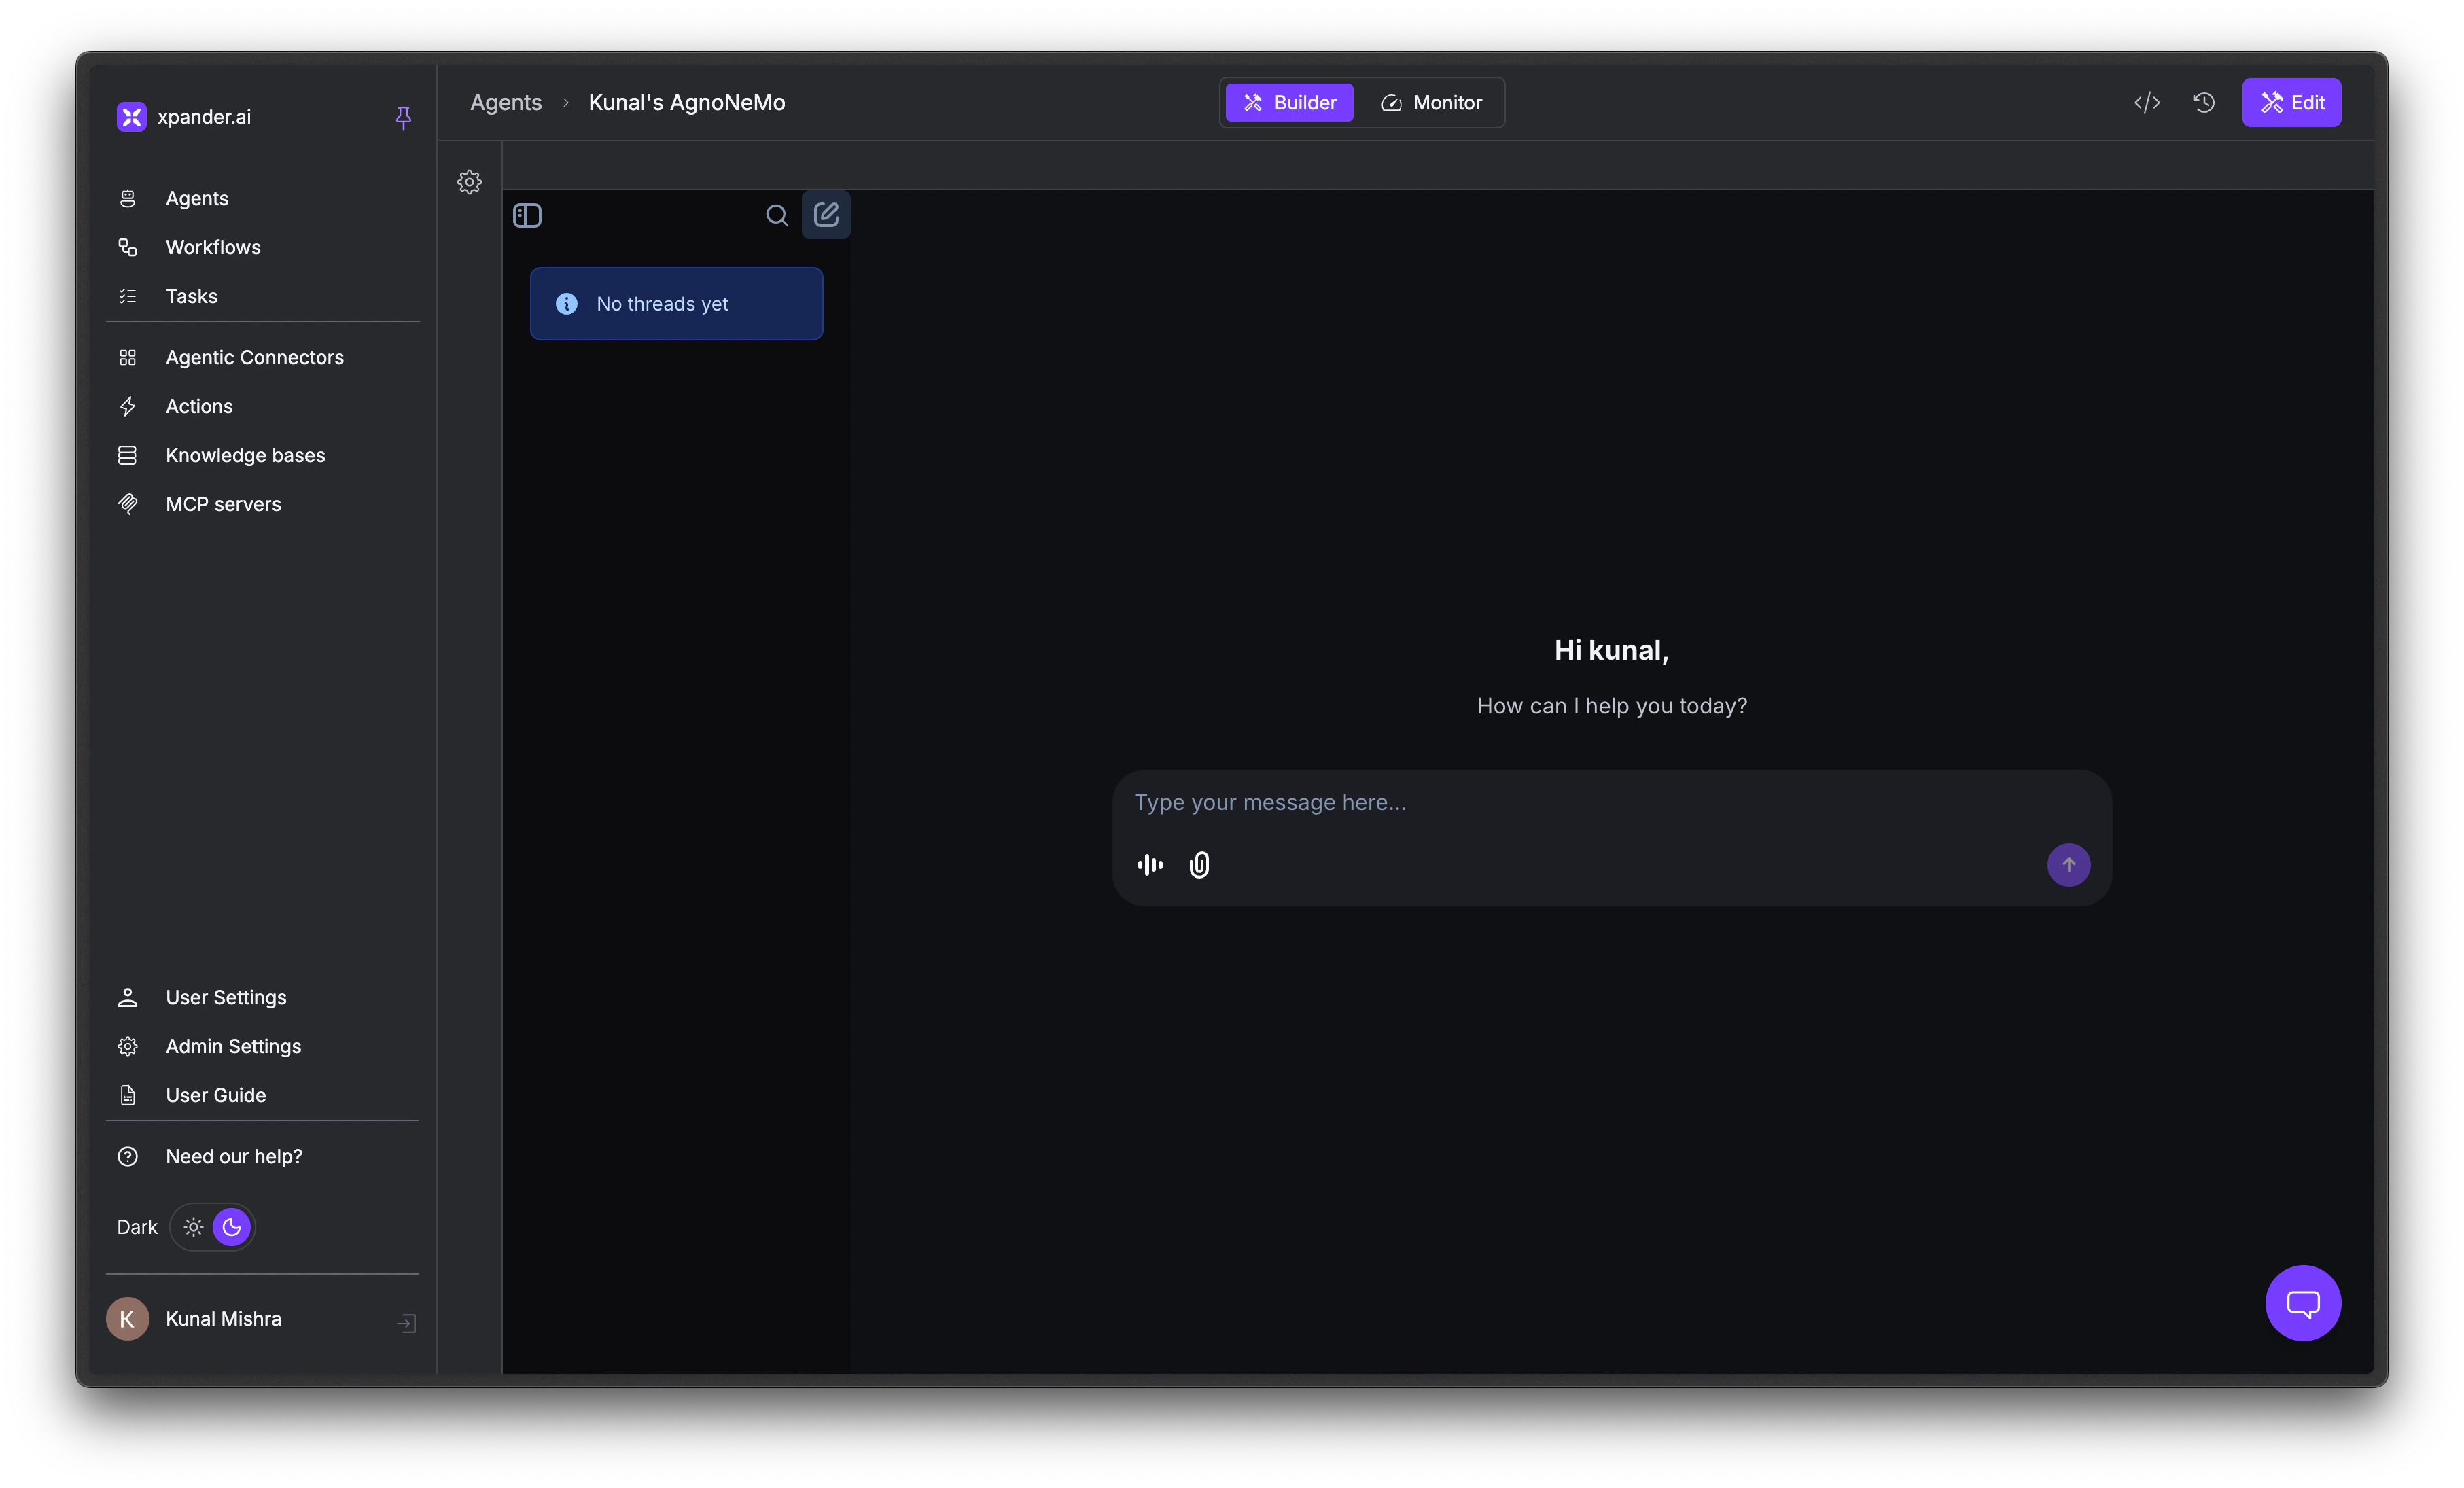
In the [Agents page](https://app.xpander.ai/agents), select your agent to open its Agent Studio.
Click Create connector. Xpander will turn each endpoint in your API spec into a tool your agent can call.
Your custom connector now appears in the catalog. Create a connection to authenticate it (see [Create a new connection](#create-a-new-connection) above), then add its actions to your agents.
## Add Tools to Your Agent
Once you've created connections, you can add tools to your agent. Tools come in two types: **Built-in tools** (pre-configured actions) and **Connector tools** (actions from authenticated services).
In the [Agents page](https://app.xpander.ai/agents), select your agent to open its Agent Studio.
 Click the **gear** icon in the top right, then go to the **Tools** tab.
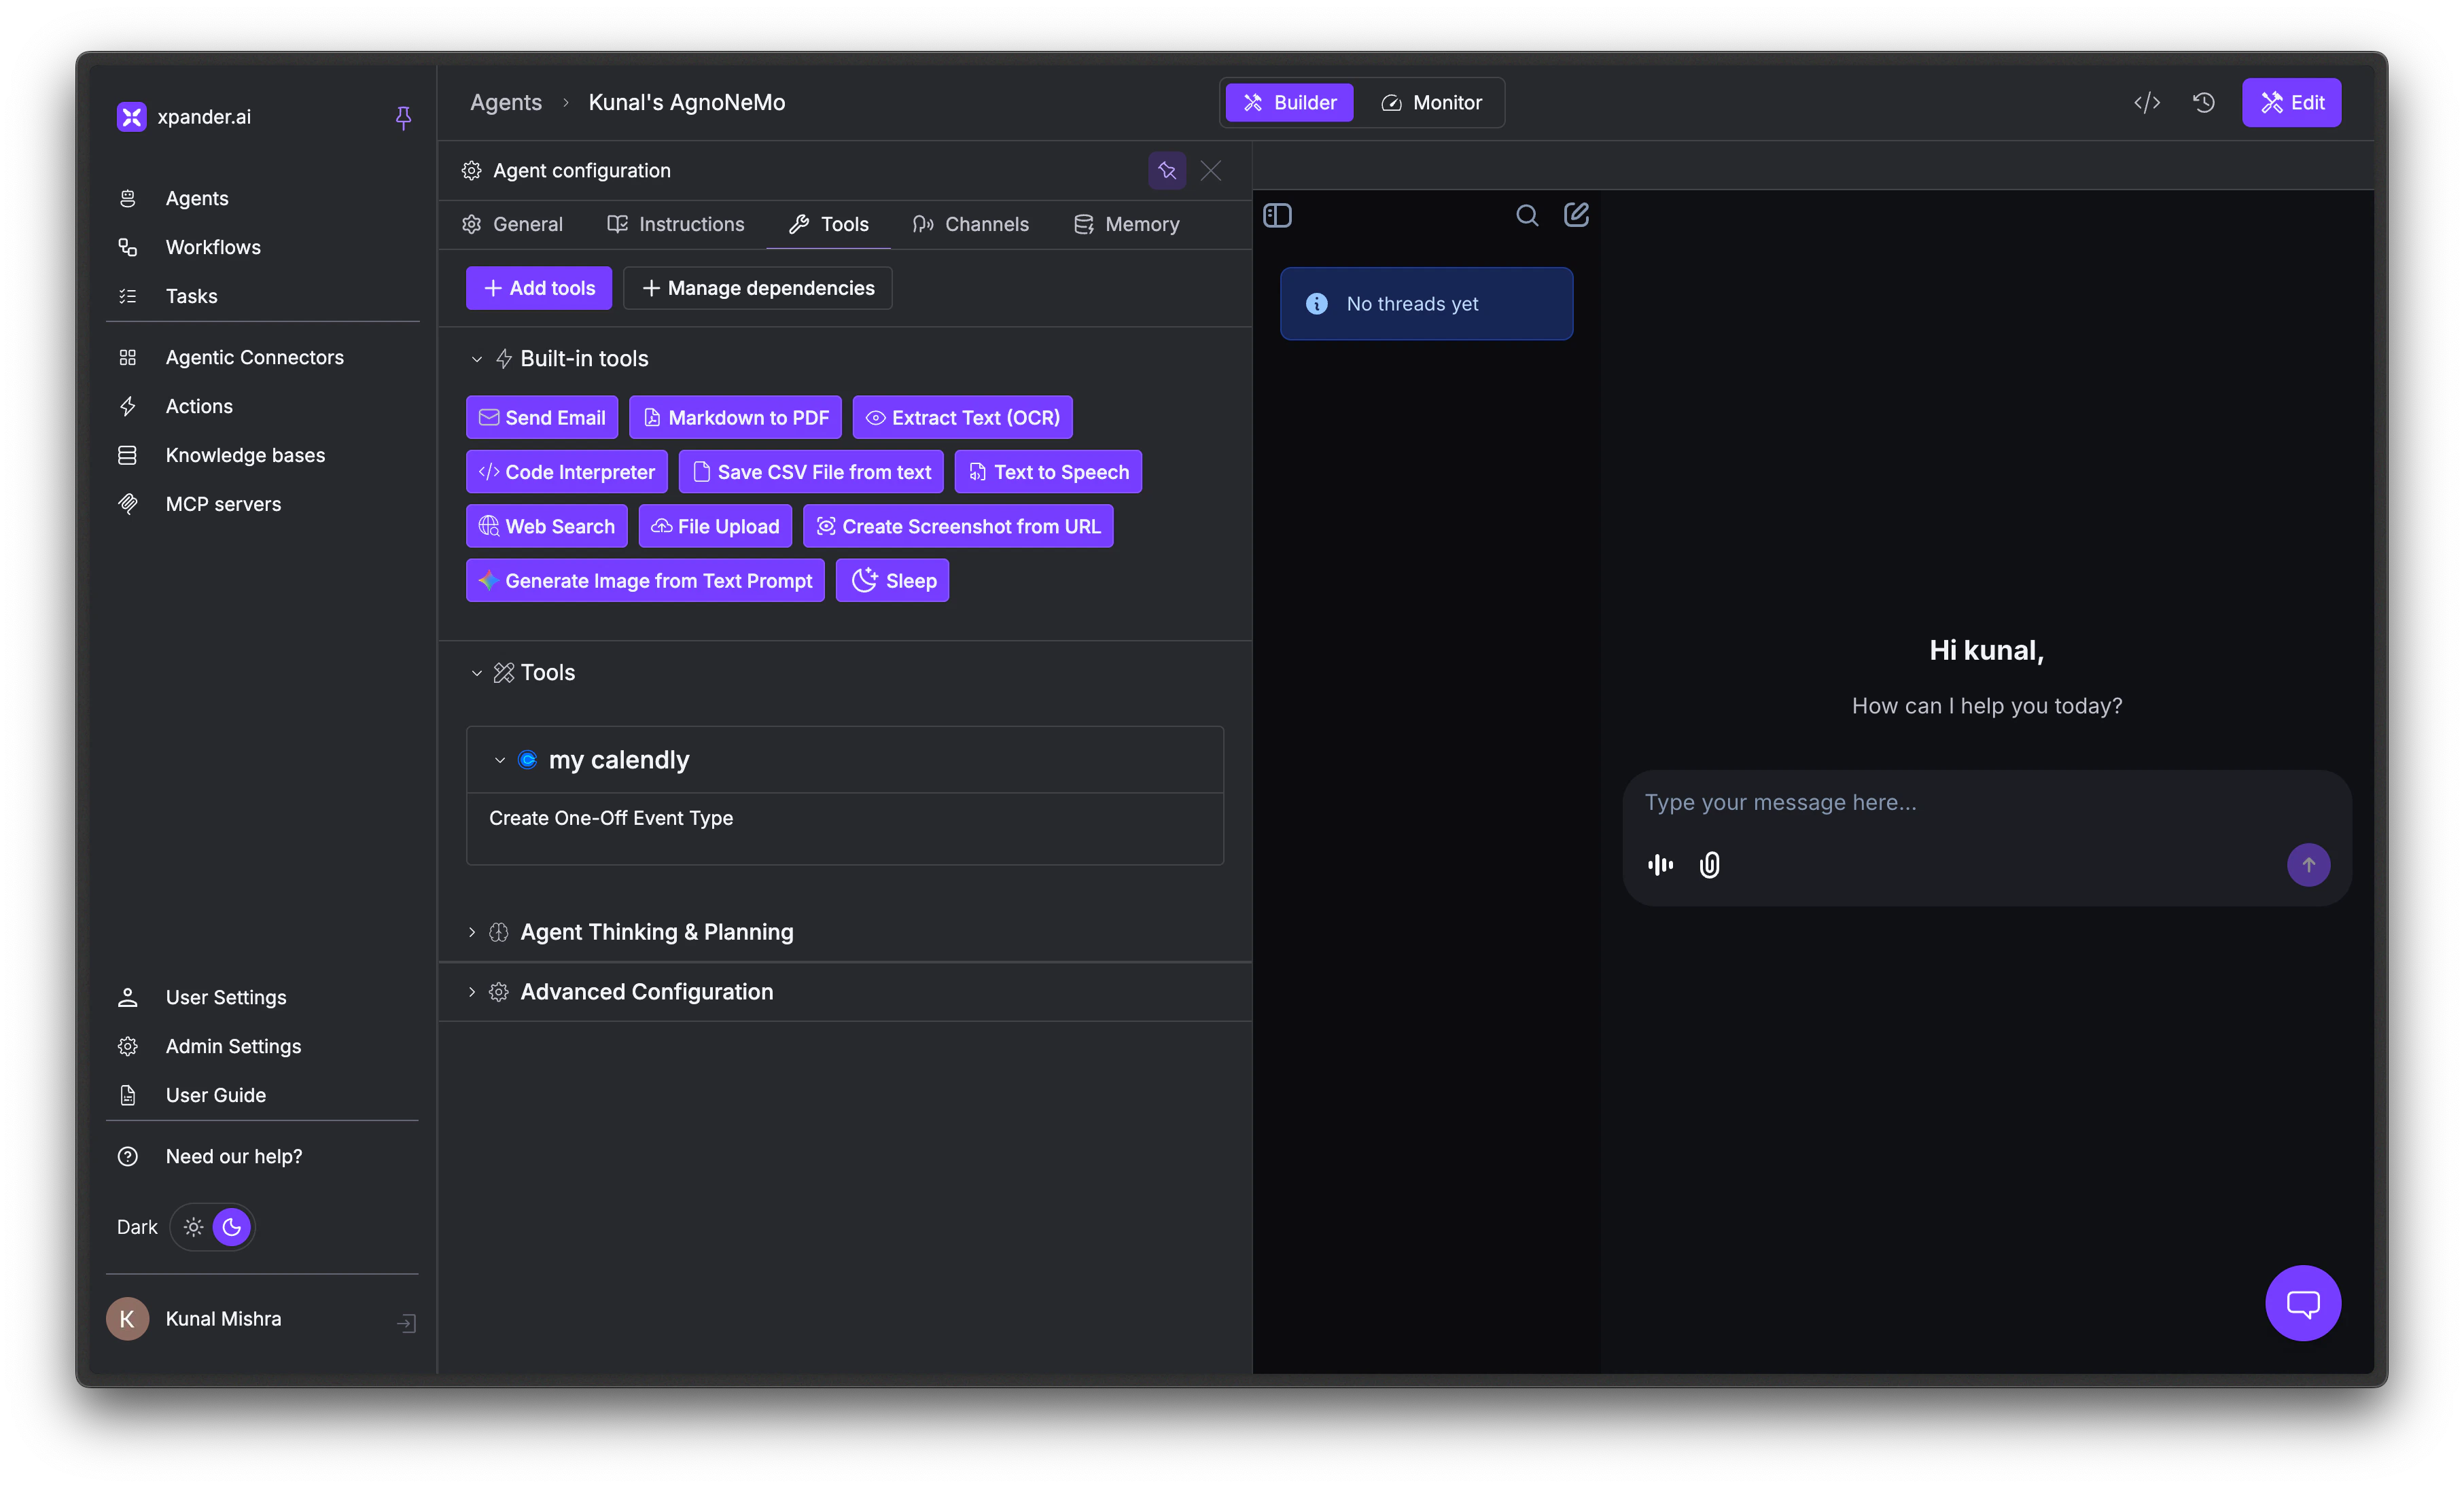 Built-in tools are pre-configured actions that ship with every agent, no authentication or setup required.
Click on any tool to toggle it on or off.
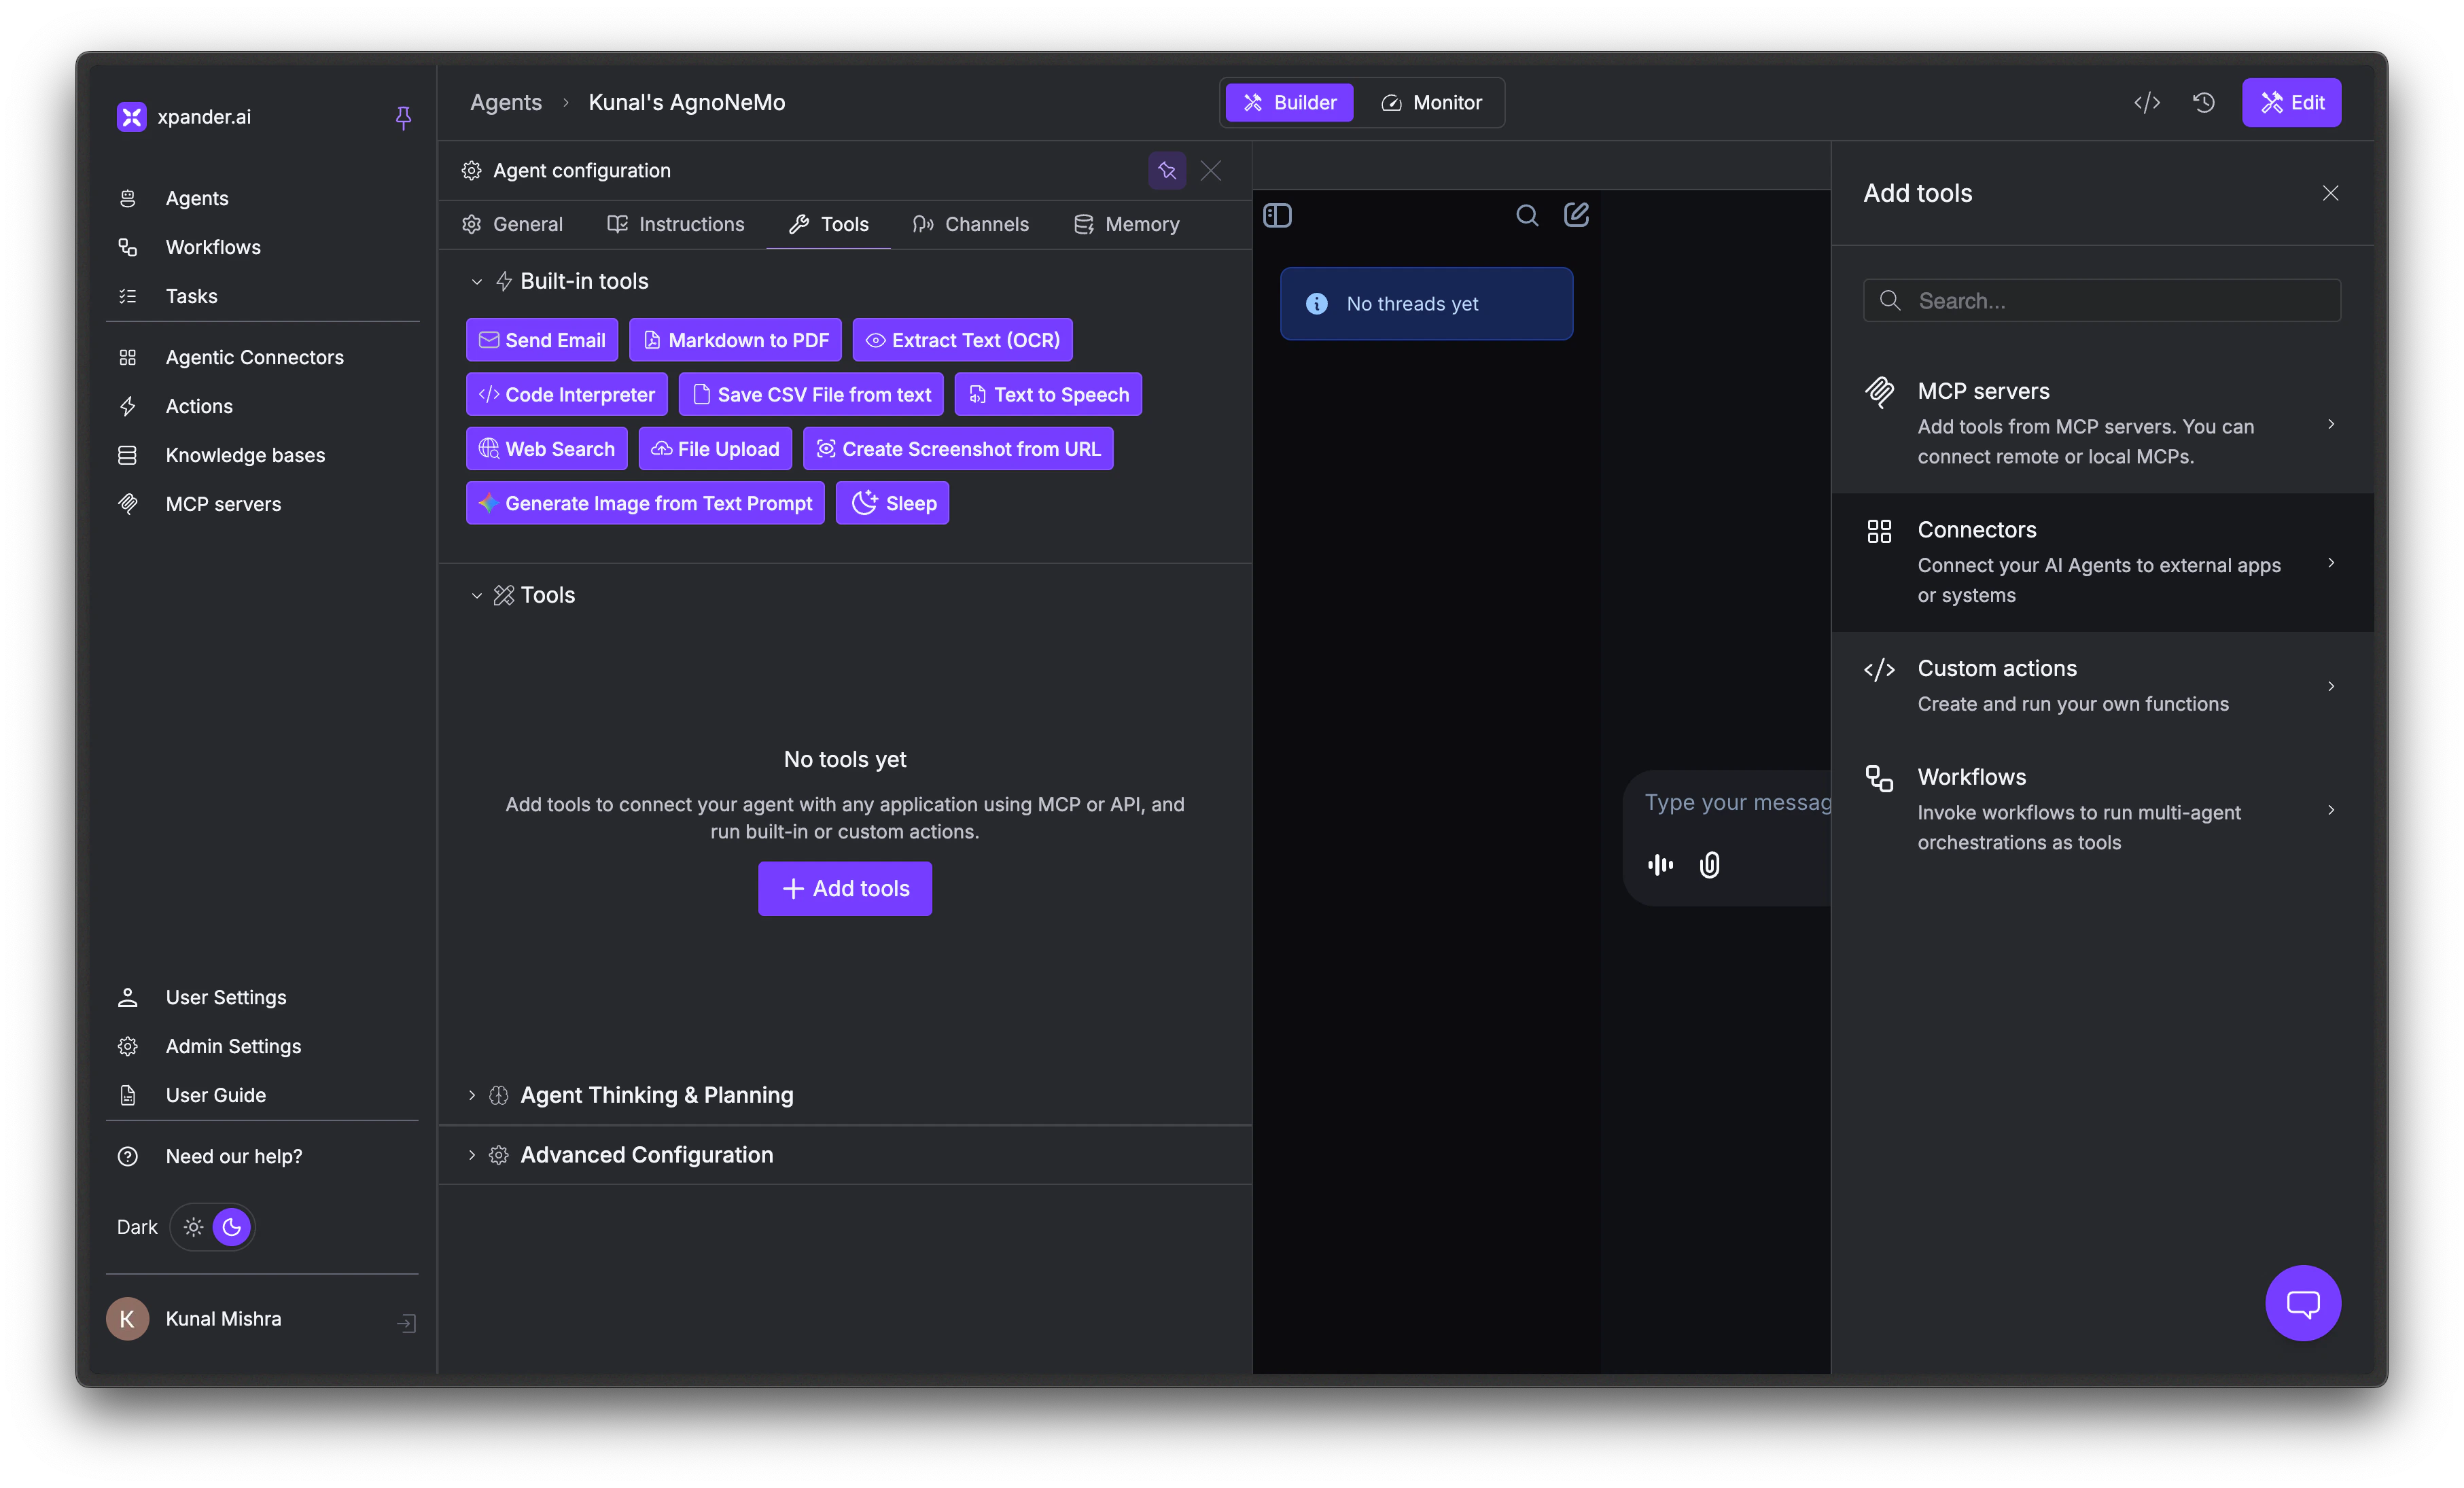
Click + Add tools to open the connector browser panel. Click Connectors to see the full catalog. Or use the search to find a specific connector.
Built-in tools are pre-configured actions that ship with every agent, no authentication or setup required.
Click on any tool to toggle it on or off.
Click + Add tools to open the connector browser panel. Click Connectors to see the full catalog. Or use the search to find a specific connector.
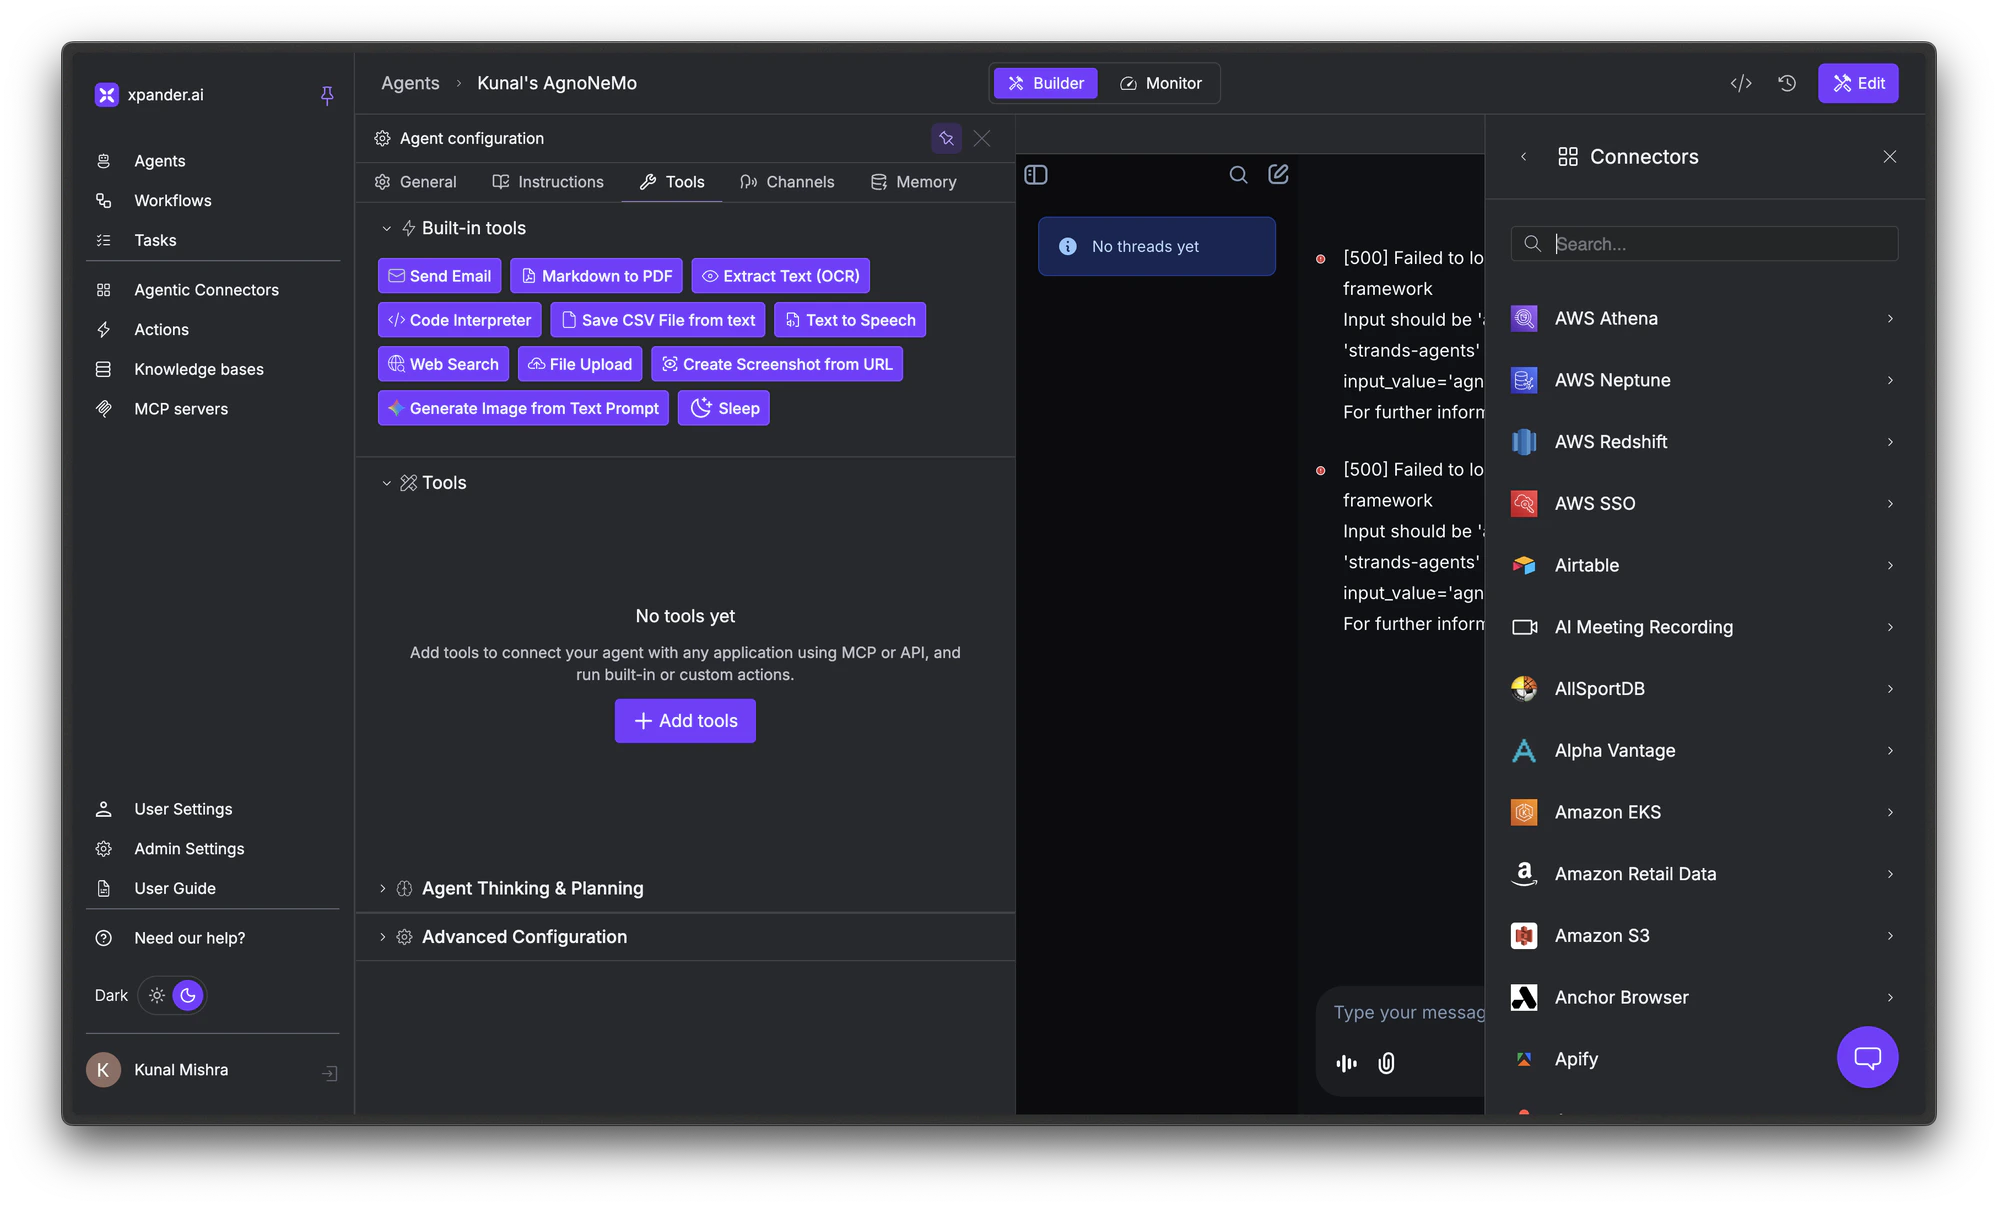 Click a connector (e.g., Calendly) to see its available connections.
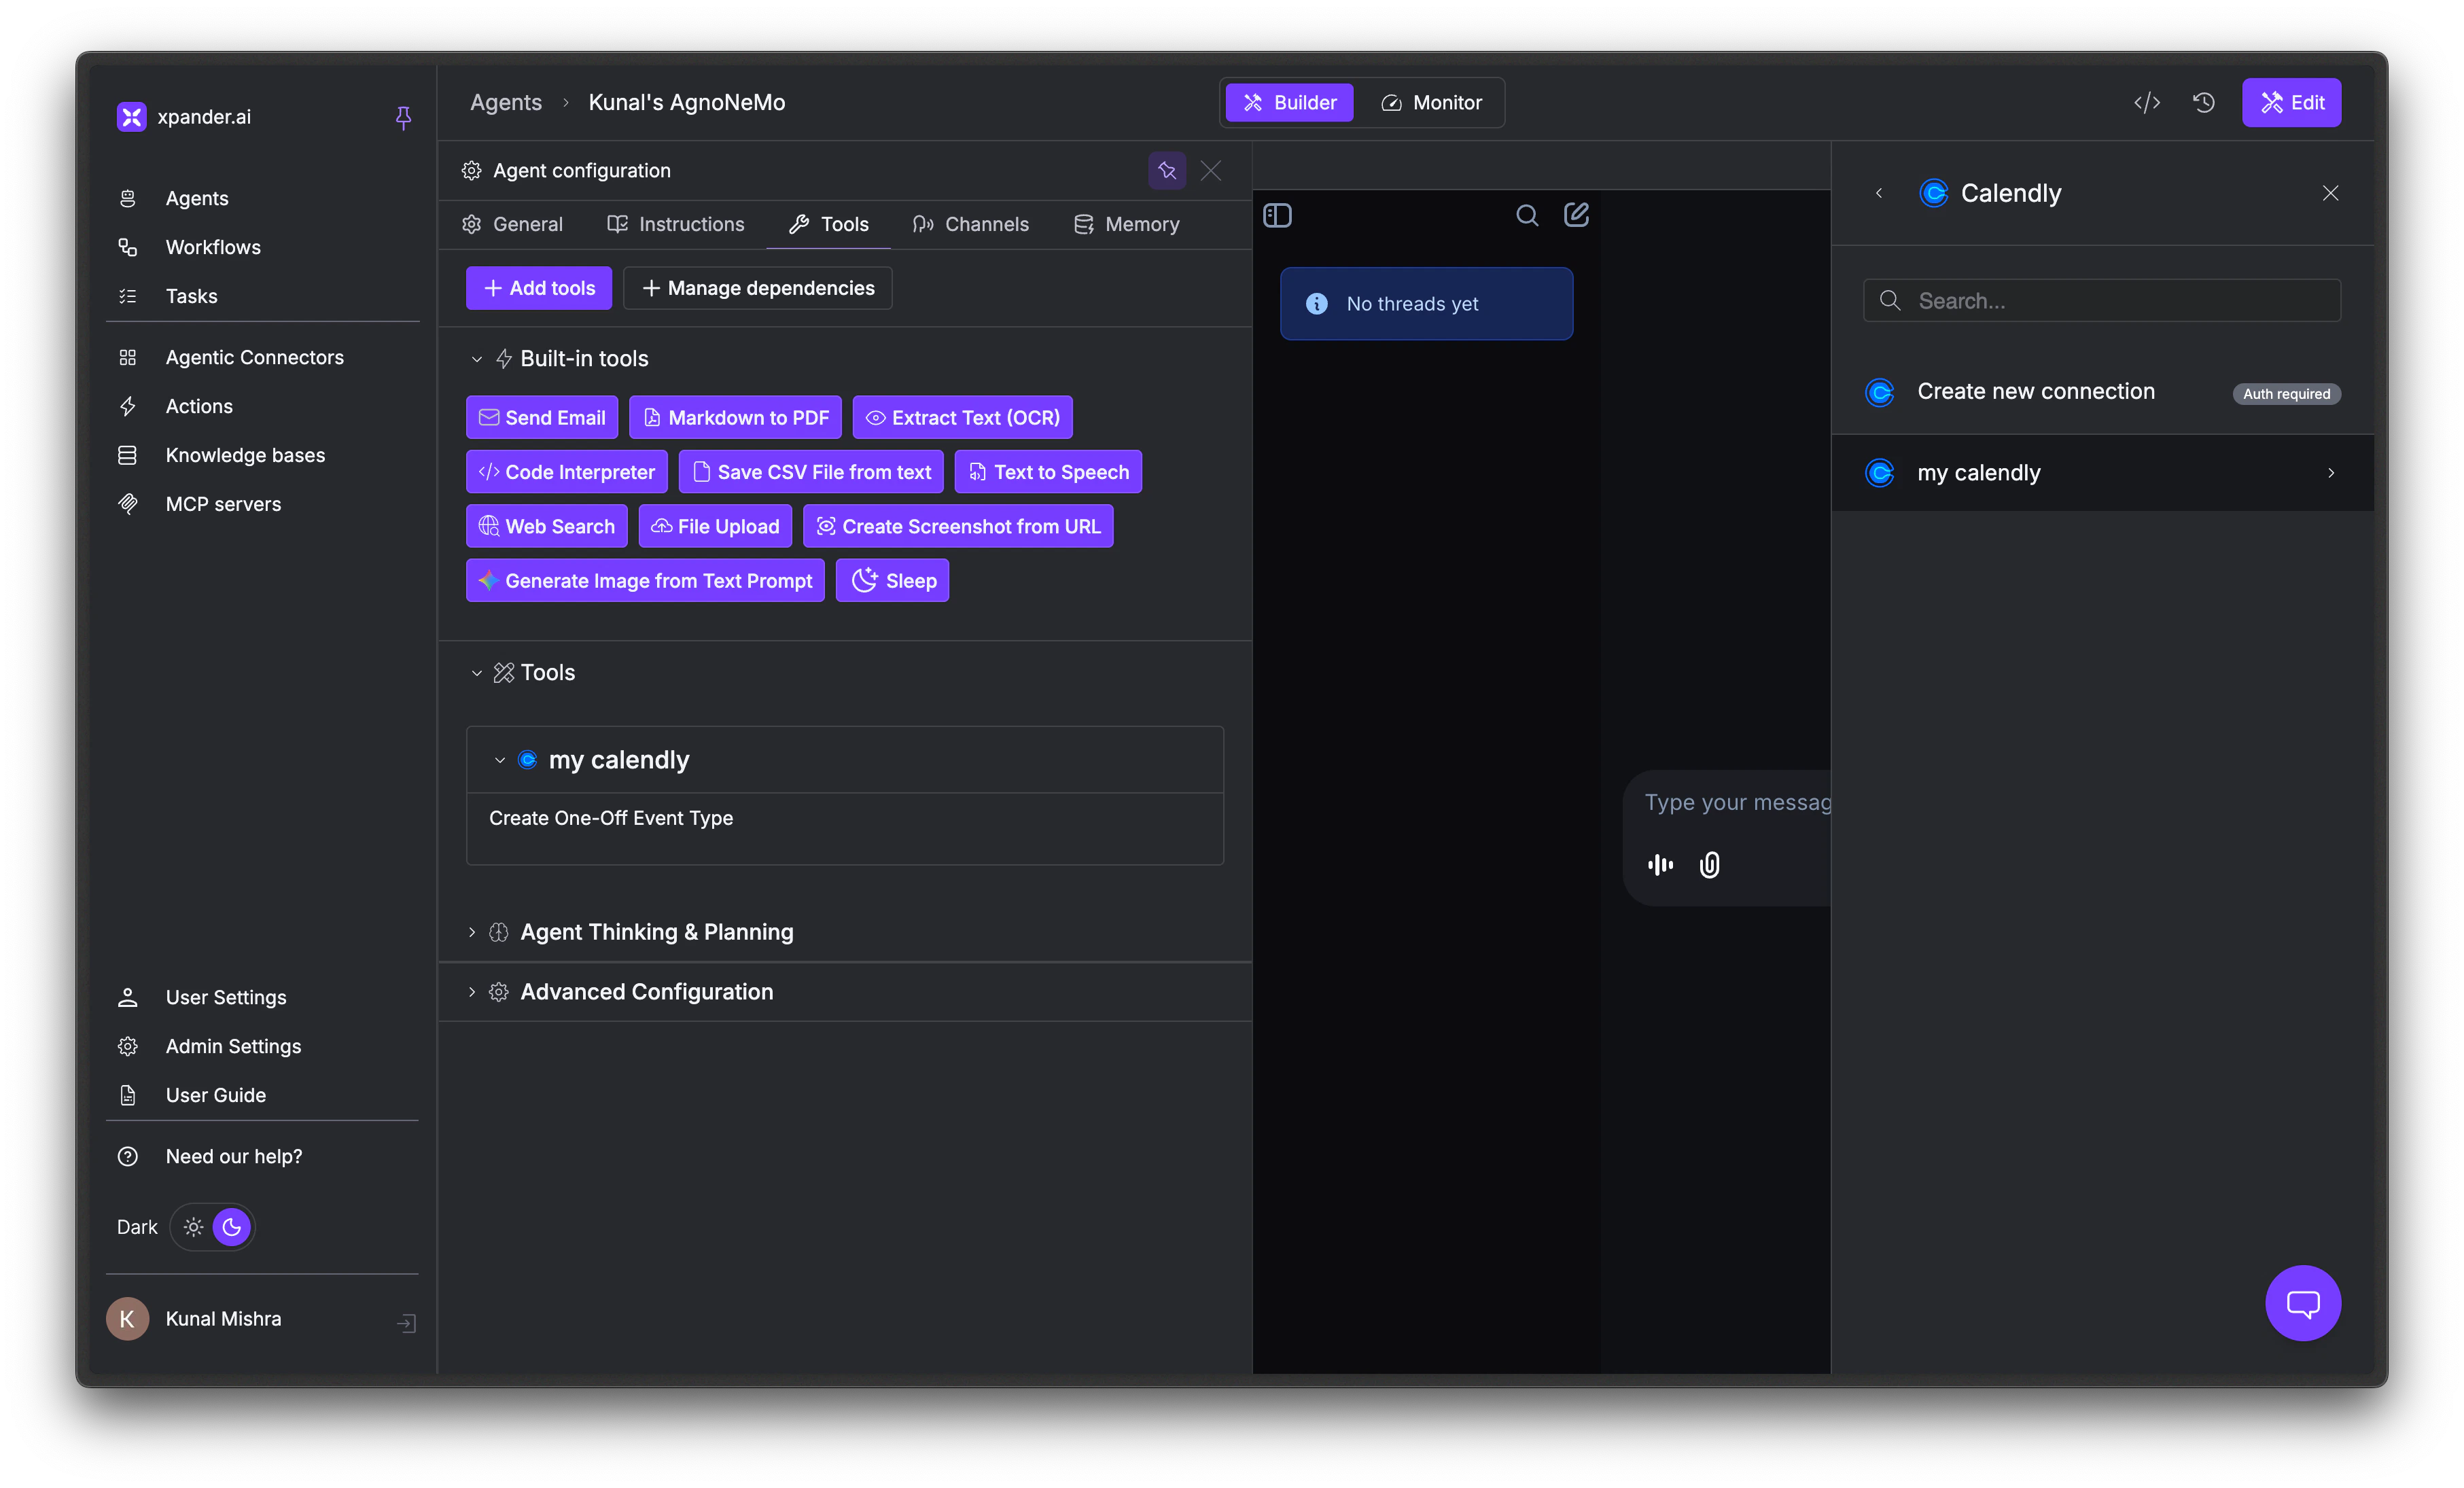 If you haven't authenticated yet, you'll see **Create new connection**. Click it to set one up (see [Create a new connection](#create-a-new-connection) above).
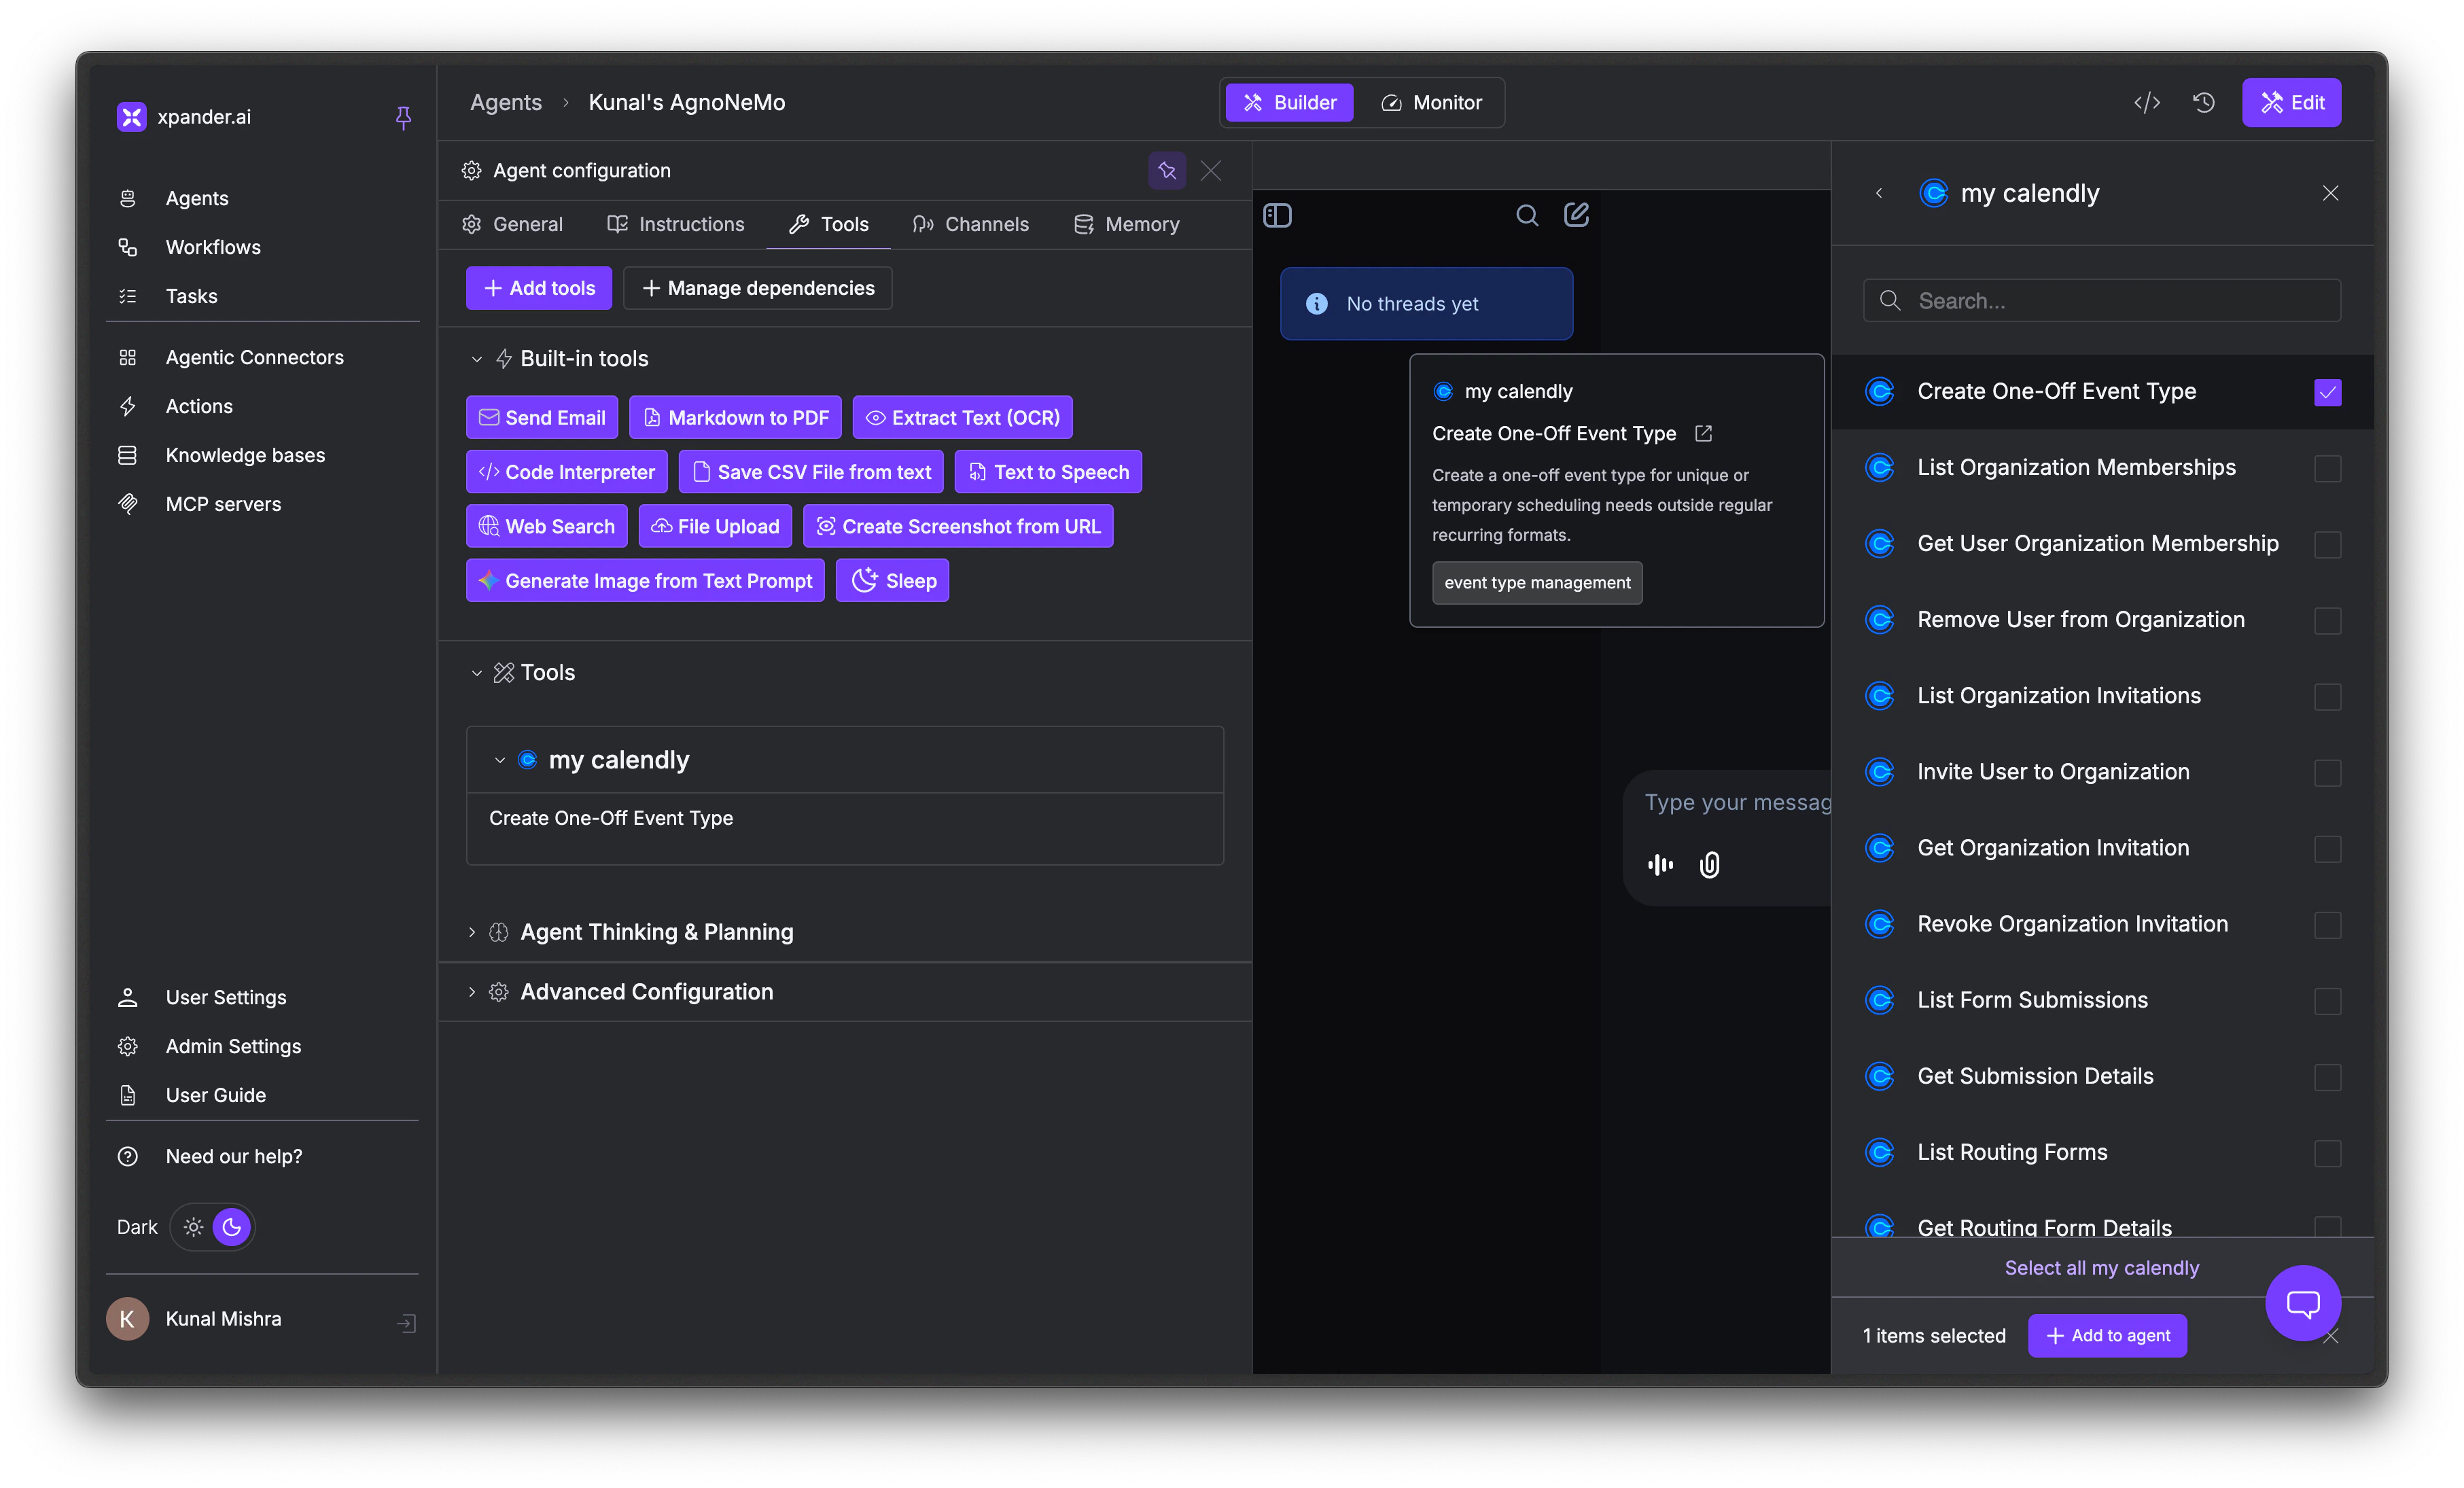
Click an authenticated connection to see its available actions.
Check the boxes next to the actions you want. Finally, click + Add to agent to attach them.
If you haven't authenticated yet, you'll see **Create new connection**. Click it to set one up (see [Create a new connection](#create-a-new-connection) above).
Click an authenticated connection to see its available actions.
Check the boxes next to the actions you want. Finally, click + Add to agent to attach them.
 Fewer tools means fewer decisions for the model, which means better accuracy. Only attach the actions your agent actually needs.
The selected actions now appear under the **Tools** section in the config panel.
Fewer tools means fewer decisions for the model, which means better accuracy. Only attach the actions your agent actually needs.
The selected actions now appear under the **Tools** section in the config panel.
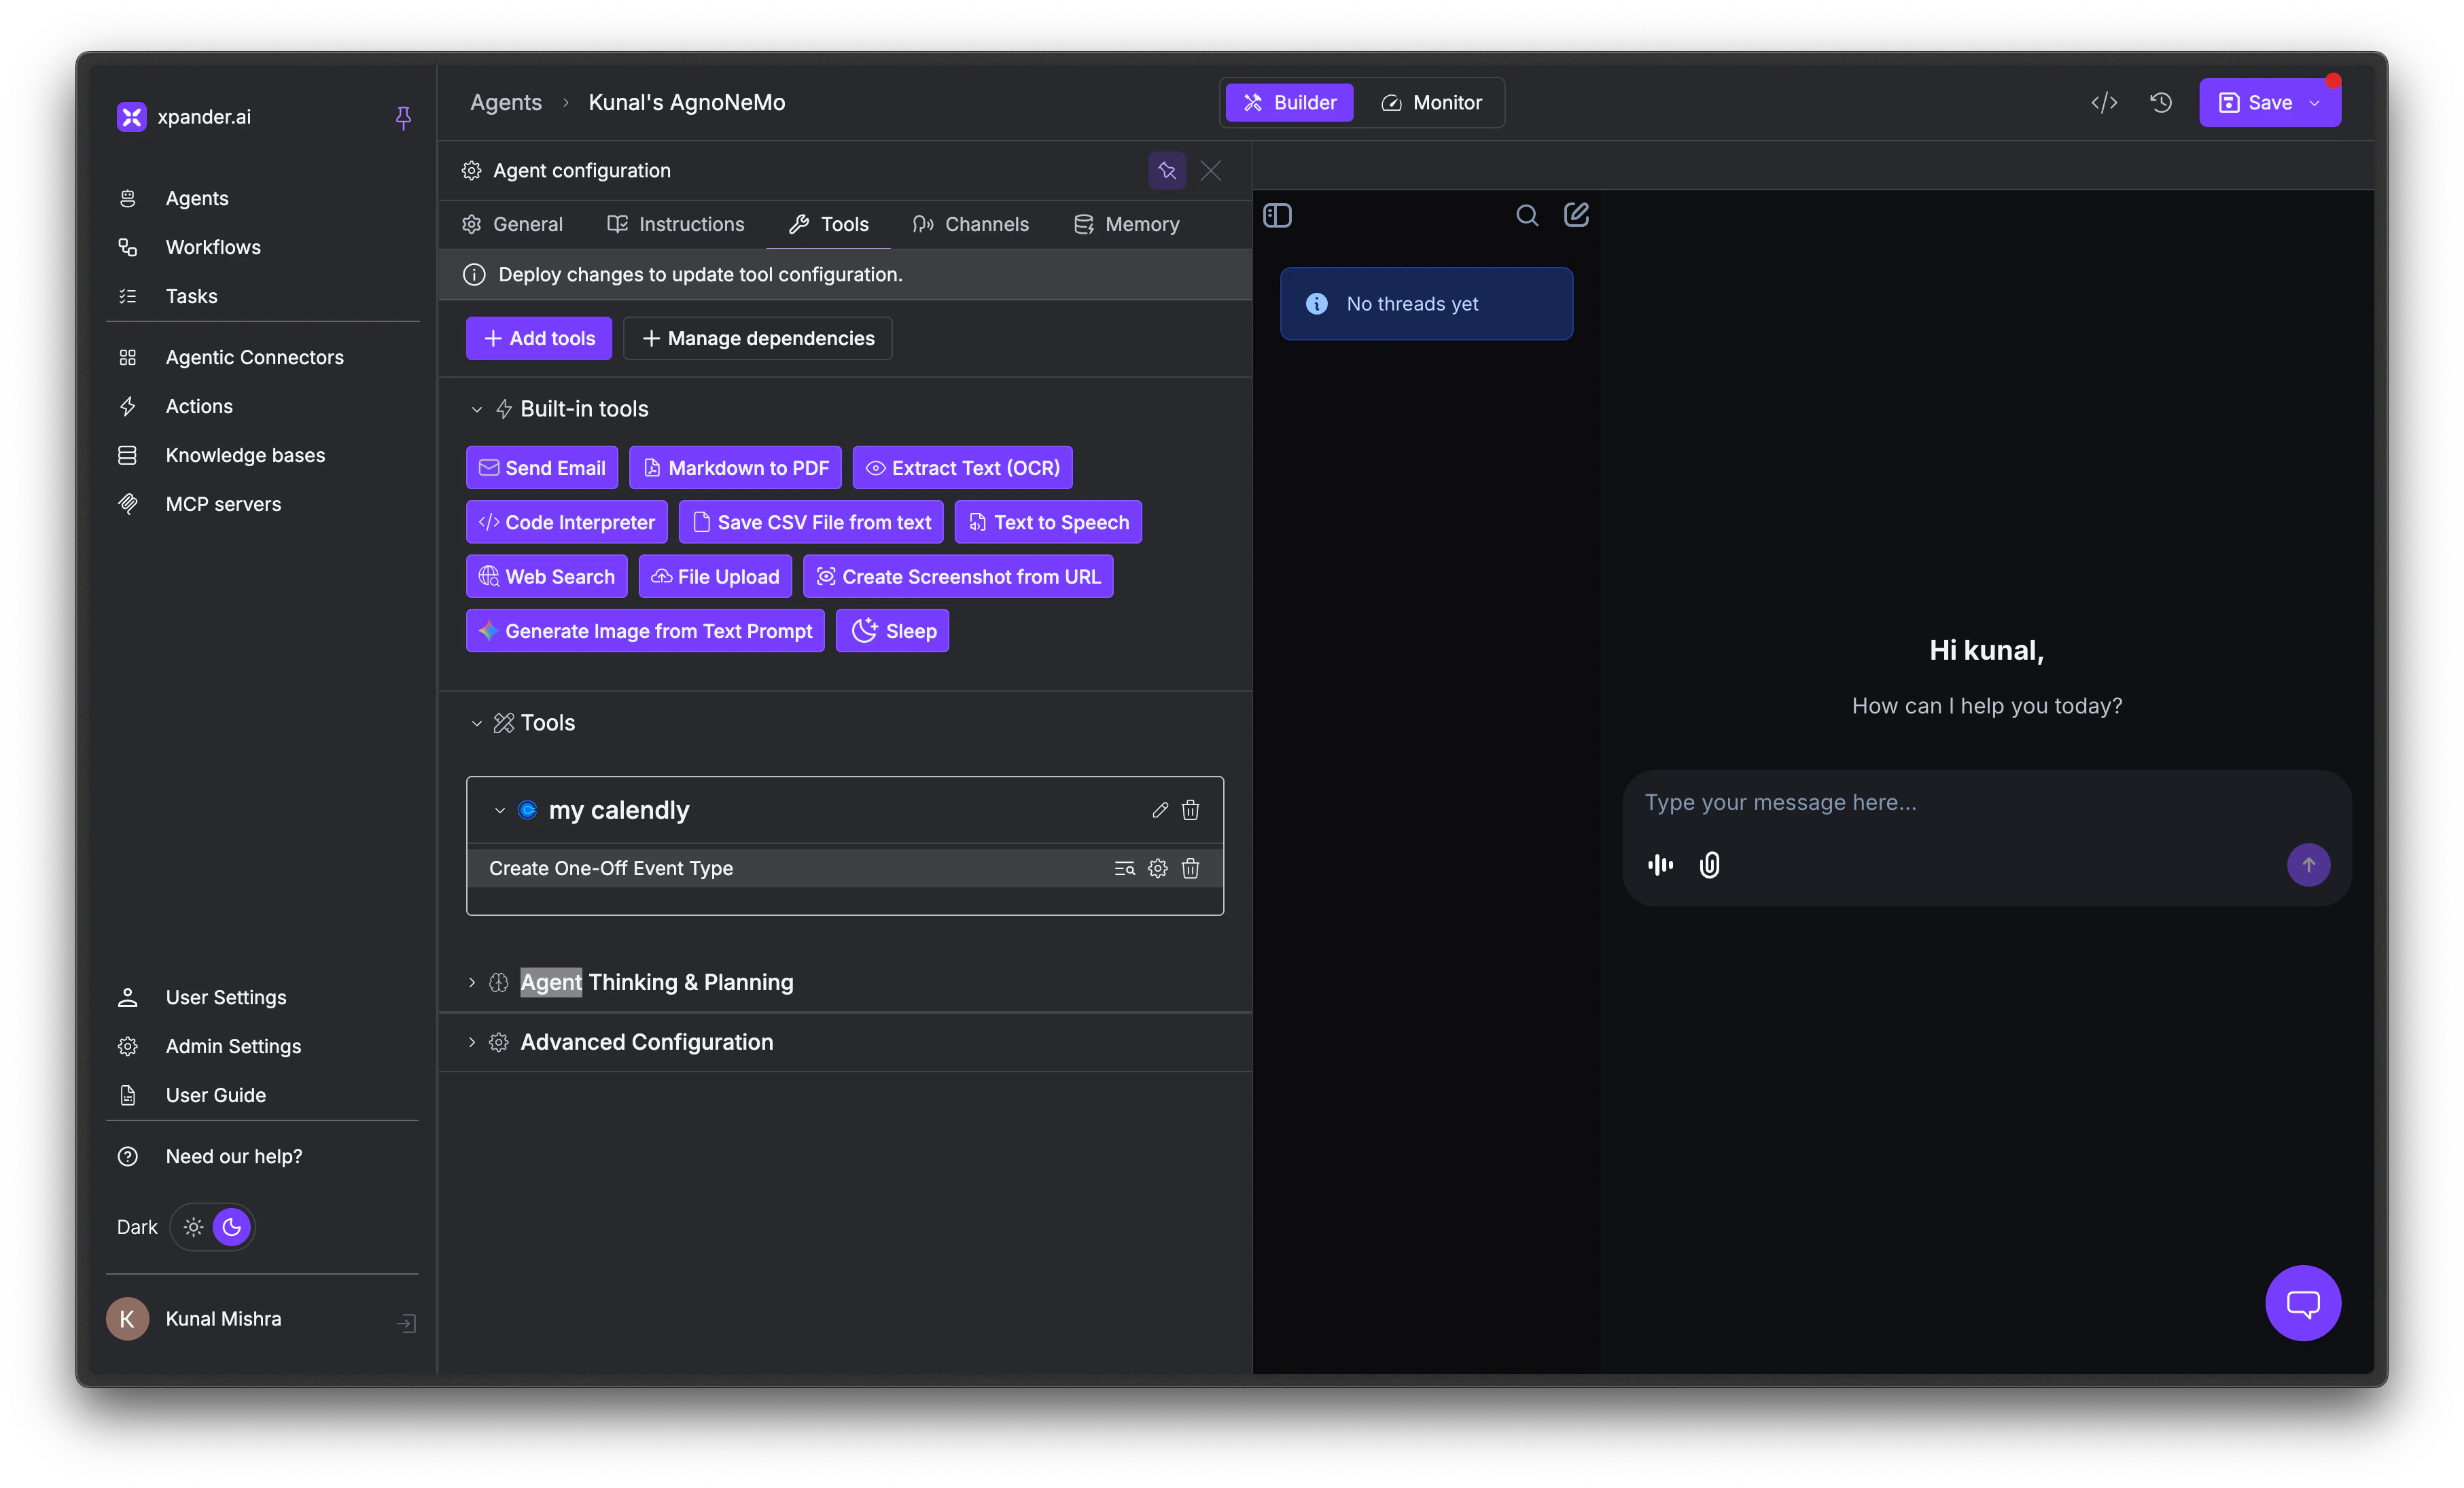 You'll see a banner: "Deploy changes to update tool configuration." Click **Publish** in the top right to push changes live, or test your draft configuration in the embedded chat first.
## Tool Dependencies
Without dependencies, an agent can call any tool in any order. Dependencies lock Tool B until the agent has called Tool A first, even if the user's request only mentions Tool B.
This is useful when one tool's output is a prerequisite for another to work correctly.
```mermaid theme={"dark"}
graph LR
A["Get calendar availability"] --> B["Create calendar event"]
```
Even if the user says "book a meeting at 3pm," the agent must call **Get calendar availability** before it can call **Create calendar event**. This guarantees the agent checks for conflicts before booking.
### Create a dependency
Click + Manage dependencies at the top of the Tools tab to open the agent graph, a visual canvas showing every tool attached to your agent as a node.
You'll see a banner: "Deploy changes to update tool configuration." Click **Publish** in the top right to push changes live, or test your draft configuration in the embedded chat first.
## Tool Dependencies
Without dependencies, an agent can call any tool in any order. Dependencies lock Tool B until the agent has called Tool A first, even if the user's request only mentions Tool B.
This is useful when one tool's output is a prerequisite for another to work correctly.
```mermaid theme={"dark"}
graph LR
A["Get calendar availability"] --> B["Create calendar event"]
```
Even if the user says "book a meeting at 3pm," the agent must call **Get calendar availability** before it can call **Create calendar event**. This guarantees the agent checks for conflicts before booking.
### Create a dependency
Click + Manage dependencies at the top of the Tools tab to open the agent graph, a visual canvas showing every tool attached to your agent as a node.
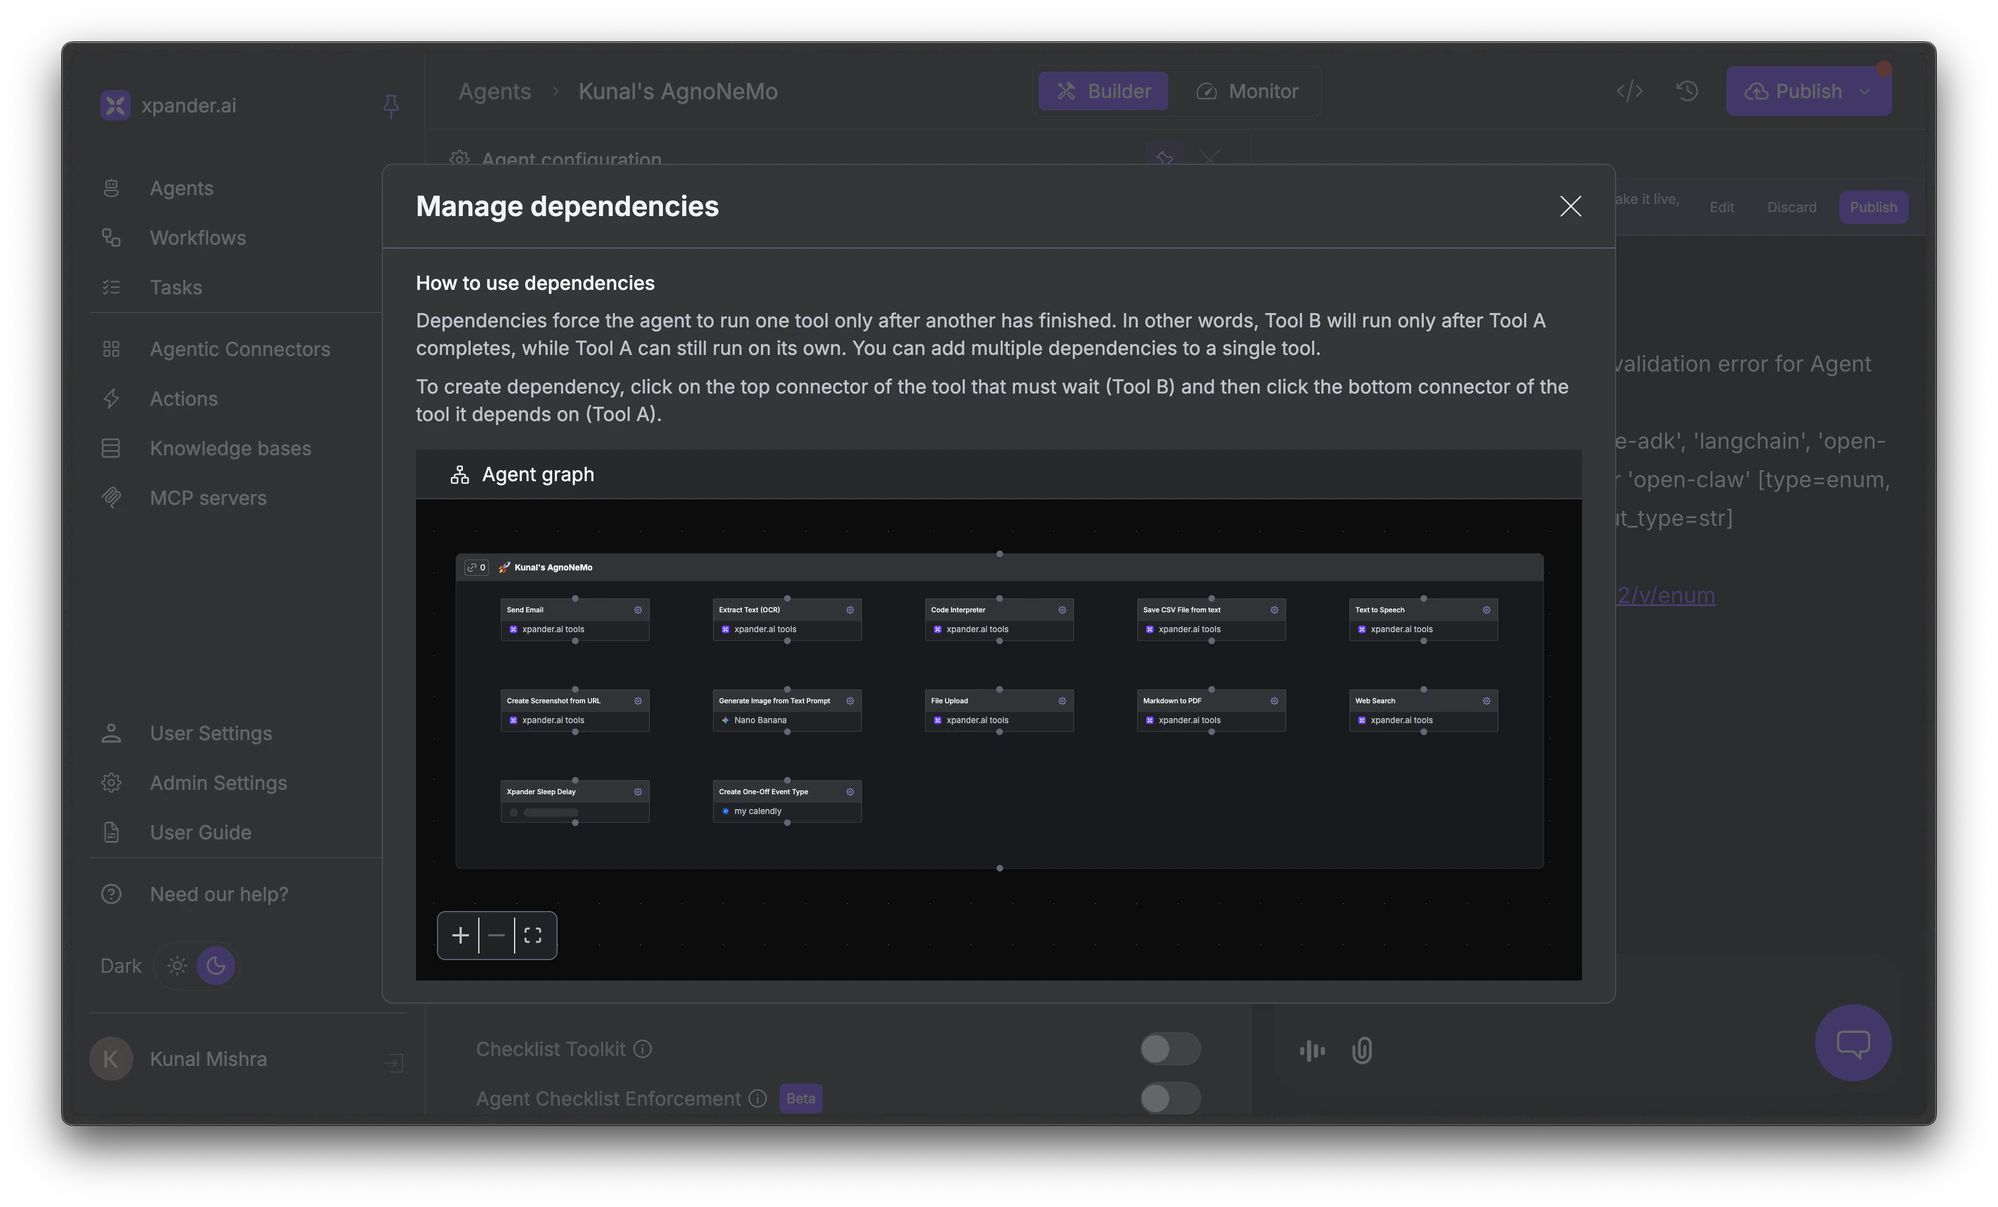 Click the **top handle** of the tool that must wait (the downstream tool).
Drag to the **bottom handle** of the tool it depends on (the upstream tool). The dependency is created automatically.
Repeat to build multi-step sequences. You can also create branching paths where multiple tools depend on the same prerequisite, or where a tool requires multiple prerequisites to complete first.
## Configure Max Tool Calls
Under **Advanced Configuration** in the Tools tab, you can limit the maximum number of tool calls per run.
Click the **top handle** of the tool that must wait (the downstream tool).
Drag to the **bottom handle** of the tool it depends on (the upstream tool). The dependency is created automatically.
Repeat to build multi-step sequences. You can also create branching paths where multiple tools depend on the same prerequisite, or where a tool requires multiple prerequisites to complete first.
## Configure Max Tool Calls
Under **Advanced Configuration** in the Tools tab, you can limit the maximum number of tool calls per run.
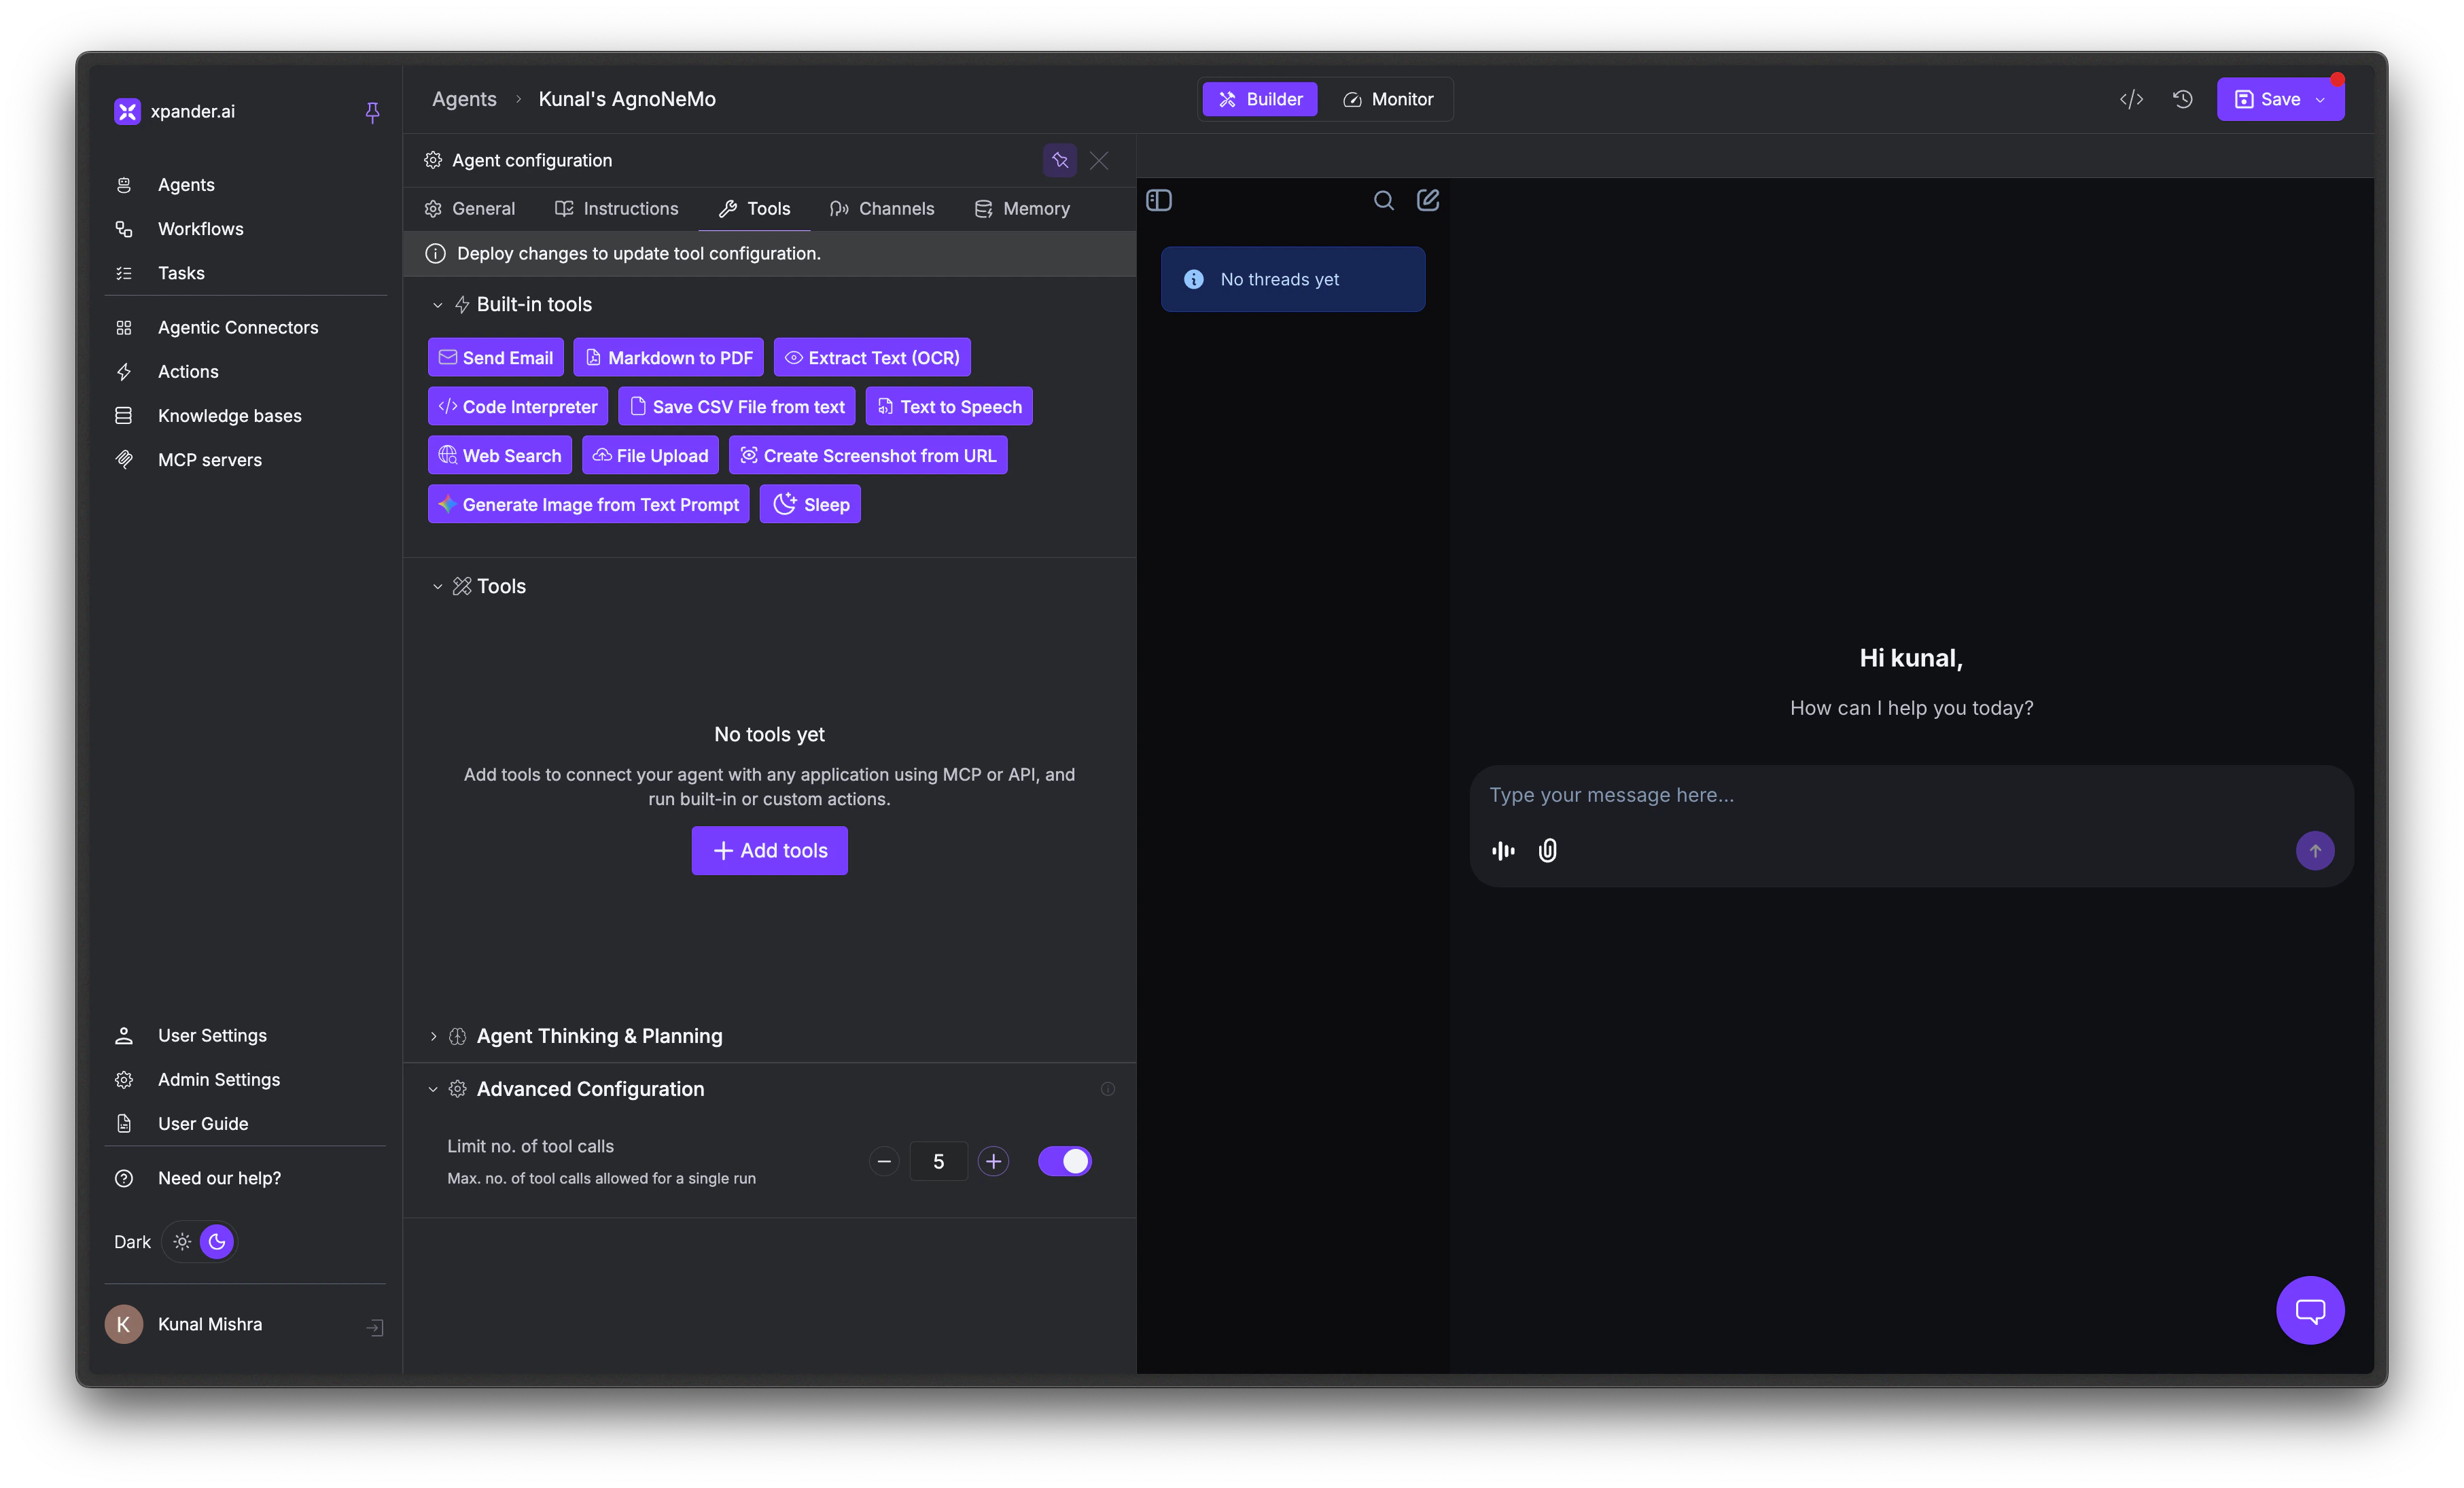 Without a limit, an agent with many tools can enter runaway loops, calling tools indefinitely and consuming tokens. Set a cap appropriate for your use case.
## Next steps
Upload documents so your agent can search and cite them
Planning mode, reasoning mode, and model selection
Full overview of all Agent Studio settings
Test your tools and debug behavior
Without a limit, an agent with many tools can enter runaway loops, calling tools indefinitely and consuming tokens. Set a cap appropriate for your use case.
## Next steps
Upload documents so your agent can search and cite them
Planning mode, reasoning mode, and model selection
Full overview of all Agent Studio settings
Test your tools and debug behavior