> ## Documentation Index
> Fetch the complete documentation index at: https://docs.xpander.ai/llms.txt
> Use this file to discover all available pages before exploring further.
# Chat Widget
> Share a hosted chat URL or embed a chat widget in your website
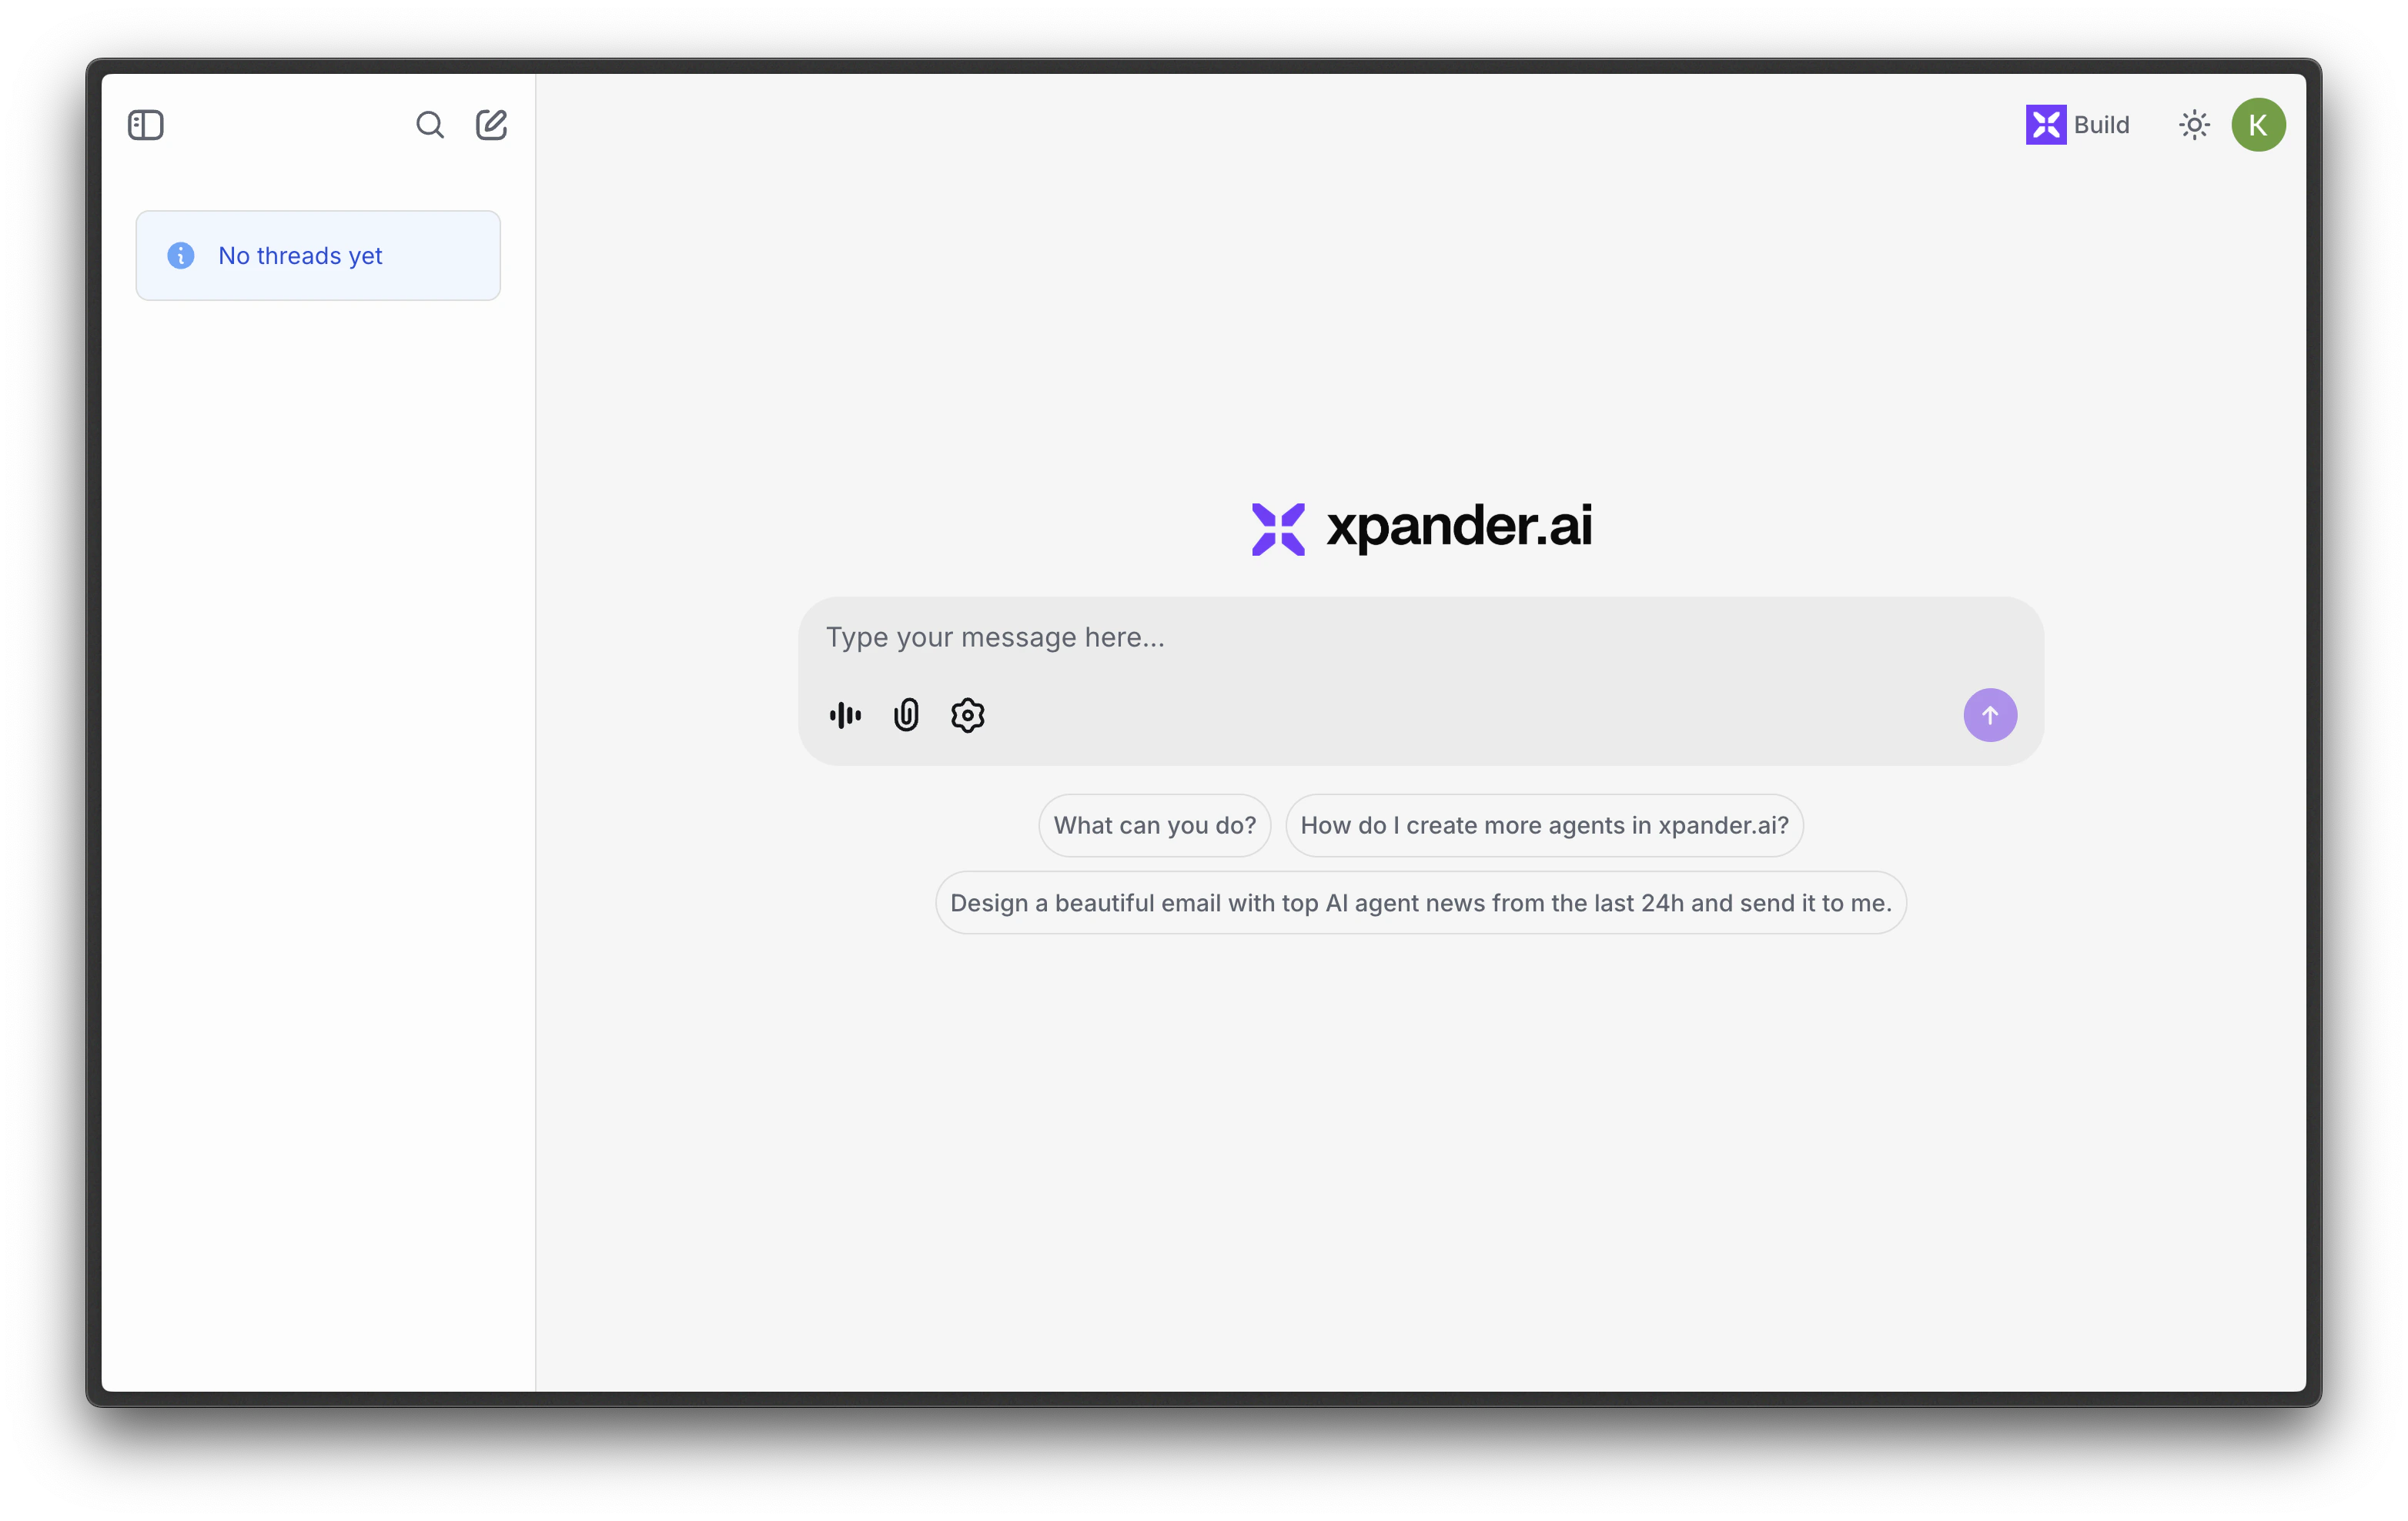
Your agent is ready, but your team needs a way to reach it without opening the Agent Studio. The Chat Widget gives every agent a hosted URL anyone in your organization can bookmark, plus an embeddable widget you can drop into any page.
Once set up, you can:
* Share a hosted chat URL with anyone in your organization
* Embed the Agent chat as a widget on any website or app
* Suggest pre-defined conversation starters to guide first-time users
* Control access with platform login or your SSO provider
Pre-requisites:
* a [**Custom Agent**](/guides/agents/agent-configuration)
Chat is not available for Personal Agents. Create a [Custom Agent](/guides/agents/agent-configuration) to use the hosted chat or embed widget.
 ## Share the Chat URL
Each agent gets a unique hosted URL that you can share directly - no code or embedding required.
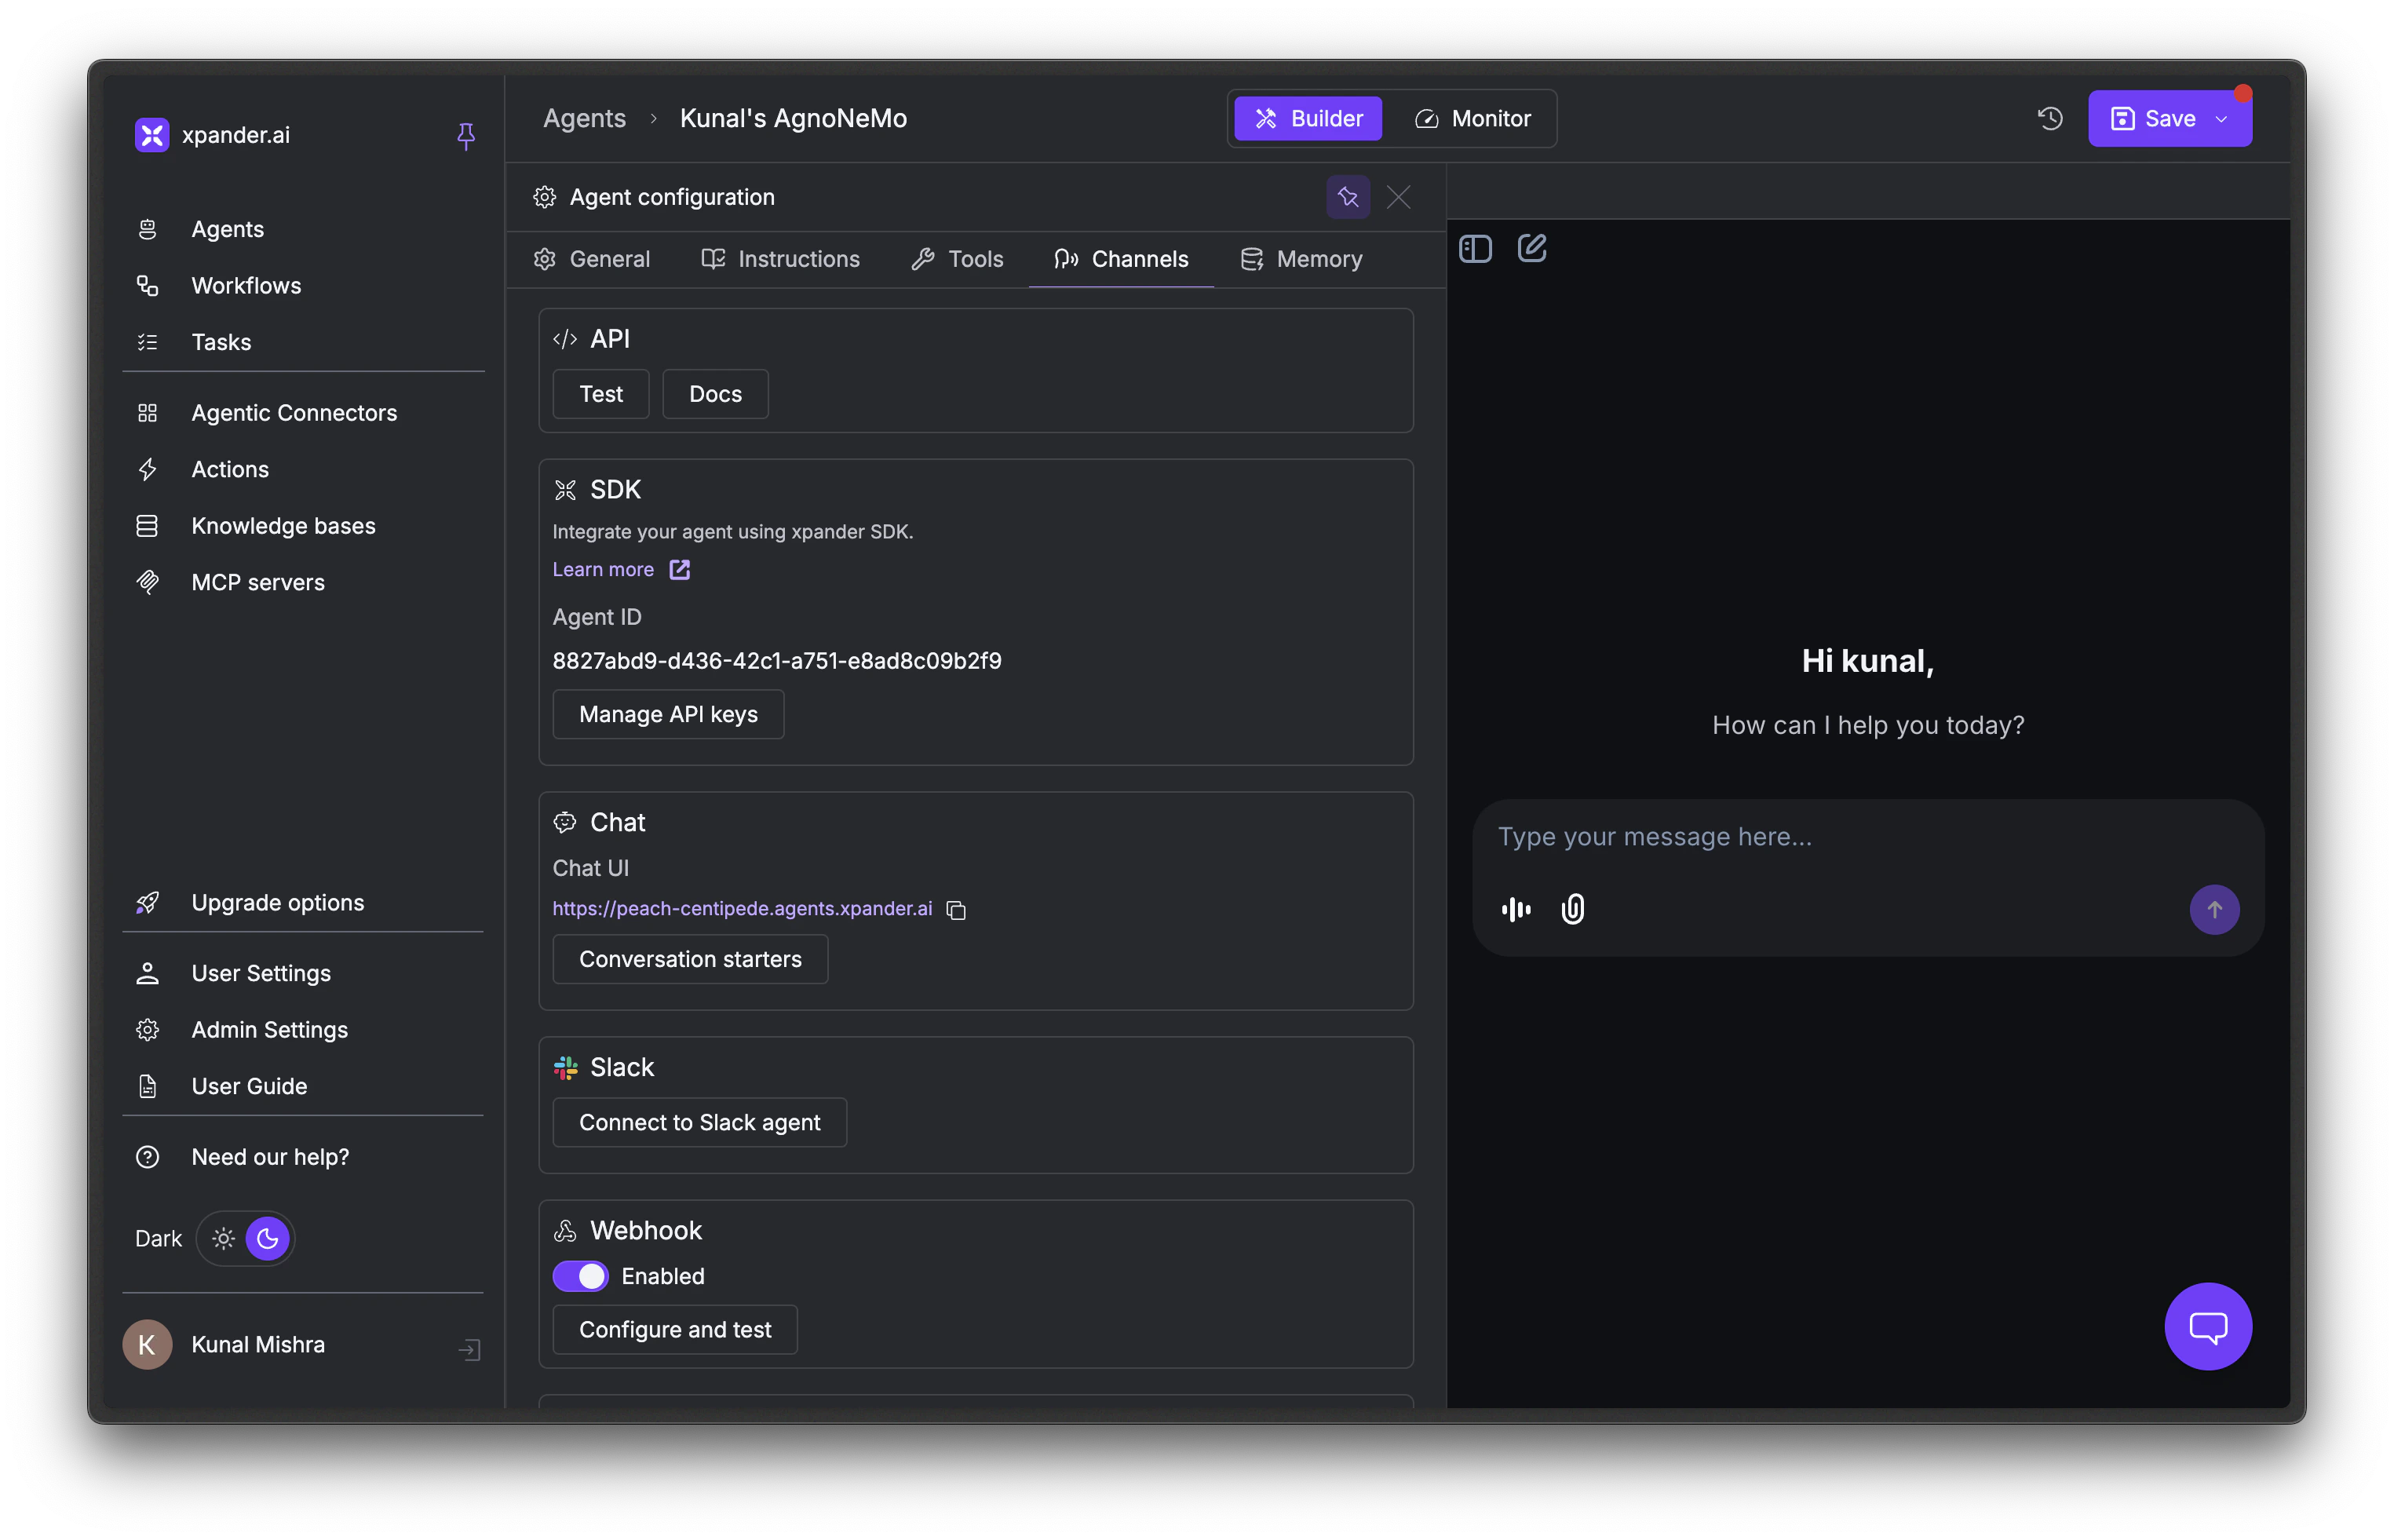
In the Agent Studio, click the **gear** icon and go to the **Channels** tab. Find the **Chat** section.
## Share the Chat URL
Each agent gets a unique hosted URL that you can share directly - no code or embedding required.
In the Agent Studio, click the **gear** icon and go to the **Channels** tab. Find the **Chat** section.
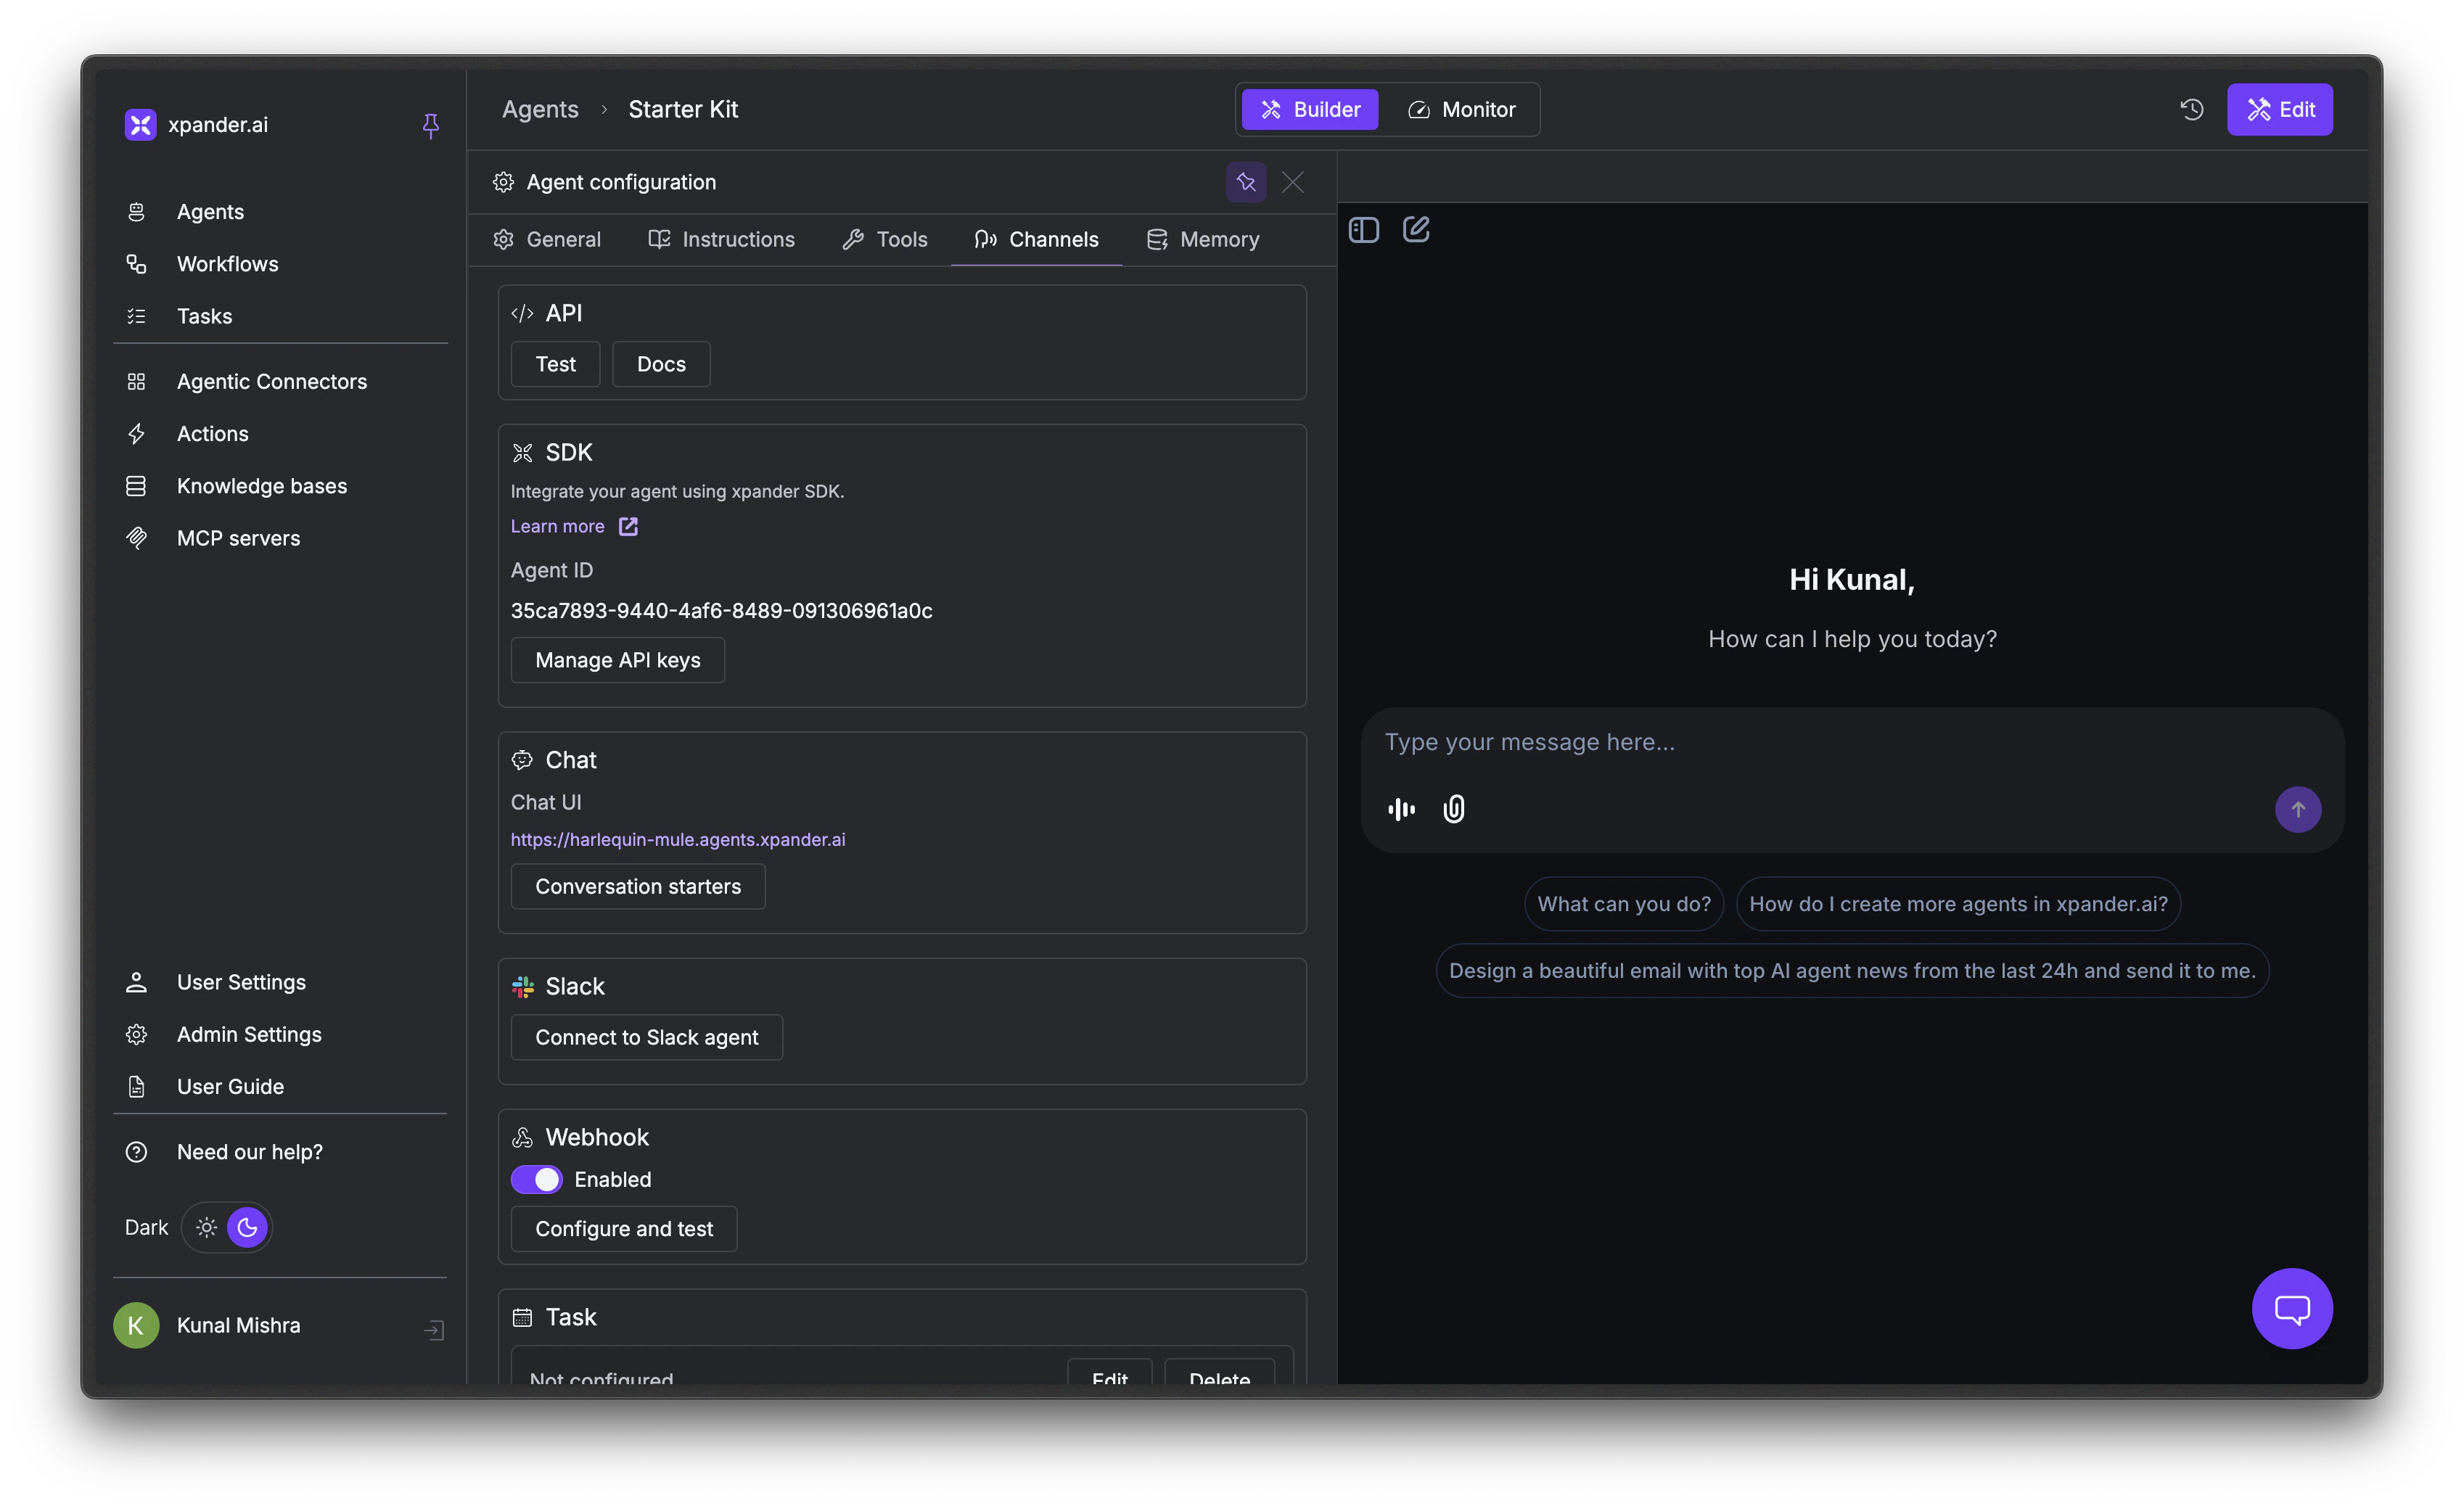 Your chat URL is displayed directly (e.g., `https://peach-centipede.agents.xpander.ai`). Share this link with your users.
 Anyone with the link and the right permissions can open the chat, start new threads, upload files, and have full conversations with your agent.
## Embed Chat Widget
You can embed the chat interface in any website using an iframe. The embedded version supports the same features as the hosted version: multiple threads, file uploads, and streaming responses.
Replace `YOUR_AGENT_ID` with your agent's ID. You can find it in the **Channels** tab under the **SDK** section (it's the same Agent ID shown there).
```html theme={"dark"}
```
The chat interface is responsive and adapts to the container size. Adjust the iframe dimensions and styling to match your site's layout.
Users who open the embedded widget still need to authenticate. If your site handles identity through an SSO provider Xpander supports, connect it so users aren't prompted to log in again.
## Control Access
Set who can reach the chat using the [Agent Studio](https://app.xpander.ai/agents/) > Configuration > General tab > **Access** setting.
Anyone with the link and the right permissions can open the chat, start new threads, upload files, and have full conversations with your agent.
## Embed Chat Widget
You can embed the chat interface in any website using an iframe. The embedded version supports the same features as the hosted version: multiple threads, file uploads, and streaming responses.
Replace `YOUR_AGENT_ID` with your agent's ID. You can find it in the **Channels** tab under the **SDK** section (it's the same Agent ID shown there).
```html theme={"dark"}
```
The chat interface is responsive and adapts to the container size. Adjust the iframe dimensions and styling to match your site's layout.
Users who open the embedded widget still need to authenticate. If your site handles identity through an SSO provider Xpander supports, connect it so users aren't prompted to log in again.
## Control Access
Set who can reach the chat using the [Agent Studio](https://app.xpander.ai/agents/) > Configuration > General tab > **Access** setting.
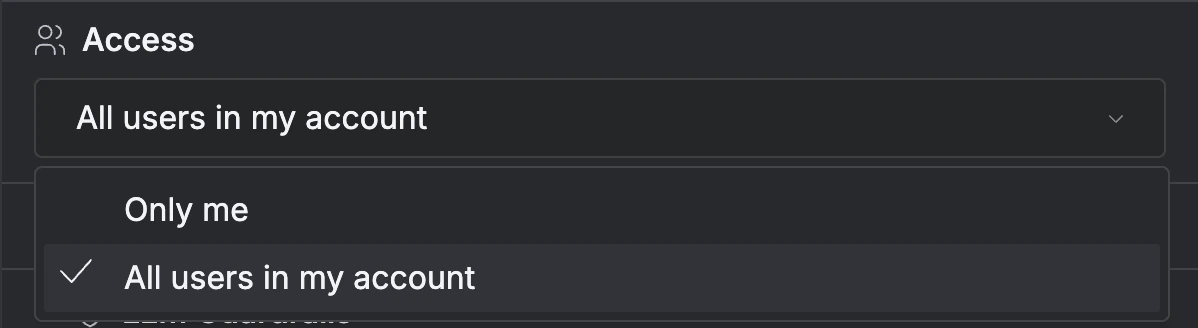 | Setting | Who can access |
| --------------------------- | ------------------------------------------------ |
| **Only me** | Only you - useful during development and testing |
| **All users in my account** | Anyone in your Xpander organization |
### Authentication
Users authenticate through one of two paths:
* **Platform login** - Xpander's built-in user management (registration, password recovery, session handling, user profiles). The default, and the right choice for most deployments.
* **SSO** - If your organization already uses Okta, Auth0, or Azure AD, connect it so users sign in with their existing credentials. Xpander supports SAML 2.0 and OAuth 2.0 with role mapping and automatic provisioning.
SSO is configured in Admin Settings. [Contact sales](https://cal.com/team/xpander-ai/activate) to enable SSO on your workspace.
## Custom Domain
Enterprise workspaces can serve the chat from a branded domain like `chat.your-company.com` instead of the default `chat.xpander.ai`. This preserves every chat feature (threads, conversation starters, authentication, and embedding) while keeping the URL on your own domain. [Contact sales](https://cal.com/team/xpander-ai/activate) to set this up.
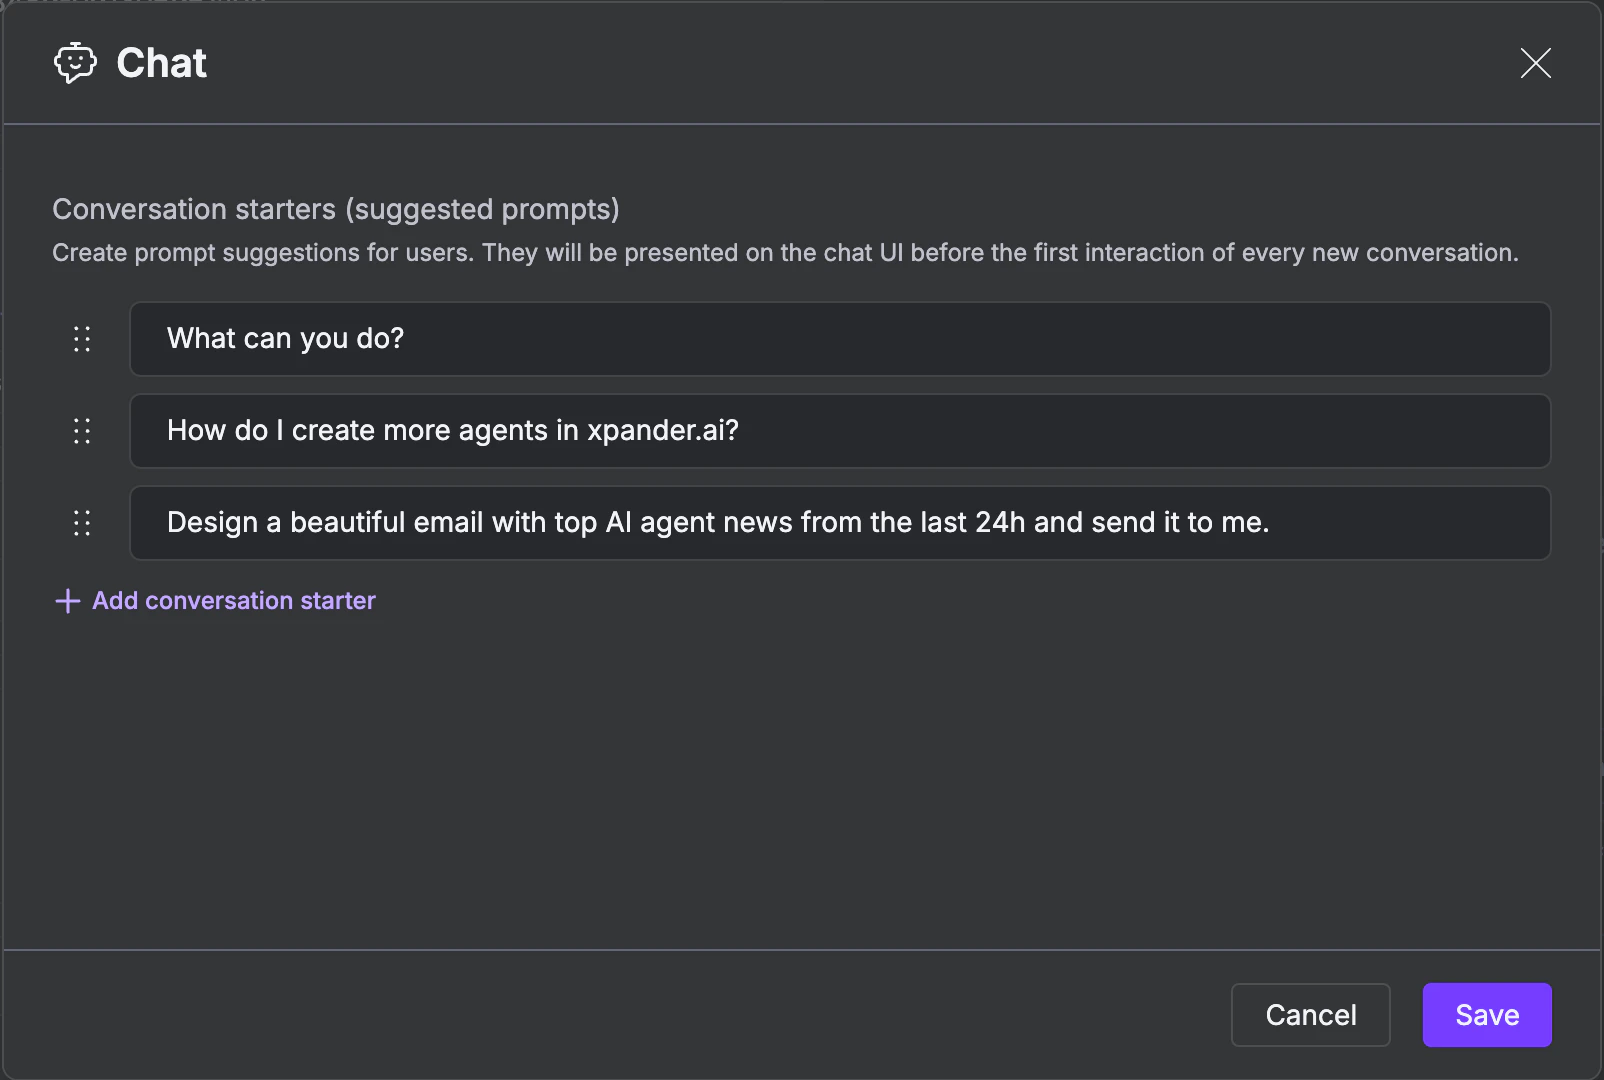
## Add Conversation Starters
Conversation starters are prompt suggestions that appear when a user first opens the chat. They reduce the blank-page problem and help users understand what the agent can do.
In the **Chat** section of the Channels tab, click Conversation starters.
Click + Add conversation starter to create suggestions. Each starter is a short phrase like "What can you do?" or "Summarize today's tickets."
| Setting | Who can access |
| --------------------------- | ------------------------------------------------ |
| **Only me** | Only you - useful during development and testing |
| **All users in my account** | Anyone in your Xpander organization |
### Authentication
Users authenticate through one of two paths:
* **Platform login** - Xpander's built-in user management (registration, password recovery, session handling, user profiles). The default, and the right choice for most deployments.
* **SSO** - If your organization already uses Okta, Auth0, or Azure AD, connect it so users sign in with their existing credentials. Xpander supports SAML 2.0 and OAuth 2.0 with role mapping and automatic provisioning.
SSO is configured in Admin Settings. [Contact sales](https://cal.com/team/xpander-ai/activate) to enable SSO on your workspace.
## Custom Domain
Enterprise workspaces can serve the chat from a branded domain like `chat.your-company.com` instead of the default `chat.xpander.ai`. This preserves every chat feature (threads, conversation starters, authentication, and embedding) while keeping the URL on your own domain. [Contact sales](https://cal.com/team/xpander-ai/activate) to set this up.
## Add Conversation Starters
Conversation starters are prompt suggestions that appear when a user first opens the chat. They reduce the blank-page problem and help users understand what the agent can do.
In the **Chat** section of the Channels tab, click Conversation starters.
Click + Add conversation starter to create suggestions. Each starter is a short phrase like "What can you do?" or "Summarize today's tickets."
 Click Save. The starters appear immediately in the chat interface.
## Next Steps
Expose your agent to Claude Desktop, Cursor, and other MCP clients
Deploy to Slack workspaces
Trace execution, debug failures, and review AI performance
Click Save. The starters appear immediately in the chat interface.
## Next Steps
Expose your agent to Claude Desktop, Cursor, and other MCP clients
Deploy to Slack workspaces
Trace execution, debug failures, and review AI performance