Goal: Connect agent to team workflows via SlackExpected Output: Agent responds to team requests in Slack channels
Watch Setup Video
Join Xpander Community
Join Xpander Community: https://bit.ly/xpander-slack (use browser)This gives you access to a test Slack workspace where you can safely configure and test your agent.
Create Your Channel
Create a dedicated channel for testing:
swe-agent-tasks-yournameReplace yourname with your actual name to avoid conflicts with other workshop participants.Create Slack Backend
- Click Task Sources and click on “Connect to Slack Agent”
- Follow the wizard and use the xpander.ai community workspace (get tokens from https://api.slack.com/reference/manifests#config-tokens)
Configure Smart Engage
Navigate to your slack agent settings and configure Slack integration: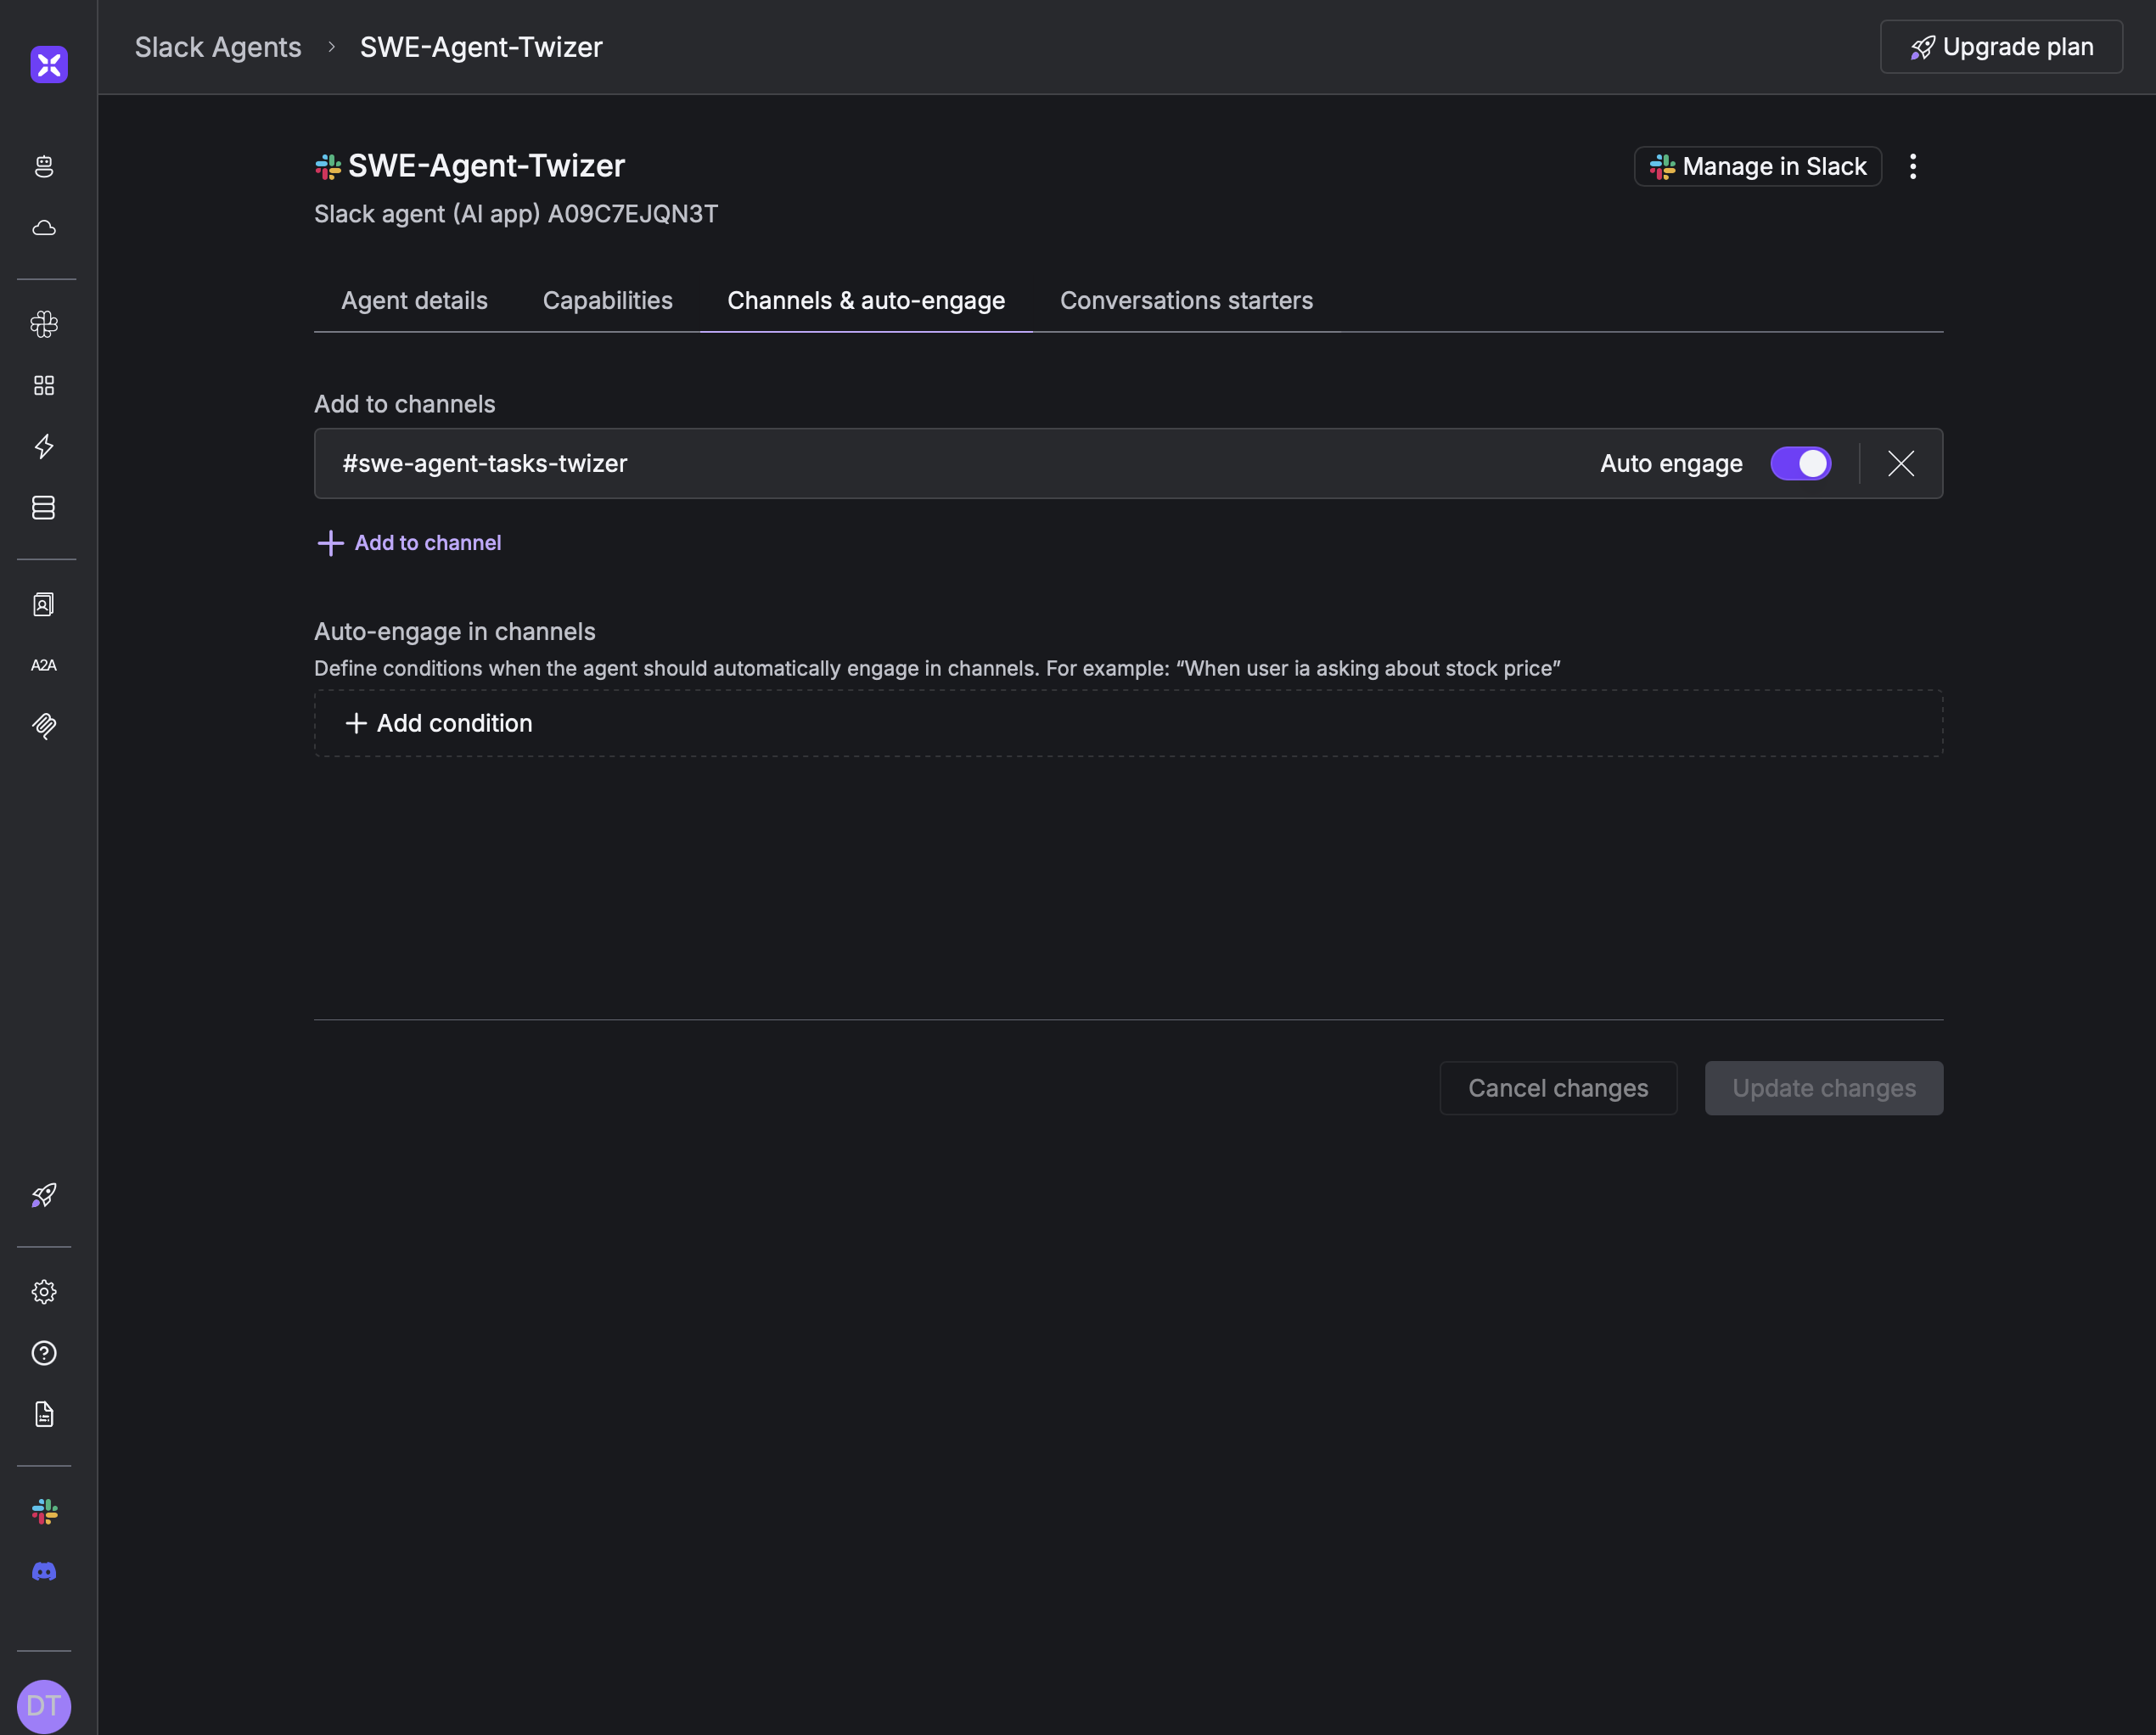
- Agent Settings → Smart Engage
- Select your channel
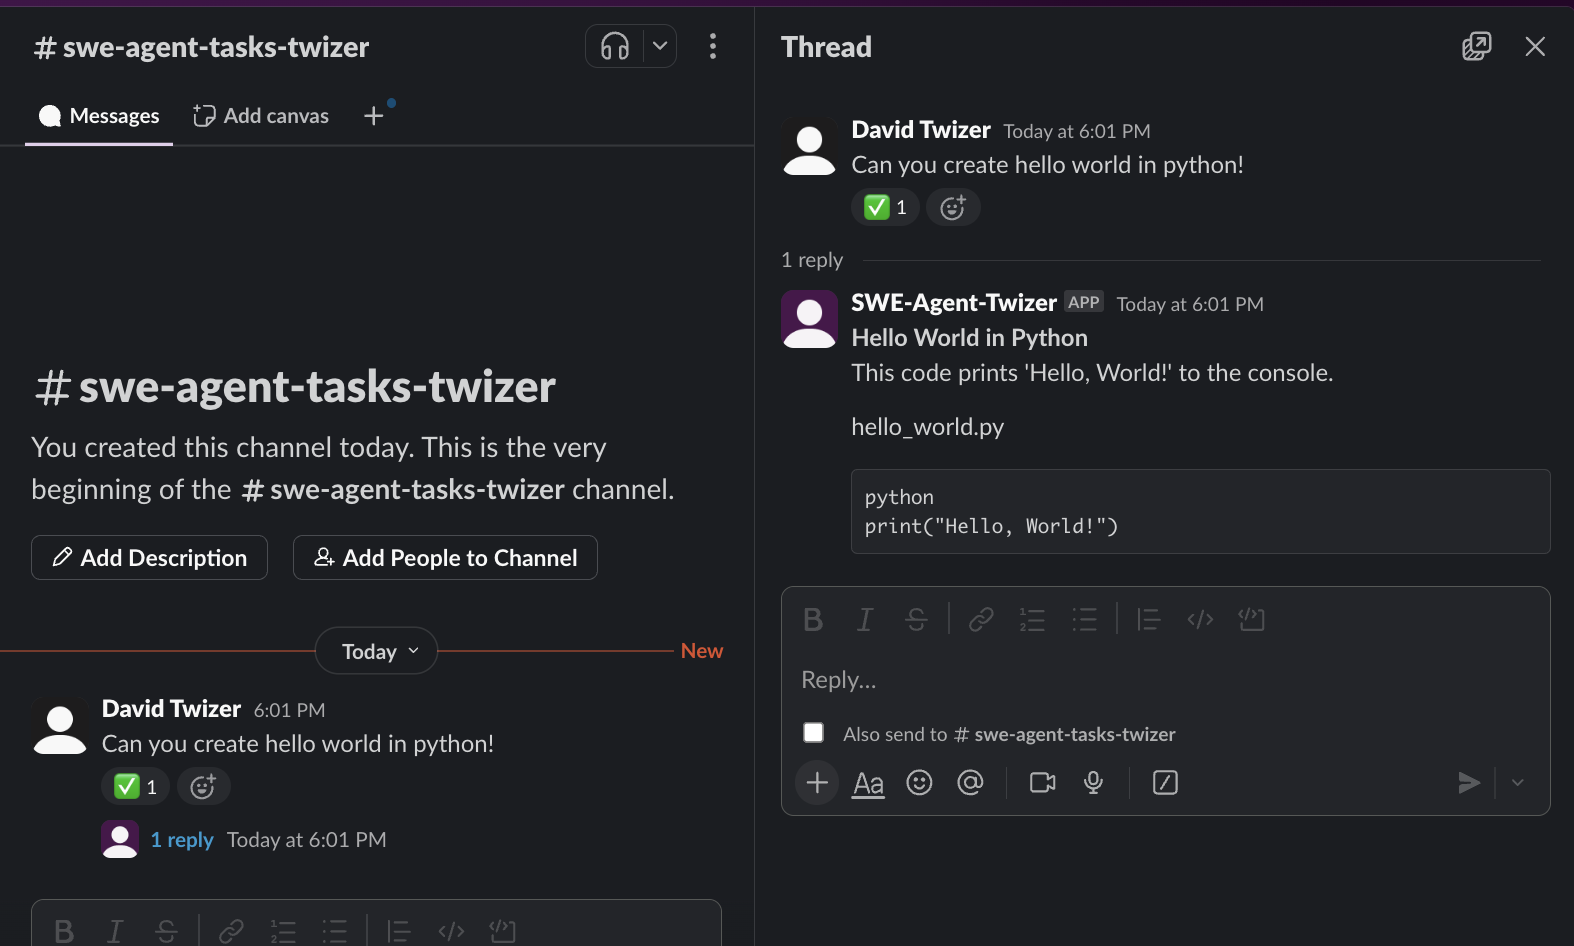
What You’ve Just Accomplished
Your agent just became something genuinely impressive: a team member that’s available 24/7 and understands natural conversation. When you tested it, notice how it responded without needing @ mentions or special commands – it just understood what you needed and helped. This isn’t just a chatbot integration. You’ve created a development partner that can handle real work while you sleep. Your team can now ask for code help in Slack and get immediate responses with working examples. They can request complex features and your agent will coordinate with Claude Code to build them, creating pull requests and updating everyone on progress. The knowledge base you configured earlier means your agent can provide expert-level answers using authoritative documentation. It remembers conversations across sessions, handles multiple requests simultaneously, and maintains context for follow-up questions in threads. You’ve essentially hired a developer that never gets tired, never forgets context, and scales infinitely across all your team’s channels.Next Steps
In the final module, we’ll complete the autonomous development pipeline with GitHub webhook automation for end-to-end issue handling.Pro Tip: Consider creating specialized channels for different types of requests – one for code reviews, another for bug fixes, and another for feature requests. Your agent can handle them all simultaneously while keeping workflows organized.