Goal: Complete autonomous pipeline for GitHub issue processingExpected Output: Agent automatically handles new GitHub issues end-to-end
Why Webhook Filtering Matters
GitHub sends webhooks on every issue event (opened, closed, commented, etc.). We only want “opened” issues, and we want to transform the raw JSON payload into AI-ready format instead of overwhelming the agent with unnecessary data.Create Repository & Configure GitHub Webhook
Task: Set up webhook to send issue events to your agent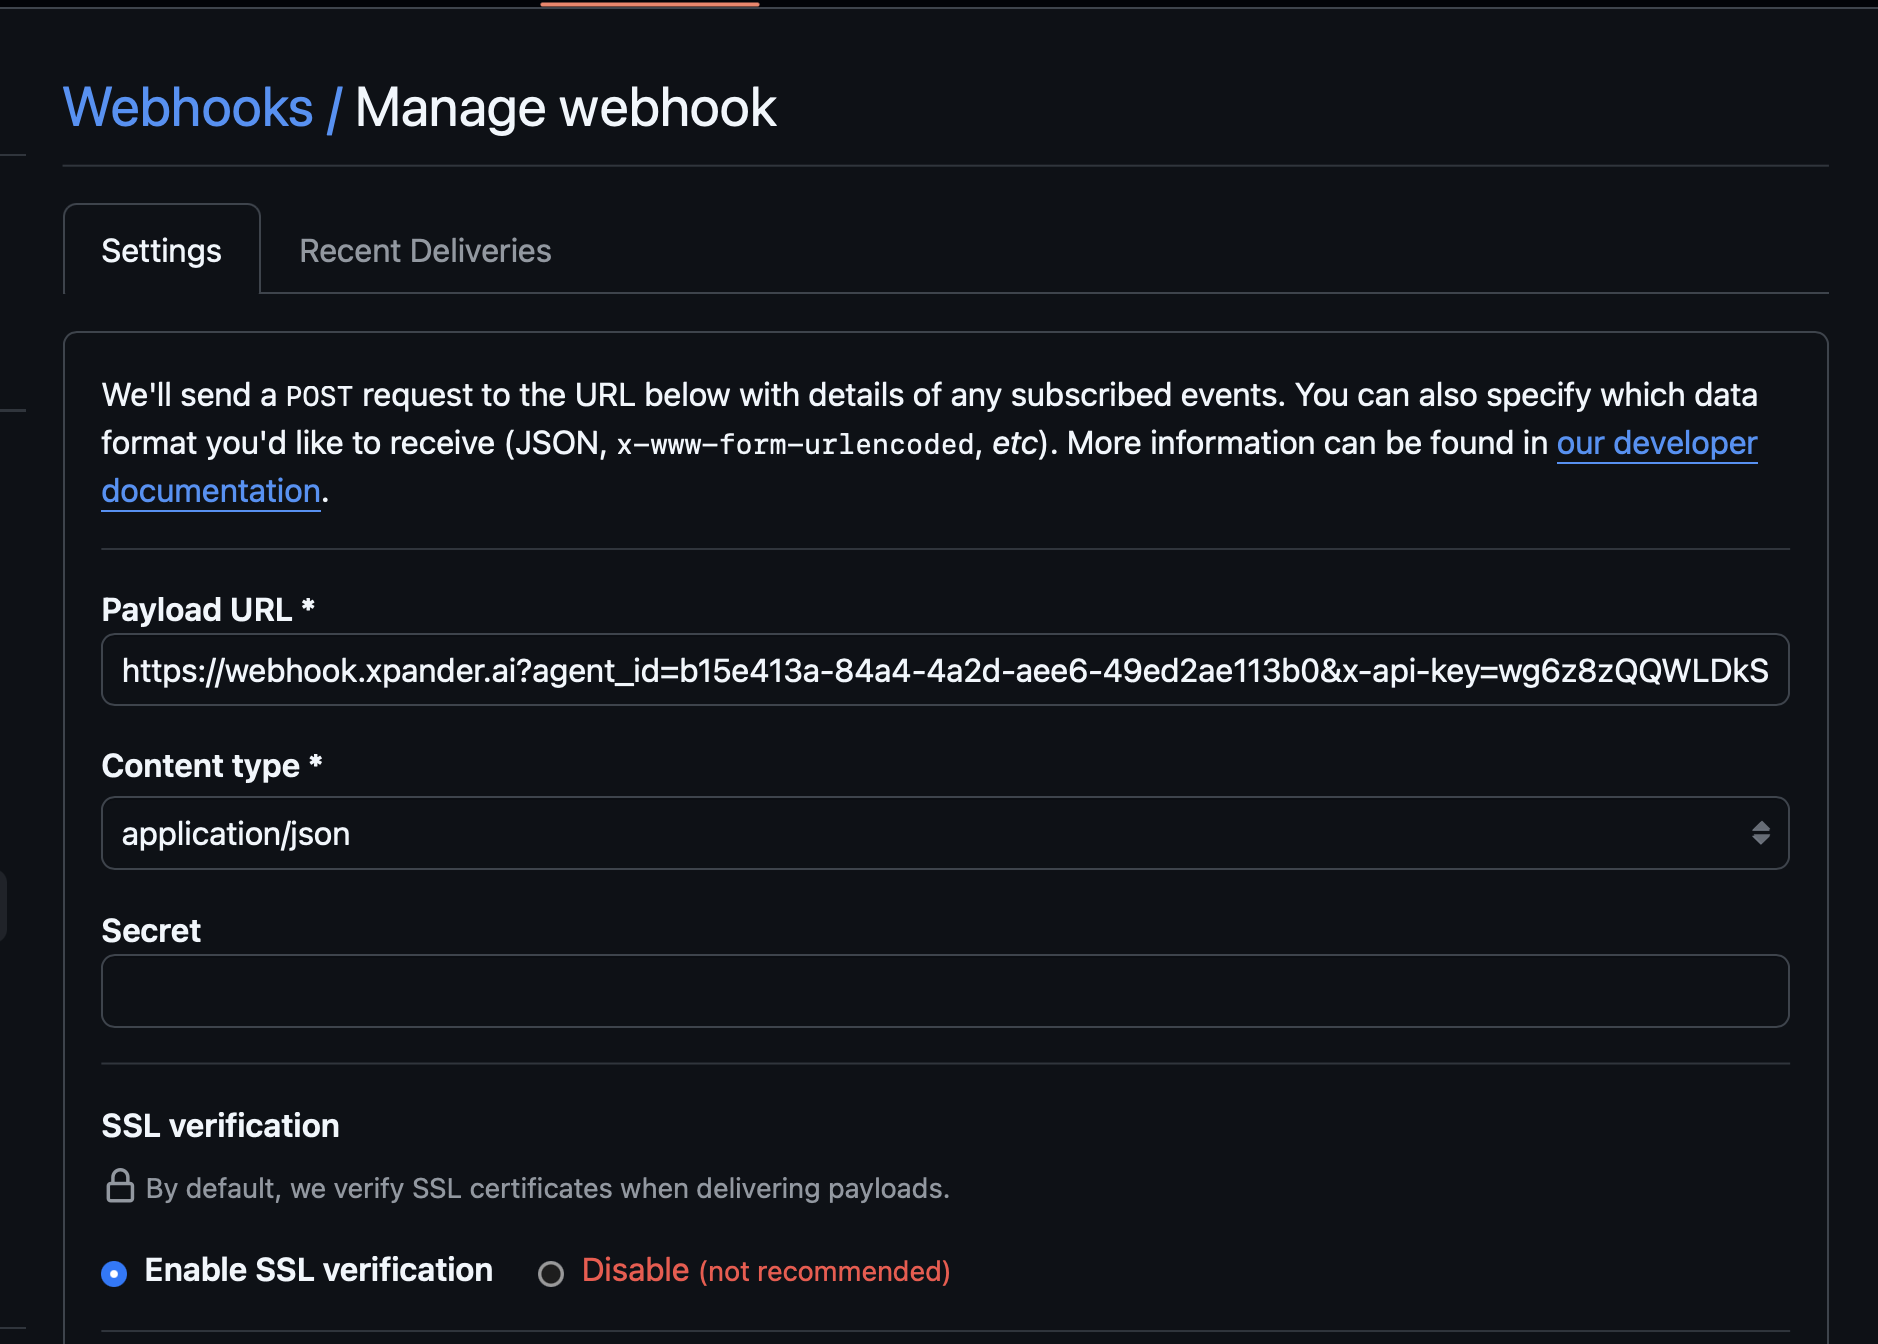
Create Repository
- Create new repository in GitHub
- Commit something to it (README, initial files)
Add Webhook
- Go to
https://github.com/<your-org>/<your-repo>/settings/hooks - Add webhook with this URL: (You can also find it in the Agent Task Sources)
webhook-url.txt
- Under “Which events would you like to trigger this webhook” select “Let me select individual events.” -> Check the Issues box and click Add Webhook at the bottom. At that point, a test webhook will be sent from Github to your agent
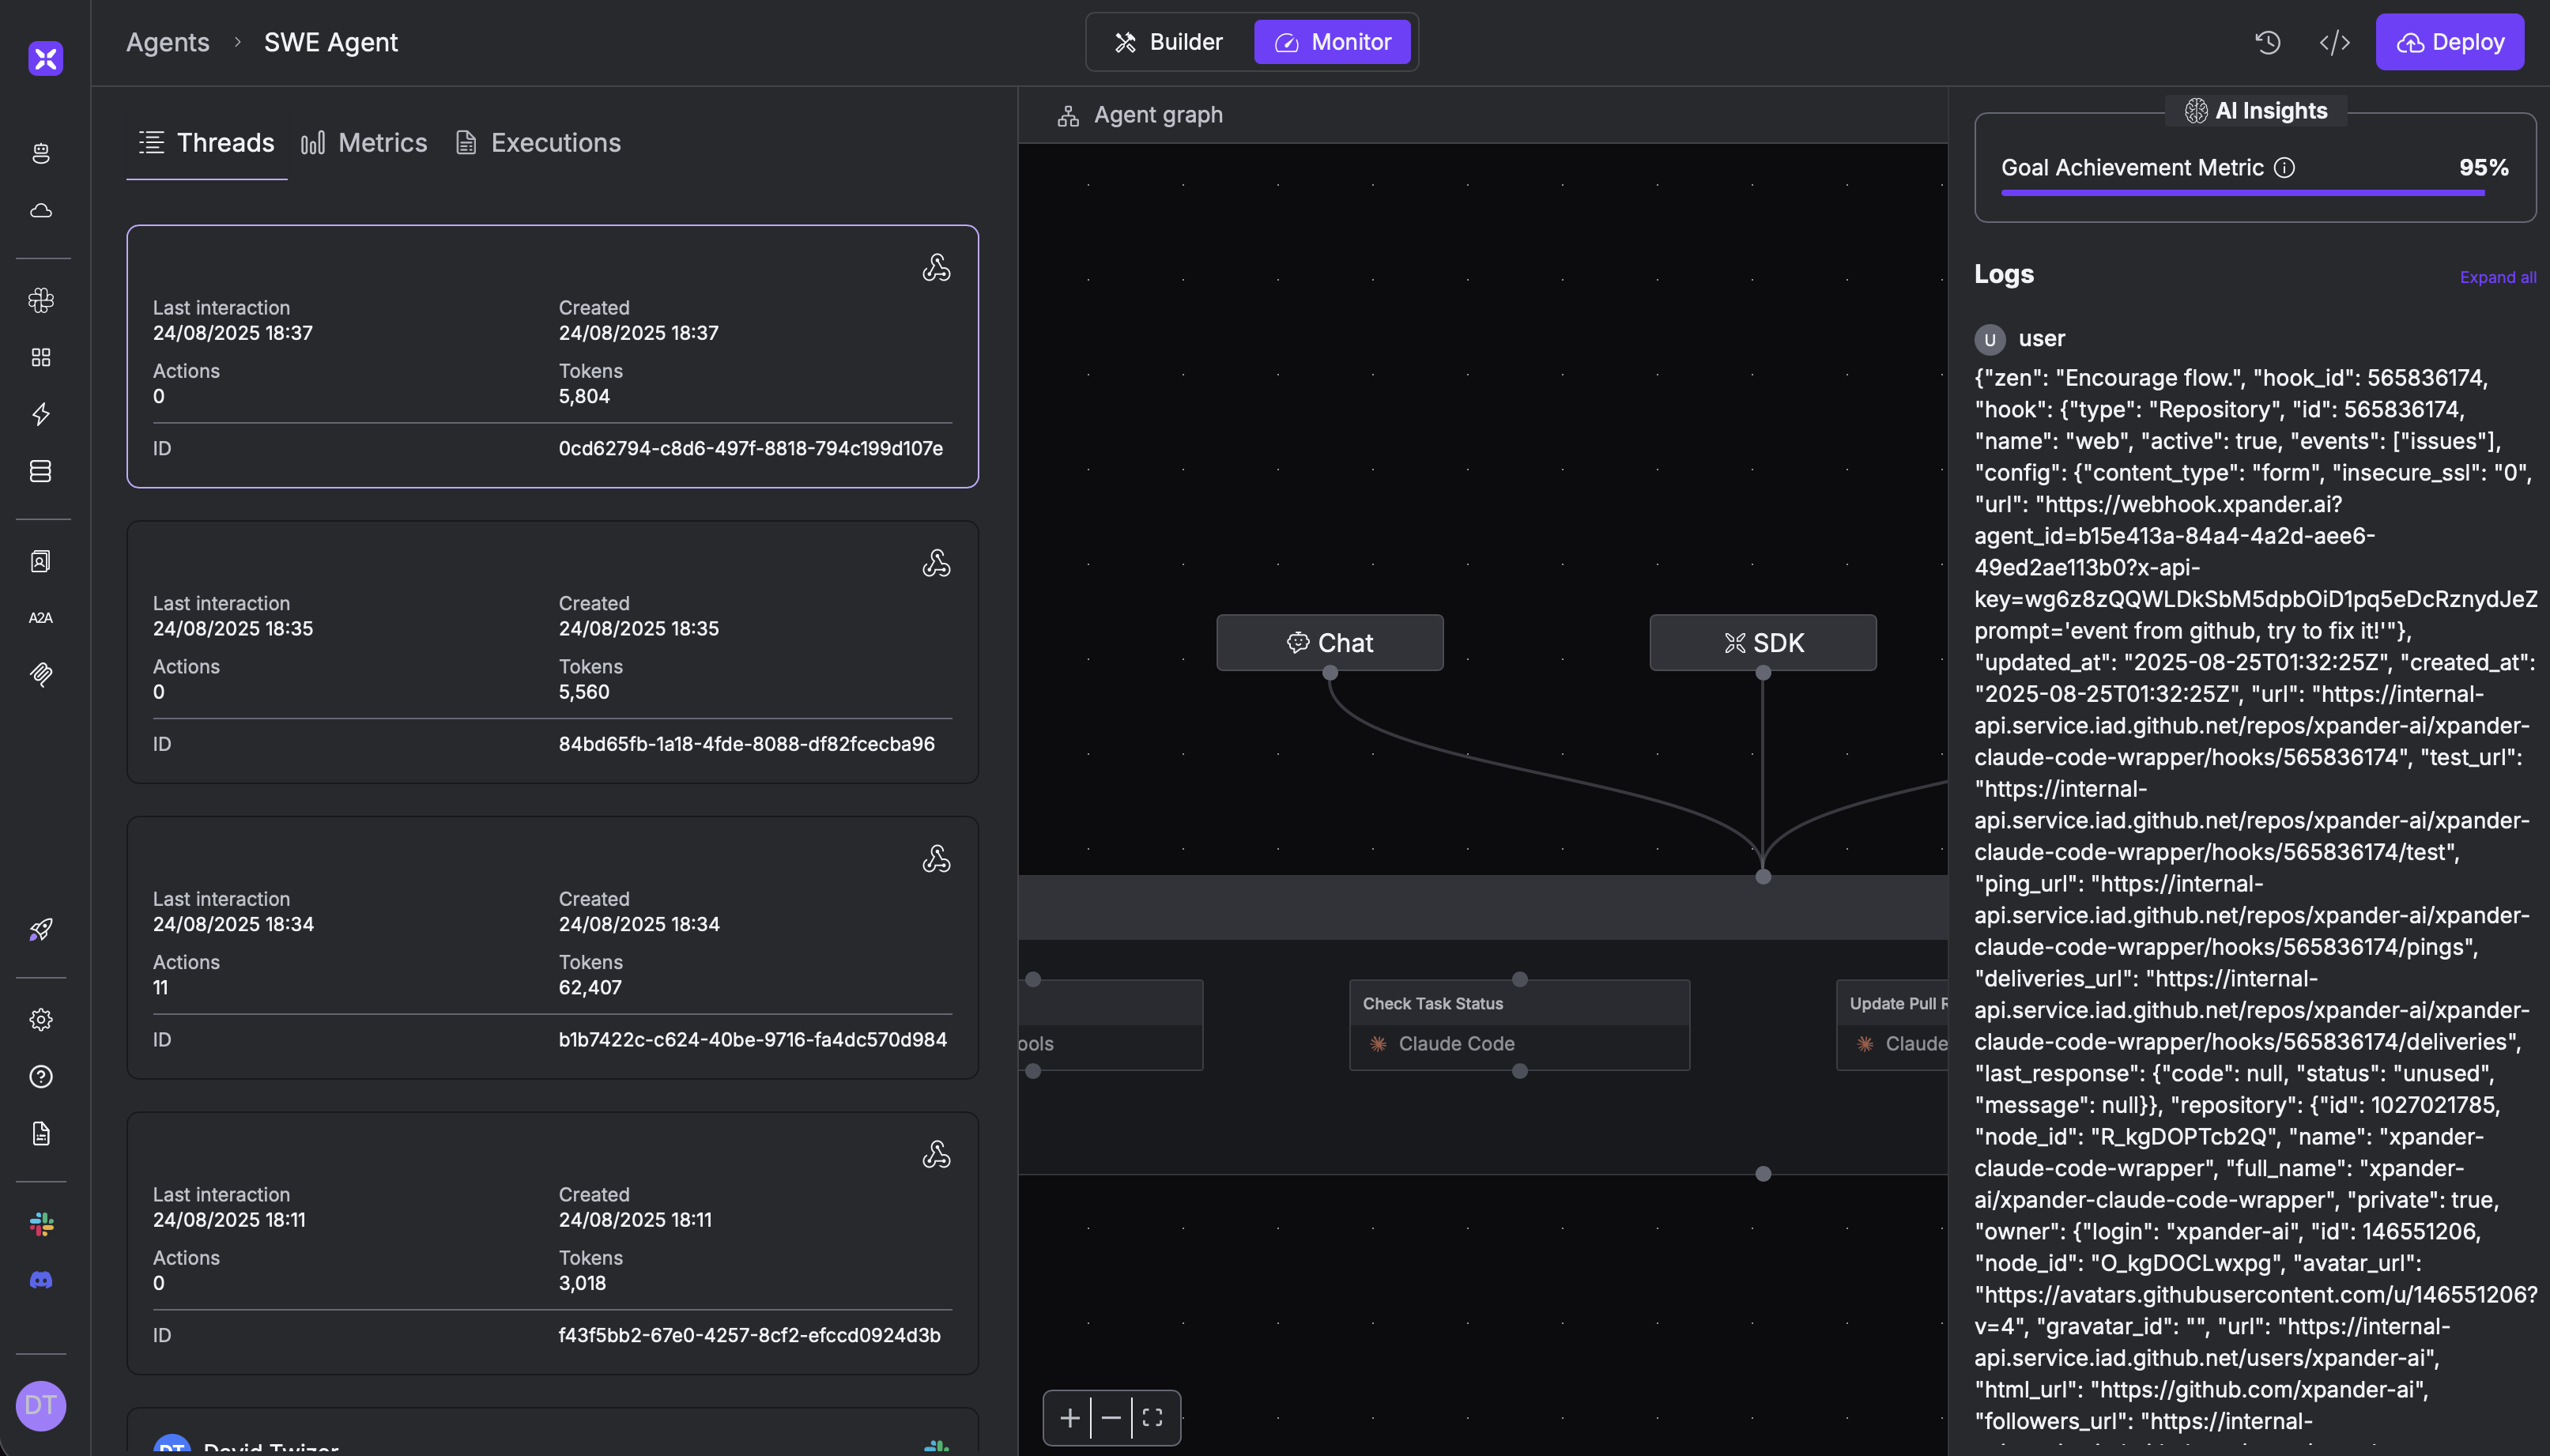
- Go to “Recent Deliveries” and check the status is 200.
- In the xpander.ai Agent console, verify in activity view that webhook events arrive
Add GitHub Issues Tool
Task: Enable agent to comment on and manage GitHub issues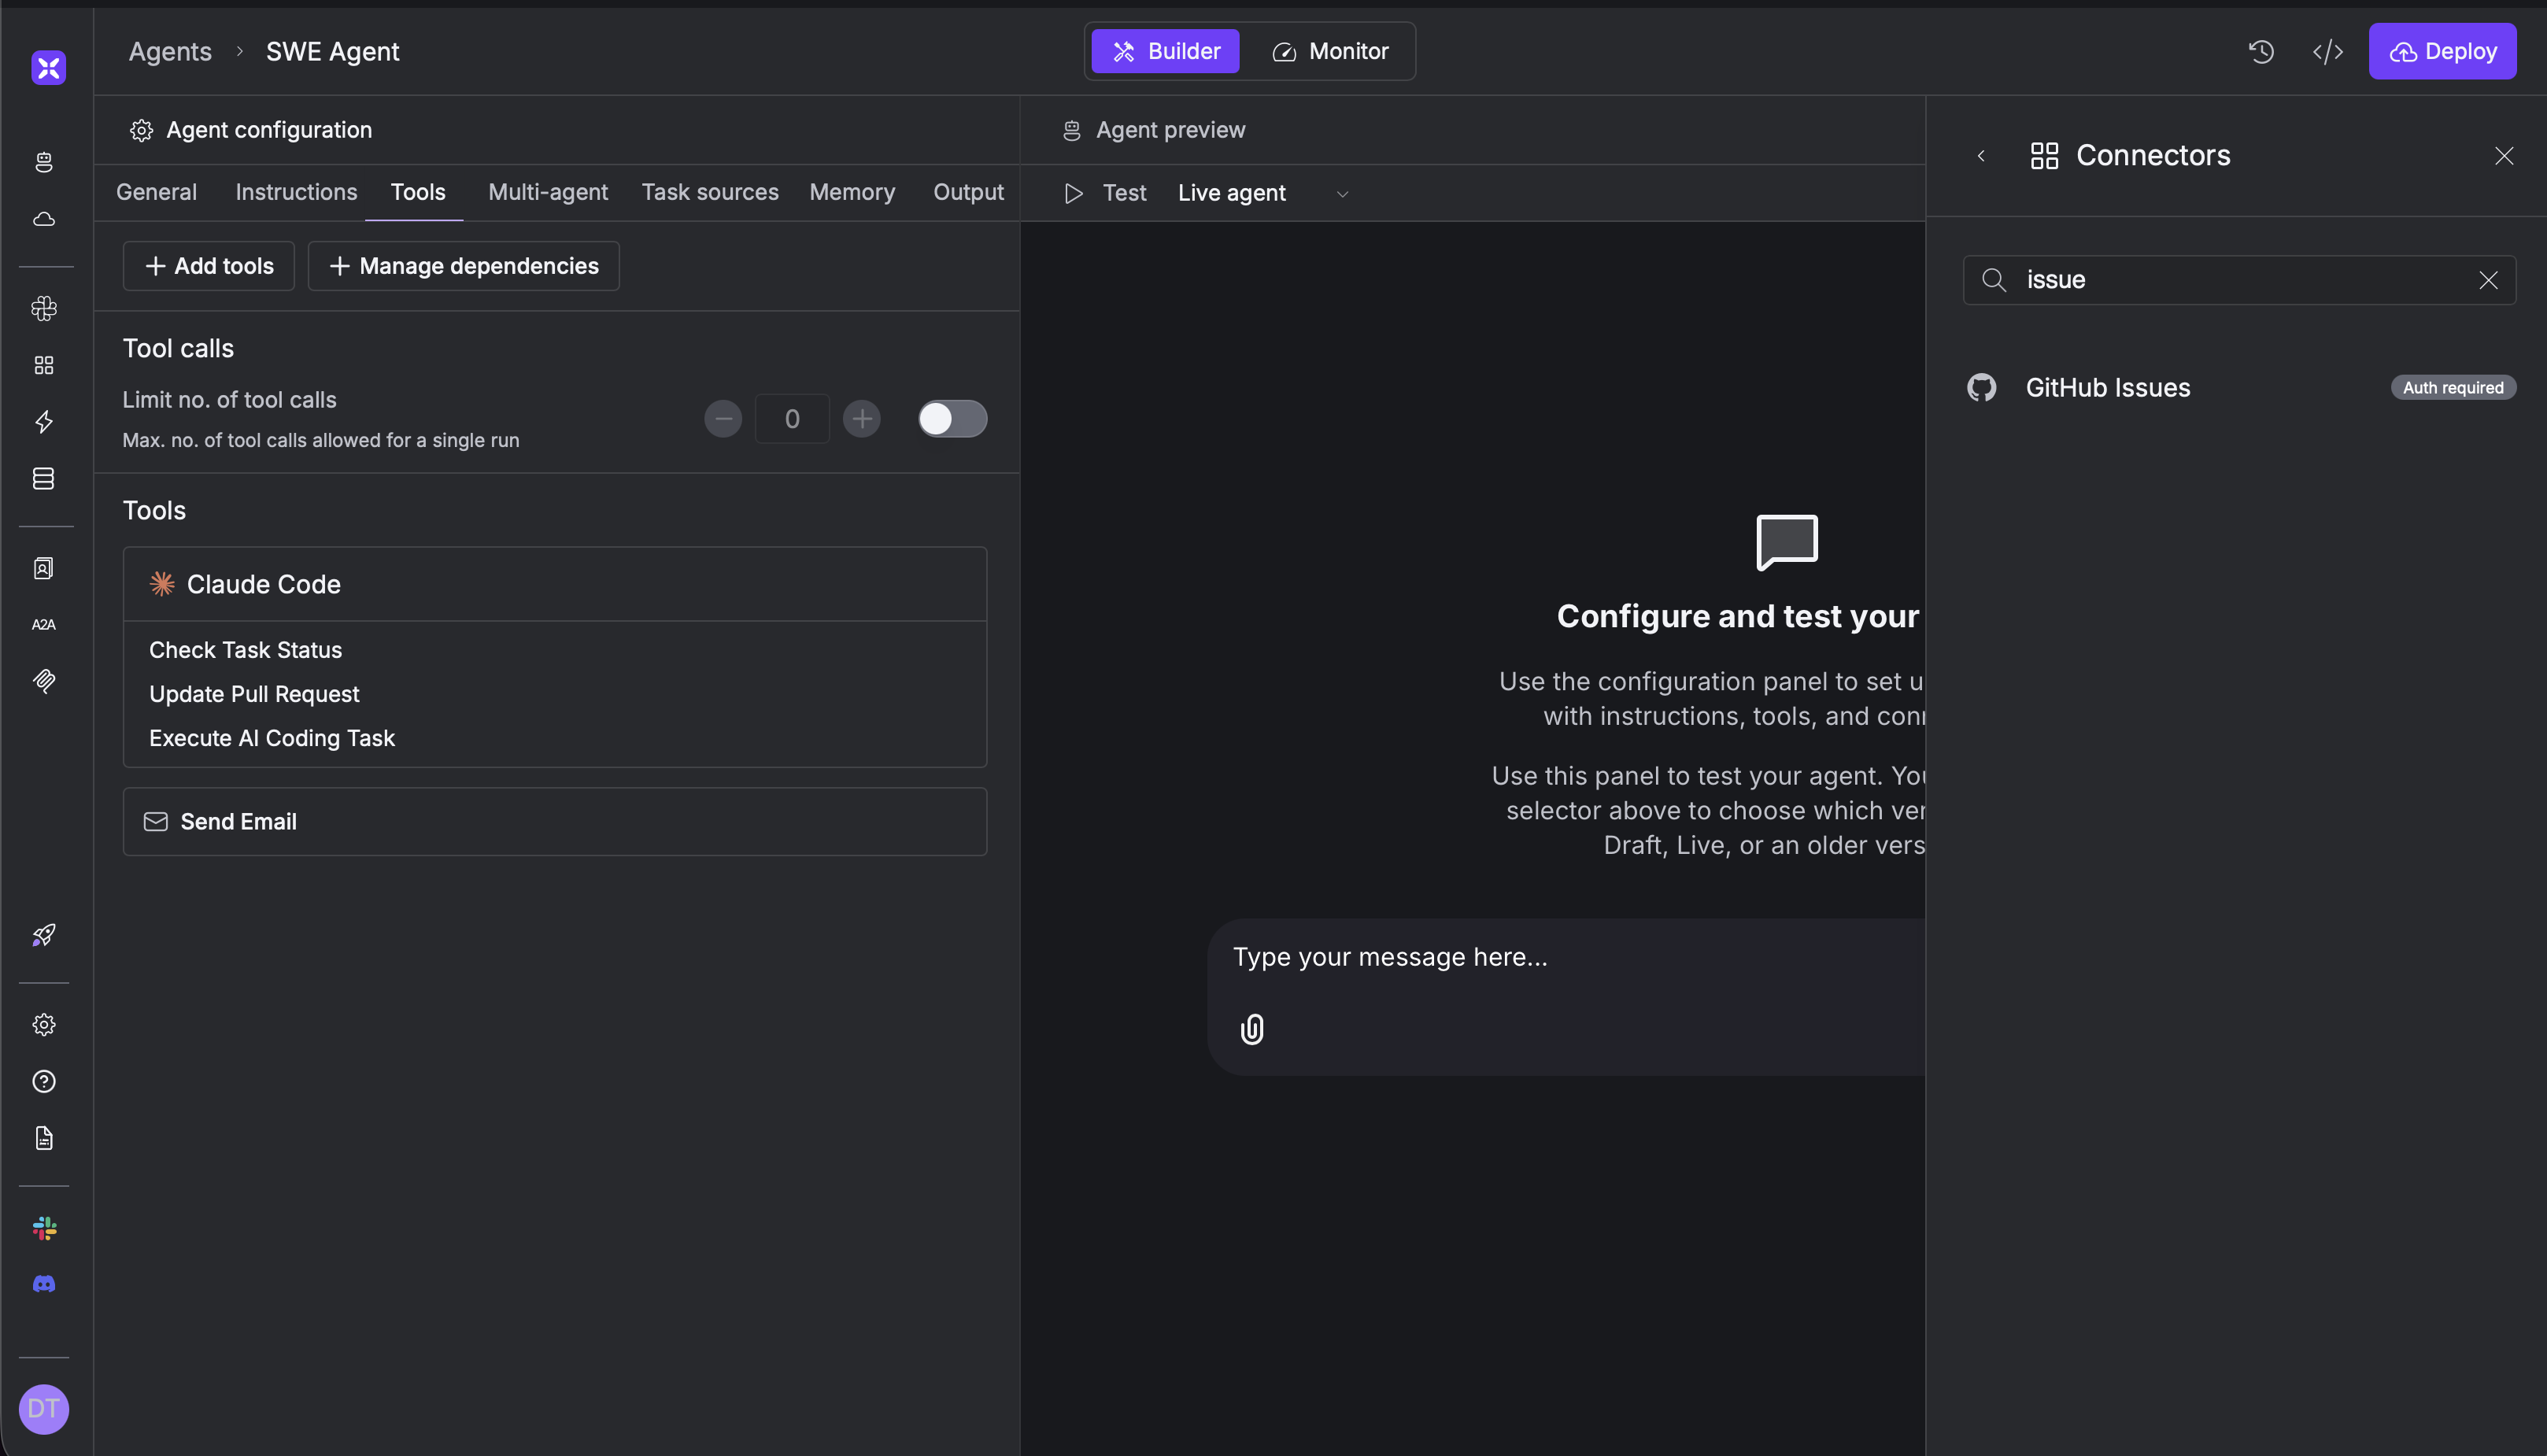
Configure GitHub Issues Connector
- Xpander platform → Connectors
- Add GitHub Issues connector and authenticate
- Add to your agent
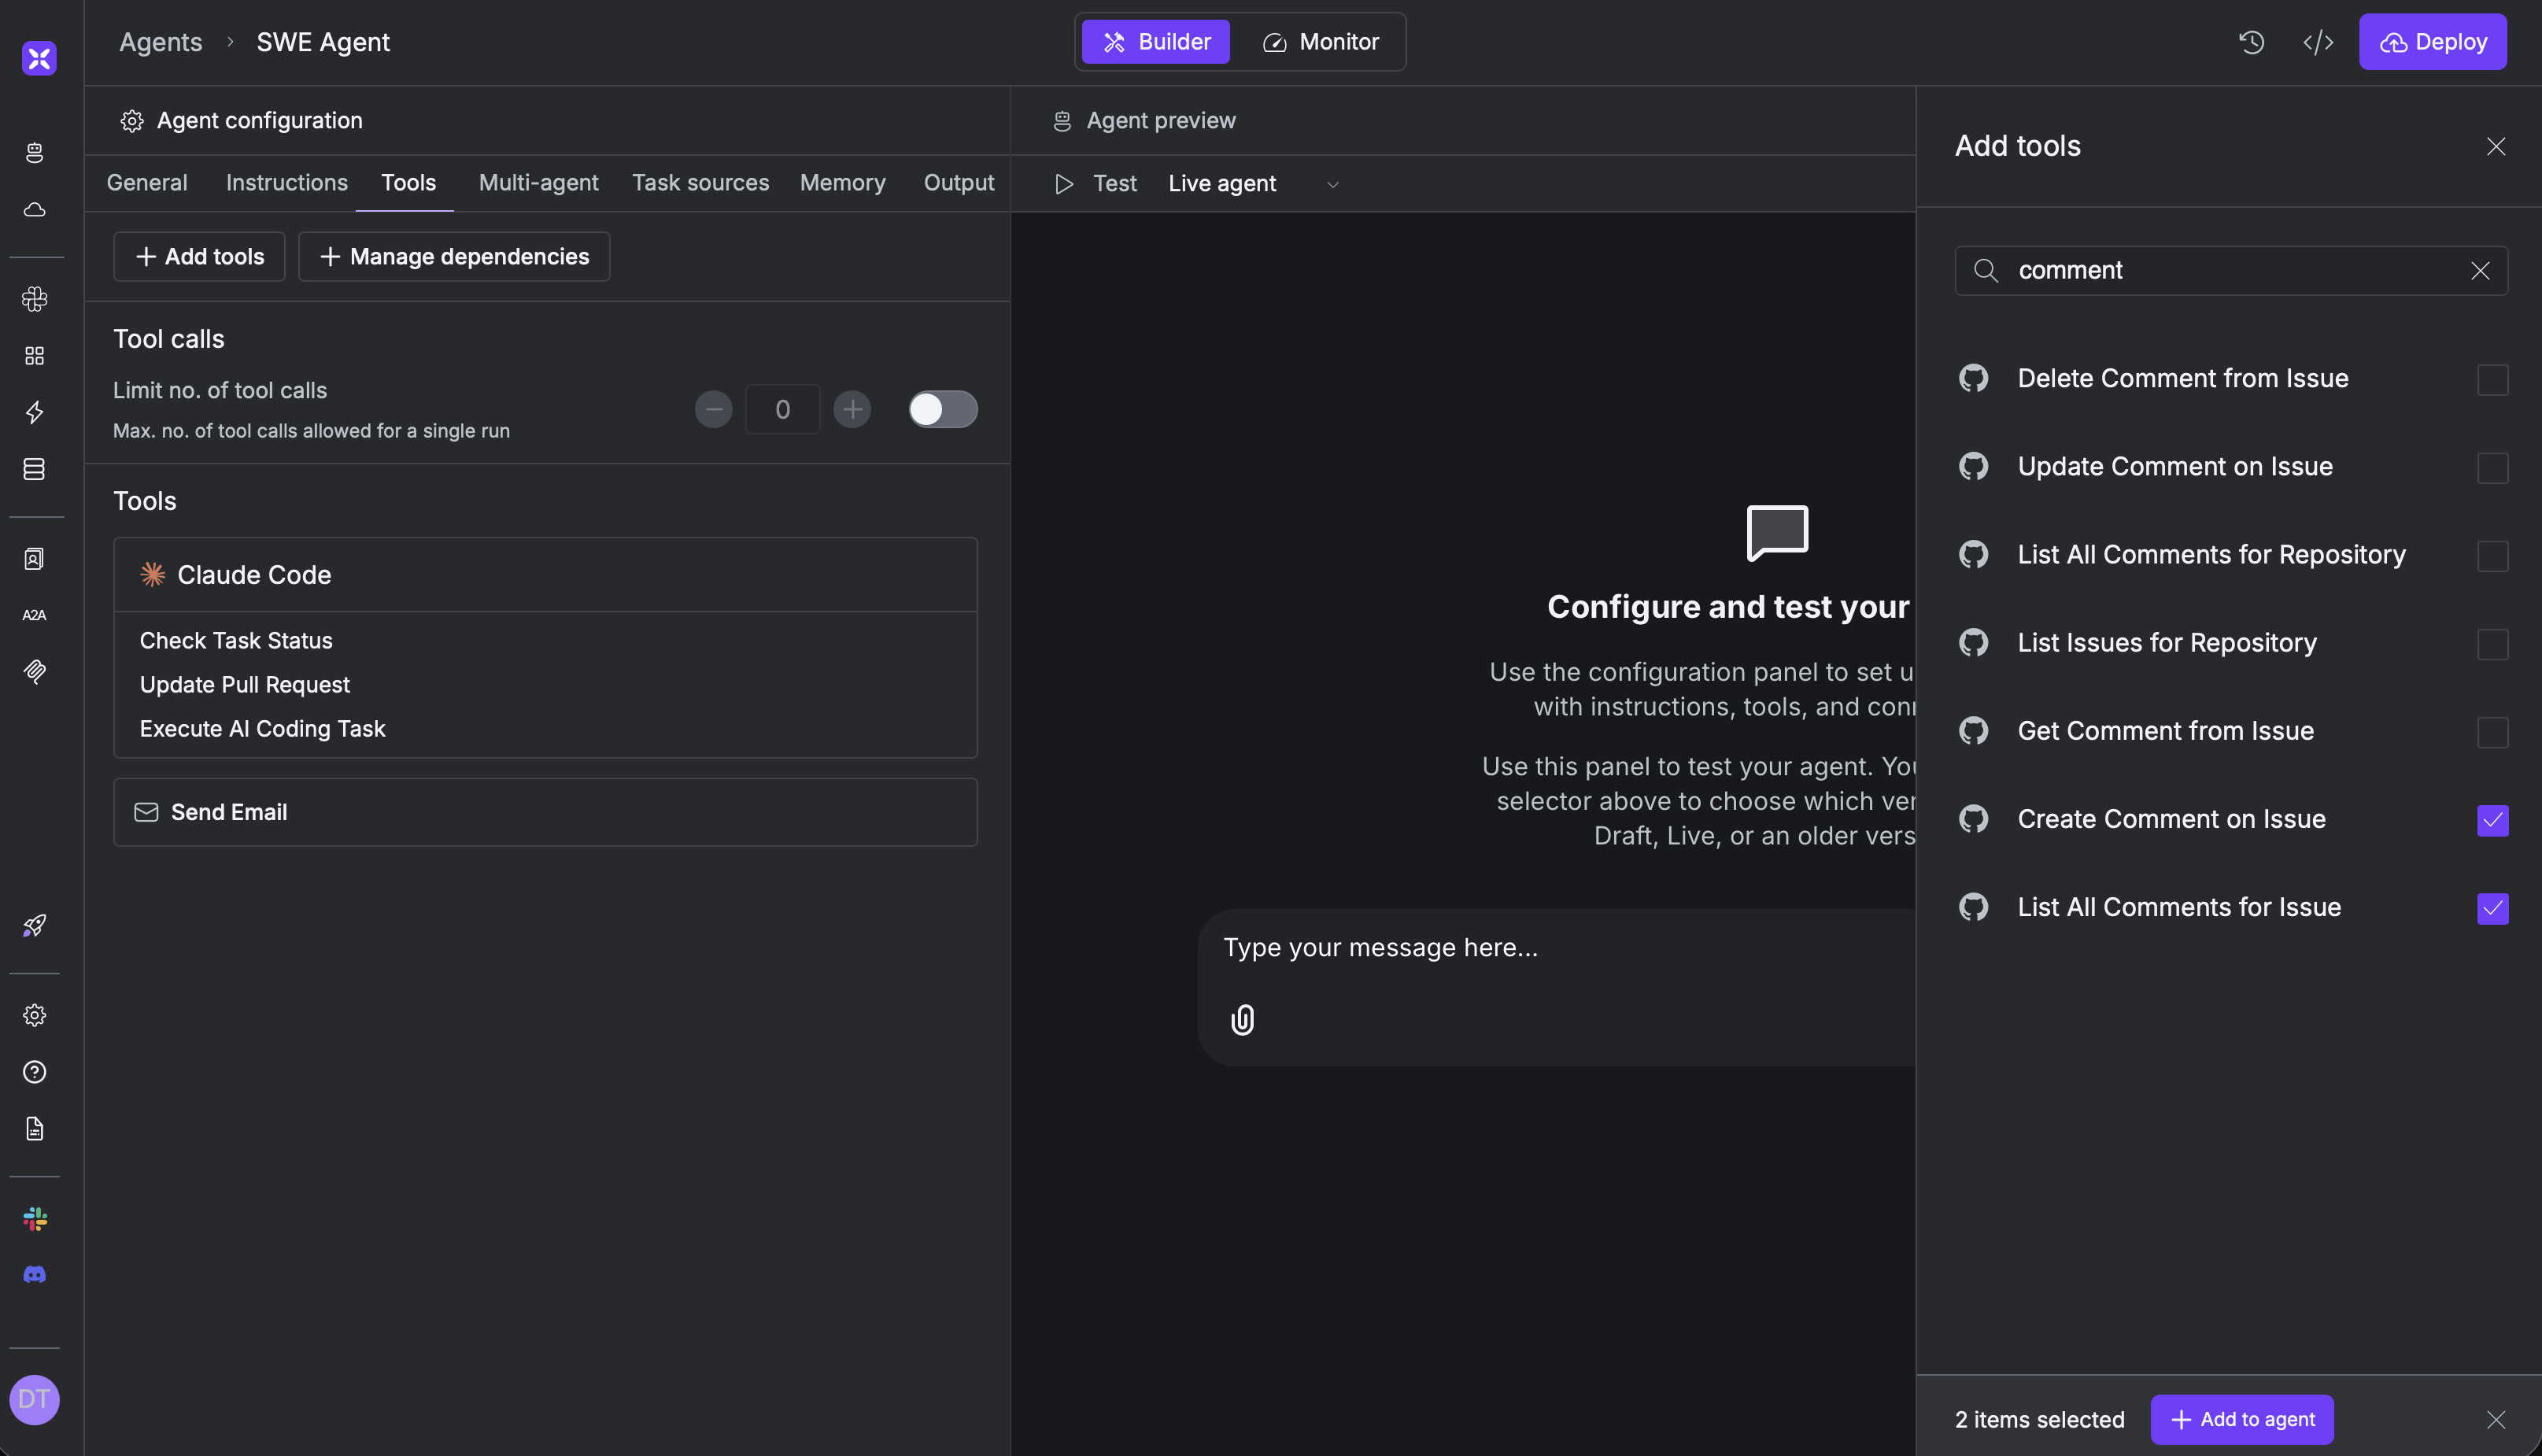
- Once authenticated, select the tools from the connector.
-
Select
Create Comment on IssueandList all comments for issues - Click deploy
Configure Collaborative Instructions
Task: Make agent communicate transparently during issue resolutionAdd this instruction to your agent:Save and Deploy
collaborative-instructions.txt
Test the Integration
Create an issue on GitHub, or use the chat to ask the agent to comment on some GitHub issue.Advanced Webhook Filtering (Bonus)
Taking Control: This bonus section shows how to move from serverless managed execution to running your own containerized agent code, giving you full control as an AI engineer.
Why This Matters
- GitHub sends webhooks for every issue action (opened, closed, edited, etc.)
- Raw webhook payloads contain 100+ fields your agent doesn’t need
- We want to filter for “opened” issues only and extract just the essential data
task object). Before invoking the AI Agent, you can transform the incoming payload. Let’s convert all GitHub webhooks into AI-Optimized payloads and filter out non-GitHub Issues events!How to do it? Download and Customize Agent Code
To implement custom webhook filtering, you’ll need to download your agent’s code and modify the handler:download-agent.bash
Edit the Agent Handler
Find and edit thexpander_handler.py file to add webhook filtering:xpander_handler.py
Test Locally
test-locally.bash
Test Webhook Filtering
While running locally, re-deliver a GitHub webhook to test filtering: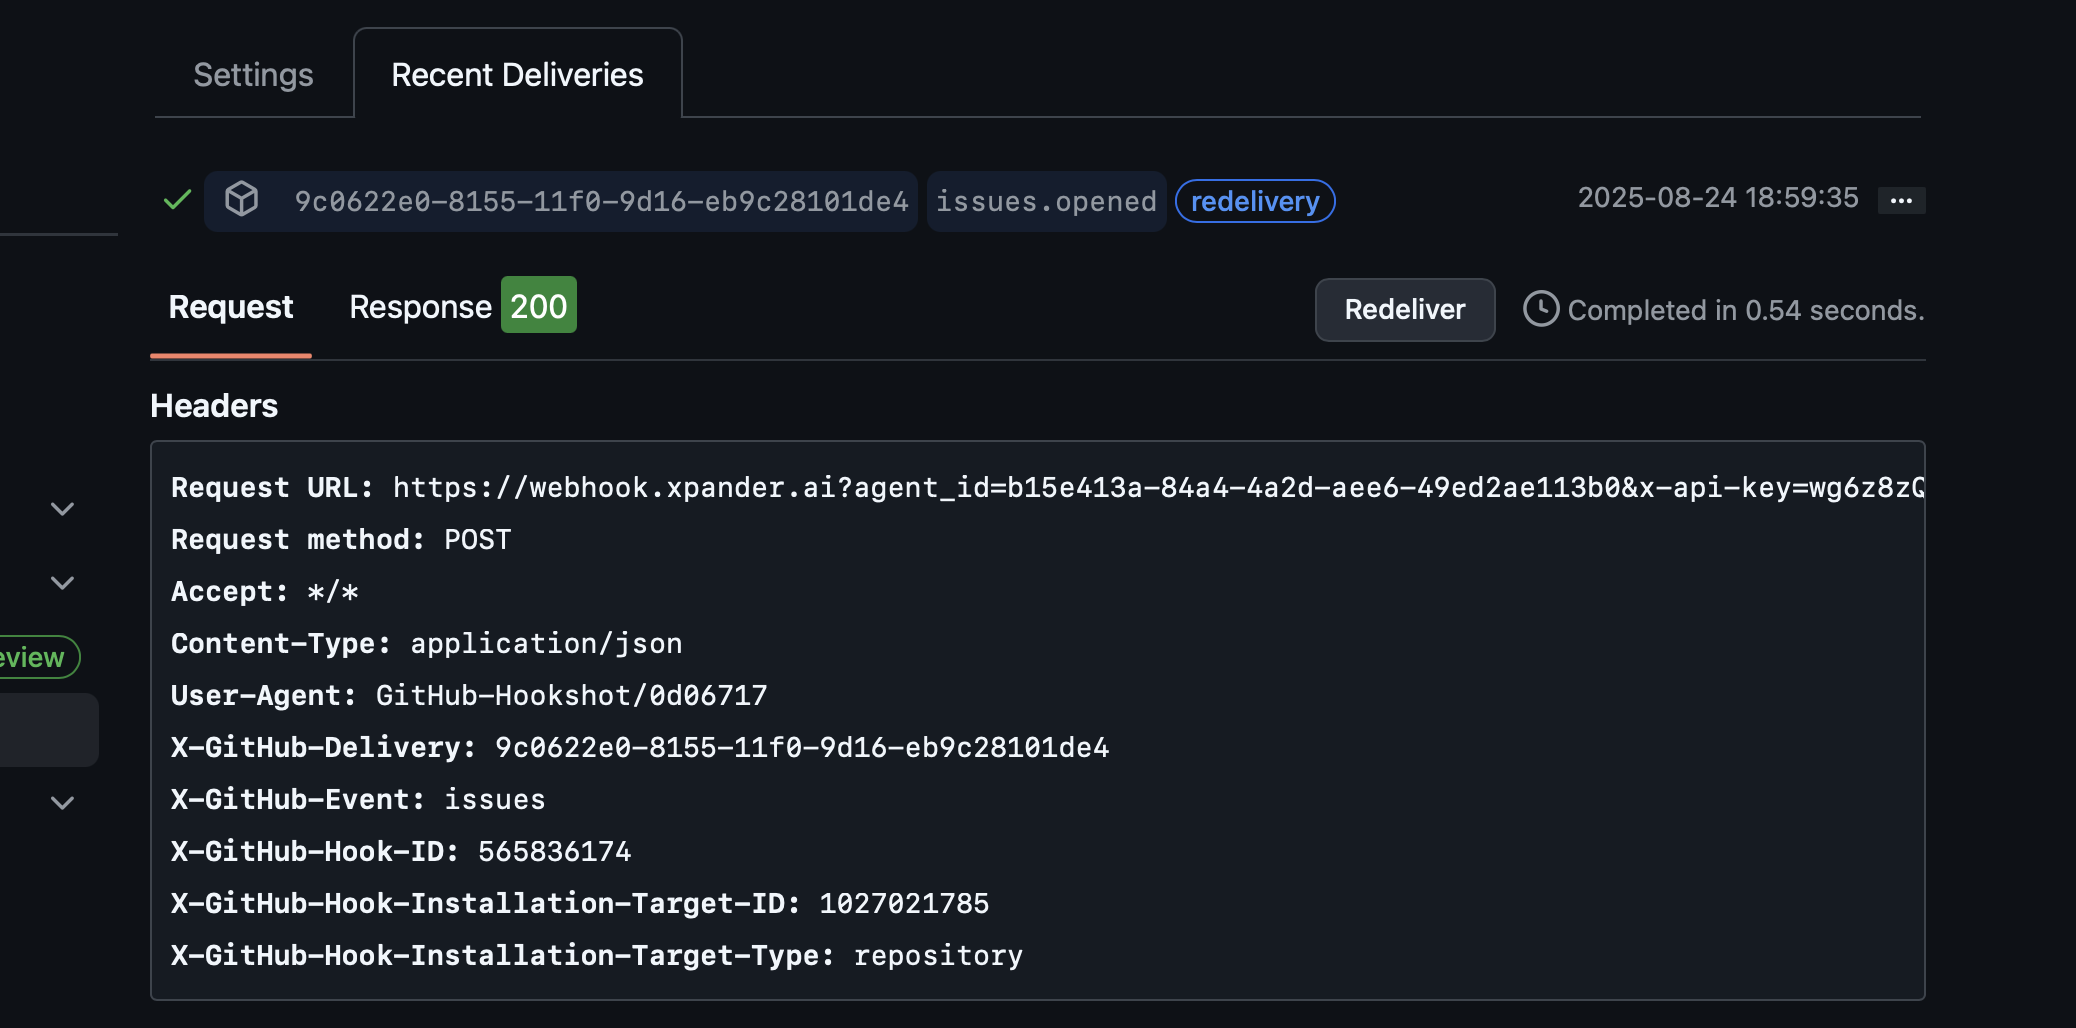
Deploy to Production (Optional)
deploy-production.bash
Test the Complete Pipeline
Create a GitHub issue and watch your autonomous development pipeline in action:- Issue Created → Webhook triggered
- Agent Analyzes → Comments with plan
- Code Development → Claude Code integration
- PR Creation → Automated solution
- Team Notification → Slack updates (if configured)
What You’ve Accomplished
🎉 Workshop Complete!Your Autonomous Development Pipeline:
What You’ve Created
You’ve just built something genuinely impressive – a complete autonomous development pipeline. Your agent can now handle GitHub issues from start to finish, coordinating with Claude Code for the actual development work, commenting on issues to keep everyone informed, and creating pull requests with complete solutions. But that’s just the beginning. You’ve also created a multi-agent system with persistent memory, custom tools, knowledge bases, and team integration through Slack. This isn’t just a chatbot – it’s a sophisticated development partner that can scale infinitely.Where to Go From Here
Your agent is ready for real-world use, but you can take it even further. Consider scaling it across multiple repositories, adding specialized tools for your specific workflows, integrating with project management systems, or building domain-specific knowledge bases. You could even create teams of specialized agents working together. You now have a 24/7 AI developer that never gets tired, never forgets context, and can handle the complete software development lifecycle.Production Ready: Your agent is now capable of handling real development workflows. Consider implementing rate limiting, error handling, and monitoring for production use cases.