SWE Cloud Agent
Module 3: Advanced Customization
Add local tools and observability
In this module, you’ll gain full control over your agent’s behavior.You’ll learn how to:
- Add your own Python tools to expand what the agent can do
- Add observability to your agent using AgentOps
Step 1: Add a Local Tool to Star a GitHub Repository
In this step, you’ll enable your agent to run a custom tool that stars a GitHub repository. Generate a GitHub Token First, create a GitHub personal access token:👉 Generate Token
⏳ Note: Make sure to select full repo access scope in order to star a repo.
Add the Token to Your
.env File
Update your .env file with the following:
pip install -r requirements.txt
🧩 3. Define the Custom Tool
Create a file undertools/local_tools.py with:
Step 2: Add the local function to the agent
Go tomyAgent.py and add the tool to the import section:
self.agent_backend.select_llm_provider(LLMProvider.OPEN_AI) add:
tool_calls = self.agent_backend.extract_tool_calls(response.model_dump()) add:
This is a very simple implementation of AI calling local functions, designed to teach the basics of how generated payload passes to a function that sits on the local machine. For more robust, and dynamic naming with asynchronous runtime and logger, refer to docs in xpander-ai/xpander.ai repo.
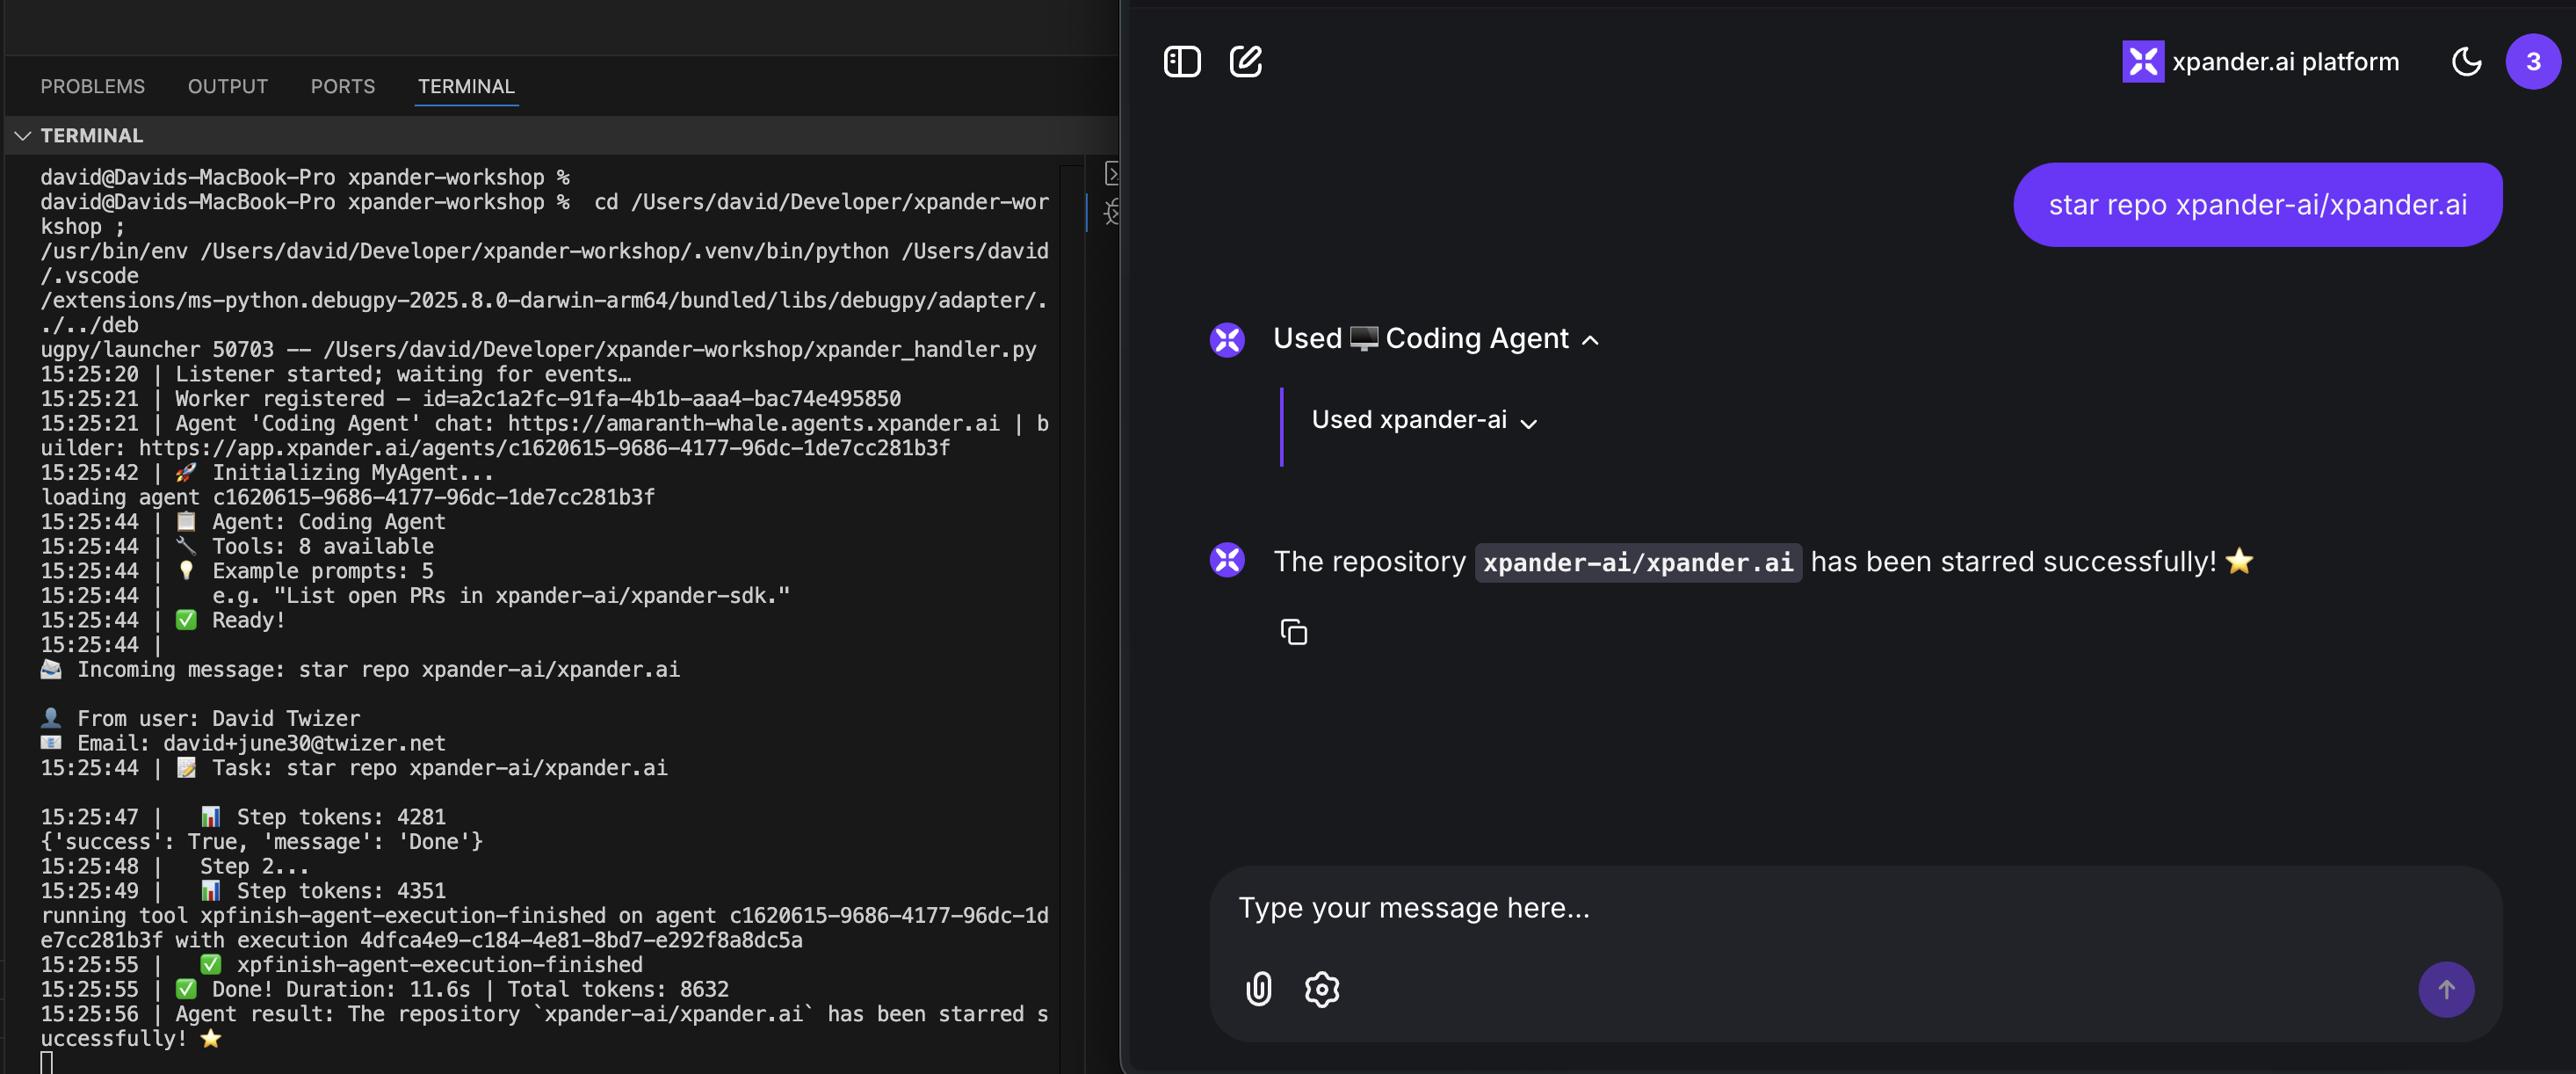
Step 3: Run the Agent
Run thepython xpander_handler.py and send the following prompt
Step 4: Add Observability with AgentOps
AgentOps is a powerful observability platform designed specifically for monitoring and debugging AI agents. It provides real-time insights into your agent’s behavior, performance metrics, and execution traces.Getting Started with AgentOps
First, sign up for an AgentOps account and get your API key: 👉 Get your API key from app.agentops.ai Update your.env file with your AgentOps API key:
requirements.txt to include AgentOps:
pip install -r requirements.txt to install the new dependency.
Integrate AgentOps into Your Agent
The integration is remarkably simple. Add these two lines to the top of yourmyAgent.py file:
- Agent execution traces
- LLM calls and responses
- Tool usage and results
- Performance metrics
- Error tracking and debugging information
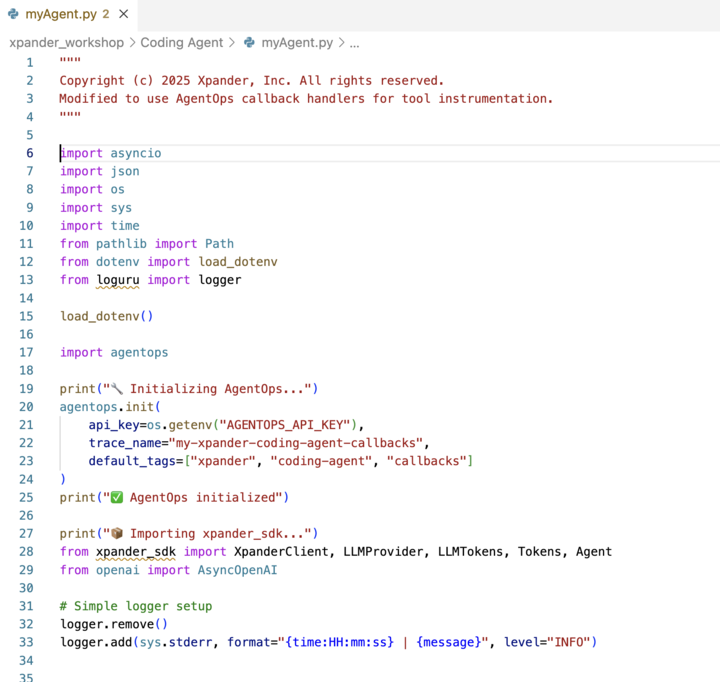
AgentOps Code Example
Here’s how yourmyAgent.py imports section should look with AgentOps:
Note: AgentOps will automatically instrument your agent without requiring any additional code changes!
Step 5: AgentOps MCP (Model Context Protocol)
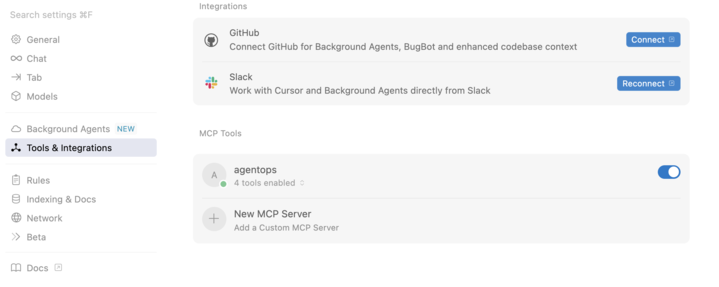
AgentOps also provides an MCP server that allows you to access your agent’s observability data directly within your development environment. This enables seamless integration with tools like Cursor, allowing you to monitor and debug your agents without leaving your IDE.Setting Up AgentOps MCP
The AgentOps MCP server provides tools to:- Authenticate with your AgentOps project
- Retrieve project information
- Access trace and span data
- View performance metrics
- Debug agent executions in real-time
Using AgentOps MCP in Cursor
Once configured, you can interact with AgentOps directly through Cursor’s chat interface. Simply ask about your agent’s performance, request specific trace information, or debug issues - all without switching contexts. Here’s a guide to set it up!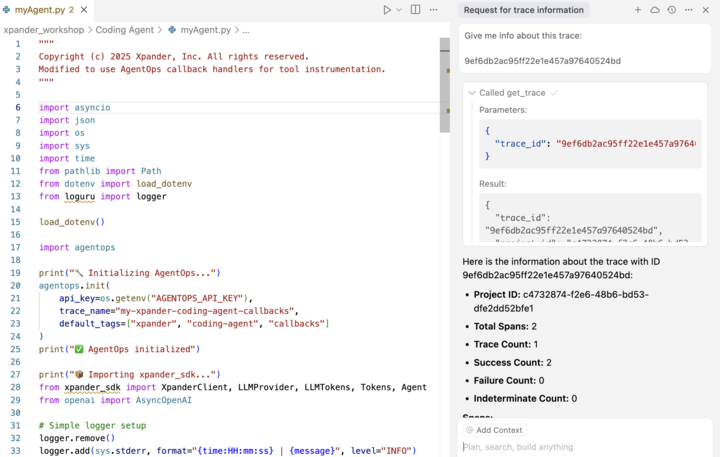 The MCP integration allows you to:
- Query trace information by ID
- Analyze span metrics for performance optimization
- Get real-time insights about your agent’s behavior
- Debug complex agent workflows
Example MCP Results
Here’s what you’ll see when querying AgentOps data through the MCP interface: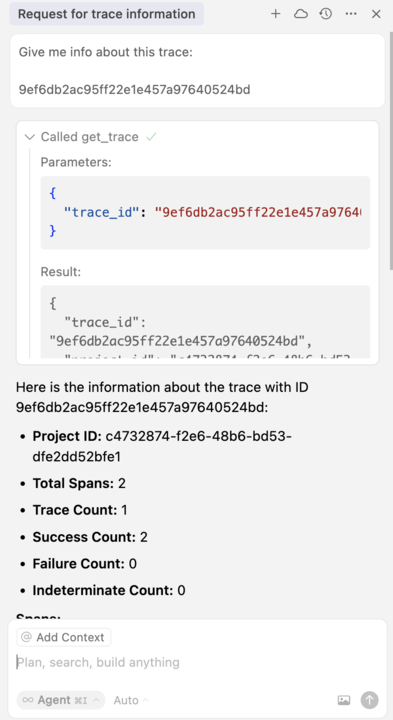 With AgentOps MCP, you have full observability of your agents integrated directly into your development workflow, making it easier than ever to build, debug, and optimize AI agents.
Summary
In this module, you’ve learned how to:- ✅ Add custom Python tools to extend your agent’s capabilities
- ✅ Integrate AgentOps for comprehensive agent observability
- ✅ Use AgentOps MCP for seamless debugging within your IDE