Quickstart
Quickstart - Workbench
Easily prototype agents in the AI agent workbench
What you will achieve in this quickstart guide:
- Prototype an AI Agent in the Workbench by adding tools and instructions.
- Use the visual tester to test the behavior and tool calling.
- Chat to the AI Agent from an external source (fully hosted Chainlit).
Using the AI Agent Workbench
1
Log in to the xpander.ai platform.
Go to https://app.xpander.ai and sign in with your credentials, then click the
+New Agent button2
Welcome to the AI agent workbench
3
Build a new AI agent
- In the Agent configuration panel, give your agent a name.
- In the Tools tab, click the
+ Add toolsbutton, and in the right panel add these following tools:- Google News → Retrieve News Articles By Topic
- Built-in actions → Send Email
4
Add AI-assisted instructions and rules
- In the Instructions tab, click “Write instructions with AI”
- Enter the following:
AI Agent that can get the latest news about any topic from the Google News tool, and then send those news in a nicely parsed way via the Send Email tool - You will see the System prompt, Rules and Goals automatically get populated with agent-optimized prompts.
- Deploy your agent by clicking the
Deploybutton on the top right.
5
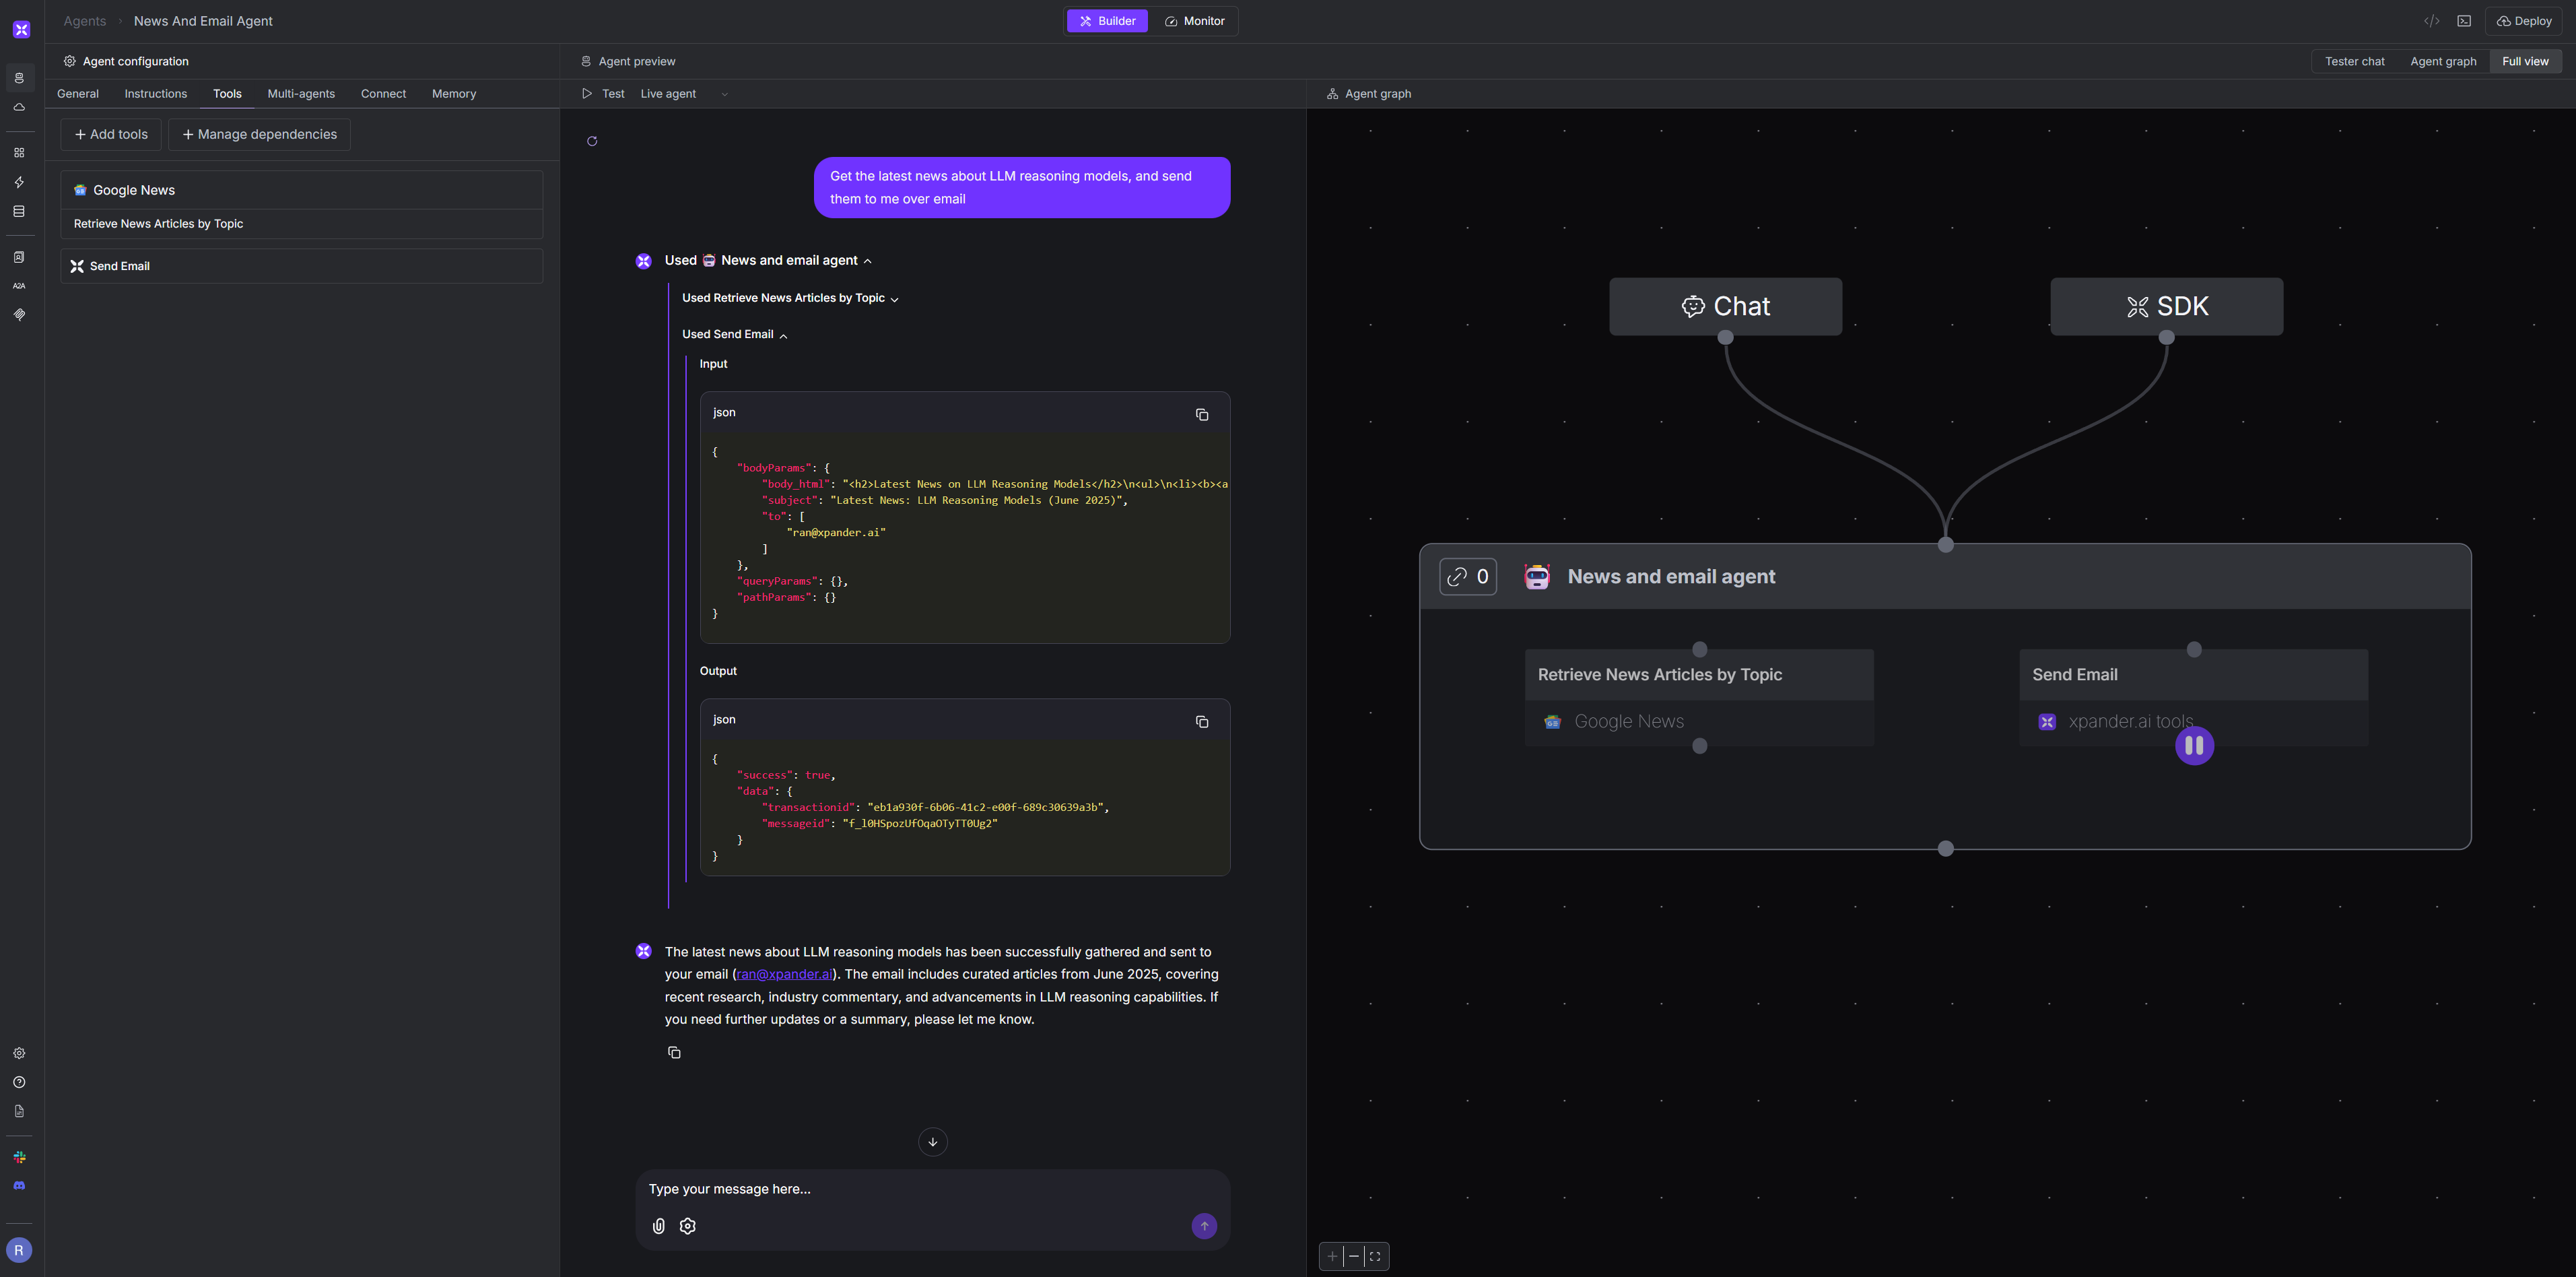
Test your agent
- In the top right workbench tabs, switch to
Full view- now you see the configuration panel, Tester (Chat) panel, and the Agent graph on the right. - In the Tester (chat) panel, enter the following prompt:
Get the latest news about LLM reasoning models, and send them to me over email - Check the tool selection process in the graph indicated by the moving Purple dot. This gets more useful as you add more tools and connected agents.
- Check the request/response process and payloads in the tester panel.
You successfully used the AI Agent Workbench to build and test your agent!
Continue the tutorial to trigger and use your AI Agent from external sources.
Continue the tutorial to trigger and use your AI Agent from external sources.
Chat to you AI Agent from a fully-managed Chainlit instance.
1
Open Chainlit
From the 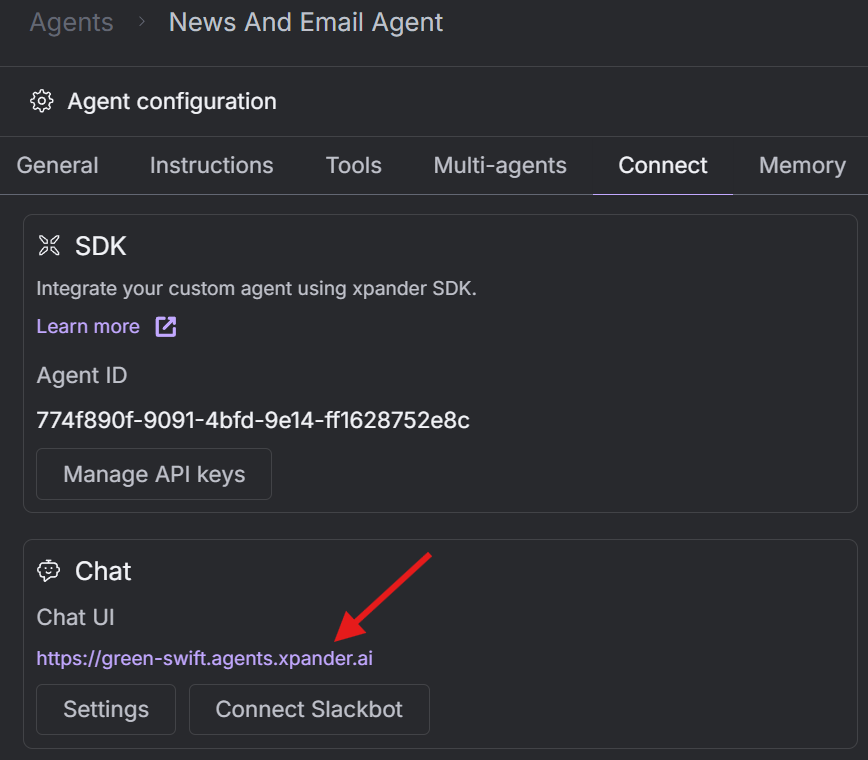
Connect tab in the Agent Configuration panel, click the URL for your agent’s Chat UI.2
You can continue prompting your AI Agent from this external source.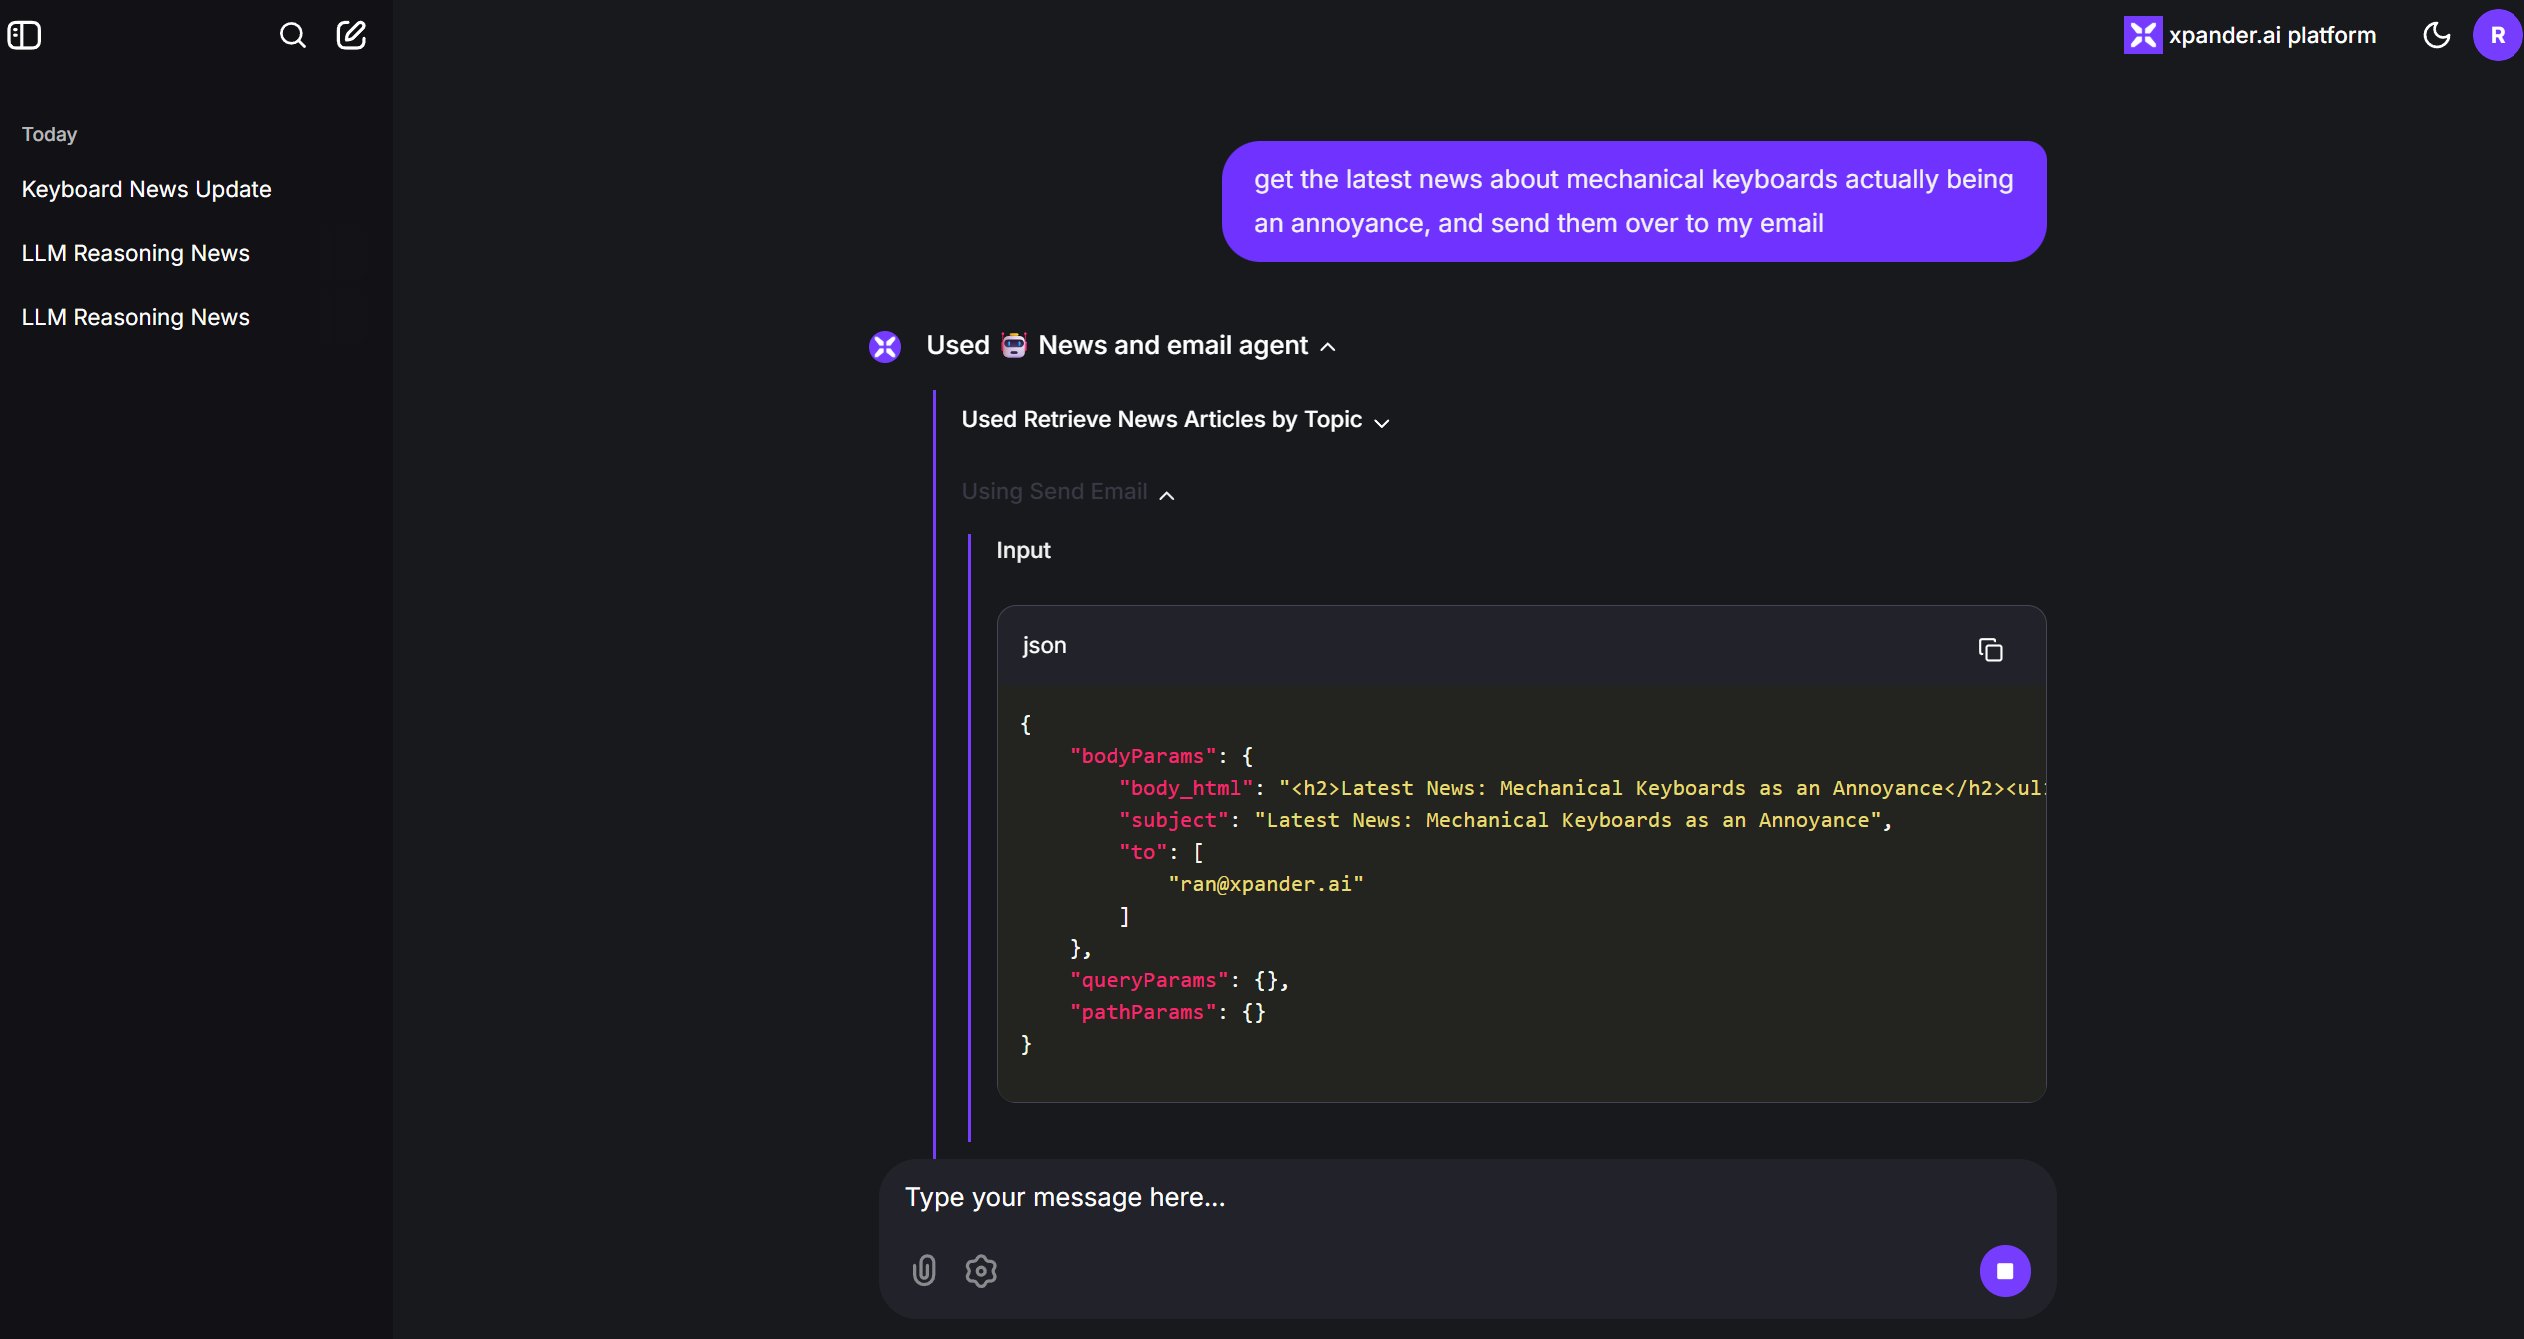
You successfully chatted to your AI Agent from an external source.
From here, the sky is the limit - you can continue adding tools, optimize your agent with storage and memory, connect multiple agents, and much more.
From here, the sky is the limit - you can continue adding tools, optimize your agent with storage and memory, connect multiple agents, and much more.