Time to complete: 5 minutes
What you’ll get: A custom MCP server from your OpenAPI spec + MCP client integration ready to use
What you’ll get: A custom MCP server from your OpenAPI spec + MCP client integration ready to use
Quick OpenAPI-to-MCP Process
1
Upload OpenAPI Specification
Go to the Connectors page in the xpander.ai console.
- Click ”+ Create new connector”
- Upload your OpenAPI/Swagger specification file (JSON or YAML)
- Provide a name and description for your connector
- Don’t forget the server URL, especially if your original spec doesn’t have one.
2
Configure Authentication
Set up authentication for your API:For API Key authentication:
- Select “API Key” as the authentication method
- Specify the key location (header, query parameter, etc.)
- Enter your API key or leave it for later configuration
- OAuth 2.0
- Bearer tokens
- Basic authentication
- No authentication
3
Review Generated Tools
The connector generator analyzes your API and creates AI-optimized tools:
- Function descriptions optimized for LLM understanding
- Parameter validation based on your schema
- Response formatting for better AI consumption
- Error handling built-in
4
Create MCP Server
Navigate to MCP Servers section in the console:
- Click “New MCP Server”
- Give your MCP server a descriptive name
- Go to the Tools tab, and click + Add tools
- Select tools from your newly generated connector
- Click Update changes
- Go to the Connect tab to get your MCP Server URL, and one-line commands to hook up your MCP server to your favorite MCP client.
5
Connect MCP Clients
Add your MCP server to your favorite MCP client using the connection details provided: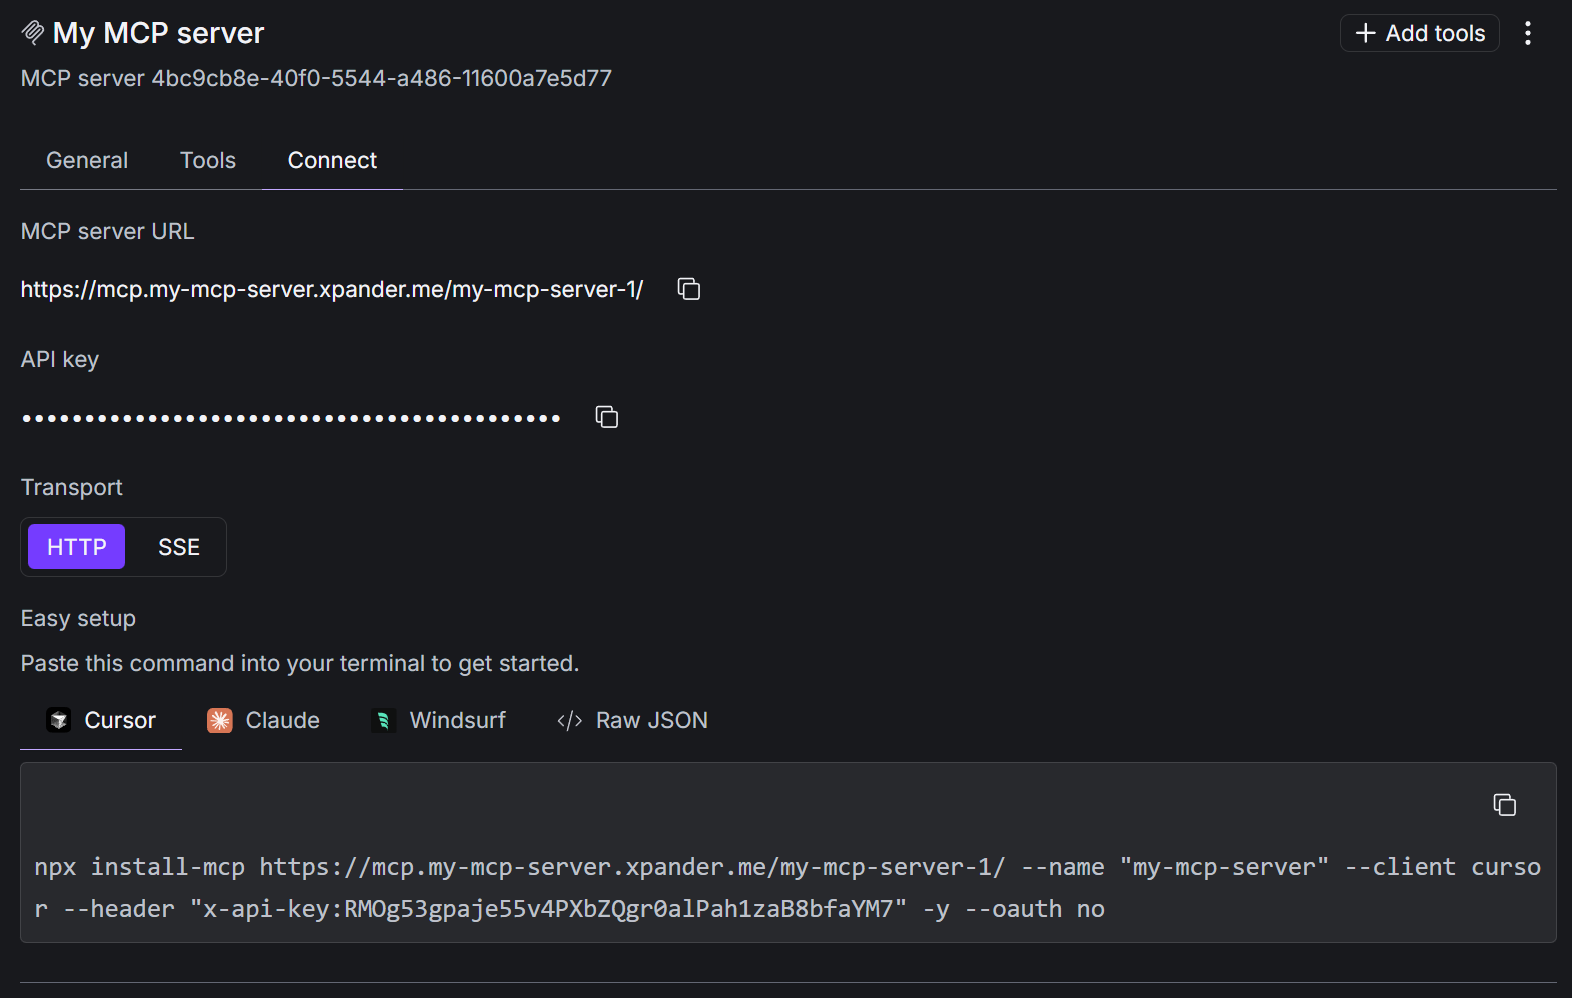
What You Just Built
🎉 A complete MCP integration with:AI-Optimized Tools
Functions described in LLM-friendly language for better tool selection
Automatic Authentication
API keys and auth handled transparently in the background
Schema Validation
Request/response validation based your OpenAPI specification
Instant Availability
Ready to use in Claude Desktop and other MCP clients immediately
Example: Connecting a Weather API
Sample OpenAPI Spec
Sample OpenAPI Spec
Here’s a simple weather API spec that would generate weather tools:
Generated MCP Tools
Generated MCP Tools
The connector generator would create:
- get_current_weather(location) - Gets current weather for a location
- Optimized description: “Retrieves real-time weather conditions including temperature, humidity, and conditions for any city or coordinates”
- Auto-validation: Ensures location parameter is provided
- Error handling: Graceful handling of API errors with helpful messages
Usage in Claude
Usage in Claude
Once connected, you can ask Claude:
- “What’s the weather like in San Francisco?”
- “Compare the weather in New York vs London”
- “Is it a good day for outdoor activities in Seattle?”
Next Step: Self-Deploy Your MCP Server
Your MCP server runs on xpander.ai’s cloud, but you can also deploy it to your own infrastructure:- Self-deploy to K8s Cluster - Run your MCP servers on your own Kubernetes infrastructure
- Full control over data and scaling
- Enterprise security with your own network policies
Troubleshooting
OpenAPI spec not uploading
OpenAPI spec not uploading
- Ensure your spec is valid JSON/YAML
- Check for syntax errors with a tool like Swagger Editor
- File size should be under 10MB
- Make sure all required fields are present
MCP client can't connect
MCP client can't connect
- Verify the MCP URL is copied correctly
- Check your MCP client configuration syntax
- Restart your MCP client after configuration changes
- Ensure your API keys are properly configured
Tools not working as expected
Tools not working as expected
- Review the generated tool descriptions and edit if needed
- Check API authentication is properly configured
- Verify your API endpoints are accessible from xpander.ai
- Test individual tools in the xpander.ai console first