

Connect the workspace
1
Open Channels settings
In Xpander Chat, open Settings and pick the Channels tab (admins only).
2
Connect Slack
Click Connect Slack. A Slack window opens asking you to authorize the xpander Slack app for your workspace. Review the permissions and click Allow.
3
Done
The window closes on its own and the Channels tab shows your workspace as connected. Members can start DMing the app immediately.
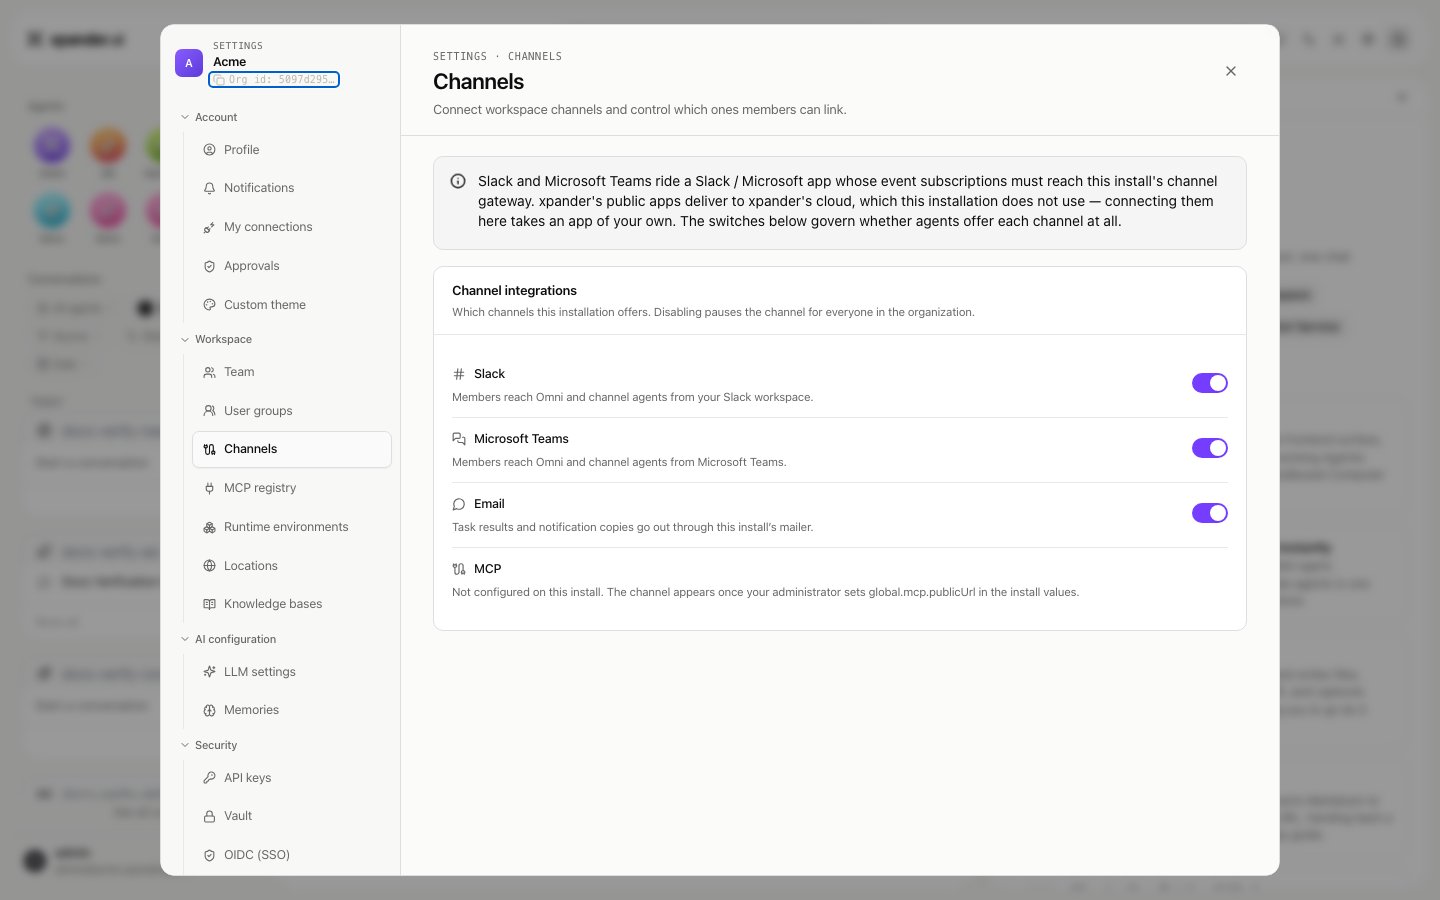
Settings > Channels on a self-hosted install.
Workspace-wide settings
Settings > Channels lists each channel with a switch. On xpander cloud that list is WhatsApp, Slack, Microsoft Teams and Telegram. On a self-hosted installation it is Slack, Microsoft Teams, Email and MCP, with the last two appearing once the install values set a mailer and an MCP endpoint. The Slack entry holds the workspace-wide Slack behavior options and shows every channel routed to an agent with its rules. Show detailed tool activity in the bot’s settings turns the step list on for every channel; a channel row can override it. Which channel sections a person may configure on an agent is set per user group under Triggers. Changes to these switches land in Settings > Audit logs asOrg Channels Updated.
Authorize handle management
A handle such as@account-research lets people select an agent from Slack’s mention picker. Handles need the workspace authorized once by an xpander organization admin, with a Slack account allowed to create, edit and deactivate user groups. This is a separate step from connecting or reconnecting the Slack app. Slack user groups require a paid Slack plan.
1
Keep Slack group permissions restricted
Use a Slack administrator account with the required user-group permissions. You do not need to let everyone create or deactivate groups. Your Slack admin can check these permissions in the workspace settings under Permissions → User Groups. See Slack’s group-management requirements.
2
Authorize from workspace settings
In xpander, open Settings → Channels → Slack and select Authorize agent handles. On Slack’s consent screen, confirm the already-connected workspace and approve the user-group management permission with the authorized Slack account.
3
Return to xpander
After authorization succeeds, the workspace shows Authorized. Agent owners can now create, rename and delete their agents’ handles; organization admins can manage handles for agents in their organization.
Reauthorize when needed
If the authorizing account loses group-management rights or its grant is revoked, open Settings → Channels → Slack and select Reauthorize. Existing active handles can continue receiving mentions while management authorization is unavailable. Creating or renaming handles requires authorization; deletion still removes the mapping immediately, with Slack cleanup waiting for authorization to be restored. If authorization asks you to update app permissions instead, use Reconnect in the same Slack settings and then select Authorize agent handles again. This refreshes the bot permission grant; it is separate from the admin user-group grant. If a workspace was authorized before automatic setup was available, authorize handles once more to finish setup. Reconnecting or disconnecting the workspace clears its handle-management authorization. After reconnecting, authorize handle management again. Bot Reconnect and user Reauthorize serve different purposes.Related
Agents in Slack
What members do once the workspace is connected: DM Omni, mention agents by handle, route channels
Microsoft Teams tenant
The same connection for a Microsoft 365 tenant