Configure a trigger
Triggers live in the START block on the left side of the canvas. Each trigger type appears as a row with a green dot when active and a chevron to open its configuration panel. The badge below the block counts active triggers (e.g., “3 events”).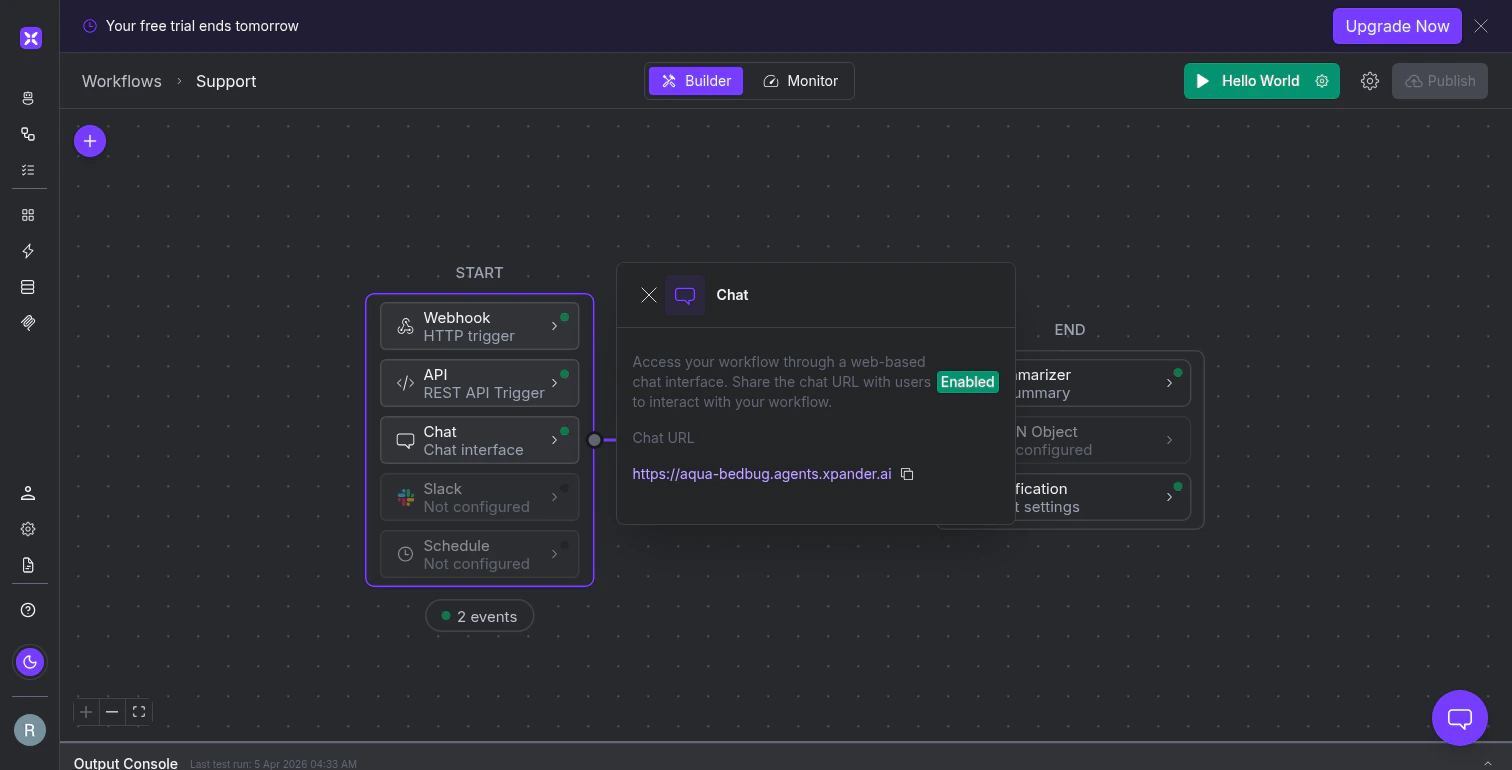
The START block with five trigger rows. Webhook, API, and Chat are enabled (green dots). Slack and Schedule are not yet configured.
Start workflows from external events with webhooks
Any service that can send an HTTP POST (Stripe, GitHub, Jira, your own backend) can trigger a run. Open the Webhook trigger panel to see a unique URL. Copy it into your external service’s webhook configuration. Every POST to that URL starts a new run with the request payload as input. The URL follows this pattern:Invoke workflows programmatically with the API trigger
The API trigger provides a REST endpoint for starting runs from your own application code. The panel shows your Workflow ID (with a copy button), a Test API button that opens an in-browser tester, and a View Docs link.The API tester
Clicking Test API opens a modal where you can construct and send requests without leaving the canvas. It provides the full endpoint URL, your API key, and a pre-generated cURL command. Three invocation modes are available:- Synchronous (wait for the result)
- Asynchronous (fire and forget)
- Stream (server-sent events)
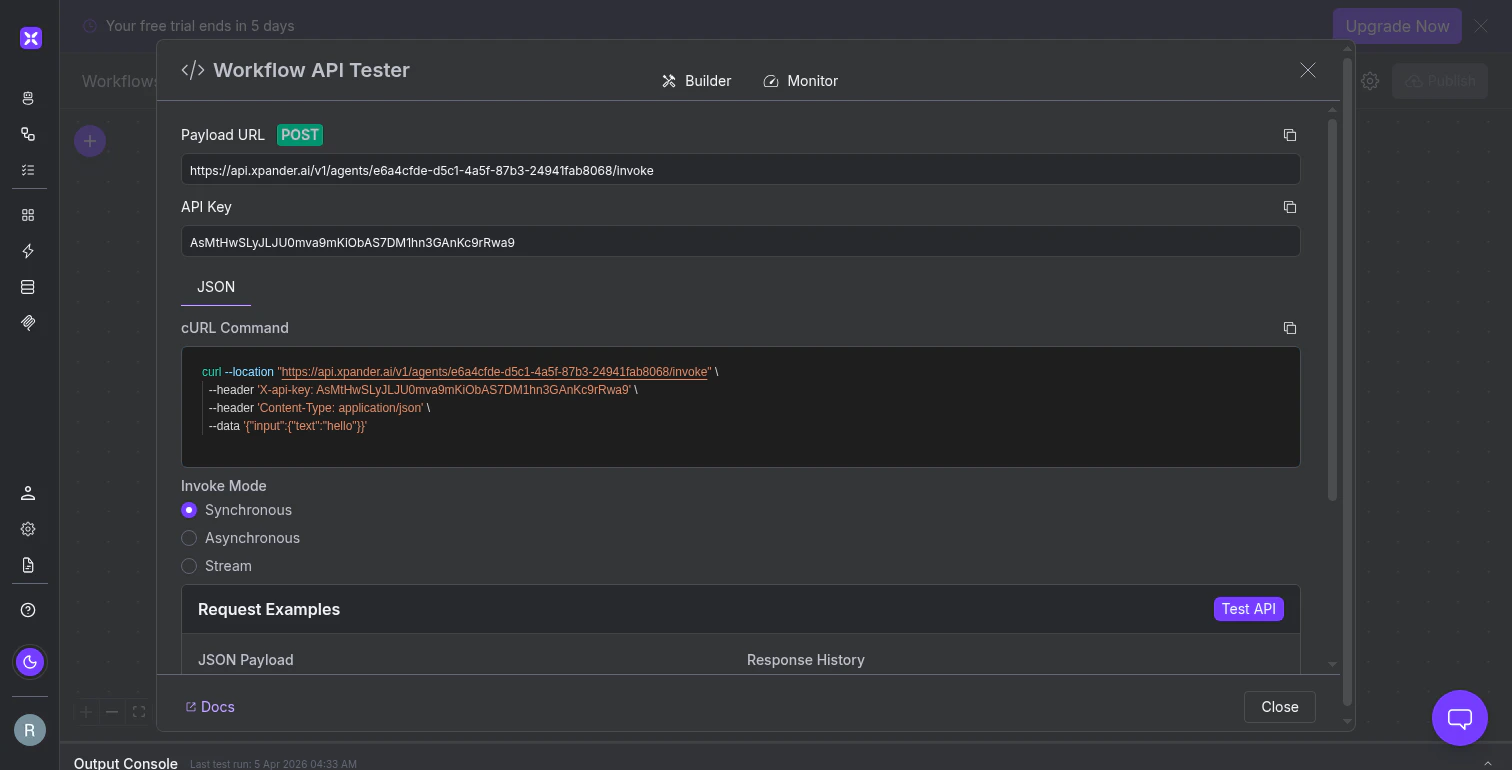
The API tester modal with endpoint URL, cURL command, invocation modes, and payload editor.
Let users trigger workflows through chat
The Chat trigger provides a hosted web interface at a URL likehttps://{name}.agents.xpander.ai. Share that URL with anyone who should be able to start the workflow.
The interface supports multi-turn conversation, file attachments, and voice input.
Connect workflows to Slack
The Slack trigger lets a bot start your workflow from channels and direct messages. The panel shows a connection status and a Connect to Slack agent button. Once connected, messages sent to the bot (or mentions in a channel) trigger runs with the message content as input.Run workflows on a schedule
Click + Add Schedule to configure a time-based trigger. The schedule modal has two parts. Instructions describe what the workflow should process on each run. Since there’s no incoming payload, this is where you provide context (e.g., “Pull all new support tickets from the last 24 hours”). The schedule controls when it runs. Two scheduling modes are available: Interval mode sets a repeating cadence. Specify a frequency (every 5 minutes, every 2 hours), then toggle which days of the week the schedule should run. The minimum interval is 5 minutes. Specific Time mode targets exact times of day rather than repeating intervals. A Cron preview below the controls shows the generated expression (e.g.,*/5 * * * *) so you can verify the schedule.
Quick Presets offer common schedules, and Advanced Settings exposes additional tuning options.

The schedule builder with interval controls, day selection, and auto-generated cron preview.
Choosing the right trigger
All five trigger types feed into the same pipeline: same nodes, same logic, same output configuration. The only difference is how and when the run starts.
What’s next
Agent Nodes
Add AI-powered steps that reason about data, classify inputs, and summarize results.
Action Nodes
Run deterministic operations: tool calls, emails, code execution, OCR.