- Route your prompts to any AI Agent created on Xpander
- Define conditions for the bot to jump into a conversation on its own
- Have agents process long conversation histories, files, links and media
- a Personal Agent
- or, a Custom Agent
Create a Slack Agent
To connect your Xpander agent to Slack, you create a Slack agent. A Slack agent is a wrapper that holds a Slack workspace’s OAuth tokens and channel settings, then routes incoming messages to your Xpander agent for processing. Think of it as the bridge: the Slack agent handles the Slack side (authentication, channels, rate limits), and your Xpander agent handles the thinking. Each Slack workspace needs its own Slack agent with its own tokens, but you can connect multiple Slack agents to the same Xpander agent, so one agent can serve several workspaces.1
Open the Slack Agents page
Go to the Slack Agents page in Xpander and click Create new Slack agent. This opens the setup page where you’ll provide a name and Slack tokens.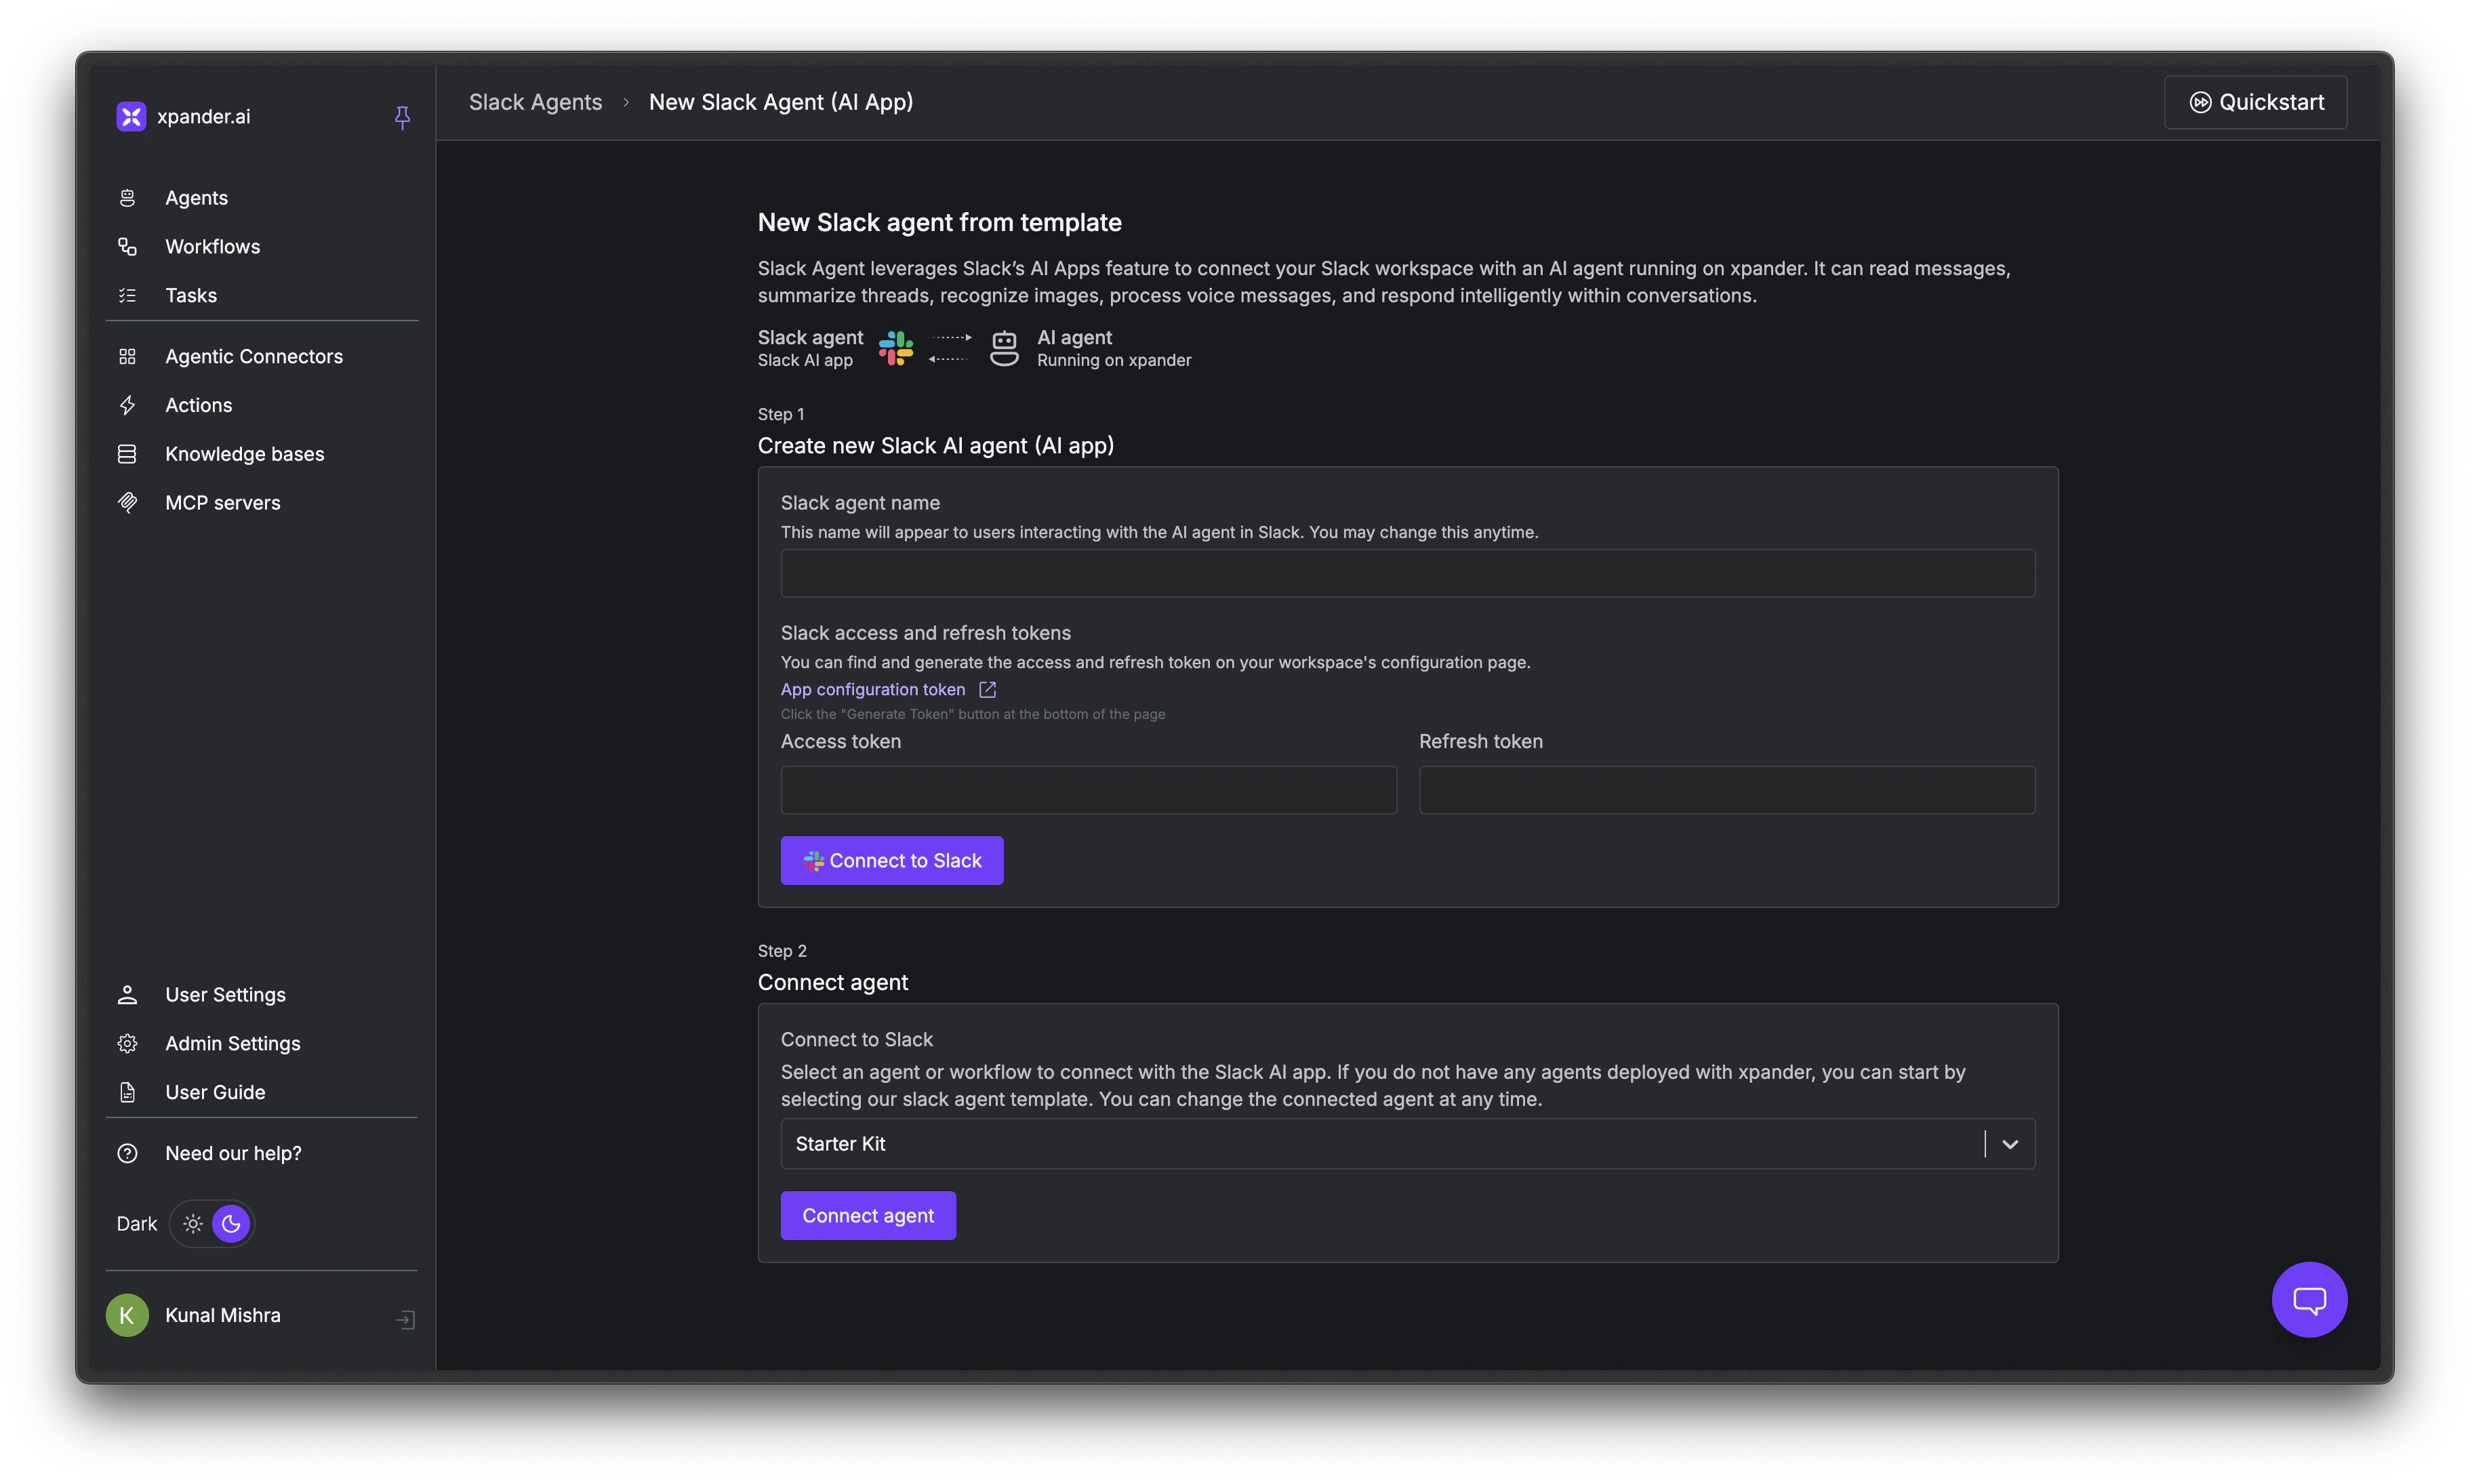
2
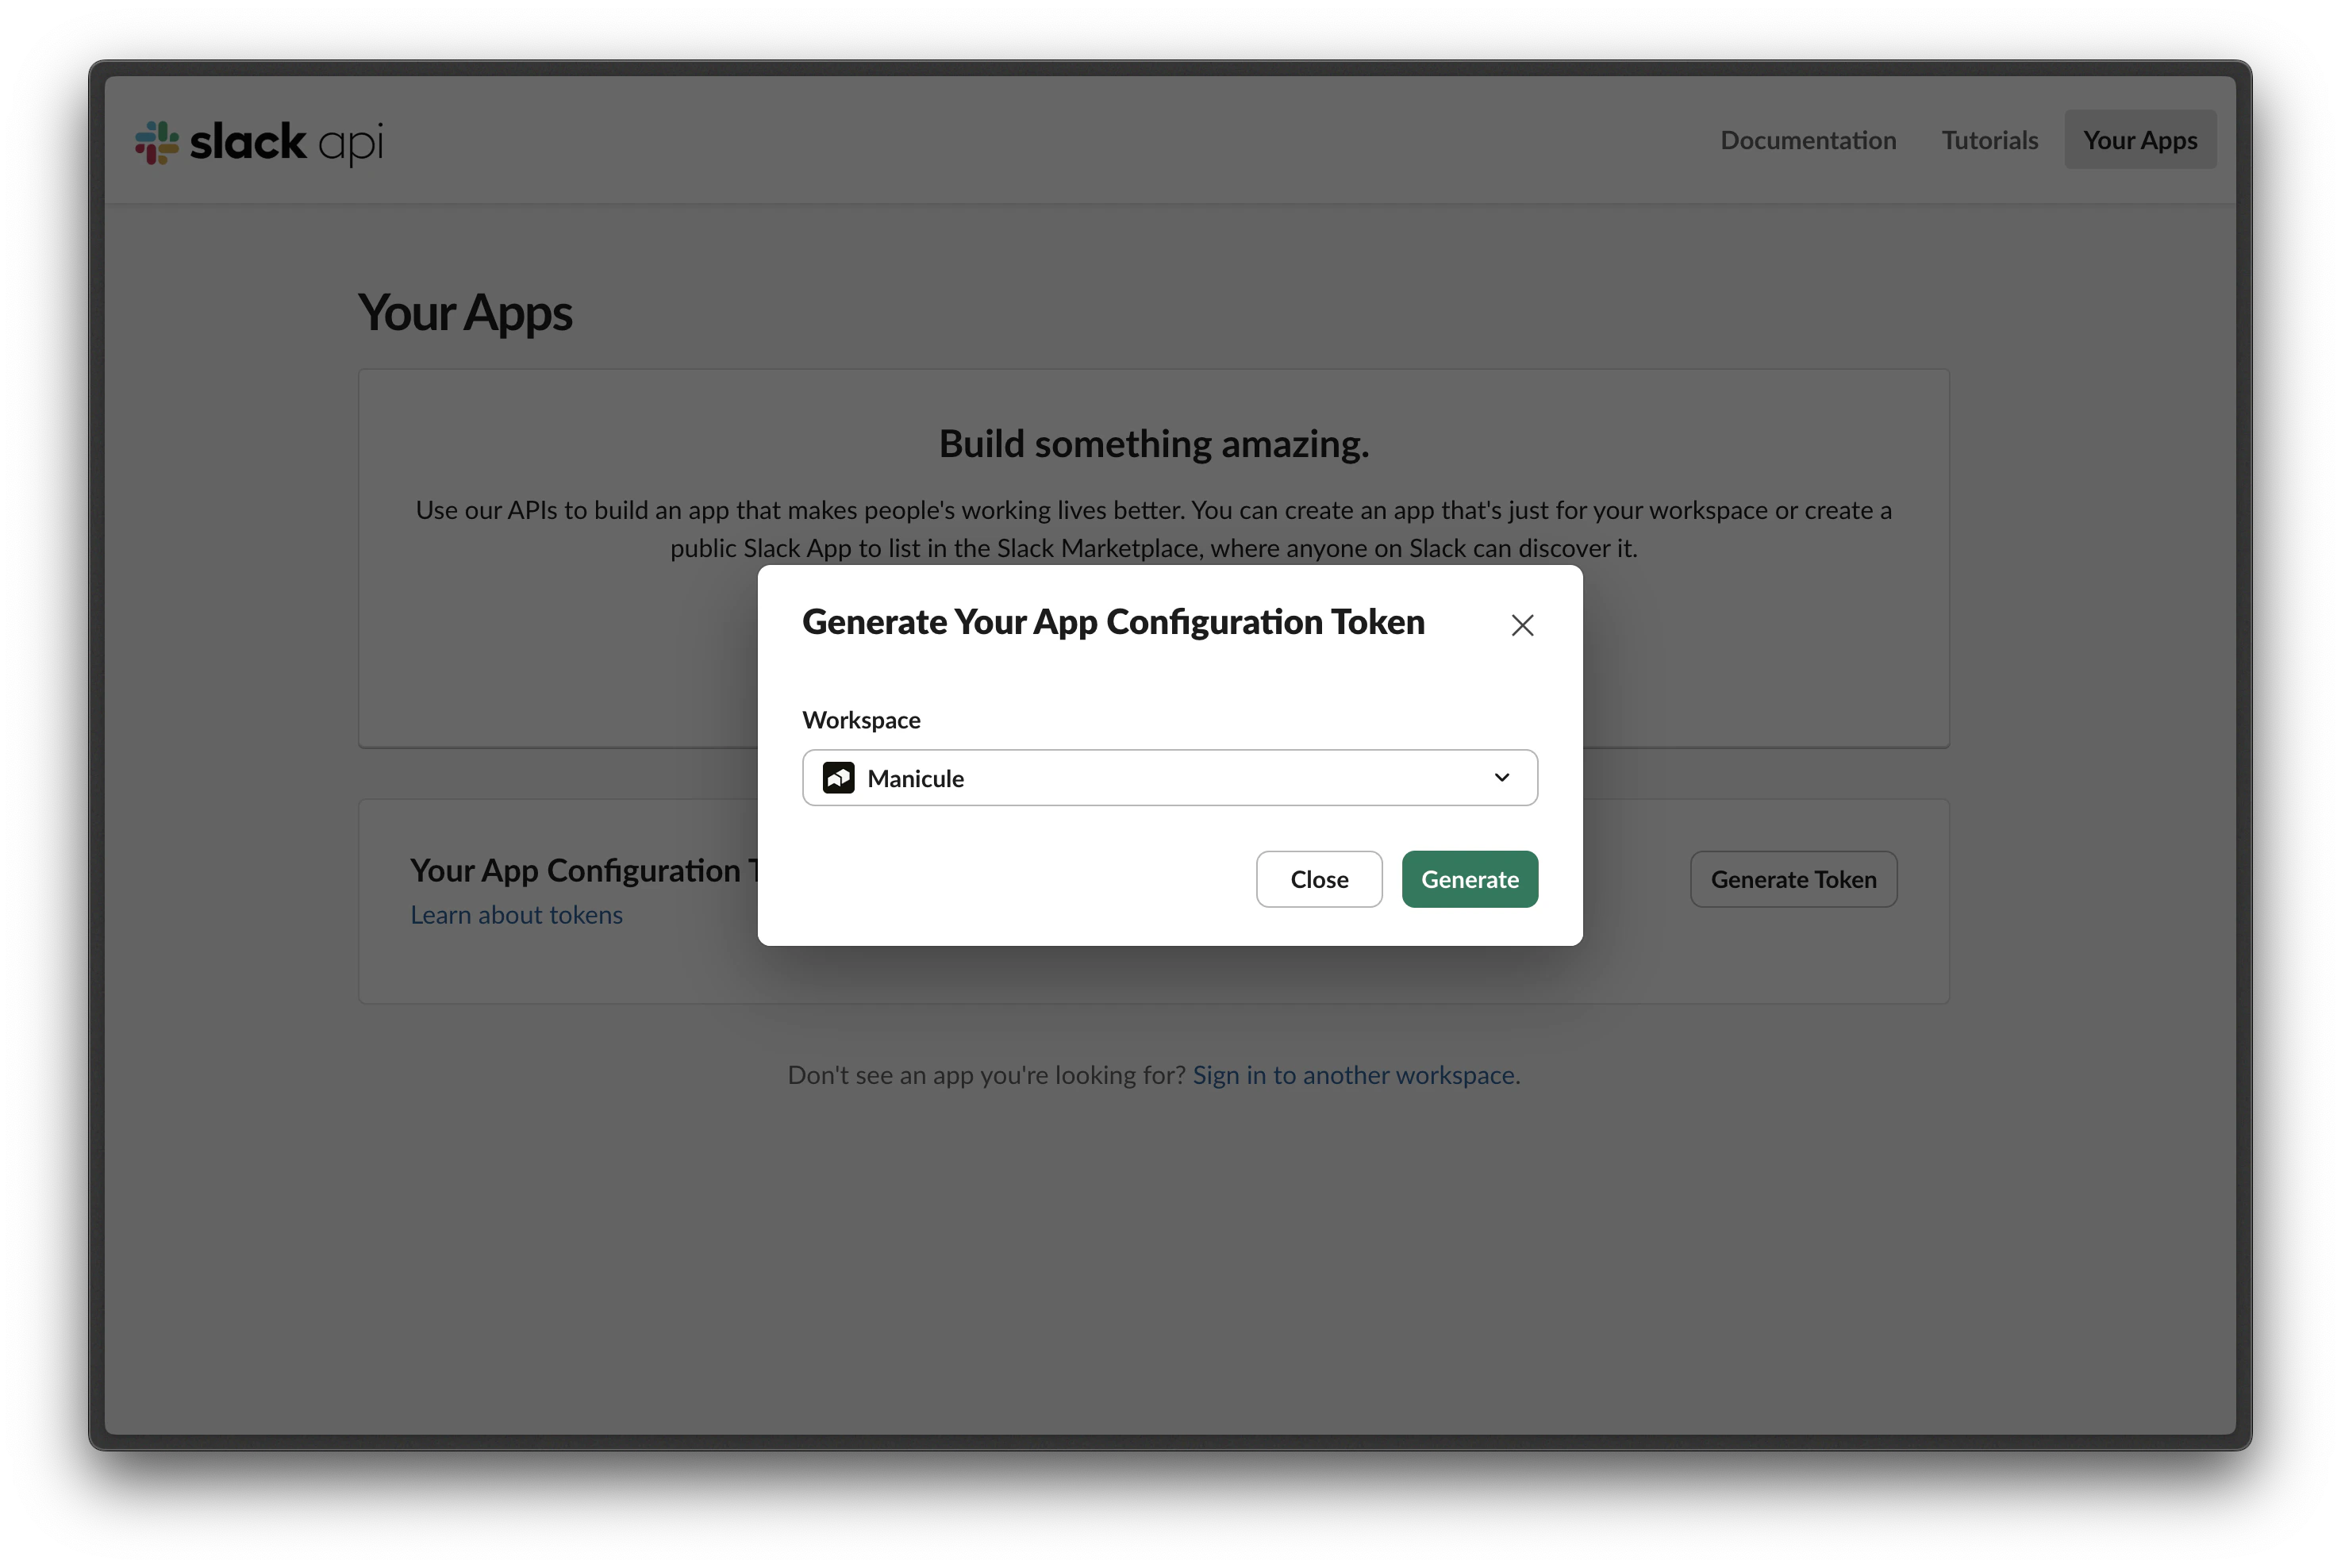
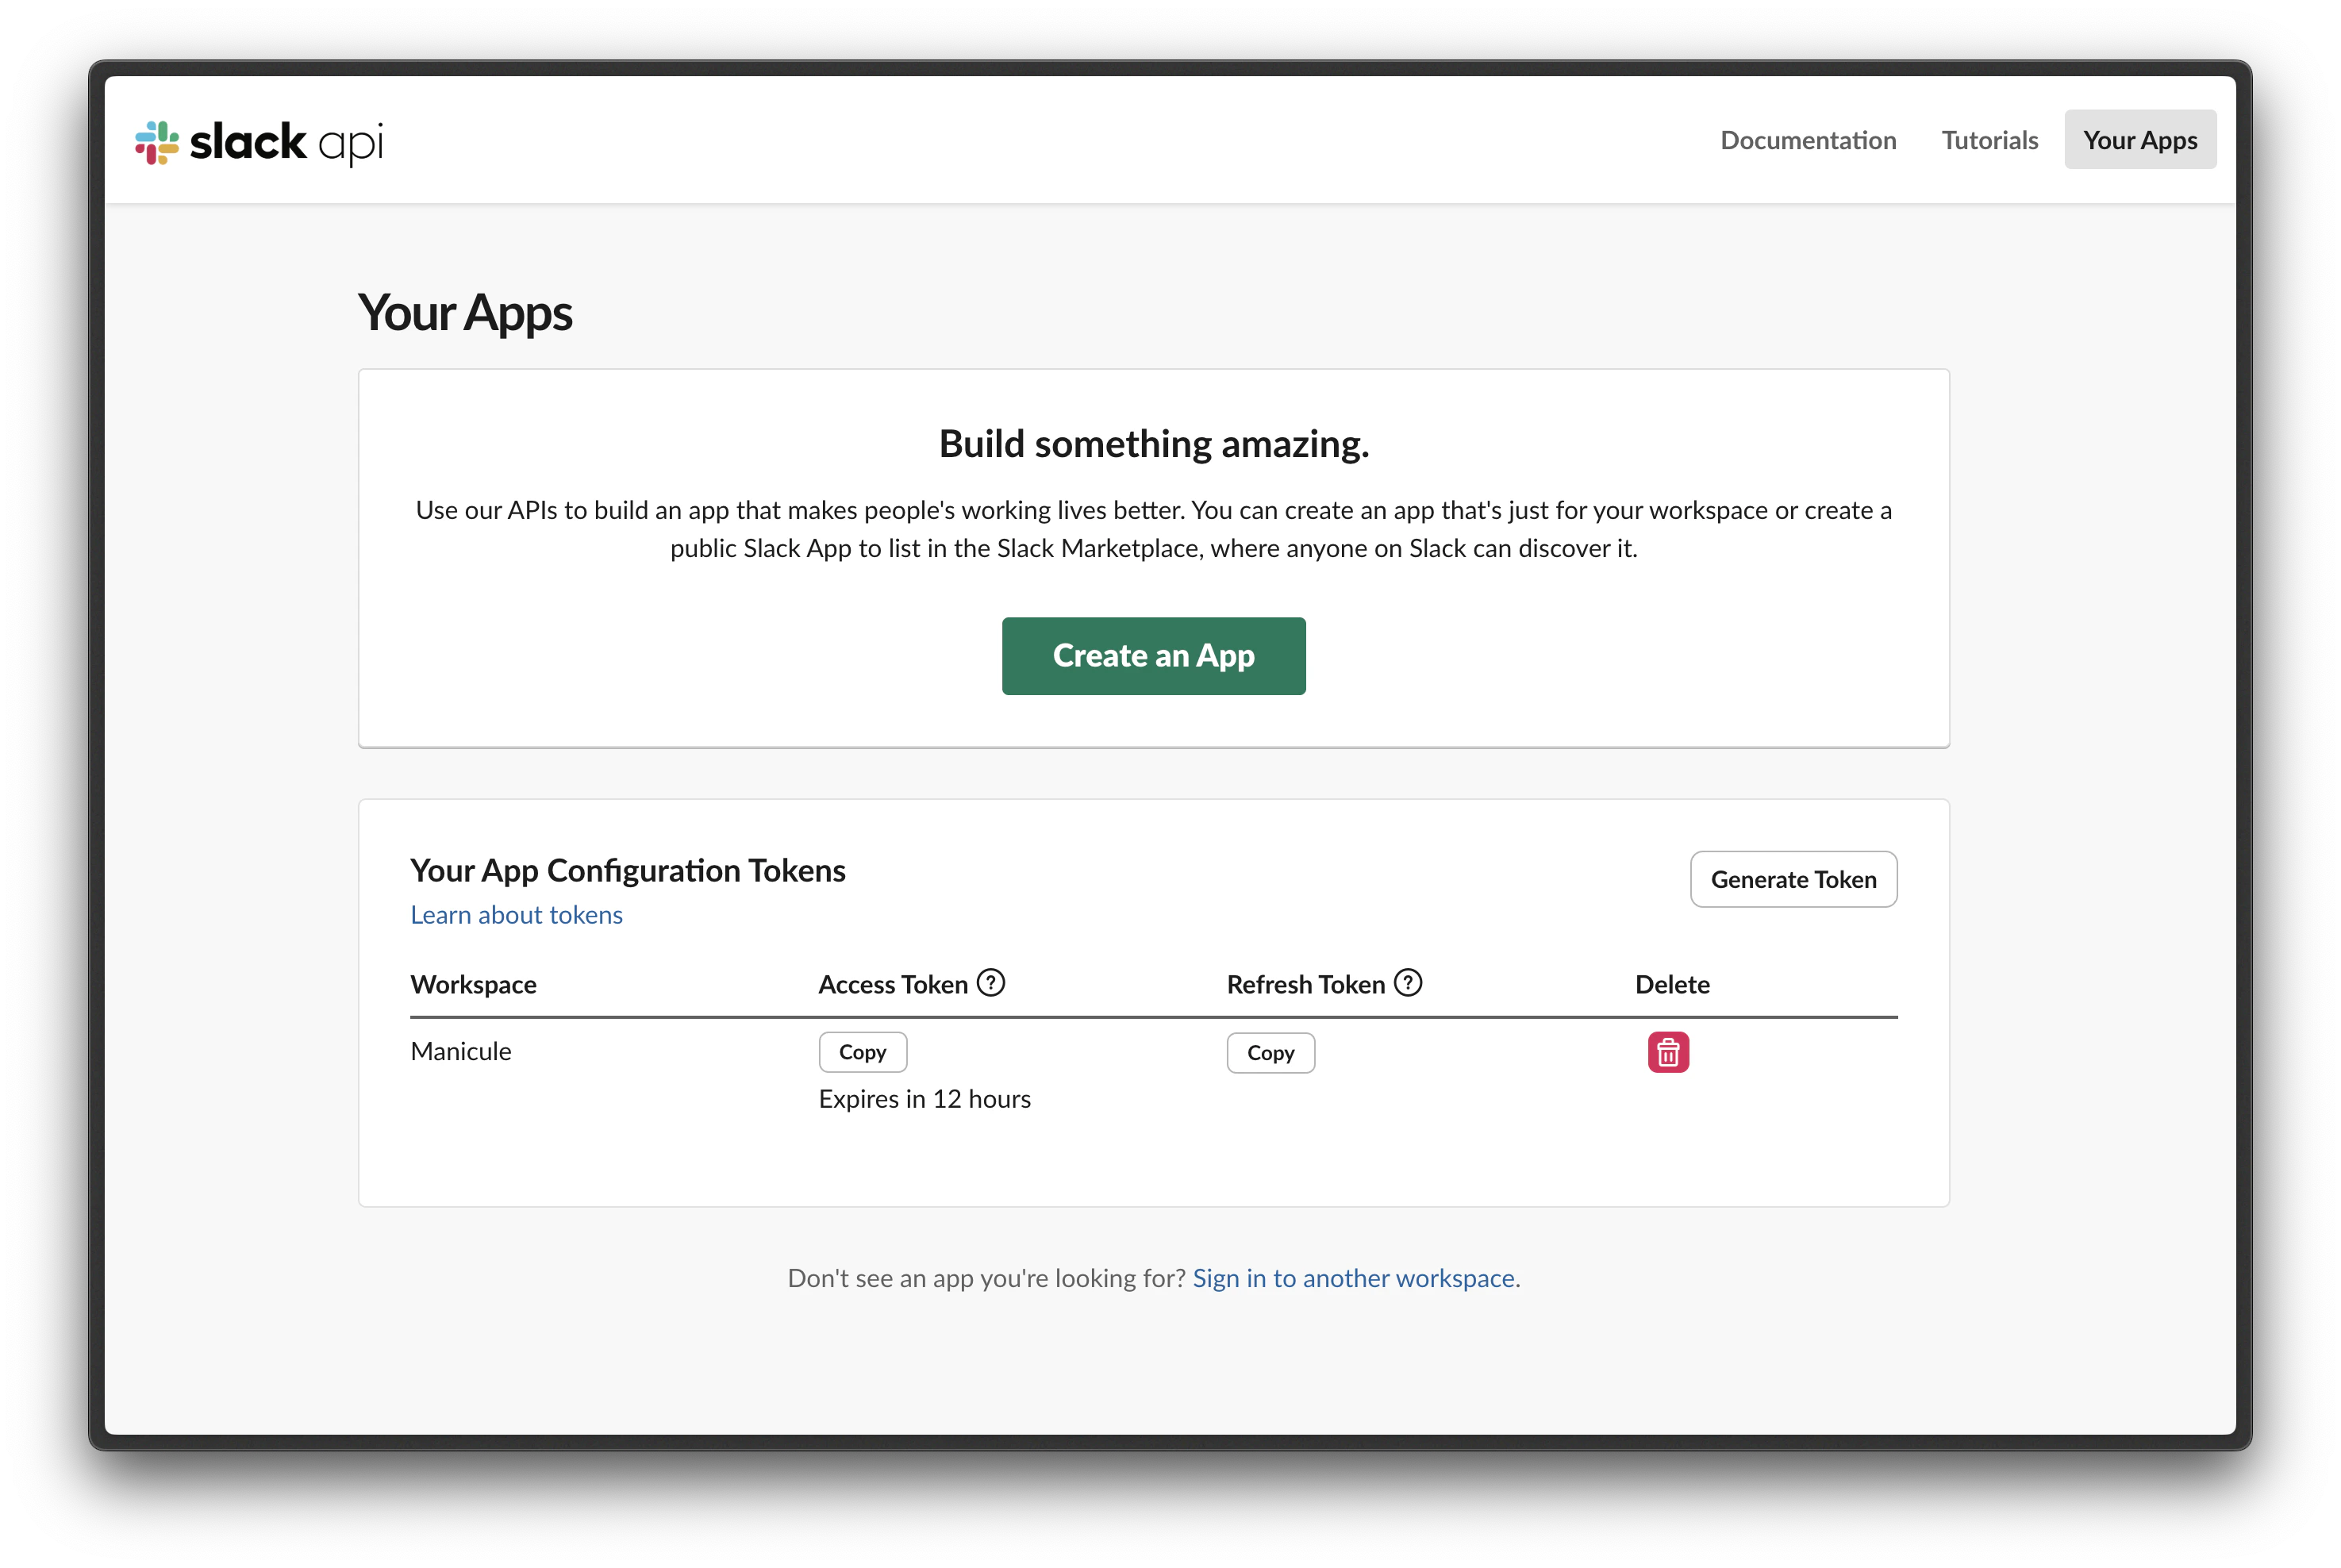
Get your Slack tokens
Go to api.slack.com/apps. Under Your App Configuration Tokens, click Generate Token.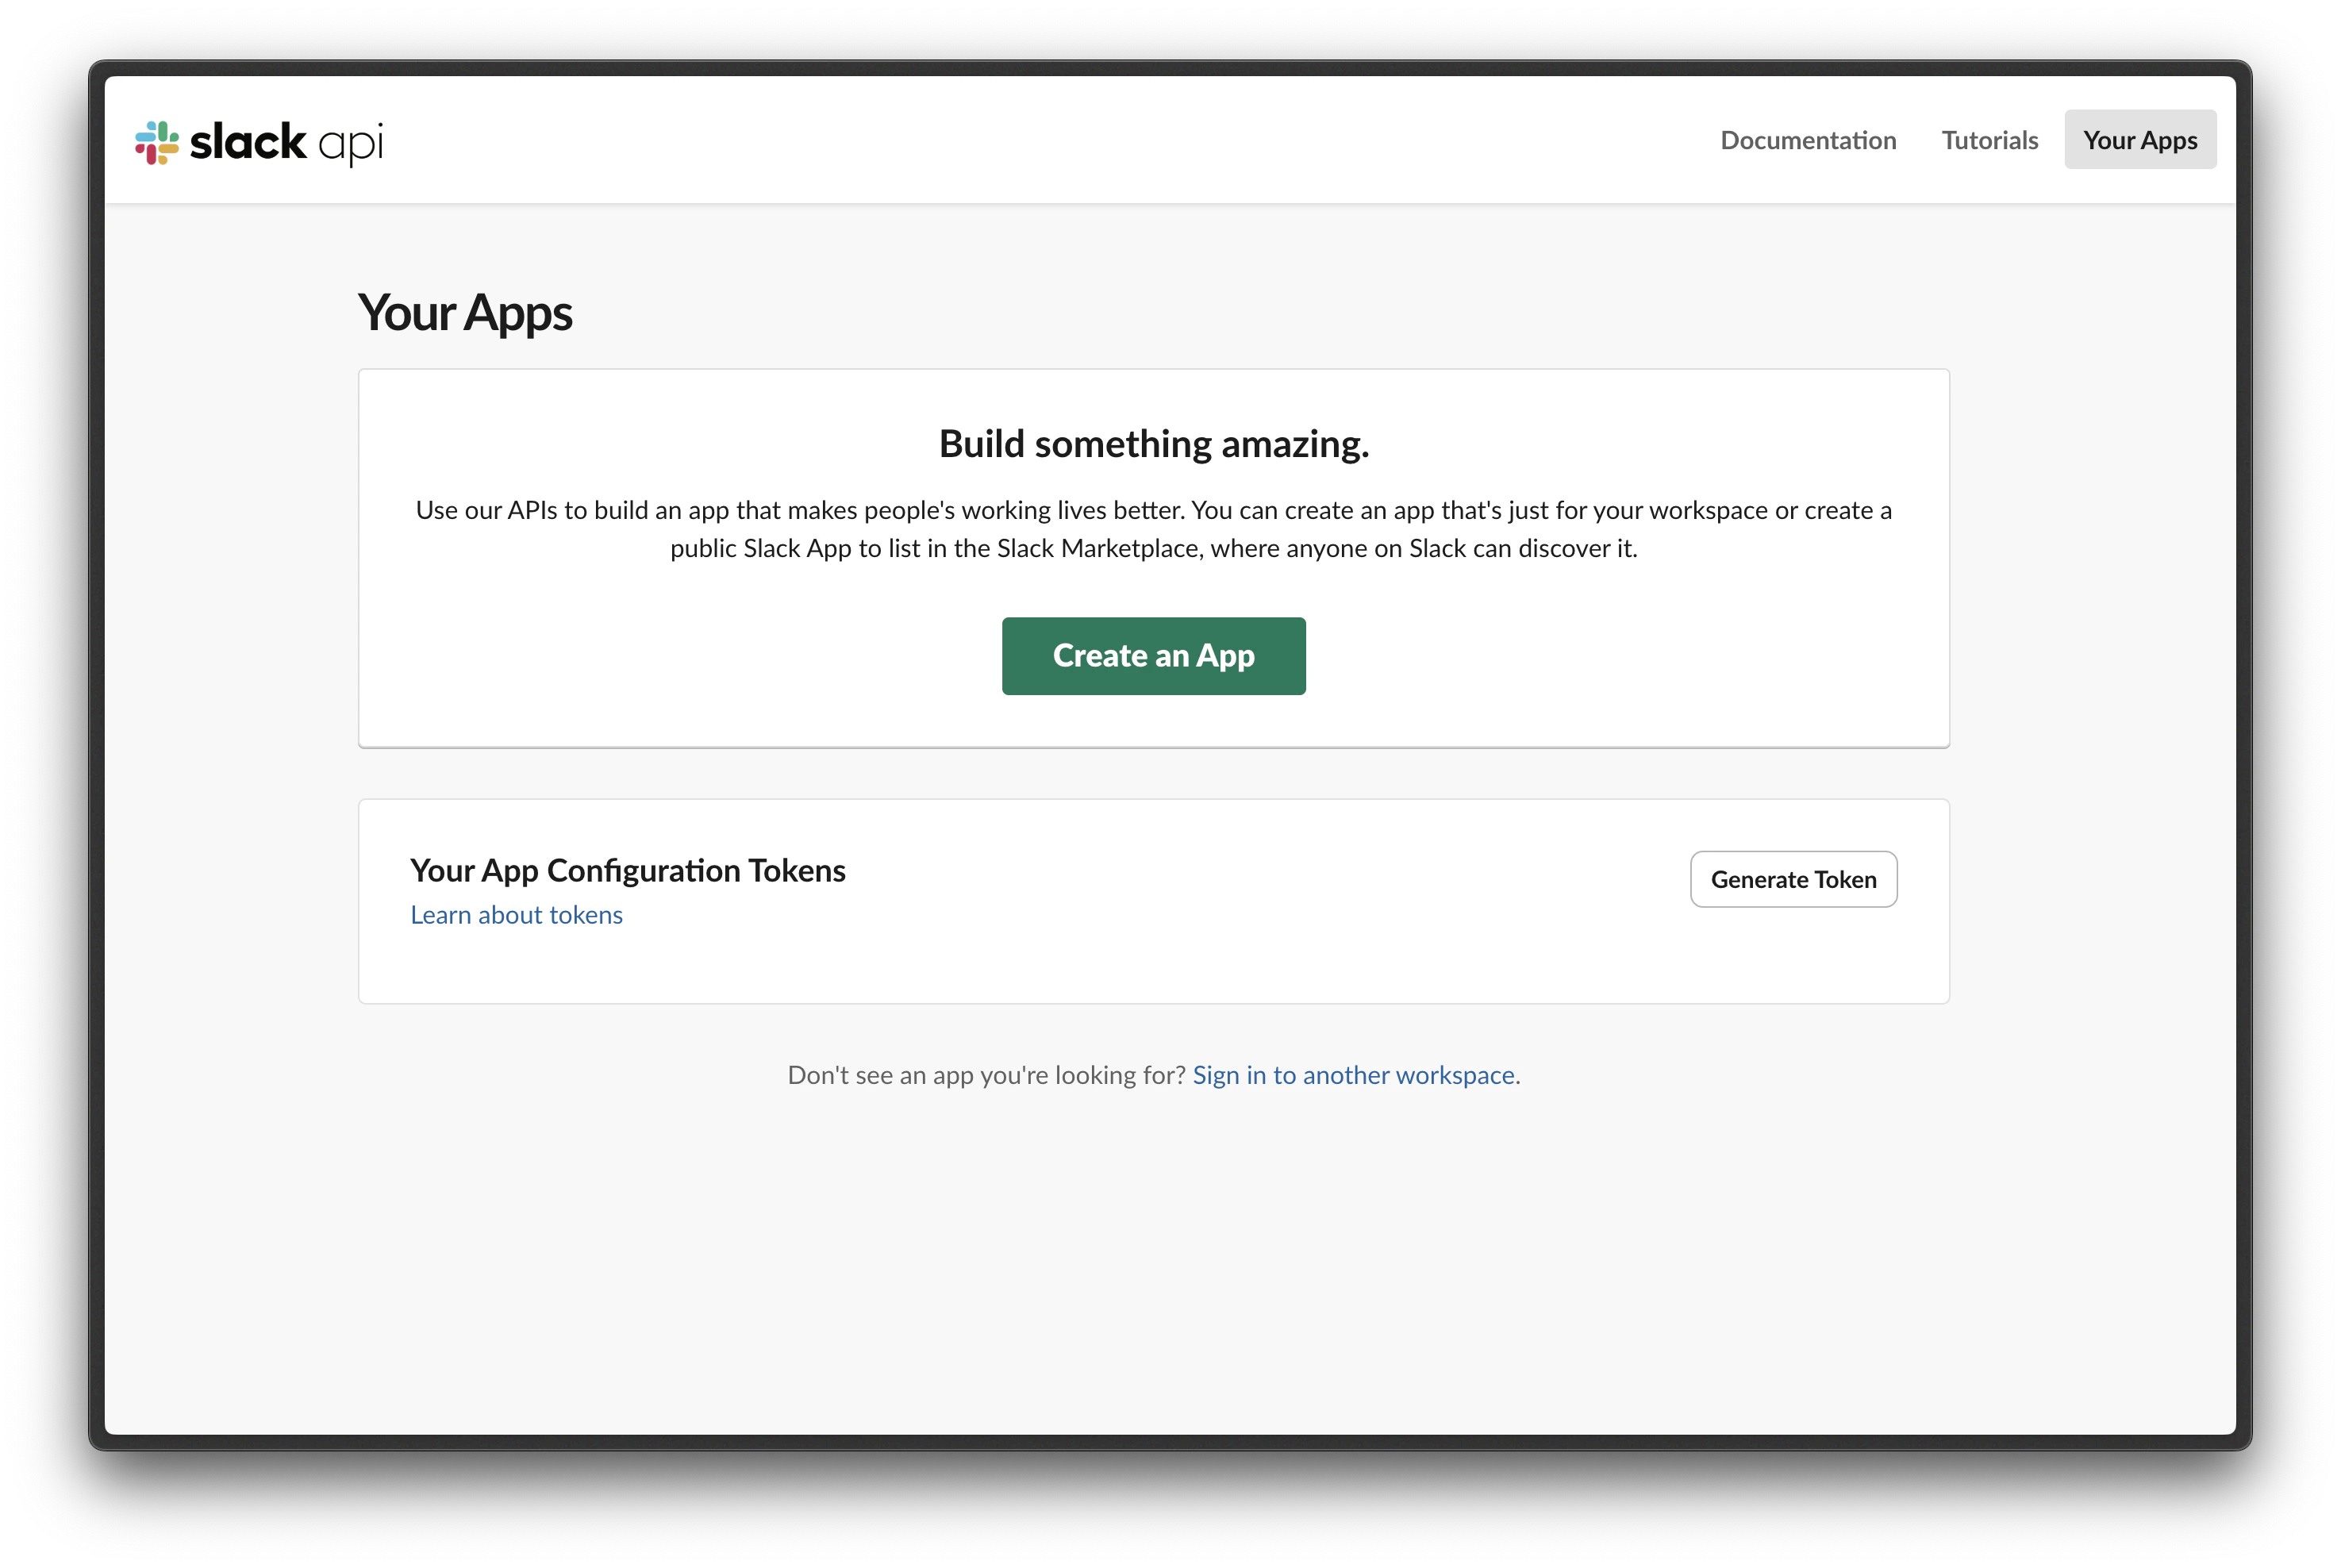
3
Authorize the workspace
Back on the Xpander setup page, enter a Slack agent name, paste the Access Token and Refresh Token, then click Connect to Slack.Slack will prompt you to review permissions. Click Allow.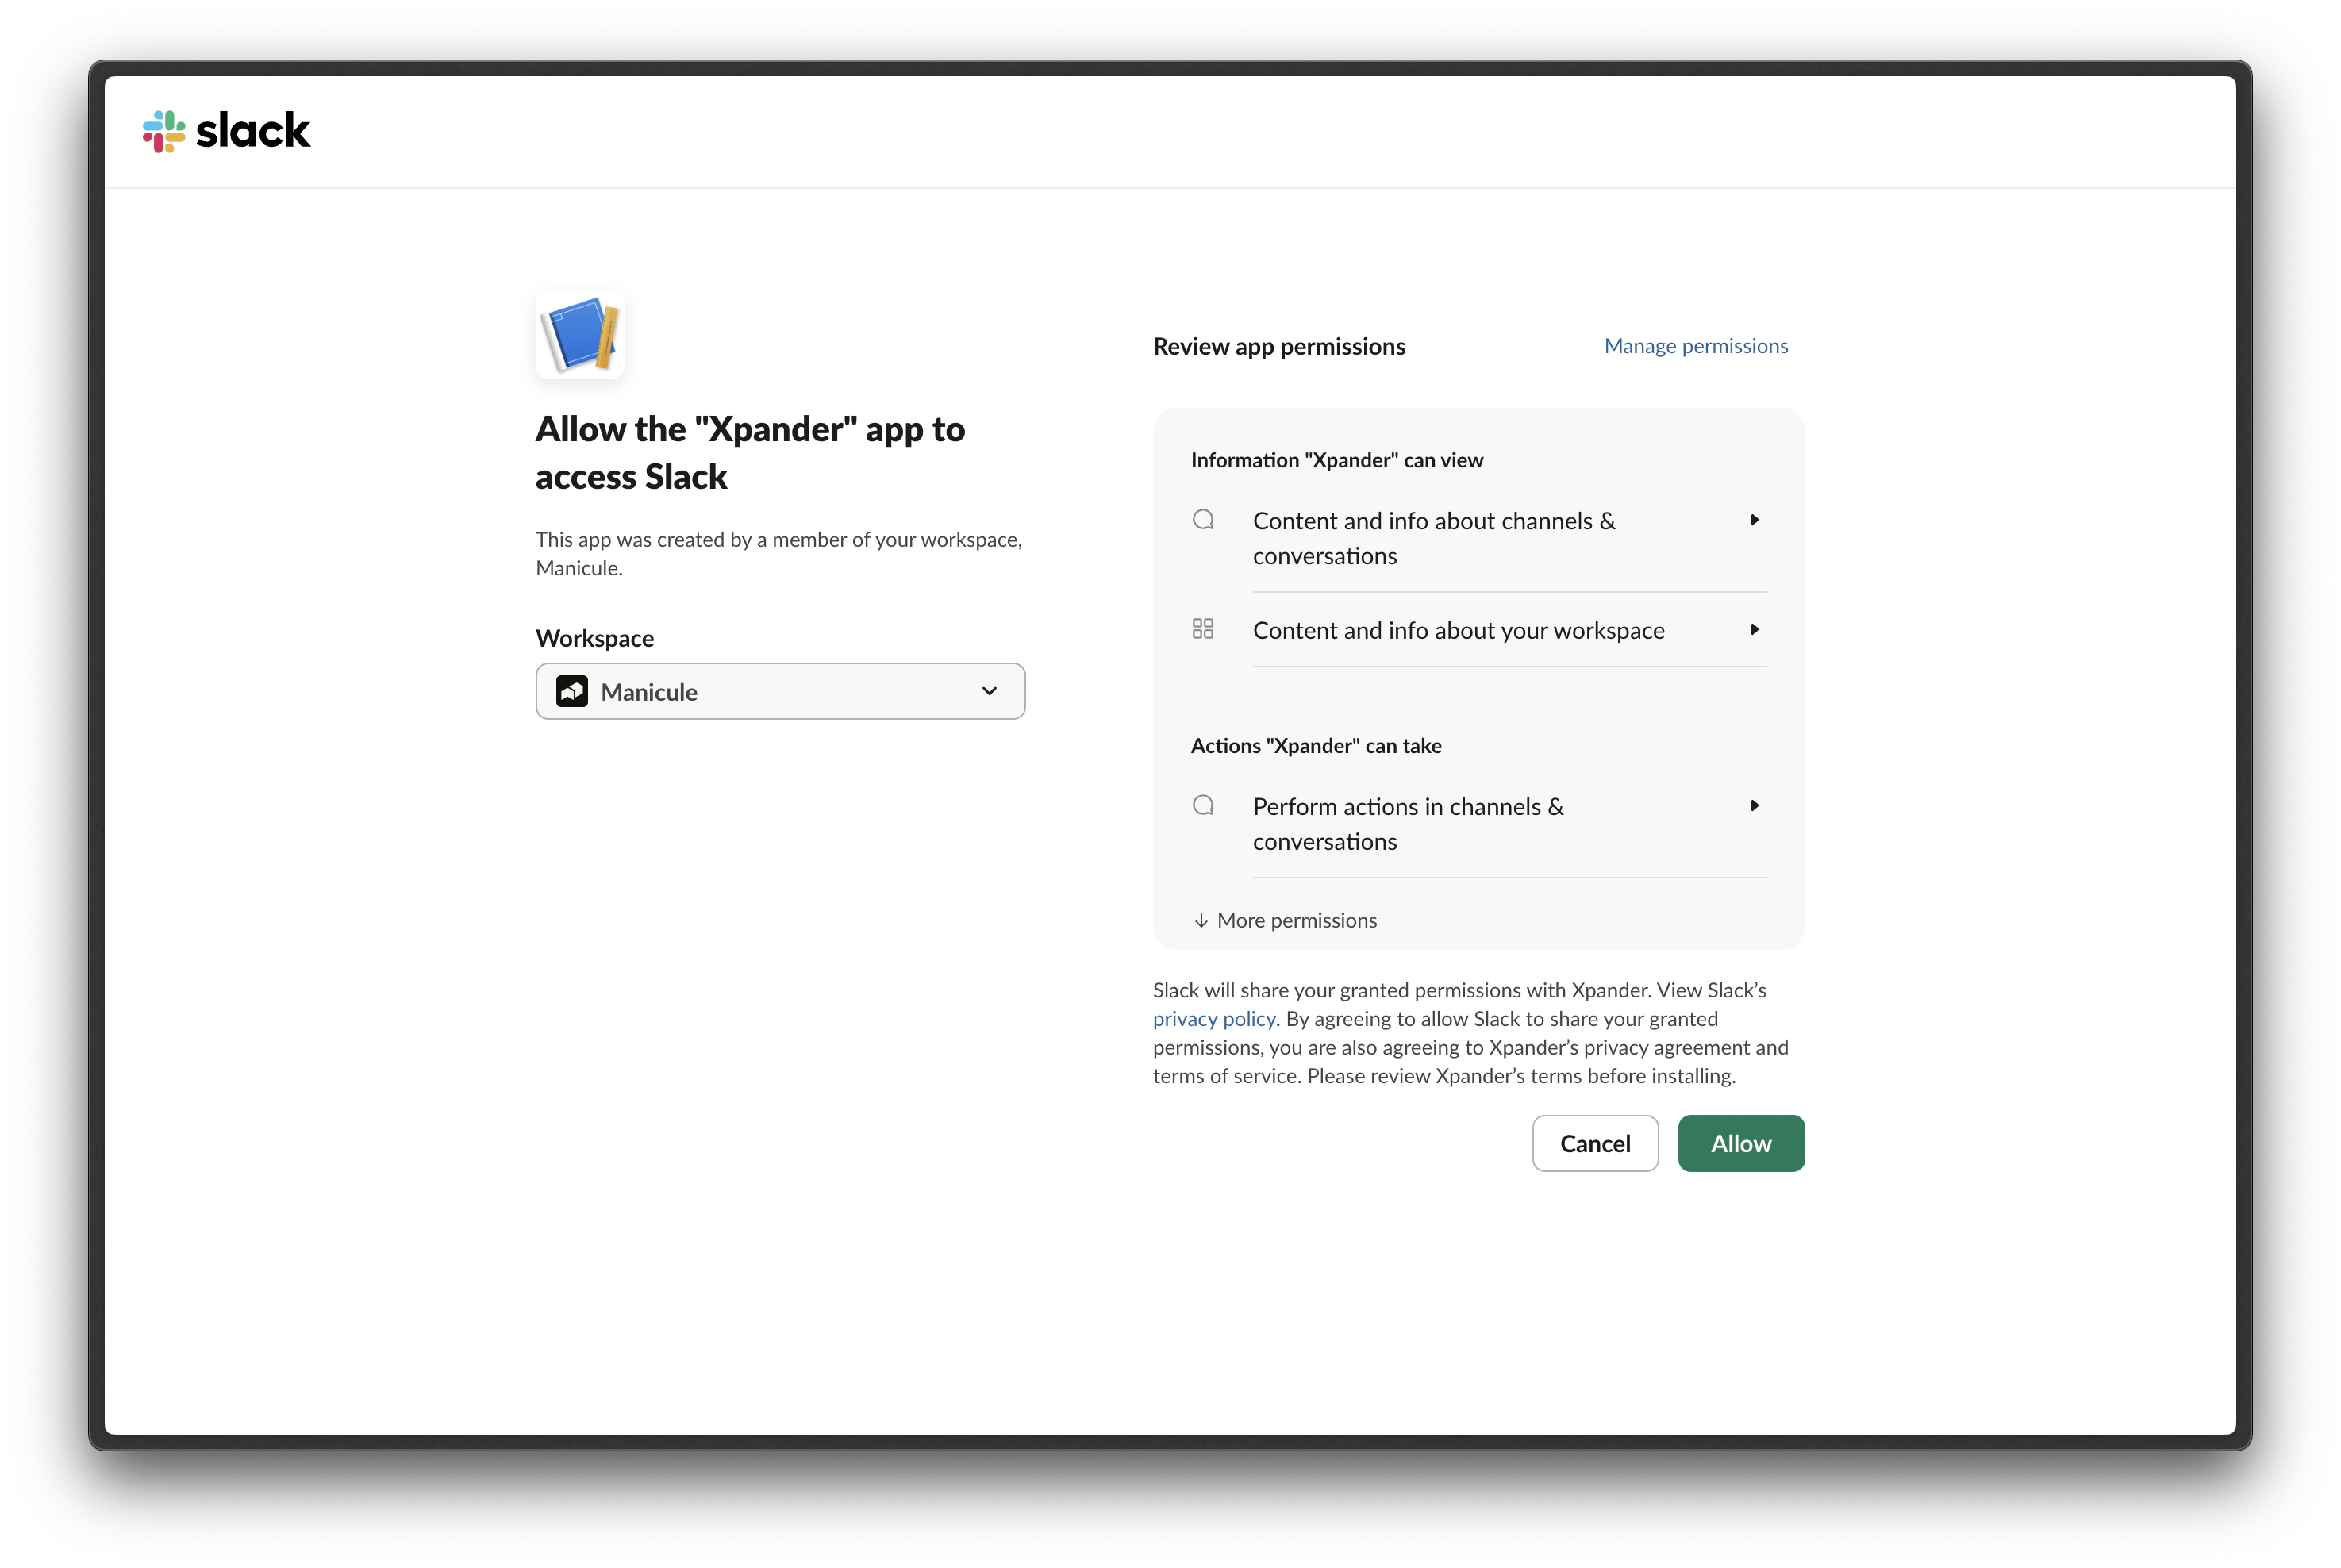
4
Add channels
Once connected, add the Slack channels the bot should be active in and click Add to channels.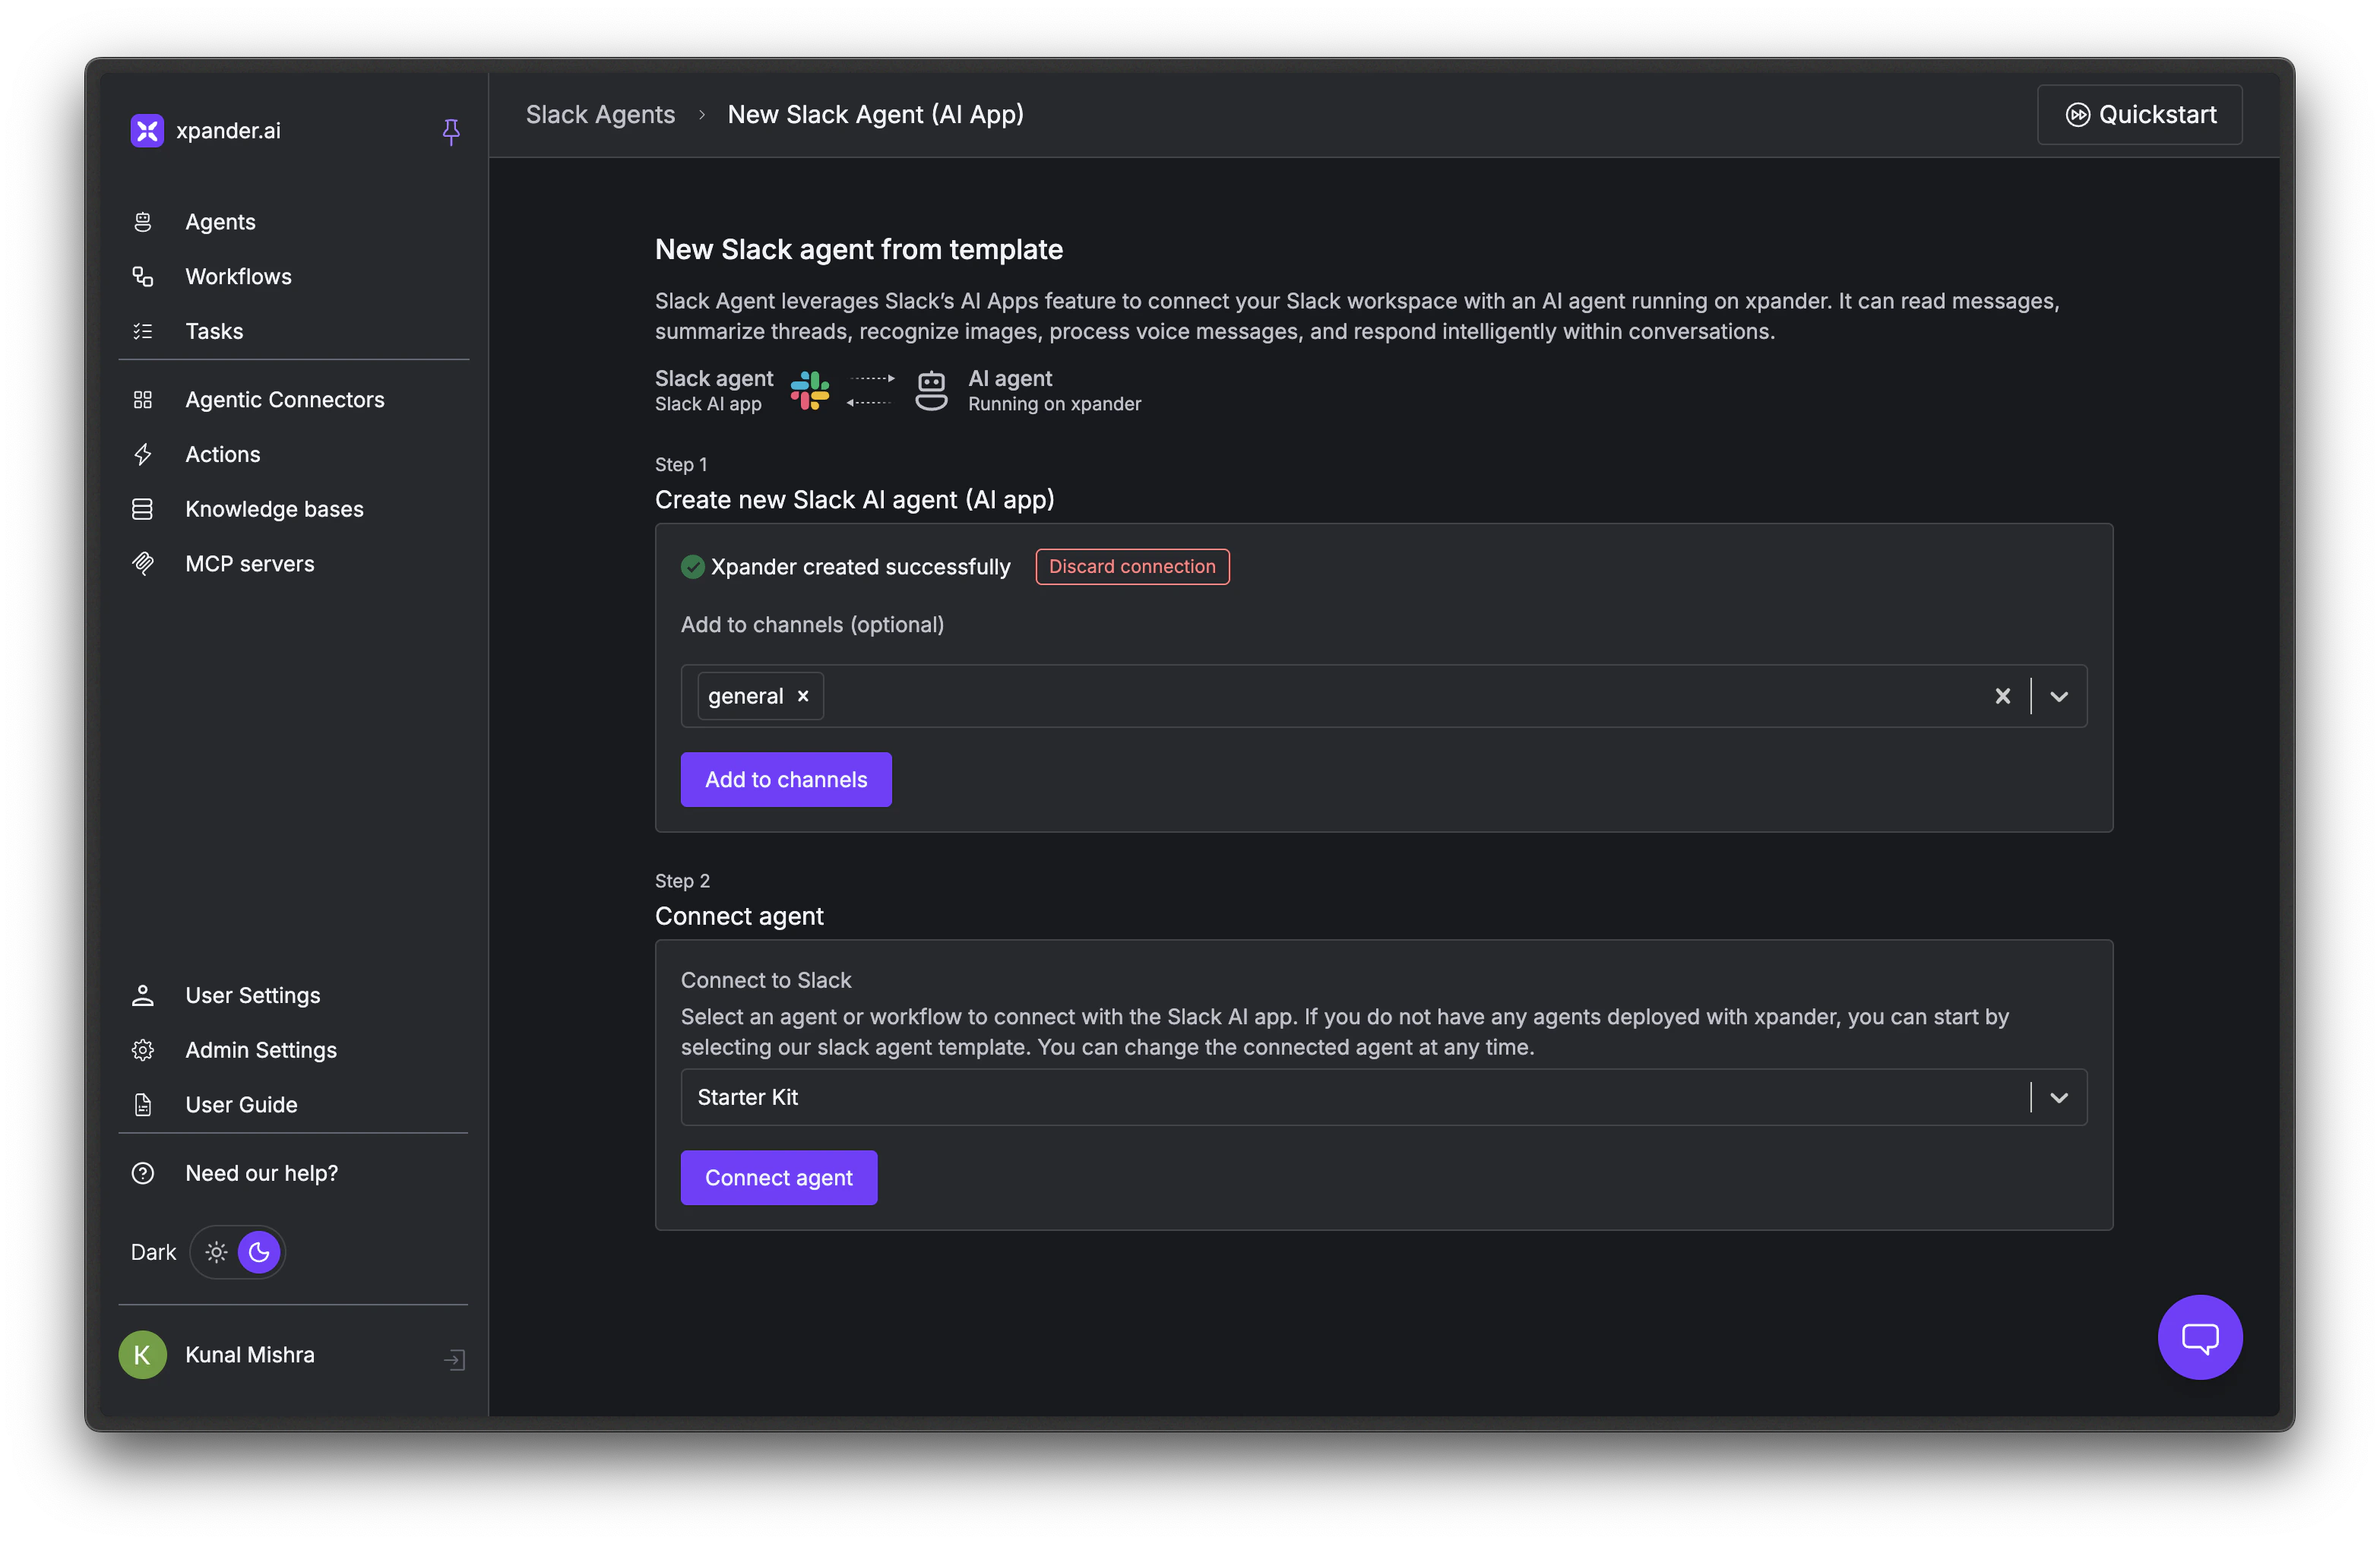
5
Choose and connect Xpander agents
On the same page, select the Xpander agent (or agents) you want this Slack agent to route messages to and click Connect agent. The Slack agent will now hand off conversations to the connected Xpander agents.
Configure Your Slack Agent
Once connected, manage all your Slack agents from the Slack Agents page. Each Slack agent has four configuration tabs.Edit Agent Details
Change the Slack agent name, description, and which Xpander agent or workflow it’s connected to. You can swap the underlying agent at any time without recreating the Slack integration.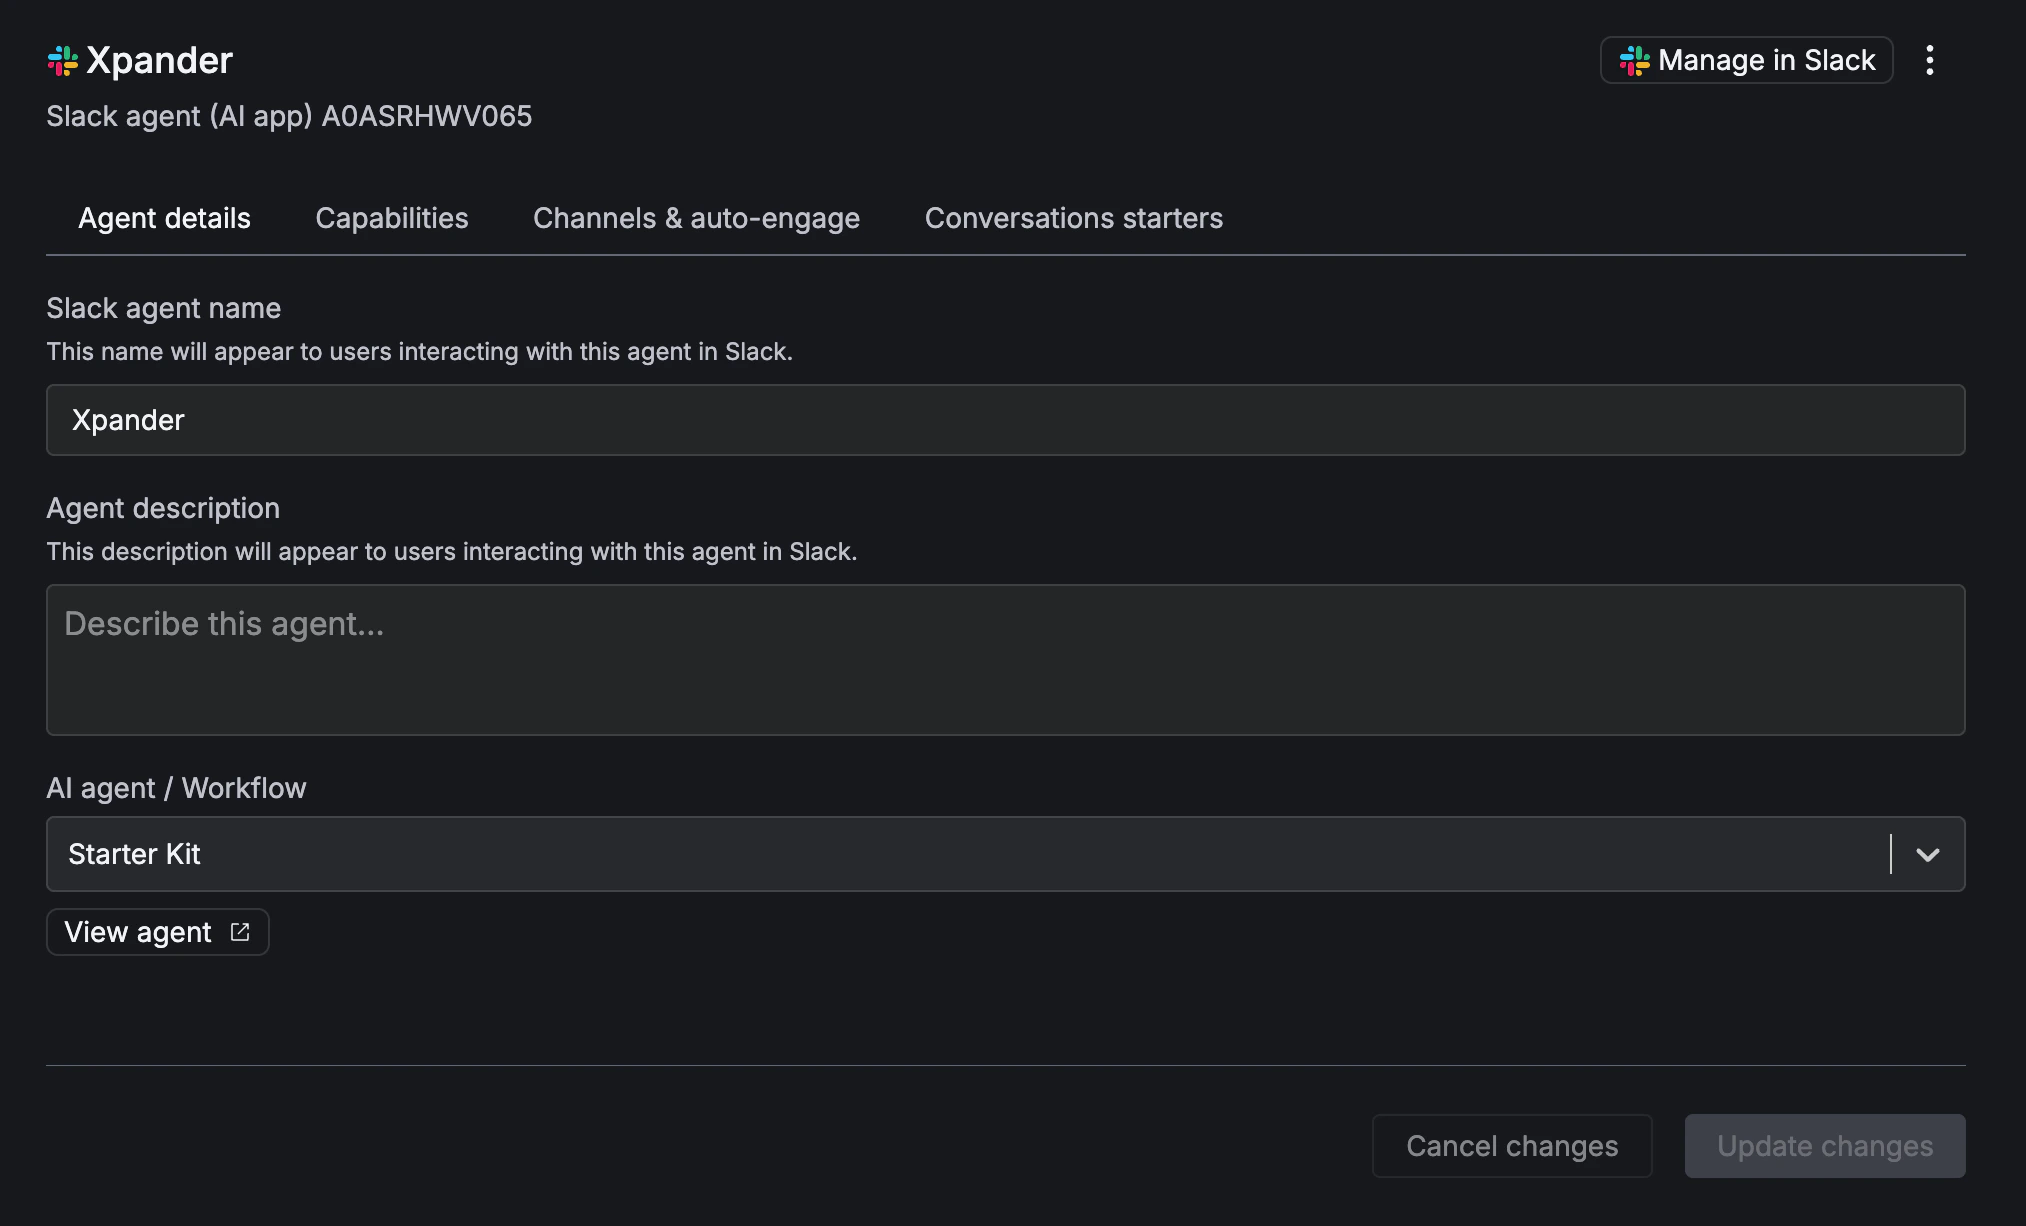
Toggle Capabilities
When a user sends a message with attached files, these toggles control whether the bot automatically processes them before the agent starts thinking. All are enabled by default.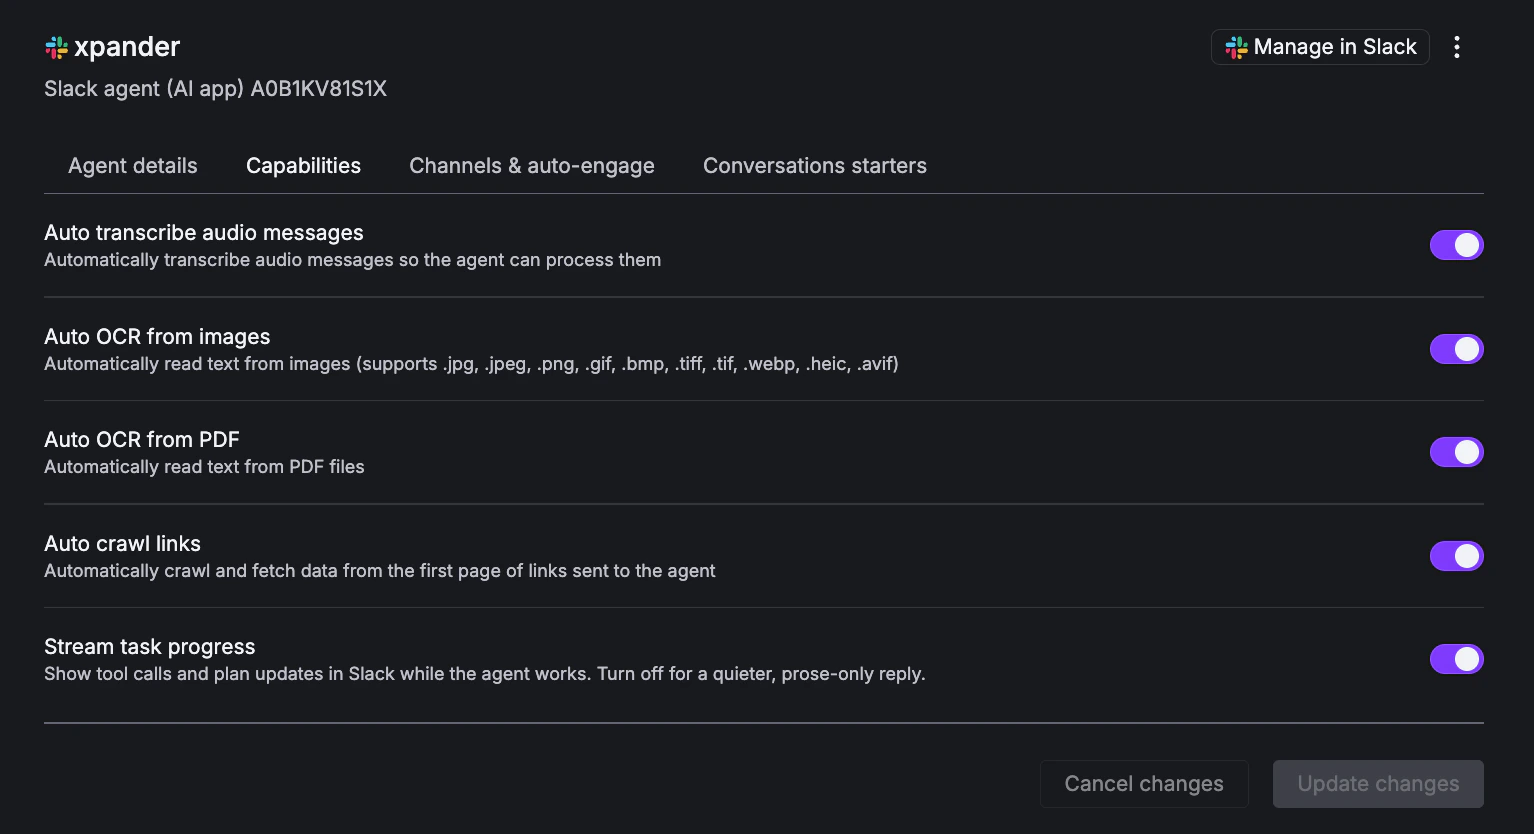
Set Up Auto-Engage
Add the Slack channels the bot is active in, and define auto-engage conditions. Auto-engage conditions are natural language rules like “When user is asking about stock price” - when a message in the channel matches a condition, the bot responds automatically without being @mentioned. Click + Add to channel to add channels, and + Add condition to create auto-engage rules. Write conditions as specific intent descriptions, not keyword lists. “When a user asks about deployment status or CI failures” works better than “deployment, CI, failure”. Describe the scenario you want the bot to respond to.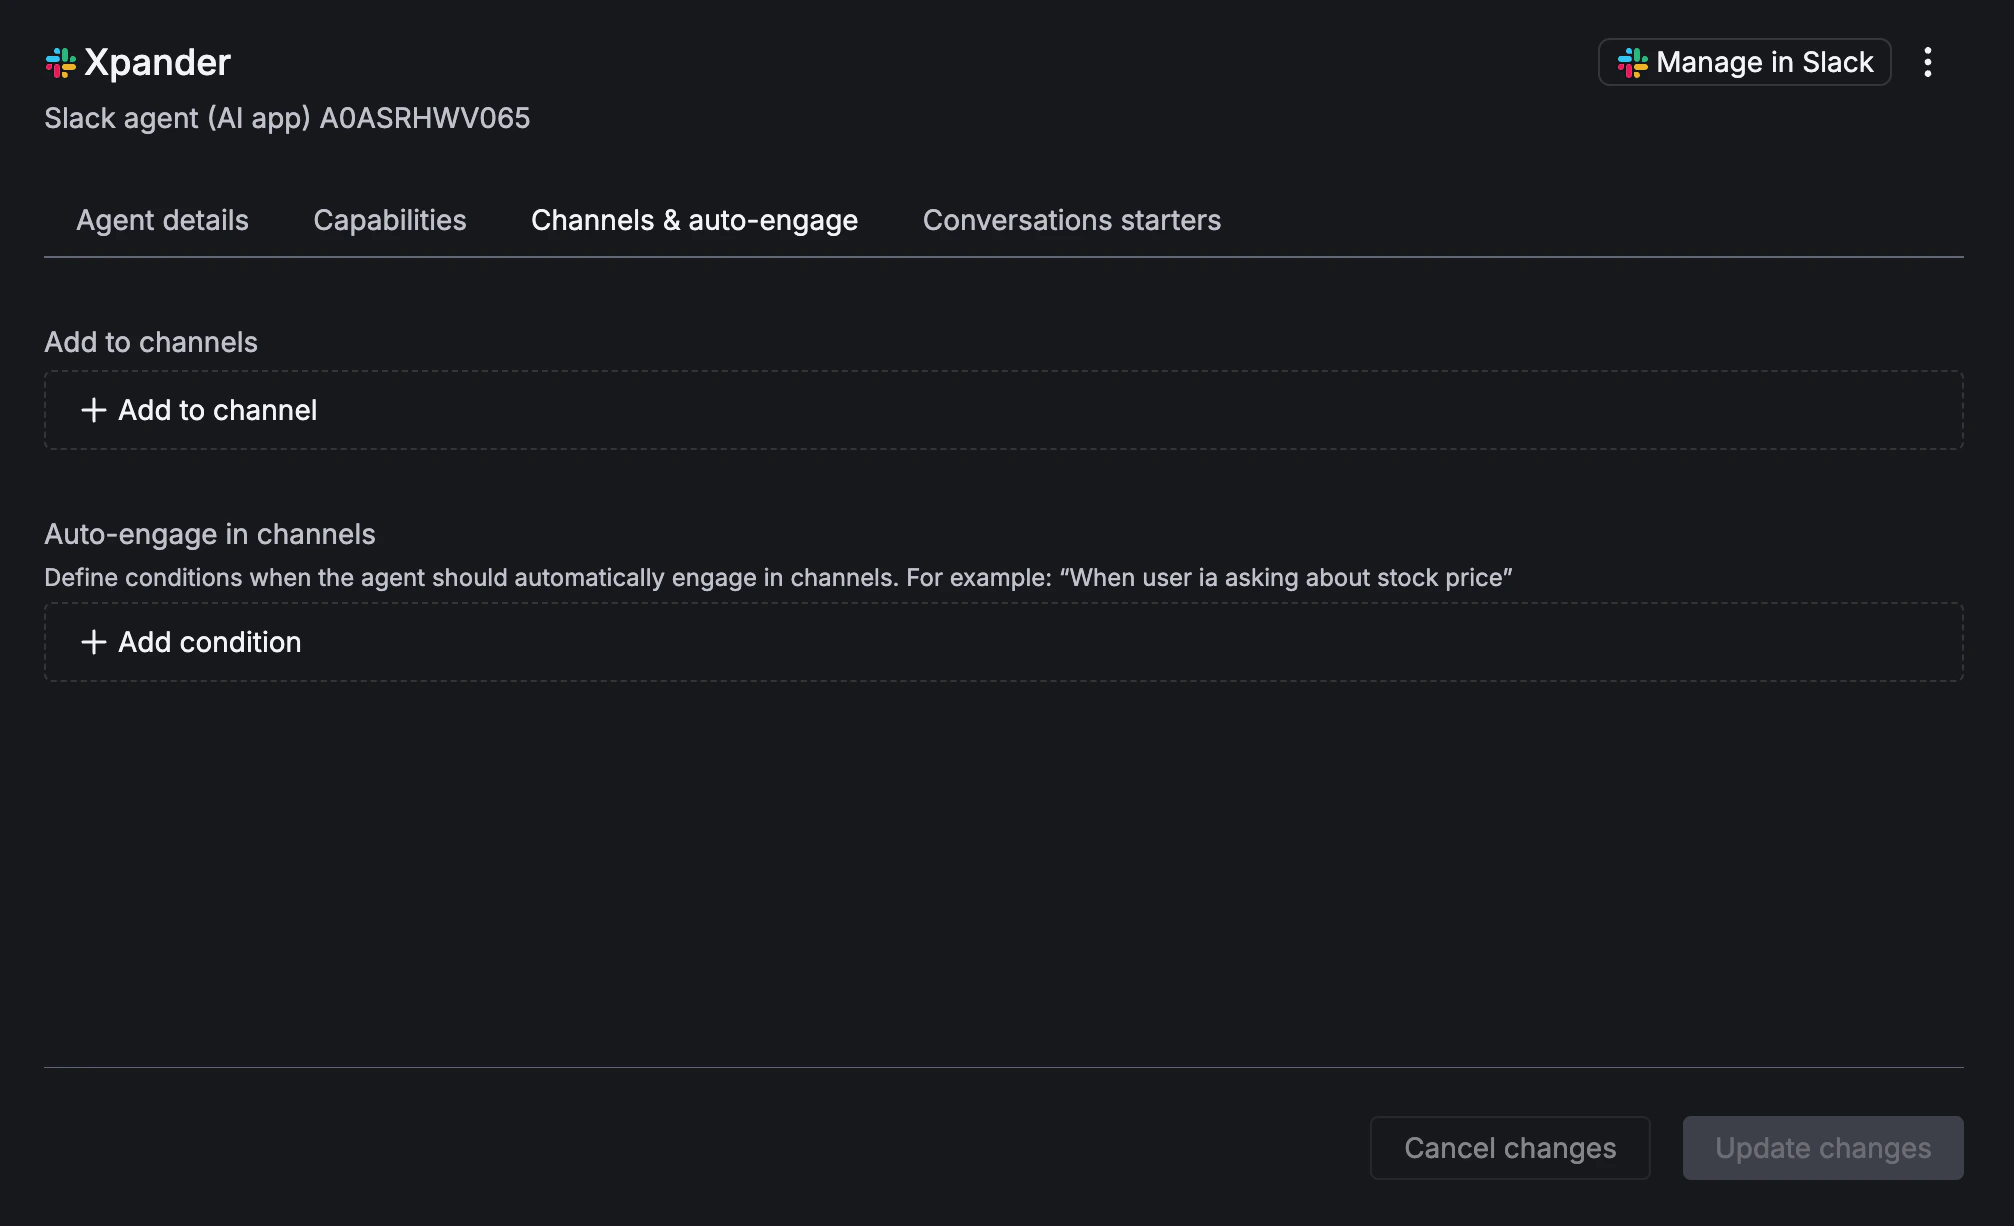
Add Conversation Starters
Add suggested prompts that appear on the first interaction in every new DM conversation. These help users understand what the agent can do. Click + Add conversation starter to create prompts like “Summarize today’s tickets” or “What’s the deployment status?”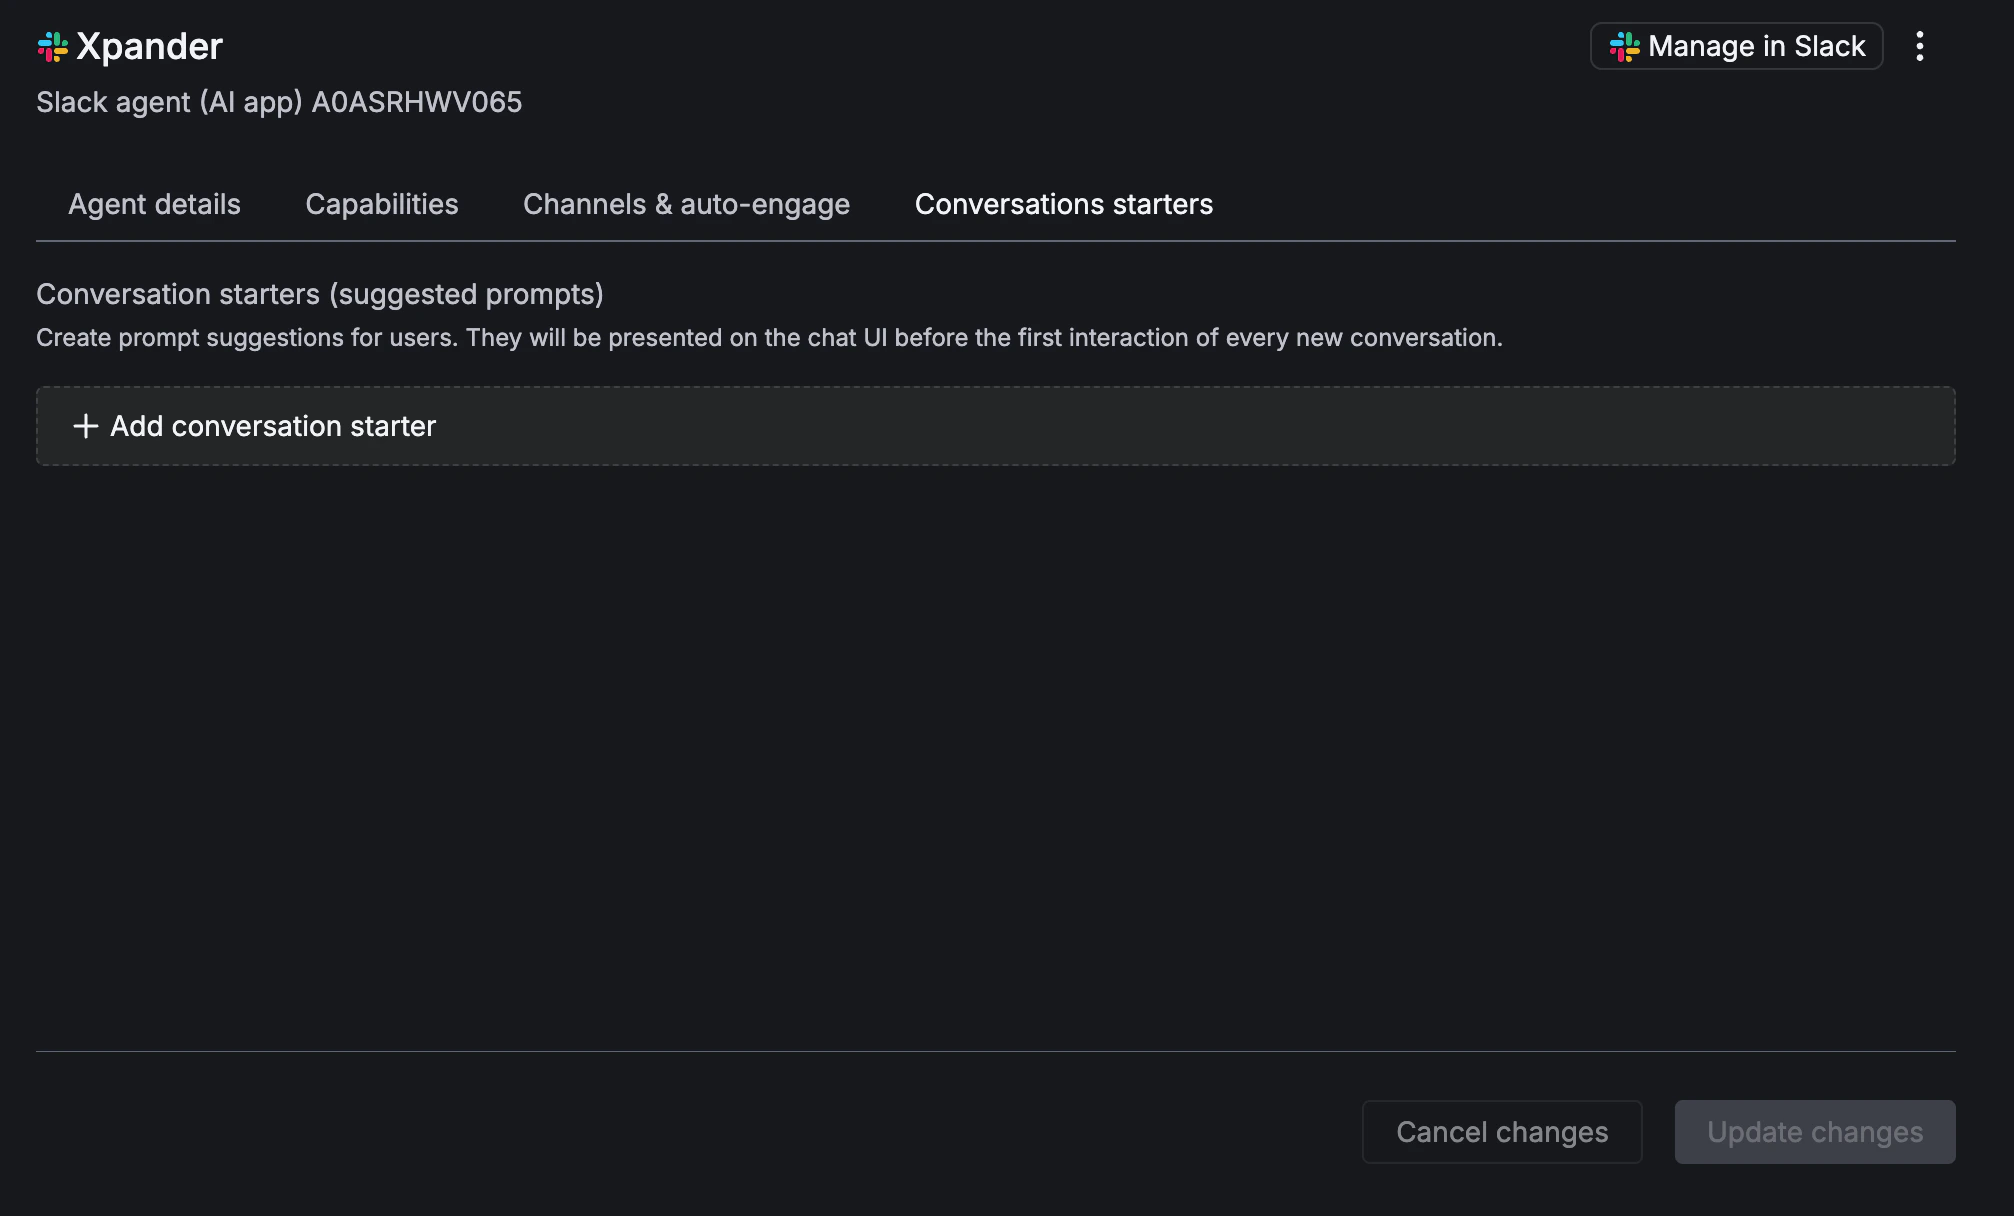
Troubleshooting
Bot doesn't respond to messages
Bot doesn't respond to messages
Check that the bot is added to the channel (Channels tab in the Slack agent config). Verify the connected Xpander agent is published and not stopped.
OAuth connection fails
OAuth connection fails
Slack configuration tokens expire. Go to api.slack.com/apps, regenerate your Access Token and Refresh Token, and paste the new values.
Bot responds when it shouldn't
Bot responds when it shouldn't
Review your auto-engage conditions. Overly broad conditions like “when someone asks a question” will trigger on most messages. Make conditions more specific.
Remove a Slack Agent
To disconnect and delete a Slack agent, go to the Slack Agents page, select the agent, and click Delete. This revokes the bot’s access to the Slack workspace and removes it from all channels. The underlying Xpander agent is not affected, only the Slack connection is removed.Next Steps
Chat Widget
Share a chat URL or embed in your website
Webhooks
Trigger agents from external systems
Monitor Runs
Trace execution, debug failures, and review AI performance