- Expose your agent as an MCP server that any compatible client can call
- Connect from Claude Desktop, ChatGPT, Cursor, VS Code, or any MCP-compatible client
- Let clients kick off agent runs asynchronously and poll for results
- Authenticate with a per-server API key without sharing your account credentials
MCP is not available for Personal Agents. Personal Agents only expose API, Slack, Telegram, and Webhook channels. Create a Custom Agent to use MCP.
Enable MCP in the Agent Studio
1
Open the Channels tab
In the Agent Studio, click the gear icon and go to the Channels tab. Find the MCP section and toggle it on.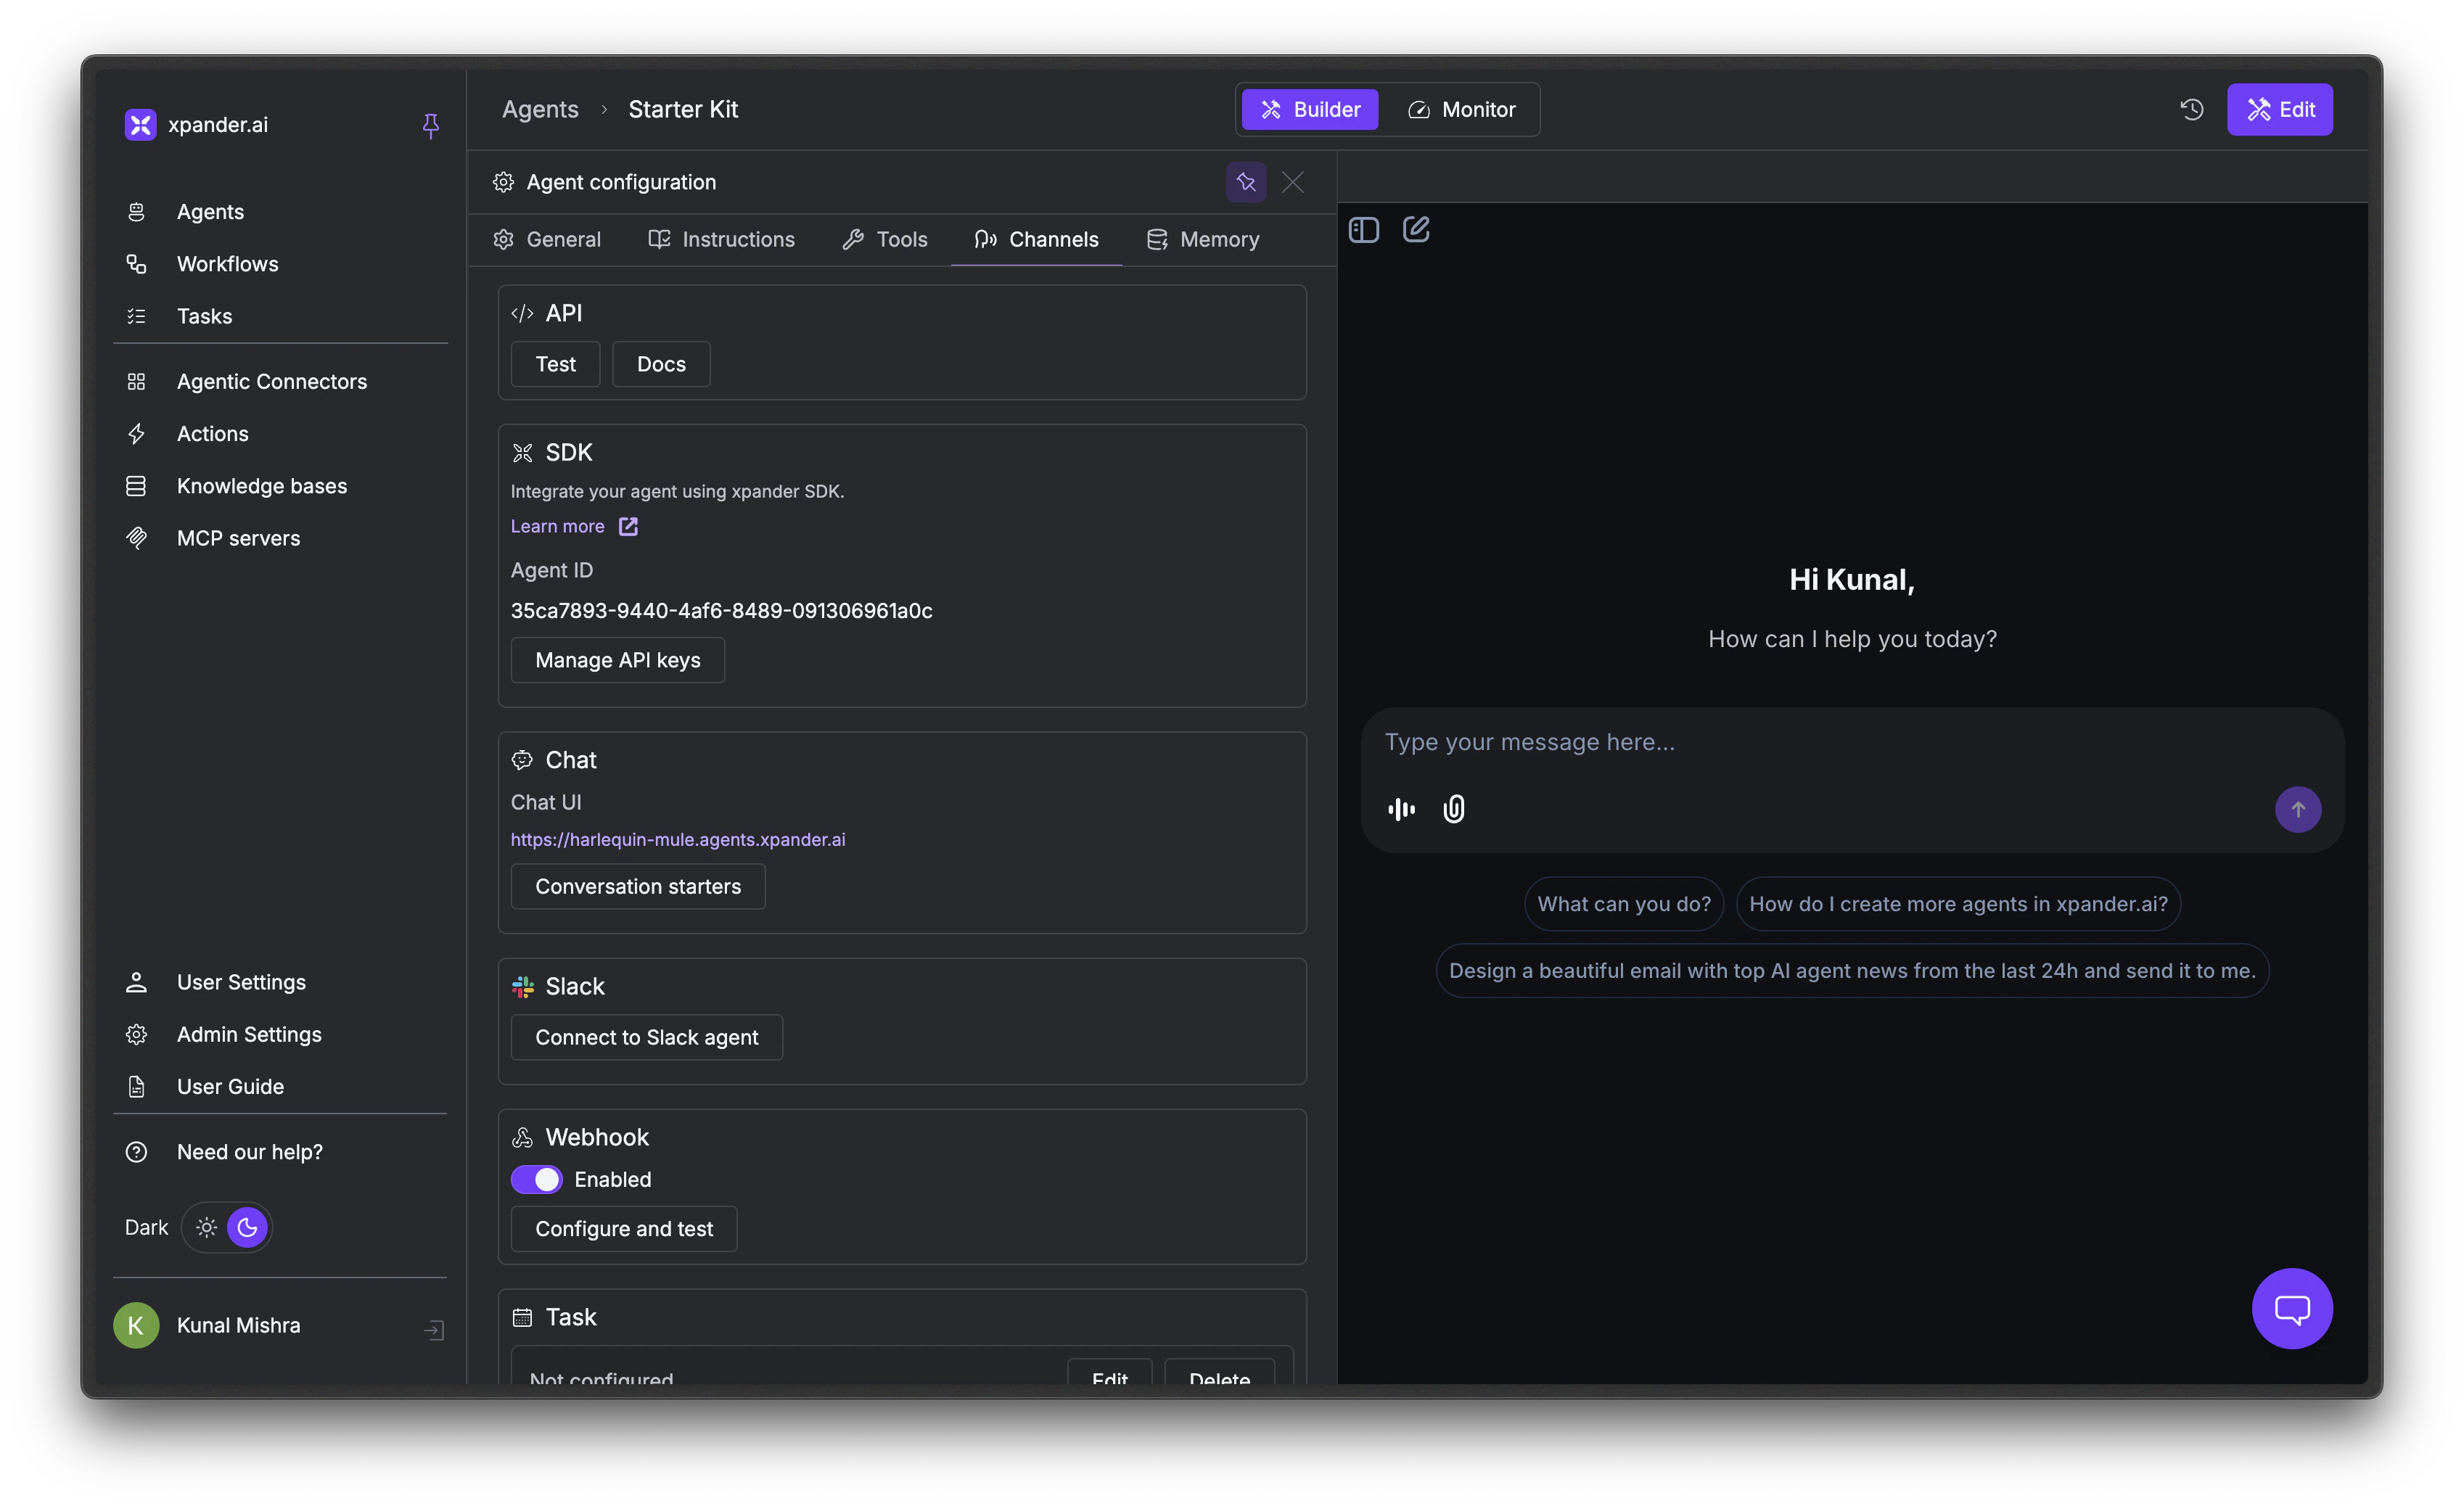
2
Open connection details
Click Details. The modal shows your MCP server URL, API key, and transport options (HTTP or SSE).Under Easy setup, select your client - Cursor, Claude, Windsurf, or Raw JSON - and copy the ready-to-paste configuration.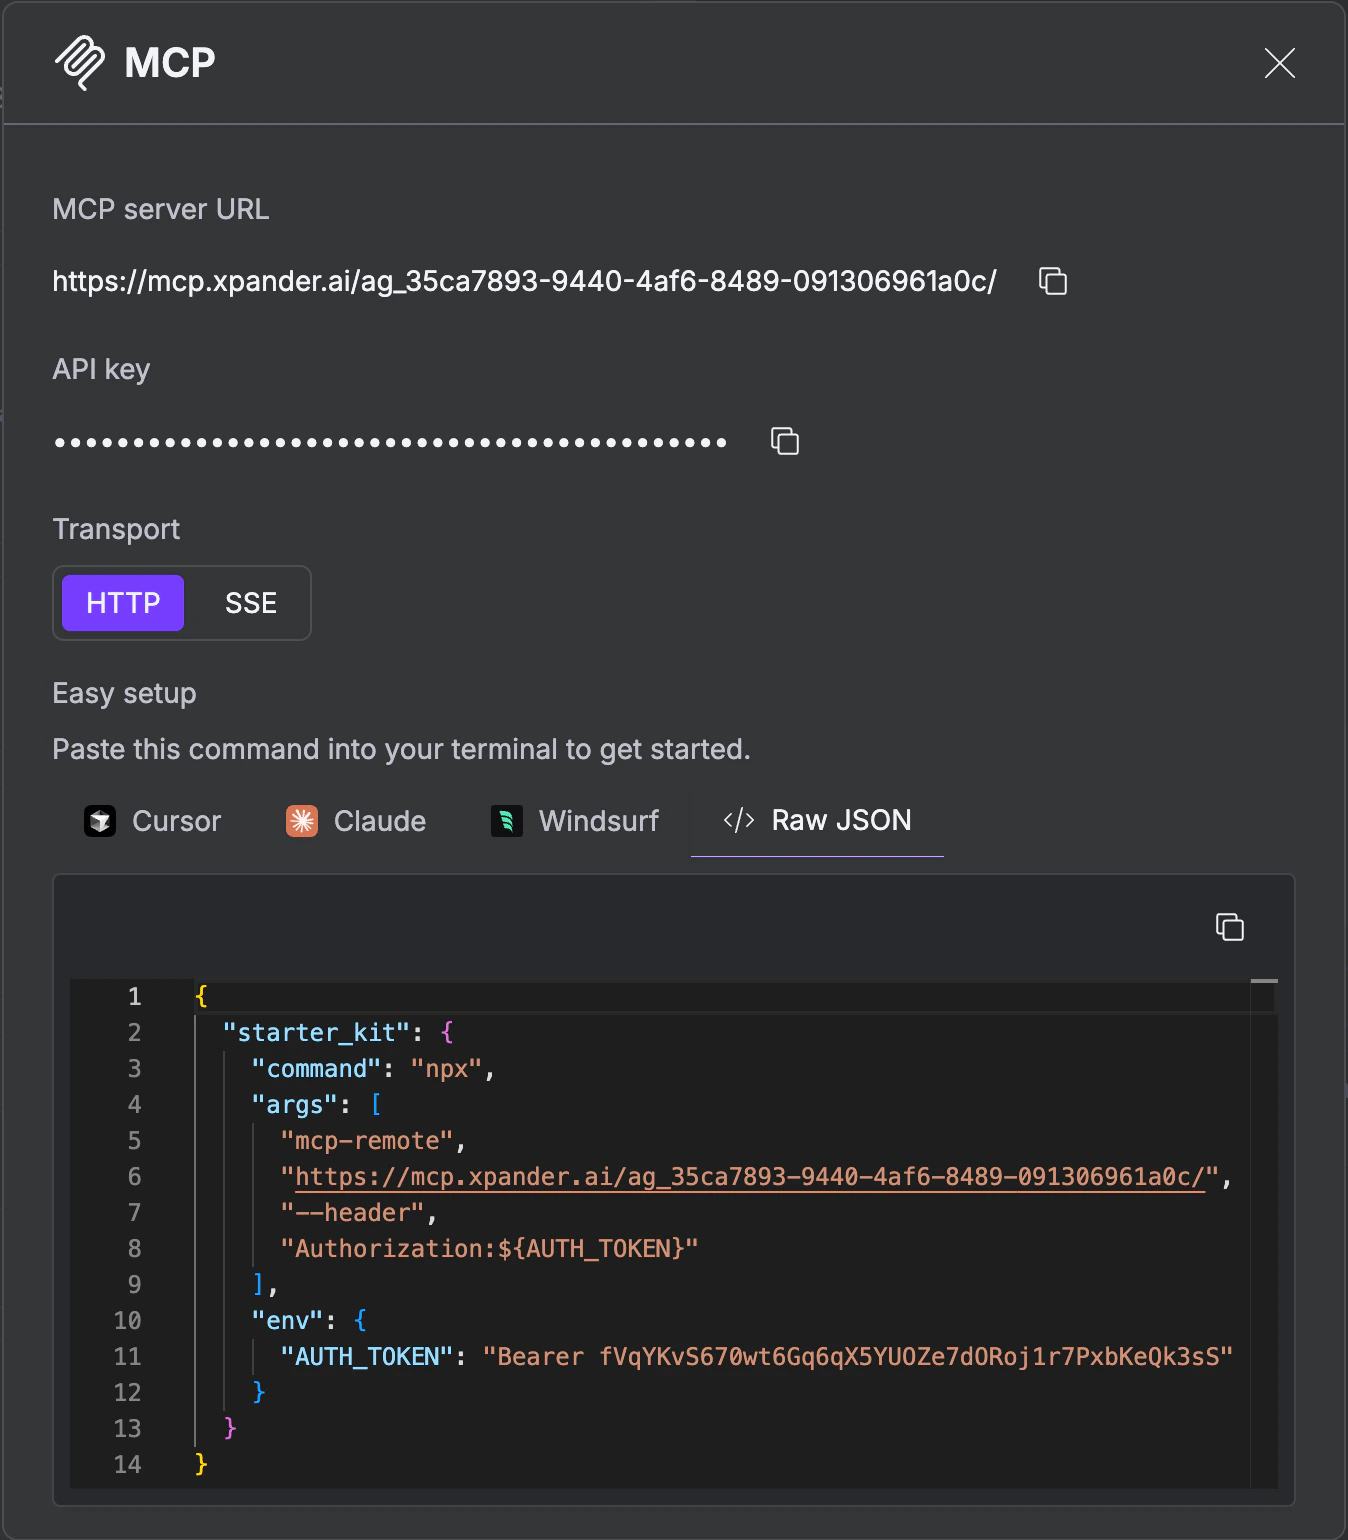
3
Publish
Click Publish to make the MCP server live.
Connect from a Client
The Agent Studio’s Easy setup generates the exact command for your client. The page also gives you a Raw JSON option you can paste into any MCP-compatible client’s config file. The MCP server supports two transports:
HTTP is the standard choice and works with all current MCP clients. SSE (Server-Sent Events) enables server-initiated updates during long-running tasks.
Easy setup (Cursor, Claude Desktop, Windsurf)
The Agent Studio generates annpx install-mcp command per client that registers the server and writes the config for you.
Swap
--client cursor for --client claude or --client windsurf to install in those apps. Run the command once per client.
Raw JSON
For any other MCP-compatible client, paste this into its config file (e.g.,~/Library/Application Support/Claude/claude_desktop_config.json for Claude Desktop on macOS):
/sse to the URL:
Use the Available Tools
Each agent’s MCP server exposes two tools. The flow is asynchronous because agent runs can take seconds to minutes (tool calls, multi-step reasoning, external API requests). Callinvoke_agent to start a task, then poll get_task_status until it completes.
invoke_agent
Returns a
result field containing the task details, including the task ID you’ll pass to get_task_status.
get_task_status
Returns a
result field with the current task state and, once complete, the agent’s response.
Example queries
- “Ask my agent to summarize the latest support tickets” →
invoke_agent - “Check on the task you just kicked off” →
get_task_status
Authentication
Each MCP server is protected by a per-agent API key generated in the Agent Studio. The client passes it on every request, either as anx-api-key header (when using npx install-mcp) or as an Authorization: Bearer <key> header (Raw JSON). There’s no interactive OAuth flow. The key is set up once when you install the server and reused on every call.
Security
- Per-agent API key - Each MCP server has its own key, scoped to a single agent. No shared account credentials sit in the config.
- Scoped access - The key only authorizes calls to that agent’s MCP tools (
invoke_agentandget_task_status); it can’t access other agents or org-level operations. - Revoke anytime - Rotate or revoke the key from the Agent Studio’s MCP section in the Channels tab.
Troubleshooting
MCP server not showing in Claude
MCP server not showing in Claude
- Verify your
claude_desktop_config.jsonsyntax is valid JSON. - Check the file location:
~/Library/Application Support/Claude/claude_desktop_config.json(macOS). - Restart Claude Desktop completely.
- Check Claude logs:
~/Library/Logs/Claude/mcp.log.
Authentication fails
Authentication fails
- Confirm the API key in your MCP config matches the one in the Agent Studio’s MCP Details modal.
- If you rotated the key, re-run
install-mcpor update the Raw JSON config so the client picks up the new key. - Check organization permissions - some agents may be restricted to specific users.
Agent invocation fails
Agent invocation fails
- Verify the agent is published in the Agent Studio.
- Ensure the agent isn’t stopped or in an error state.
- Check the agent’s logs in the Monitor tab.
Next Steps
Webhooks
Trigger agents from external systems
Scheduled Tasks
Run agents on a schedule
Monitor Runs
Trace execution, debug failures, and review AI performance