

https://zohoapis.com/ and carry the credential the connect dialog asks for.
What the skill can do
API connector: 23 actions, as they appear in the skill panel. 8 of them create, change or delete something in Zoho; mark those under These actions need approval when you add the skill to an agent.- Report service (6): Creator Report Service Update Multiple Records, Creator Report Service Delete Specific Record, Creator Report Service Update Specific Record, Creator Report Service Fetch Report Records, Creator Report Service Delete Multiple Records, Creator Report Service Fetch Record Detail View
- Bulk operations (4): Creator Bulk Operations Download Export Job Result, Creator Bulk Operations Get Export Job Details, Creator Bulk Operations Create Export Records Job, Creator Report Service Get All Reports
- File handling (4): Creator File Handling Upload Record File, Creator File Handling Download Subform Record File, Creator Field Management Get Form Fields, Creator File Handling Download Record File
- Publishing service (3): Creator Publishing Fetch Published Report Records, Creator Publishing Fetch Published Record Detail, Creator Publishing Add Multiple Records To Form
- Application management (2): Creator App Management Get Workspace Applications, Creator App Management Get All Accessible Applications
- Form management (2): Creator Form Management Get All Forms, Creator Form Management Add Multiple Records
- Section management (1): Creator Section Management Get Web Components
- Page management (1): Creator Page Management Get All Pages
Authentication Options
- API Access
Generate a Zoho API Key
- Log in to your Zoho API console.
-
Choose the type of application you want to create. In this example, we’ll create a Self Client app.
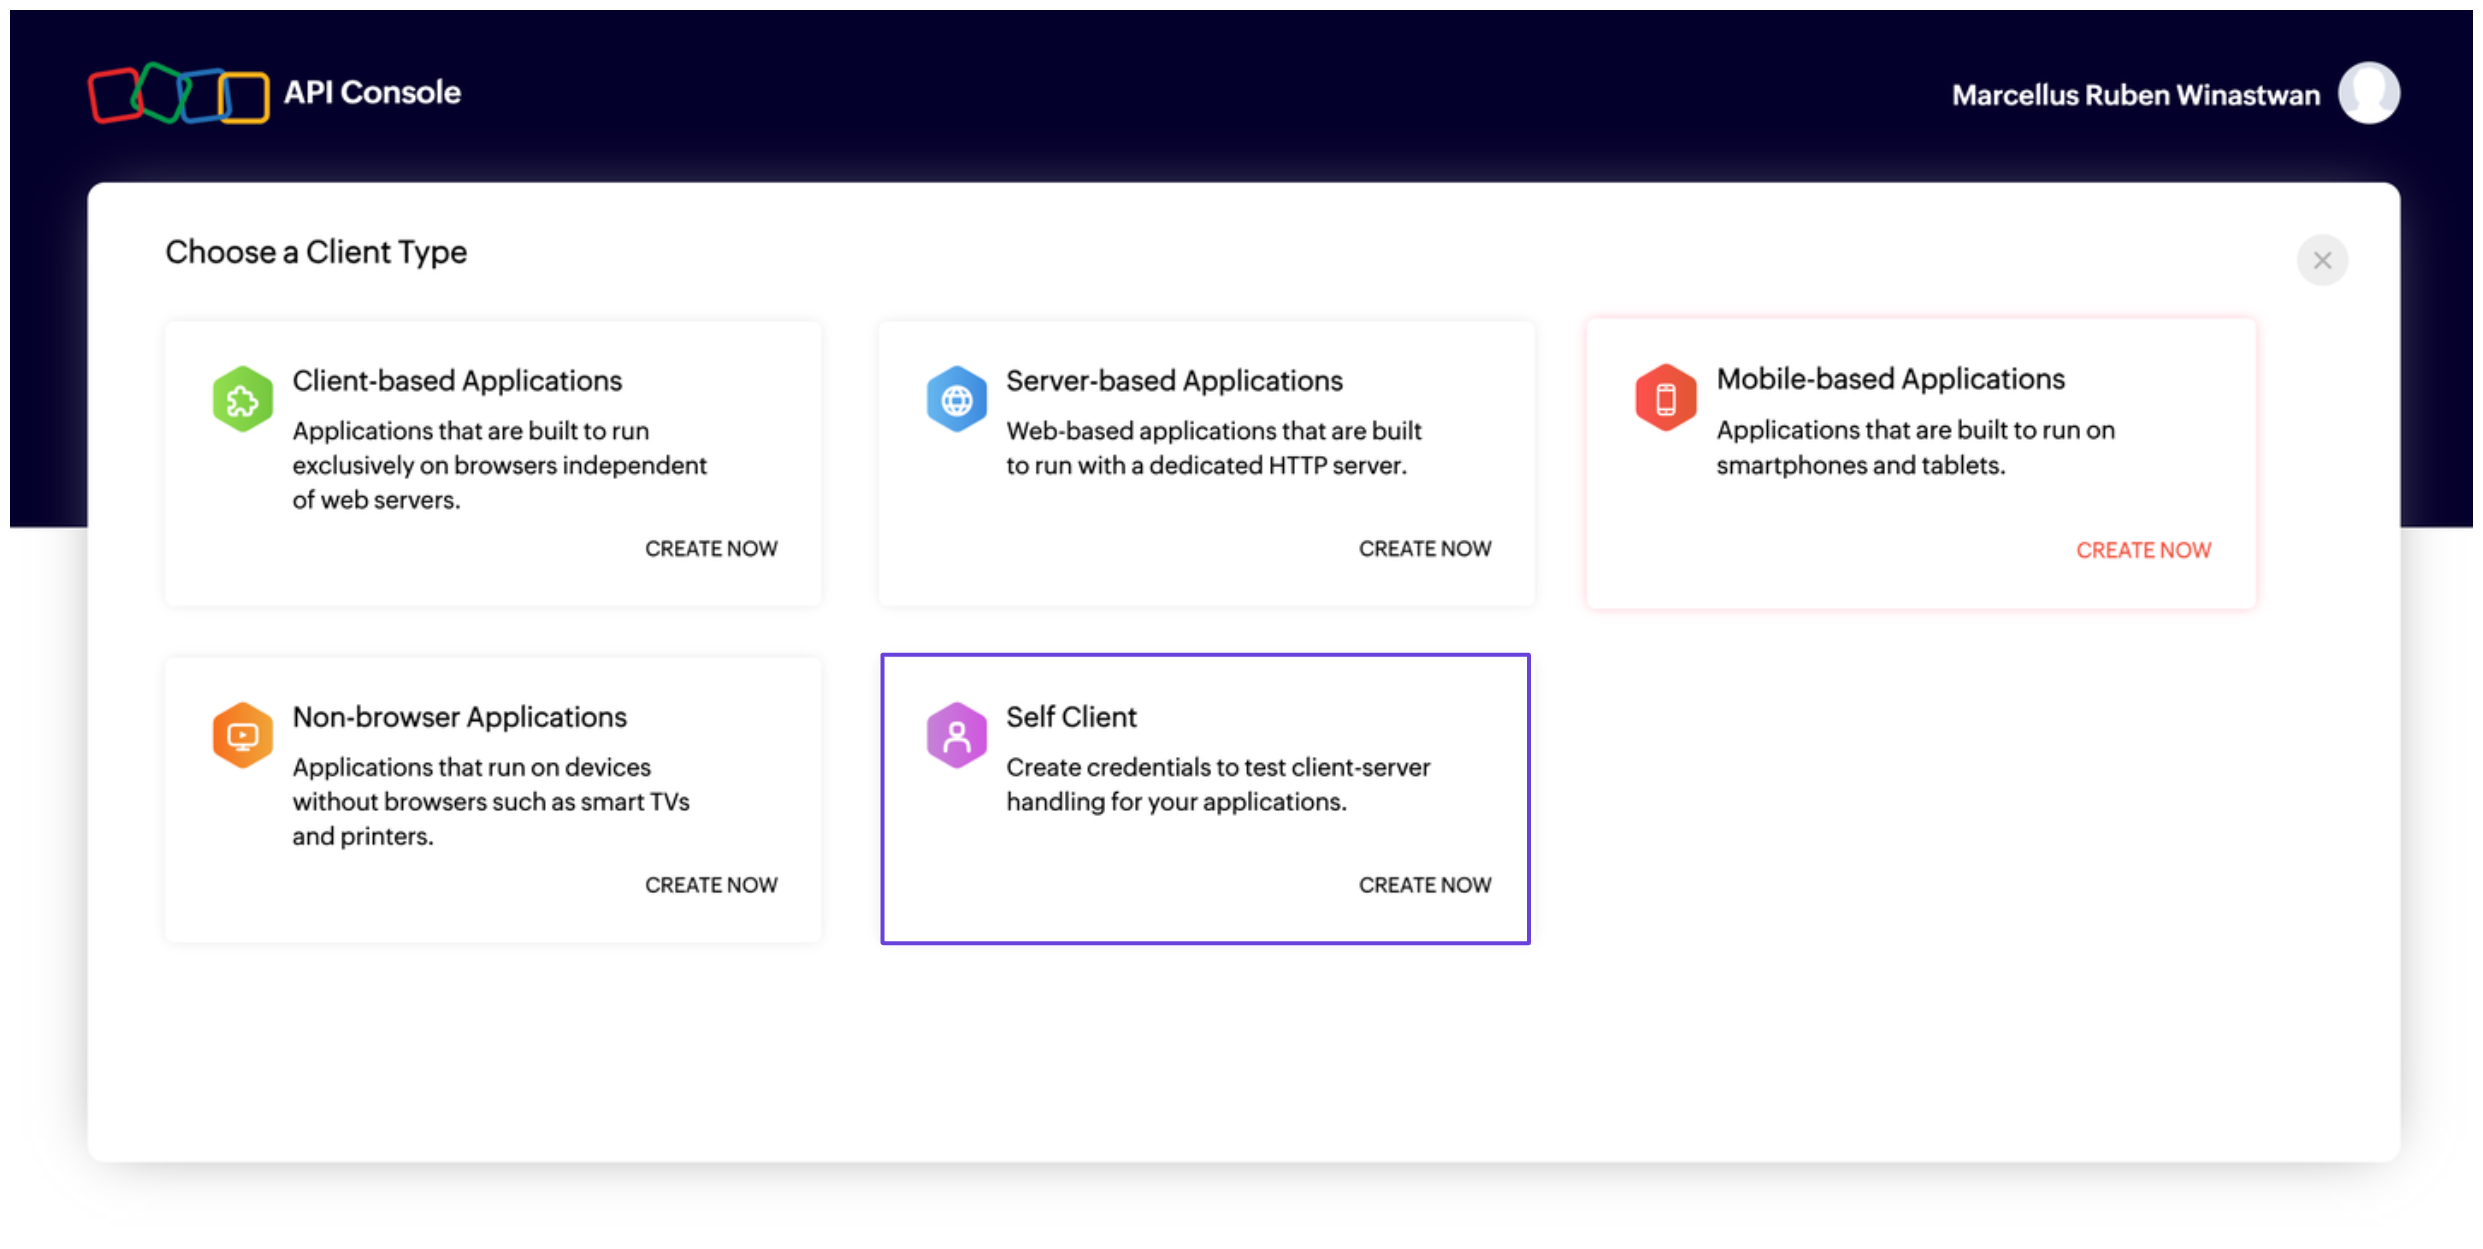
- Select Self Client and click Create.
- You’ll see the Client ID and Client Secret. Next, you’ll need to generate an authorization code.
- Go to the Generate Code tab. Under Scope, select the appropriate scopes for your app. You can find a full list in the Zoho Creator documentation.
-
Set the validity duration for the authorization code, then click Create.
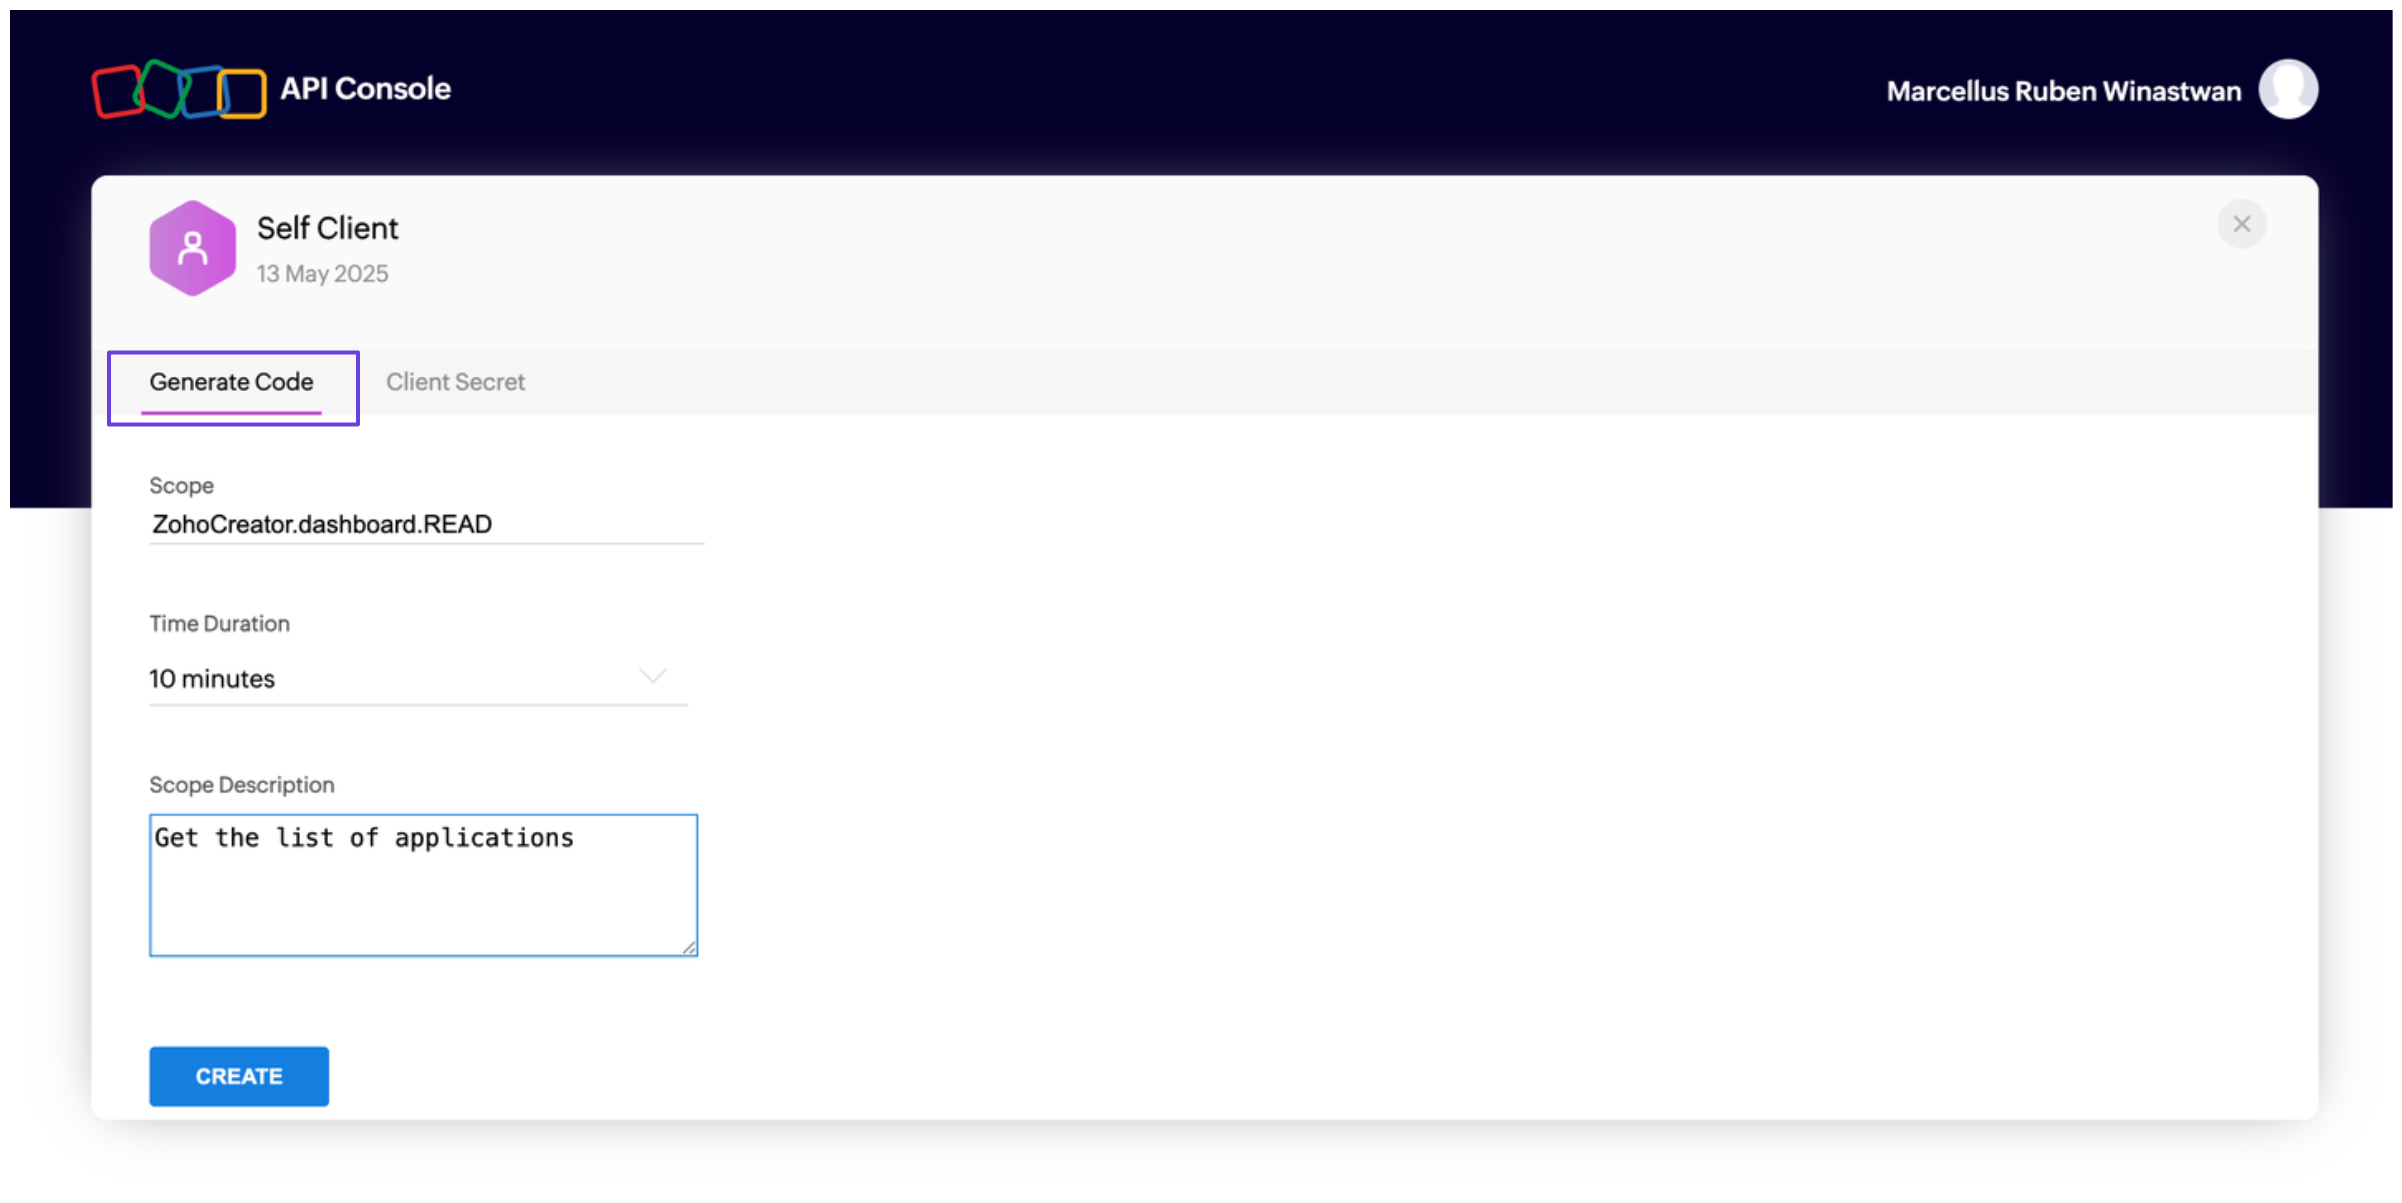
- Copy and save your authorization code.
- To get your access token, run the following request:
<BASE-URL> for your Zoho account here.- The response will include your access token and refresh token.
Connect Zoho in xpander
- In Xpander Chat, open the agent’s settings and click Add skill.
- Search for Zoho and select it.
- Enter a connection name, e.g., “xpander-zoho”.
- Choose Organization access (one shared account) or Personal (your own account, so the agent acts with your permissions where systems allow). On an agent other people use, a personal connection runs their requests as you unless the binding requires each person’s own sign-in; see whose credential a shared agent uses.
- Choose API Key as the authentication method.
- Paste your Zoho access token into the provided field.
- Set the Type to Custom.
- In the Header name field, enter:
Authorization: Zoho-oauthtoken. - Click Connect.