About Snowflake
Snowflake is a cloud-based data platform designed for modern analytics, AI applications, and large-scale data engineering. It enables developers, data teams, and intelligent agents to store, process, and analyze massive datasets using a unified, fully cloud-native data warehouse architecture. Snowflake offers advanced capabilities such as data sharing, secure collaboration, and workload isolation through virtual warehouses, along with native support for modern data engineering and machine learning pipelines. These features allow teams to run concurrent analytical queries, ingest streaming or batch data, and securely share datasets across organizations, all while maintaining high performance and scalability.Authentication Options
Below are possible authentication options you can choose:- API Access
Generate a Snowflake Programmatic Access Token
- Log in to your Snowflake account.
-
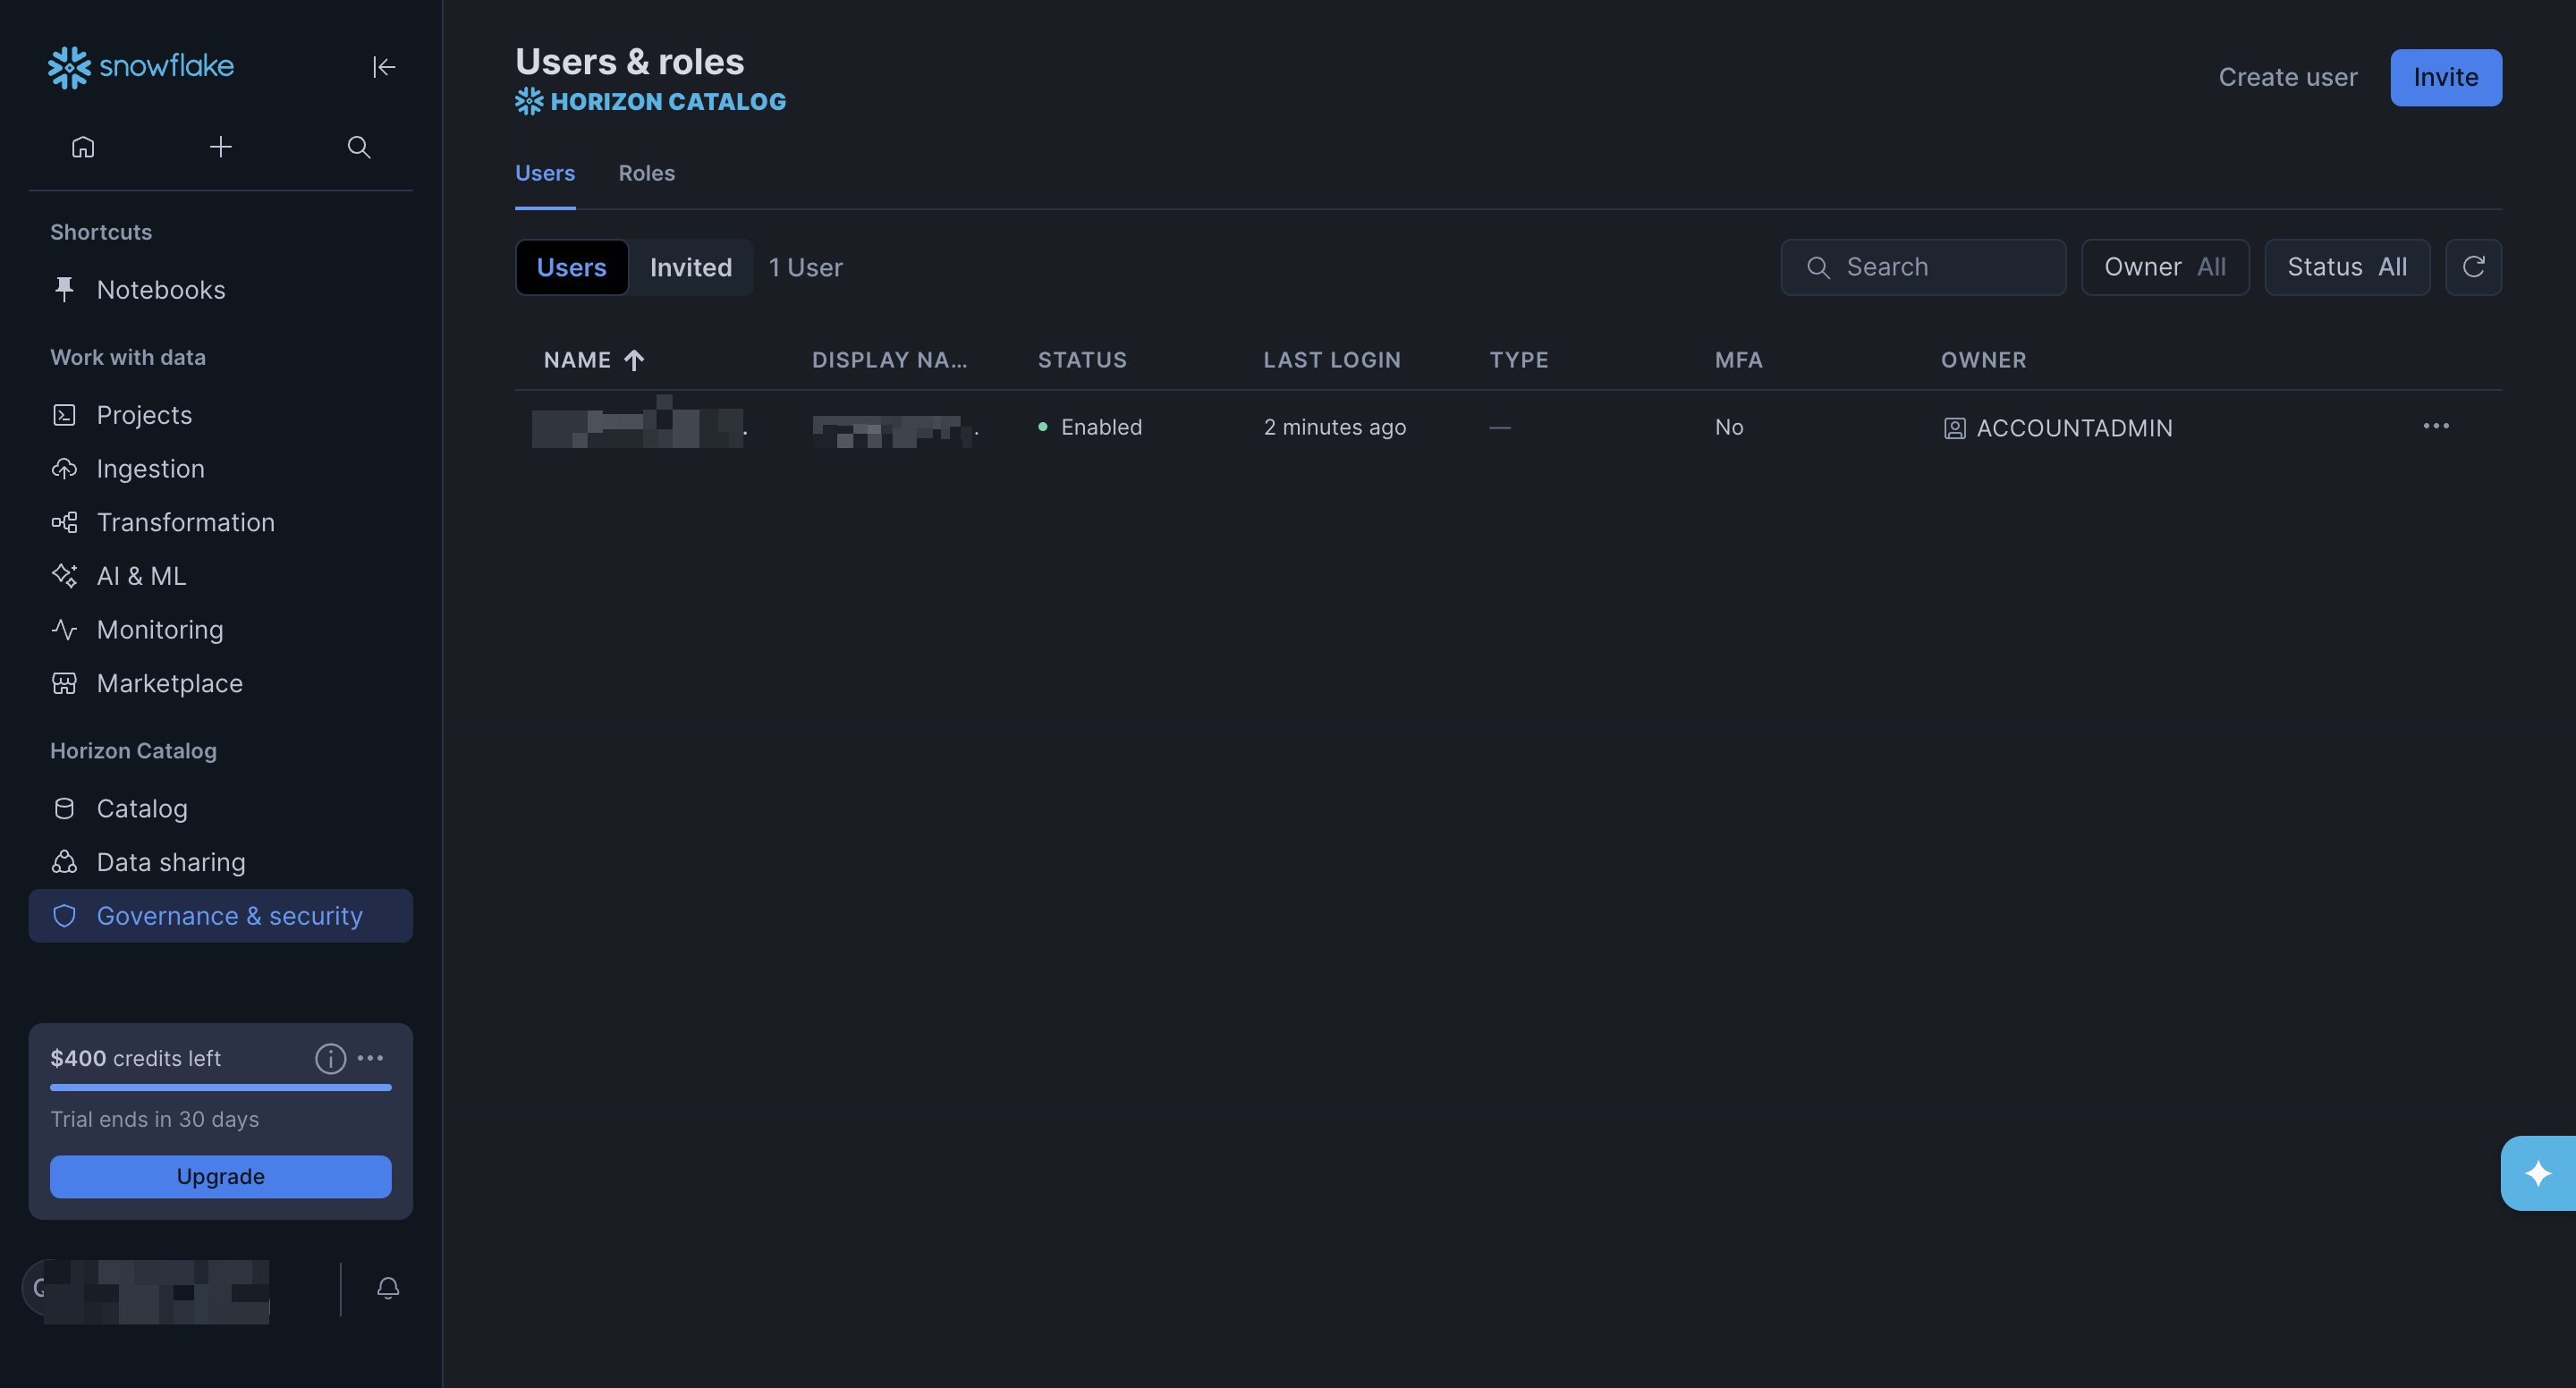
Select Governance & security, then click Users & roles.
-
Select a user to open the user’s page, scroll down to the Programmatic access tokens section, and click Generate token to open the New programmatic access token dialog.
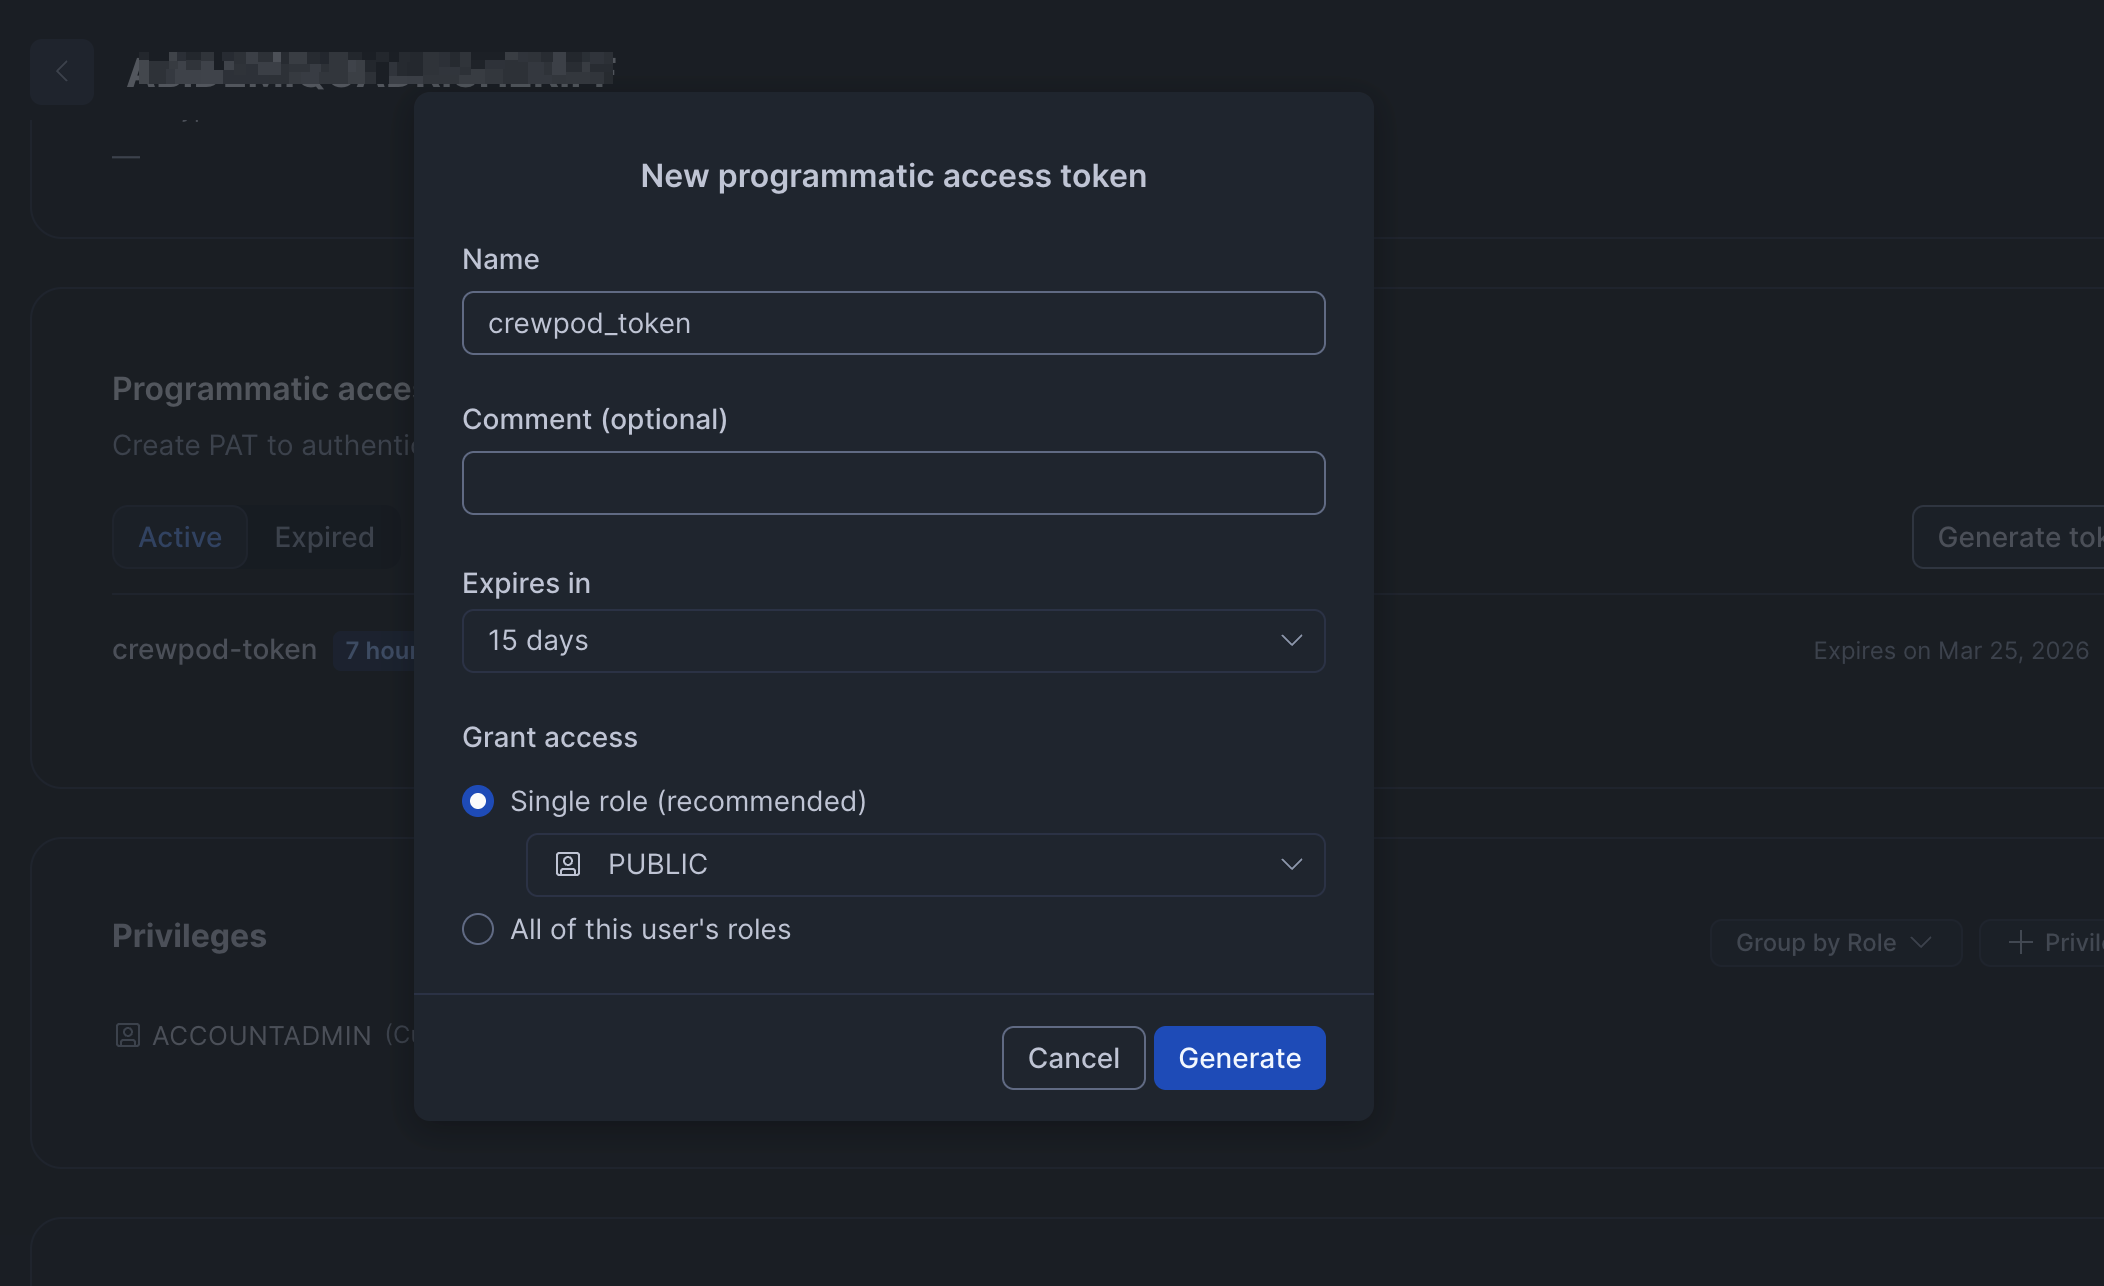
- Enter a name for the new programmatic access token, set the expiry period and role, then click Generate to create the token.
-
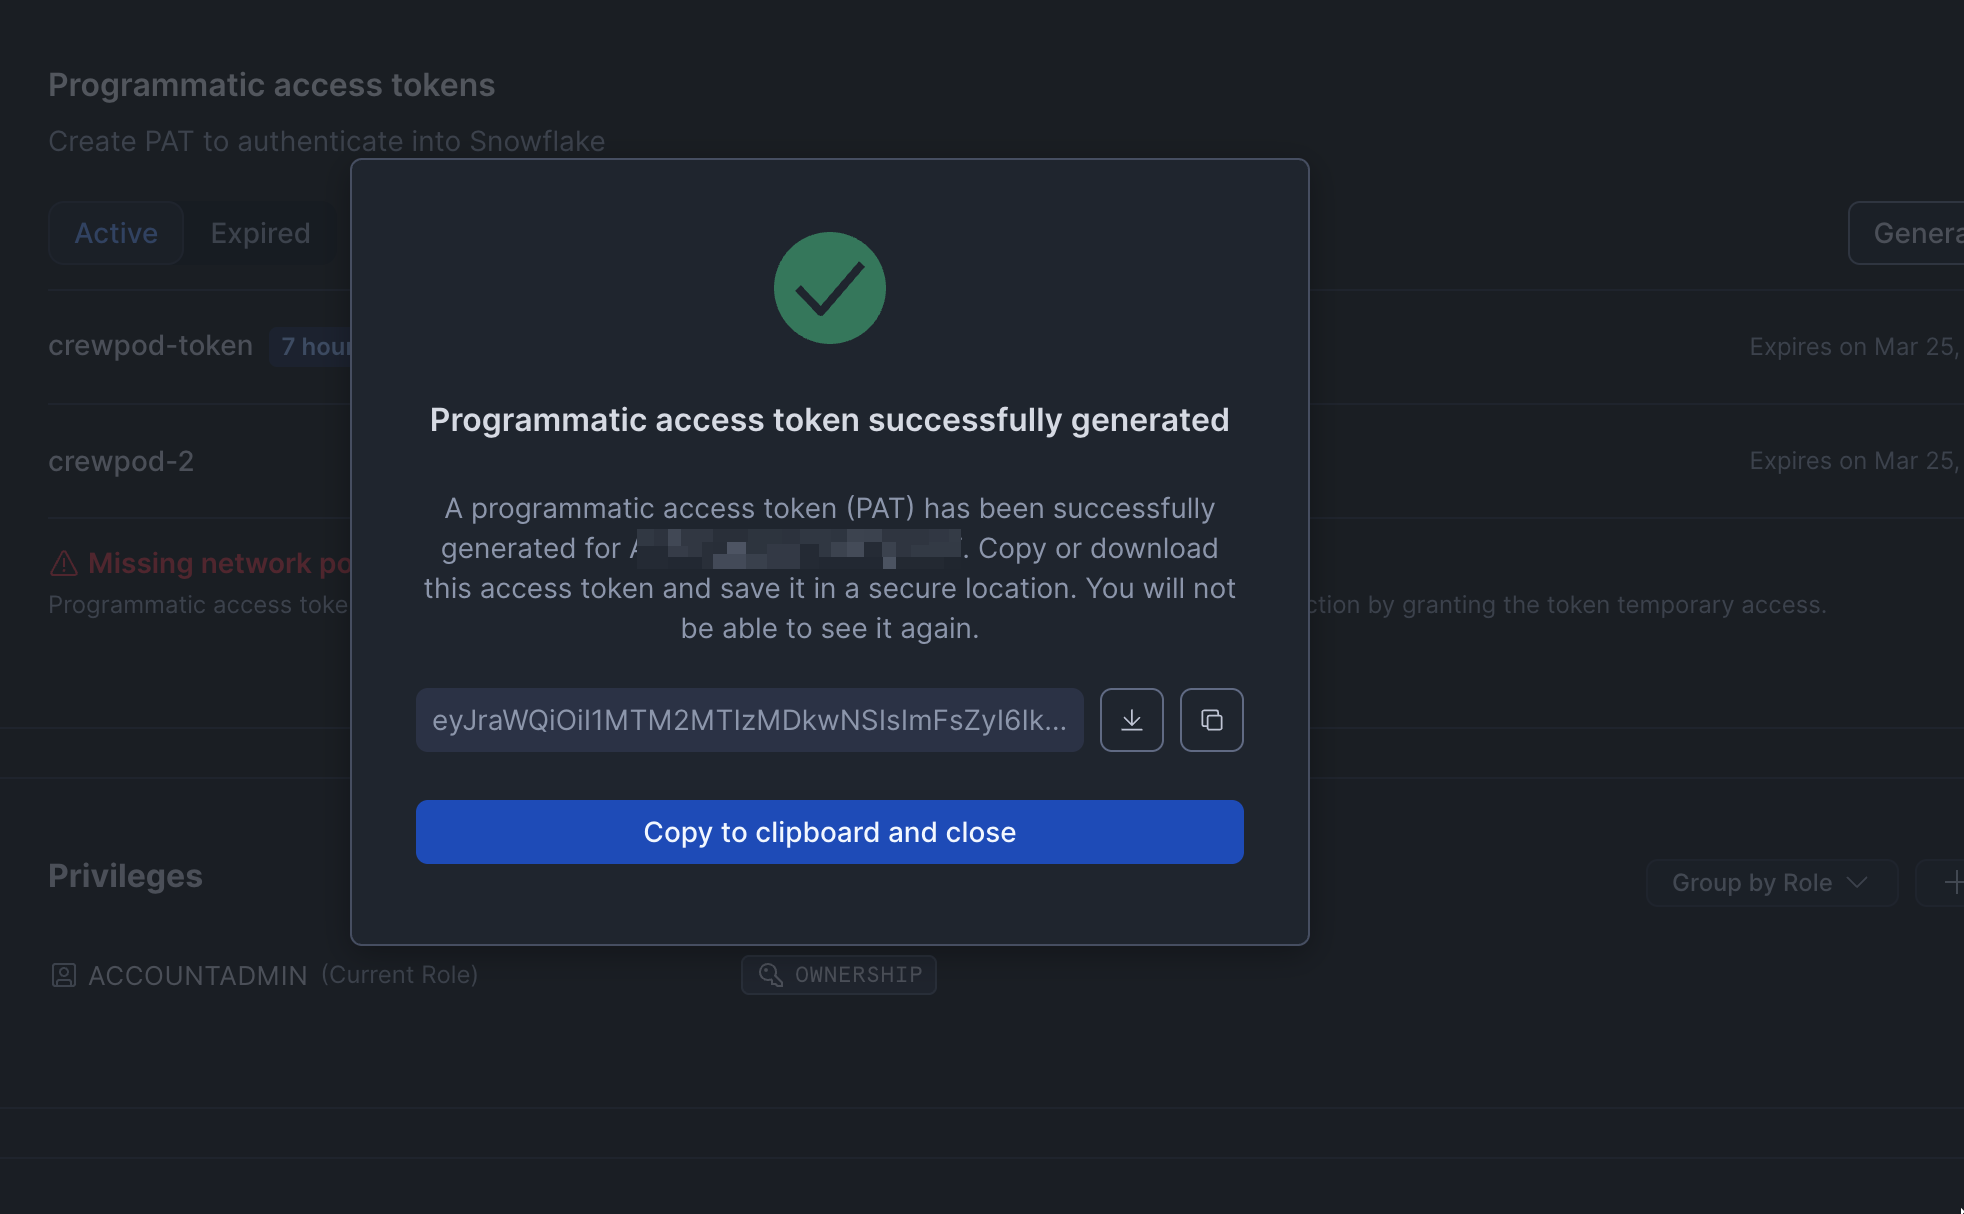
A new dialog will appear with the created token. Click Copy to clipboard and close to copy the generated token and store it somewhere safe.
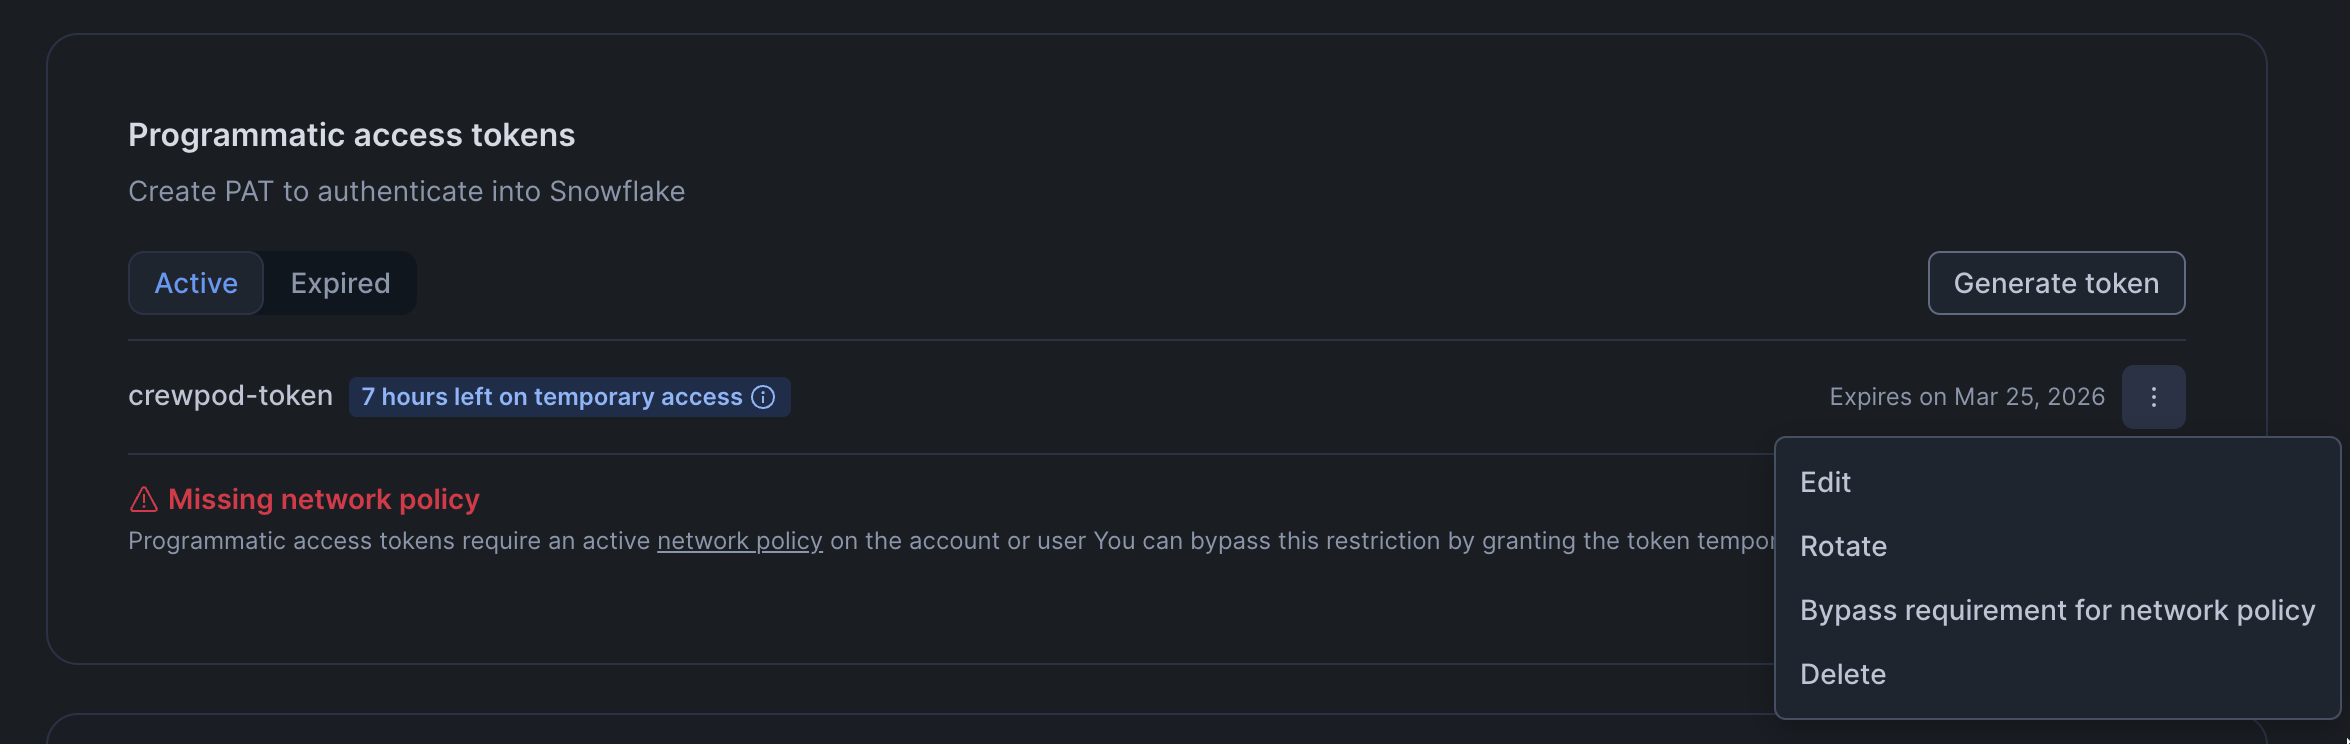
- Click the ellipsis icon next to the programmatic access token
-
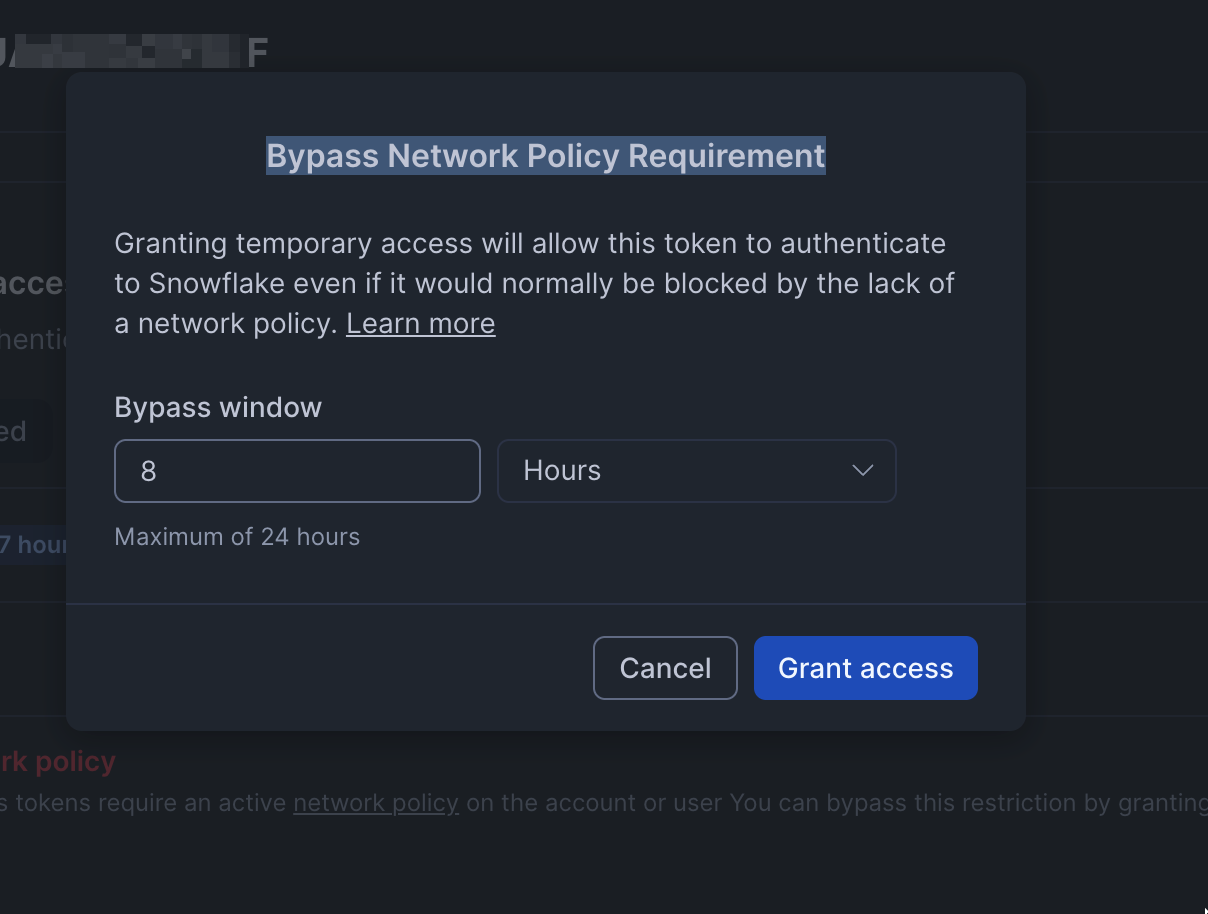
Select Bypass requirement for network policy in the dropdown that appears to open the Bypass Network Policy Requirement dialog.
-
Specify a Bypass window and click Grant access to grant your programmatic access token temporary access.
Integrate Snowflake into xpander.ai
- Go to the Agentic Connectors section in the sidebar of your xpander.ai dashboard.
- Select Snowflake from the available integrations.
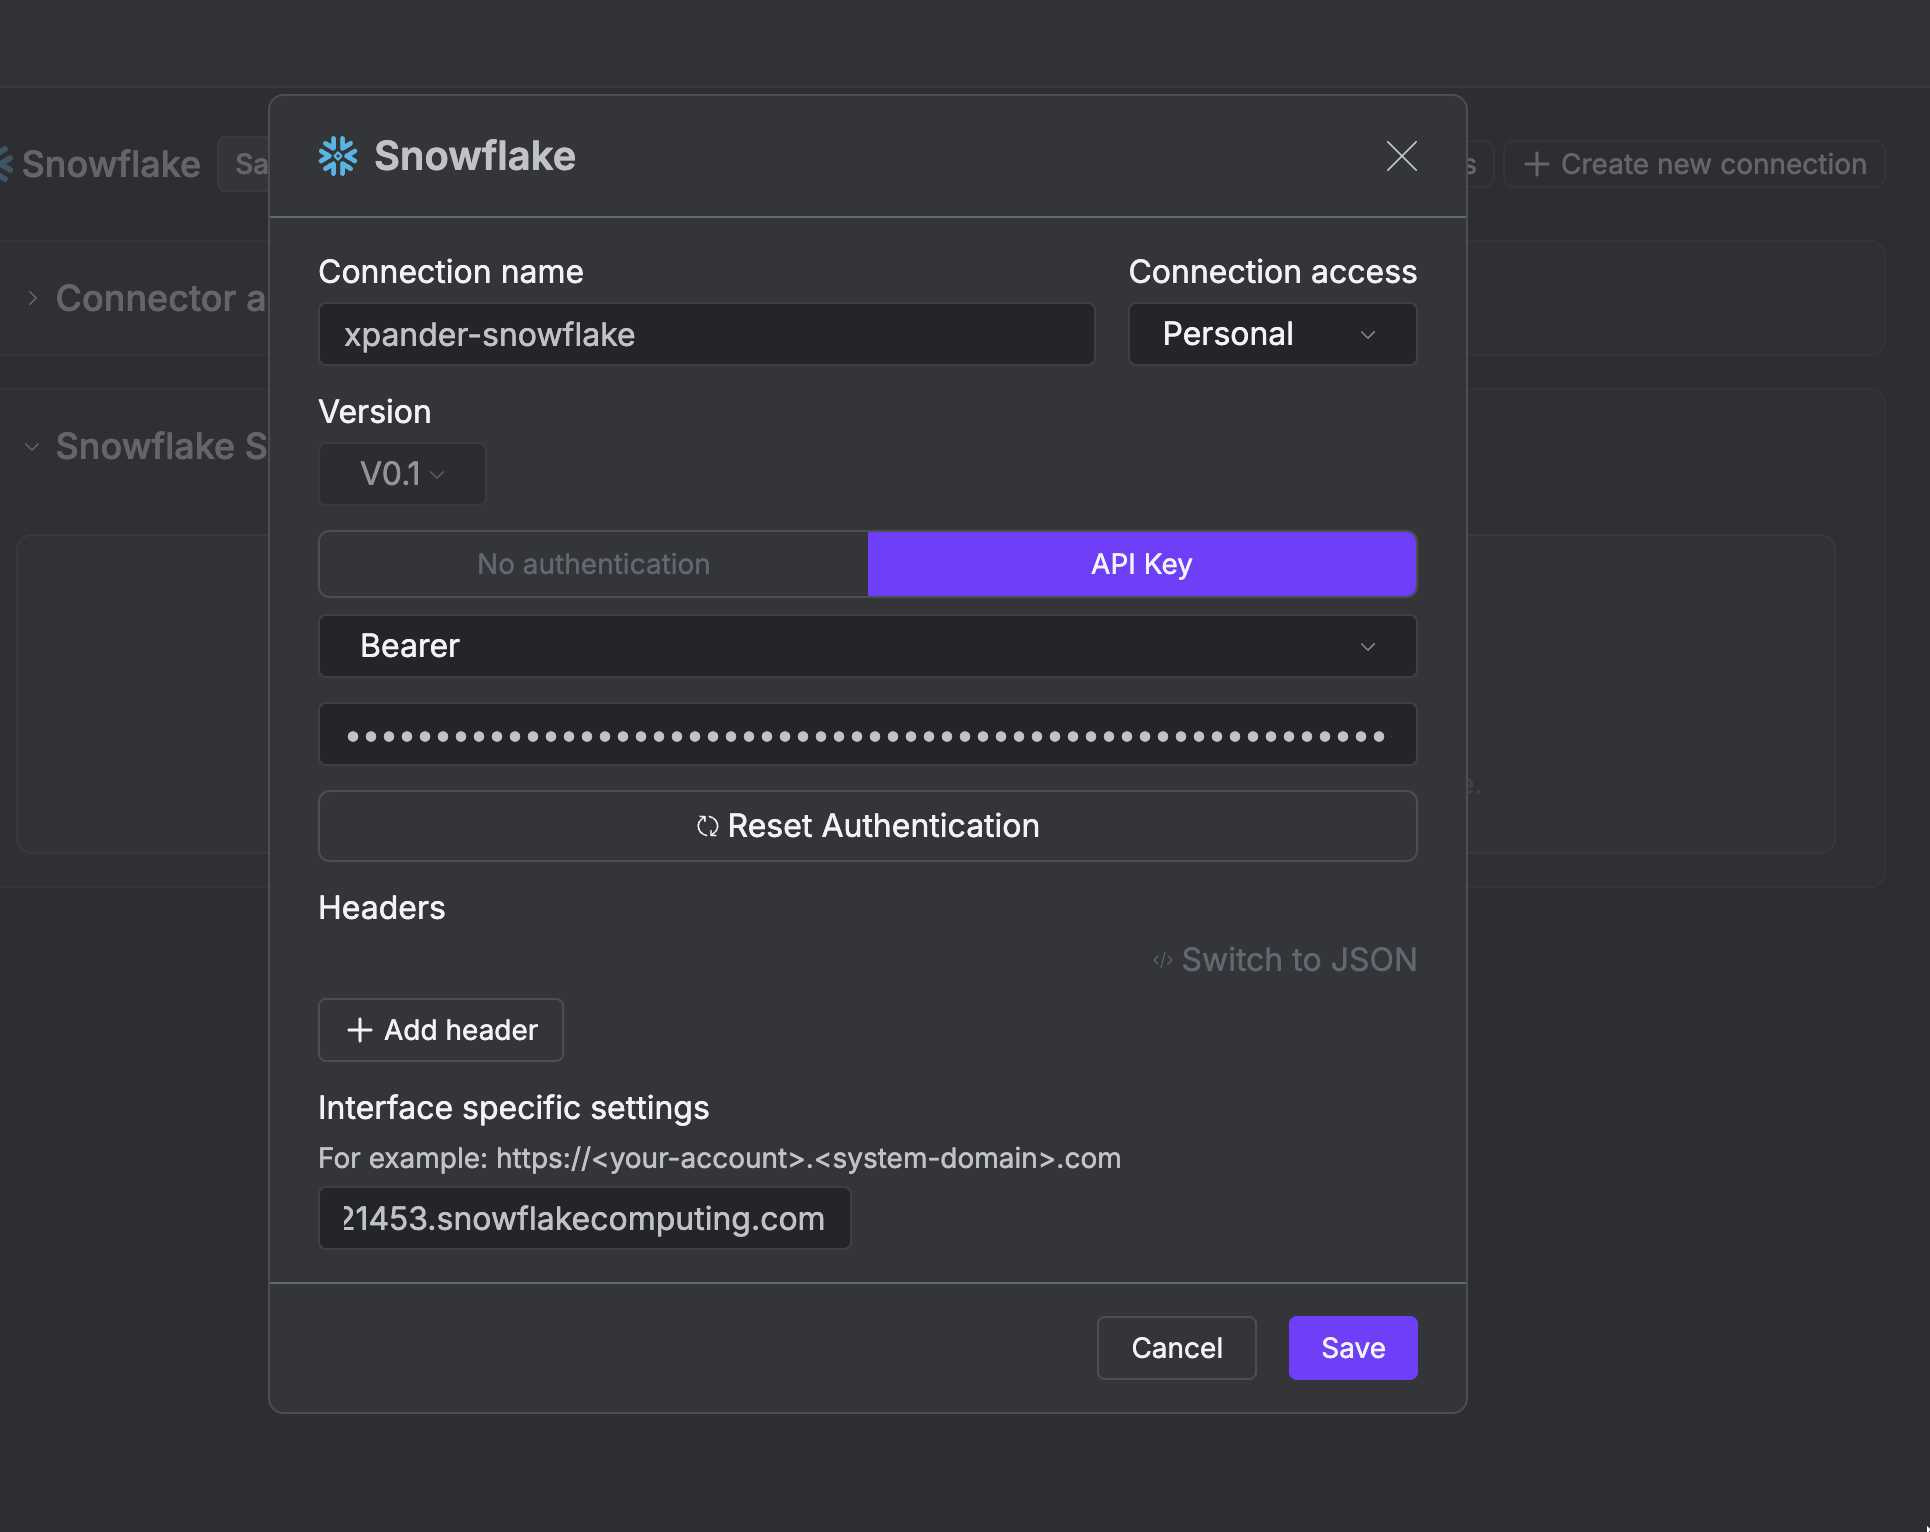
- Click + Create new connection.
- Enter a connector name as desired, e.g., “xpander-snowflake”.
- Paste your Snowflake programmatic access token into the provided API Key field.
-
Copy the base URL from your Snowflake web console, e.g.,
https://<account_identifier>.snowflakecomputing.com, and paste it into the Interface specific settings field. -
Save the configuration.
Integration of Snowflake into an AI Agent
Once you’ve configured your Snowflake connector with the authentication option(s) described above, you can integrate it into your AI agent with xpander.ai:- In your xpander.ai dashboard, navigate to the Agents page, select an agent and click Edit on the agent page to open the Agent Configuration tab.
- Select Tools, then click Add Tools.
- Select Connectors.
- Choose Snowflake with the same connector name you configured in the previous section (e.g., xpander-snowflake).
-
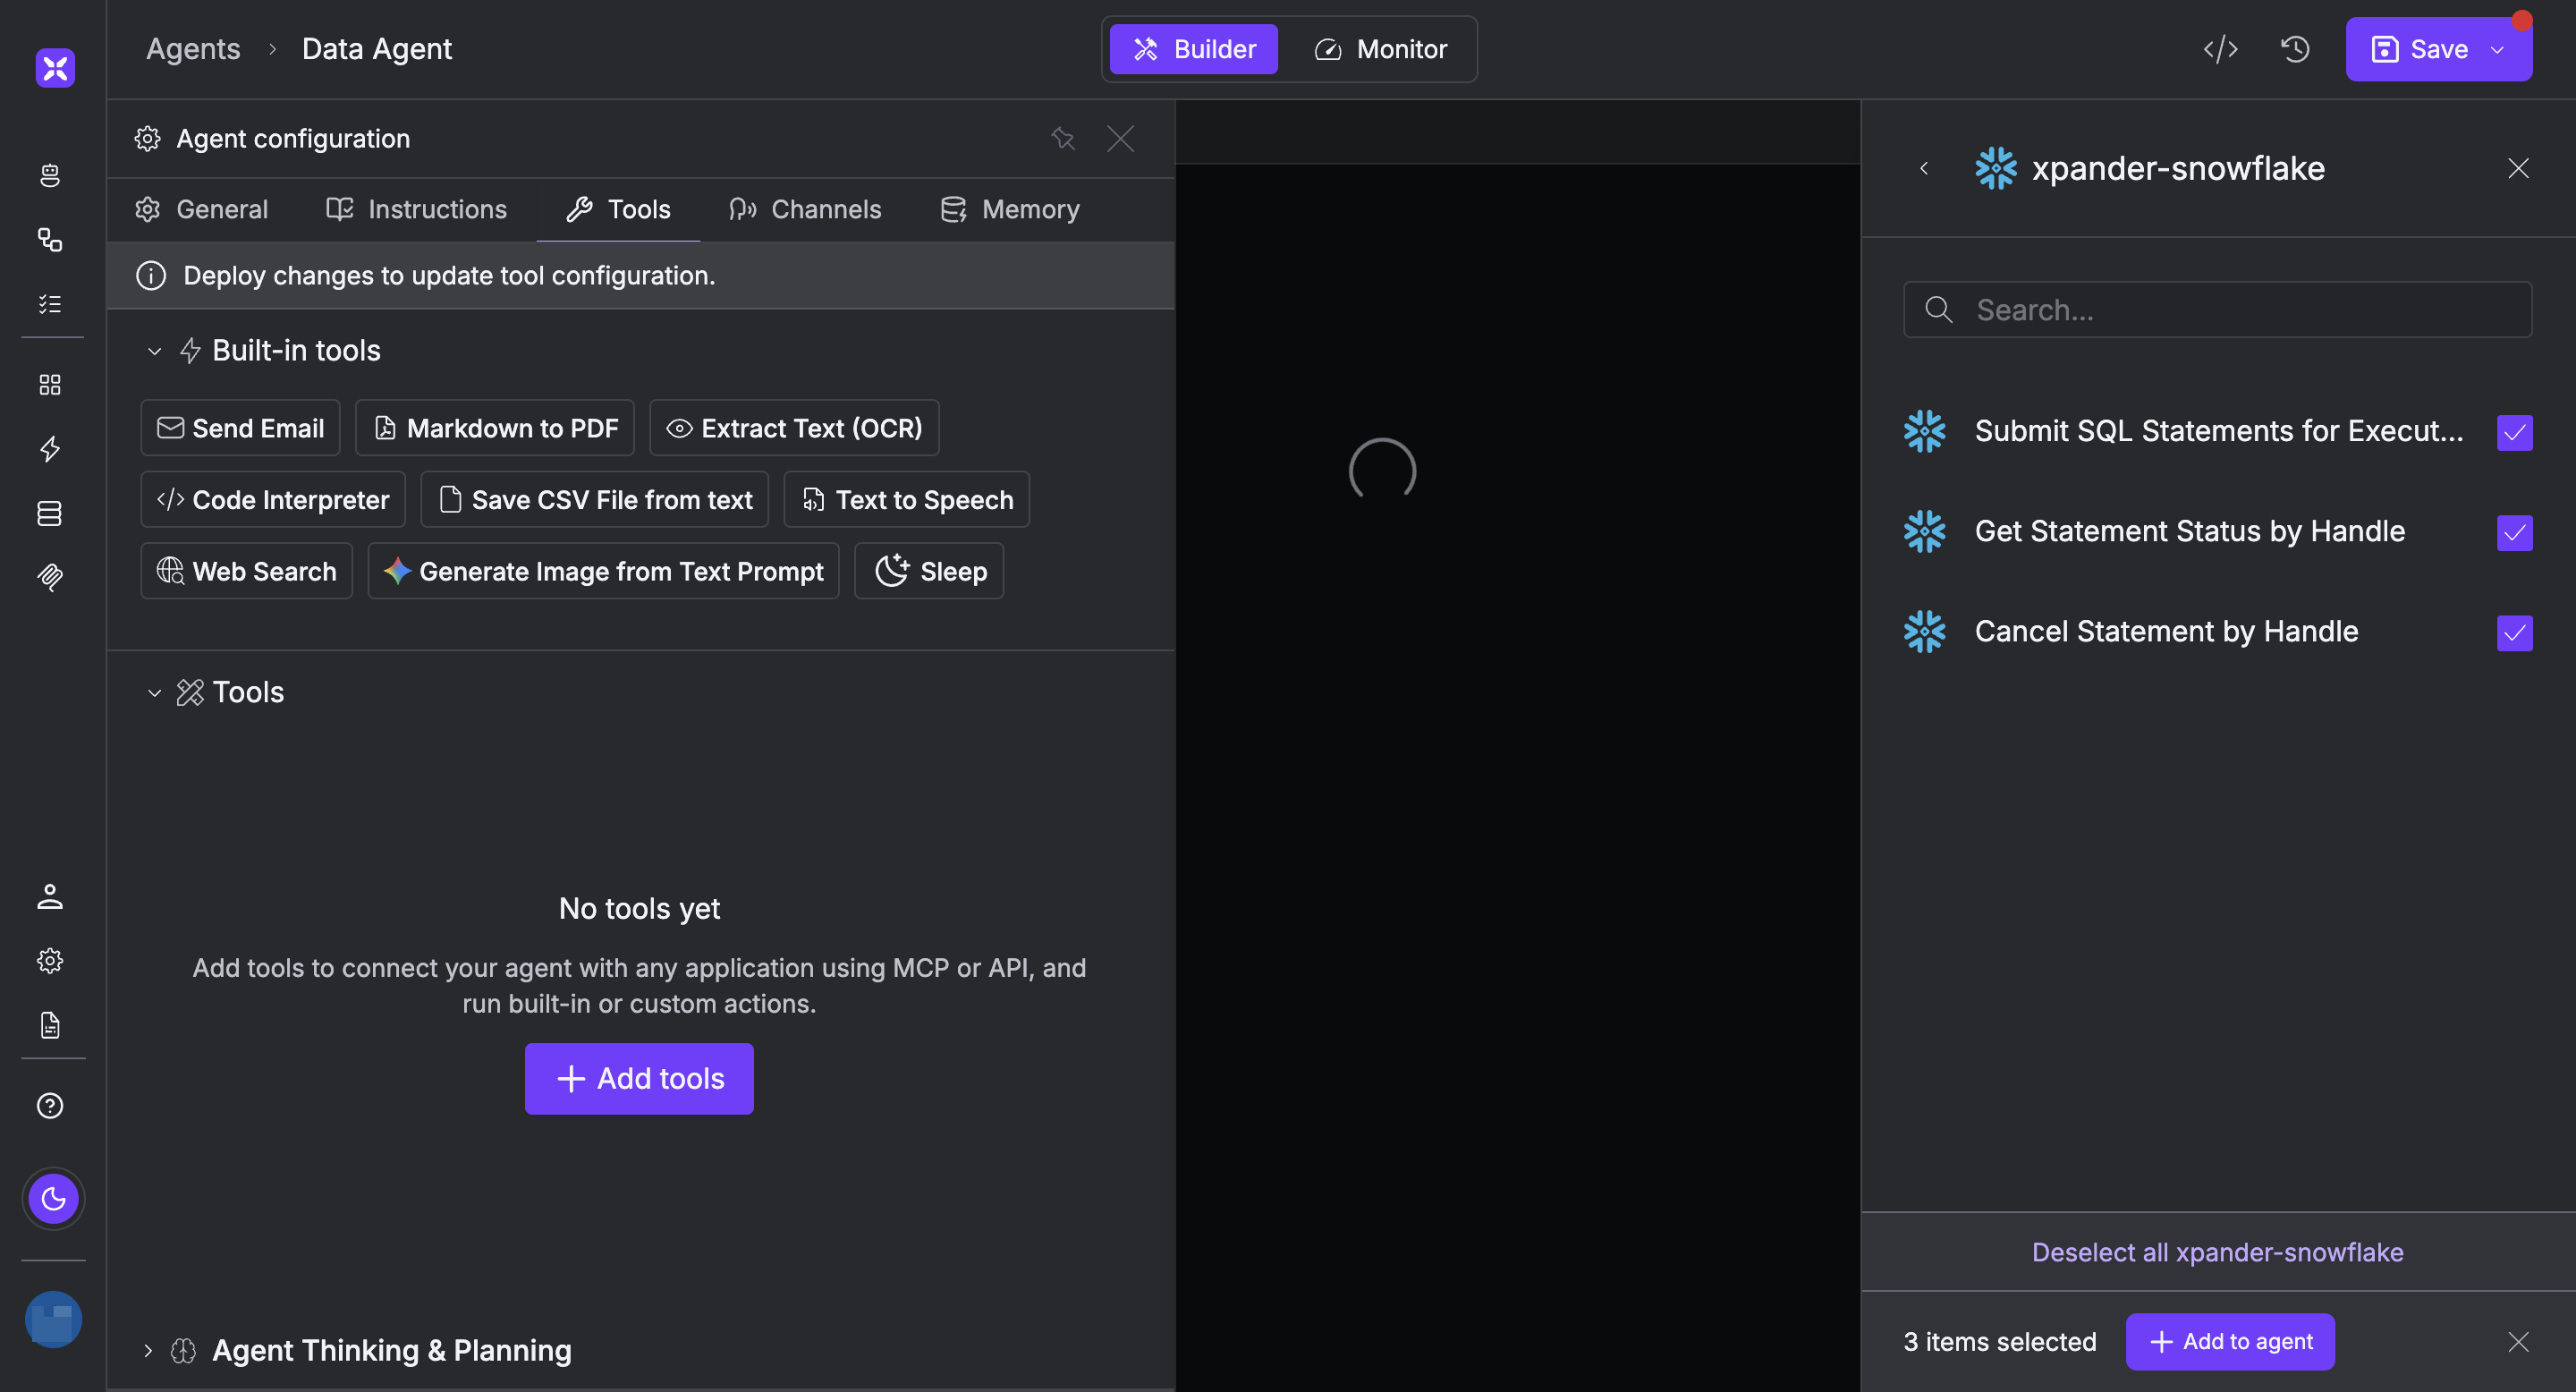
Select the available Snowflake operations that suit your use case.
To grant your agent database management capabilities, enable the following operations.
- Submit SQL Statements For Execution
- Get Statement Status by Handle
- Cancel Statement by Handle
AI Agent Snowflake Prompt Library
Below are possible prompts or use cases you can try after integrating Snowflake into your xpander.ai AI agent: